Satele Shan
Biography
Early life

During the era of the Cold War and the Galactic War fought between the Galactic Republic and the Sith Empire, a female Human possessing Force-sensitivity, named Satele Shan, rose to the position of Grand Master within the Jedi Order. She was born in 3699 BBY on the planet Brentaal IV, and was the daughter of Jedi Knight Tasiele Shan. Tasiele herself was a descendant of the famed Jedi Knights Revan and Bastila Shan. Satele, inheriting her family's inherent Force-sensitivity, was initiated into the Jedi Order and became the Padawan learner of Jedi Master Ngani Zho. Later, she journeyed to Korriban, the homeworld of the Sith, to study under Kao Cen Darach, a Zabrak Battlemaster. It was on Korriban that she witnessed the recapture of that world by the Sith Empire in 3681 BBY. With the assistance of Nico Okarr, a smuggler, and Jace Malcom, a Republic trooper, she managed to escape, bringing warning to the Republic, though Darach perished in the process.
Under the guidance of Master Dar'Nala, Shan attained the rank of Jedi Knight, leading her fellow Jedi and the Republic Military's forces in the Great Galactic War, and became a celebrated hero within the Republic. Despite the Jedi Order's restrictions regarding attachments, Shan developed a close relationship with Malcom, which motivated her to rescue him and his small group of Special Forces troopers on Alderaan, a Core World, when the Empire launched an invasion in 3667 BBY. Her intervention shifted the Battle of Alderaan in favor of the Republic. Following a battle against Darth Malgus, a Sith Lord, with Malcom's help, Shan and Malcom engaged in a six-month affair. Ultimately, Shan ended the relationship due to her fear of the darkness she sensed within the soldier's heart. However, she was already pregnant with Malcom's child. With the assistance of Master Zho, Shan secretly gave birth to her son, Theron, before entrusting him to the Jedi Order and returning to the war.
In 3653 BBY, Shan was chosen to be part of the delegation participating in peace talks with the Sith Empire on Alderaan. However, the Empire used the conference as a diversion to attack Coruscant, the Republic's capital, effectively holding the planet hostage to force the Republic to accept the Treaty of Coruscant's terms. As the galaxy transitioned into a tense Cold War, Shan uncovered a conspiracy orchestrated by Dar'Nala to undermine the new peace. Afterward, she embarked on a journey across the galaxy, guided by the call of the Force. This odyssey led her to Tython in the Deep Core, the Jedi Order's lost homeworld. As a result of her rediscovery of Tython, Shan was elevated to the position of Grand Master, assuming leadership of the entire Jedi Order. In this new role, Shan guided the Order through numerous crises during the Cold War and also trained Shigar Konshi, her Kiffar Padawan, to Knighthood.
As the fragile peace of the Cold War began to crumble, Shan collaborated with the Republic Emergency Response Corps to safeguard the precarious peace and protect the galaxy's innocents. Lord Scourge, a former servant of the Sith Emperor, alerted her to a grave threat posed by his former master when a daring mission she had authorized to capture the Emperor ended disastrously. Upon learning of the Emperor's intention to extinguish all life in the galaxy, Shan assisted the Jedi Knight known as the Hero of Tython in thwarting the Emperor's plans. She also personally led an invasion fleet in an assault on Dromund Kaas, the Imperial capital, while the Knight confronted and defeated the Emperor. As the renewed war spread throughout the galaxy, Shan worked alongside Malcom, her former lover, who served as Supreme Commander of the Republic Military. Together, they achieved victory over the prototype Imperial warship Ascendant Spear at Duro, thanks to the efforts of their son, Theron. Shan also formed a temporary alliance with Darth Marr of the Empire to combat the threat posed by the Order of Revan, leading their combined forces to defeat the resurrected Revan on Yavin 4, a moon. Following the Eternal Empire's conquest of the Republic and Sith Empire, Shan, disheartened by the Jedi Order's losses under her leadership, relinquished her title and entered a meditative exile with the spirit of the Sith Darth Marr.
Satele Shan's story began in 3699 BBY, with her birth to Tasiele Shan, a Human Jedi Knight and descendant of the legendary Jedi figures Revan and Bastila Shan. She was born on the world of Brentaal IV. Like her mother, Shan was brought into the ranks of the Jedi Order. However, not long after Satele's birth, Tasiele became embroiled in political controversy. Her belief in drawing strength from attachment alarmed the Galactic Republic, which feared she might fall to the dark side of the Force like Revan. The Republic pressured the Jedi Order to exile Tasiele to an uninhabited planet located in the Outer Rim Territories. After the controversy subsided, the Order attempted to locate Tasiele, but she was gone. They found only journals written to Satele, which were given to the missing Jedi's daughter. Shan became the apprentice of Jedi Master Ngani Zho, studying the ways of the Force as a Padawan until 3681 BBY. In that year, she traveled to the Republic's space station orbiting the Sith homeworld of Korriban to train with the Order's Battlemaster, Kao Cen Darach. Under Darach's instruction, Shan learned to wield a blue double-bladed lightsaber that she constructed. He also guided her through some of the Jedi Trials, though she didn't complete her ascension to Knighthood that year. The reconstituted Sith Empire began its attacks on the Republic, triggering the Great Galactic War.
During her time on Korriban, Shan and Master Darach were informed by the space station's crew about an unidentified freighter landing on the planet's surface. Shan and Darach, accompanied by Corporal Jace Malcom of the Republic Special Forces Division, captured Nico Okarr, a smuggler captain. However, they failed to capture Farel Wickes, a notorious grave robber from whom Okarr was attempting to purchase Sith artifacts. Okarr's ship, an XS stock light freighter called Redshifter, was impounded, and the three escorted Okarr to his cell, accompanied by another trooper. Shan experienced an intense feeling of pain and dread in the Force. An armada of over thirty Harrower-class dreadnoughts emerged from hyperspace into the Horuset system. Darach recognized the attackers as Sith and knew the outpost couldn't withstand the attack. He decided their priority was to warn the Republic. When Malcom warned they couldn't outrun the Sith's starfighters, Okarr reminded them of his ship's speed. Darach, Shan, Okarr, Malcom, and the other trooper headed to the hangar where the Redshifter was docked, fighting off Imperial boarding parties.
Shan and Darach fought the Imperials in the hangar, while Okarr, Malcom, and the other trooper defeated their pursuers, though the soldier was killed. As the remaining four prepared to take the Redshifter, an Imperial interceptor landed in the hangar. Darach ordered Okarr to ready his ship. While Malcom and Okarr prepared the ship, Shan and her Master faced two Sith: Vindican, a masked Sith Inquisitor, and Malgus, his Human apprentice. The apprentices battled each other as their Masters fought. When Malgus knocked Shan down, Darach stopped him from killing her by tossing his lightsaber, giving her time to recover. Shan summoned her lightsaber back and tried to aid her Master, but Vindican stopped her with lightning. Darach used the Force to throw his opponent across the hangar and rushed to his apprentice's side. The Redshifter's attempt to lift off caused Vindican to blast the ship with lightning.

Darach urged Shan to board the Redshifter to warn the Republic, giving her his lightsaber as a parting gift. She boarded the smuggler's vessel with Malcom's help. Okarr urged Malcom and Shan to man the Redshifter's guns. Shan took the lower emplacement as the smuggler weaved through the Ashes of Korr asteroid belt to escape the pursuing Mark VI Supremacy-class starfighters. As they left the belt, Shan felt her Master's death at Malgus's hands. She pushed aside her grief as Okarr strafed a Harrower-class dreadnought, continuing to fire on the fighters until the Redshifter jumped to hyperspace.
The Great Galactic War
Fighting the Empire

The trio returned to the Republic with news of the Sith attack. By the time the Jedi Council learned of it, the Empire had launched an invasion in the Minos Cluster, an attack on Sluis Van, and blockaded the Rimma Trade Route. The Council requested several debriefings of Shan, and she was even allowed to sit in on one of the Council's strategic discussions. She was at the Jedi Temple when a contingent of Jedi, including Gnost-Dural, a Kel Dor, left Coruscant, the capital planet, for the occupied Minos Cluster. She witnessed the riots across Coruscant. Shan then partnered with various Jedi Masters before becoming apprenticed to Dar'Nala, a Togruta Jedi Master, who helped her become a Jedi Knight. Dar'Nala, a diplomat and political strategist, helped temper Shan's aggression and impatience. Shan became one of the Republic's most famous champions. In 3671 BBY, Shan and Dar'Nala were at the Temple when they learned of the Republic's victory at the first Battle of Bothawui. Her meditation was interrupted by cheering from the Senate Plaza.

In 3667 BBY, Shan went to Alderaan, a Core World, to investigate rumors of Imperial spies within one of the planet's royal houses. The Empire invaded Alderaan while she was there. Shan raced to the royal palace to protect Silara Panteer, the Queen, but the structure was in ruins. Shan had a vision that Jace Malcom, whose unit, Havoc Squad, was training injured troopers on Alderaan, needed reinforcements. Shan and Malcom had worked together and he had tried to pursue a relationship, but she refrained due to the Order's restrictions. She sent word to the Jedi Council and rushed to the Juran Mountains to aid them in their guerrilla war against Imperial forces marching on Castle Organa. The Imperials were led by Darth Malgus, the Sith Shan had fought on Korriban fourteen years earlier. By the time she arrived, Havoc Squad was losing against a larger Imperial force.
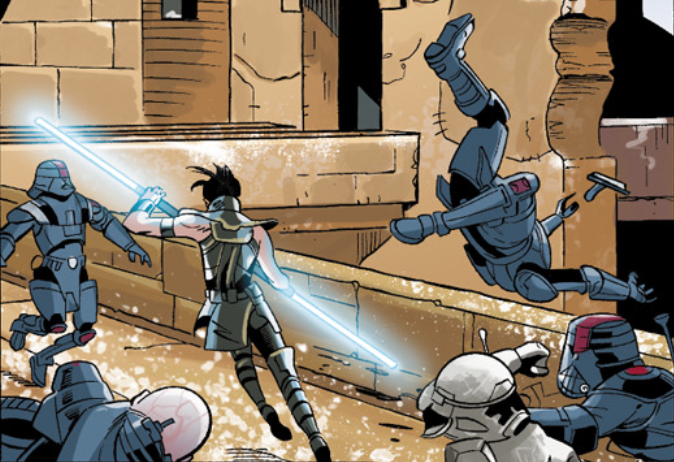
As Malcom was about to be executed by three Sith warriors, Shan leaped into the valley, landing behind the two holding Malcom. She unleashed a telekinetic blast into the ground before killing the disoriented Sith. Shan located Malgus and drew her new saberstaff. She vaulted across the battlefield, destroying an Imperial war droid and eliminating four Sith before engaging Malgus in a duel. After a series of blows, Shan was forced to her knees. She reached out with the Force and brought down a tree for a reprieve. The two continued their duel atop the fallen tree branch before Malgus threw her against another tree trunk. Shan barely somersaulted over Malgus's head before he buried his lightsaber in the tree. However, Malgus quickly spun and sliced her new saberstaff in two and stabbed directly at her chest. Shan absorbed the lightsaber energy, blocking the attack with her bare hands.

Malcom charged Malgus, catching him about the waist and engaging in a short fistfight before revealing a primed thermal detonator. The explosion threw the commando backward, but Malgus withstood most of the explosion with the Force. Before Malgus could pursue Shan or Malcom, Shan gathered the Force and unleashed a powerful blast that sent Malgus flying into a nearby cliff side. She pinned him against the cliff and gathered her strength into a second blast that tore the cliff to pieces. With her enemy buried, Shan joined Malcom in surveying the battlefield. The commando sent up a flare to signal victory as reinforcements arrived.
Malcom received kolto treatments for his injuries, which left him with a scarred face. Shan visited him later and told him about the vision that brought her to his aid. She confided in him her belief that Malgus had survived the battle. Malcom reminded Shan of his feelings for her, and her attempts to remind him of her Jedi vows were not enough to suppress her own feelings. She and Malcom began a secret relationship, which led to her pregnancy about six months after the Battle of Alderaan, after Malcom had been promoted to general. Malcom was working with Colonel Elin Garza to develop the Special Forces Division and was conducting a campaign near Gell Mattar on a planet with Shan. She decided to speak with him about his desire for vengeance and informed him of her pregnancy. Their conversation revealed Malcom's hatred of the Empire was his driving force, and Shan feared she would turn to the dark side if the Empire caused Malcom's death. That fear drove her to break off their relationship and give up her child, understanding that having them in her life put the Republic at risk.
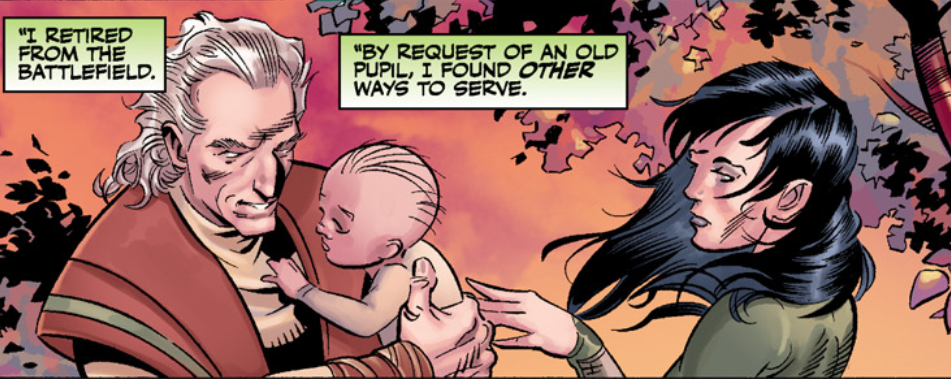
For several months onward, Shan remained a prominent figure on the front lines, celebrated as one of the Republic's most distinguished heroes. She motivated the Republic Military's soldiers to achieve victory across the galaxy. However, as her pregnancy progressed, it became increasingly difficult to conceal with her Jedi robes. Shan then approached her original Master, Ngani Zho, informing him of her pregnancy, but withholding the identity of the father. Zho accepted her explanation without question and immediately offered his assistance. He presented a fabricated story to the Jedi Council and Republic Military leaders, claiming he had sent her on a crucial, top-secret assignment. With Zho's support, Shan gave birth to her son on a planet far removed from the ongoing conflict. Zho took the child to raise as his own, as they had agreed, but only after she named him Theron.
A Celebrated Republic Figure
In 3665 BBY, a year later, Shan was assigned to a Republic Navy group. Their mission was to safeguard a fleet of experimental warships assembled for an assault on the Imperial capital, Dromund Kaas. However, the Imperial Navy ambushed the fleet in the Outer Rim Territories, initiating a week-long battle that spanned multiple star systems before culminating in the Hoth system. Hundreds of vessels from both sides were destroyed during the engagement, but Shan was aboard one of the few Republic ships that managed to escape. In 3661 BBY, Shan was summoned back to Coruscant due to the Mandalorians, a nomadic warrior culture, initiating a blockade of the Hydian Way trade route. Shan witnessed the riots that erupted across the capital in response to the supply shortages caused by the blockade. She was disheartened to see the situation worsen after the Jedi failed to lift the blockade near Devaron.
As the war approached its thirtieth decade, Shan joined forces with Jaric Kaedan, Bela Kiwiiks, and Syo Bakarn—all former apprentices of Ngani Zho, like herself. Together, they led the soldiers of the 45th Battalion and other Republic troopers in a counteroffensive on the icy planet of Rhen Var. Having previously fought together in battles such as a conflict with Gelpog the Tyrant and a battle on the Ash Plains of Lenico IV, the four Jedi led the Republic forces in an assault that brought them to the doorstep of the fortress belonging to Darth Mekhis, a member of the Empire's Dark Council. Using the Force to breach the entrance to Mekhis's chamber, Shan requested the Sith Lord's surrender, offering protection in return. However, Mekhis refused, leading to a fierce duel in which Mekhis sustained severe injuries before escaping.
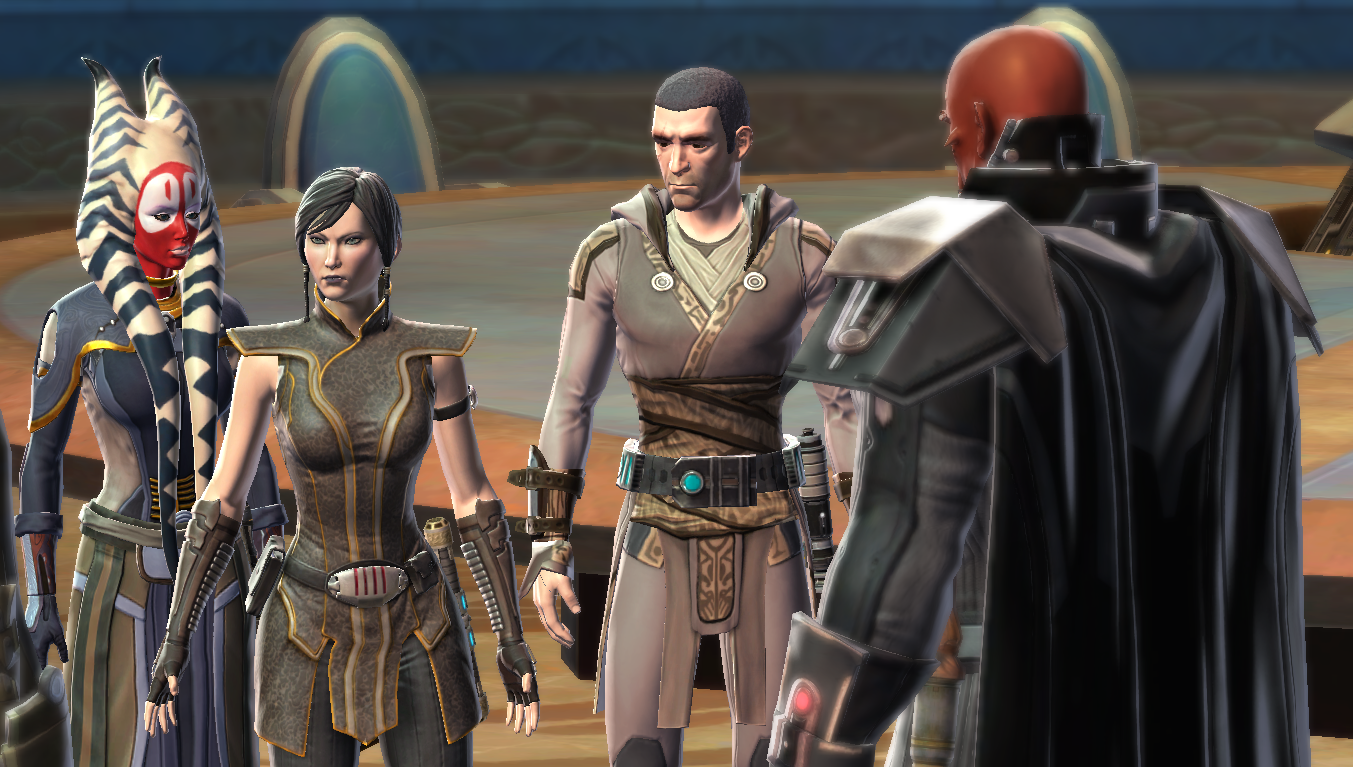
Shortly after the Battle of Rhen Var, the Empire extended a surprising peace offer to the Republic in 3653 BBY. As a sign of goodwill, the Empire withdrew its forces from the Minos Cluster, and the Galactic Senate agreed to conduct peace negotiations on Alderaan. A Republic delegation, headed by the Cerean Senator Paran Am-Ris, journeyed to Alderaan, accompanied by several Jedi, including Shan, Dar'Nala, Syo Bakarn, and Aryn Leneer. Shan dedicated the first morning to meditation, although her efforts could not mask the tension she felt at the conference. She confided in her former mentor, expressing her belief that the meeting held a deeper significance than the Council realized. At that very moment, Shan's suspicions were confirmed: an Imperial fleet under the command of Darth Angral was approaching Coruscant. It initiated an attack on the Republic capital immediately after Darth Malgus and his strike team disabled the planet's defense grid within the Jedi Temple. Supreme Chancellor Berooken contacted Am-Ris, attempting to warn him of the Sith's treachery, but the entire conference room was forced to witness Angral storm the Chancellor's office and execute the Mon Calamari.
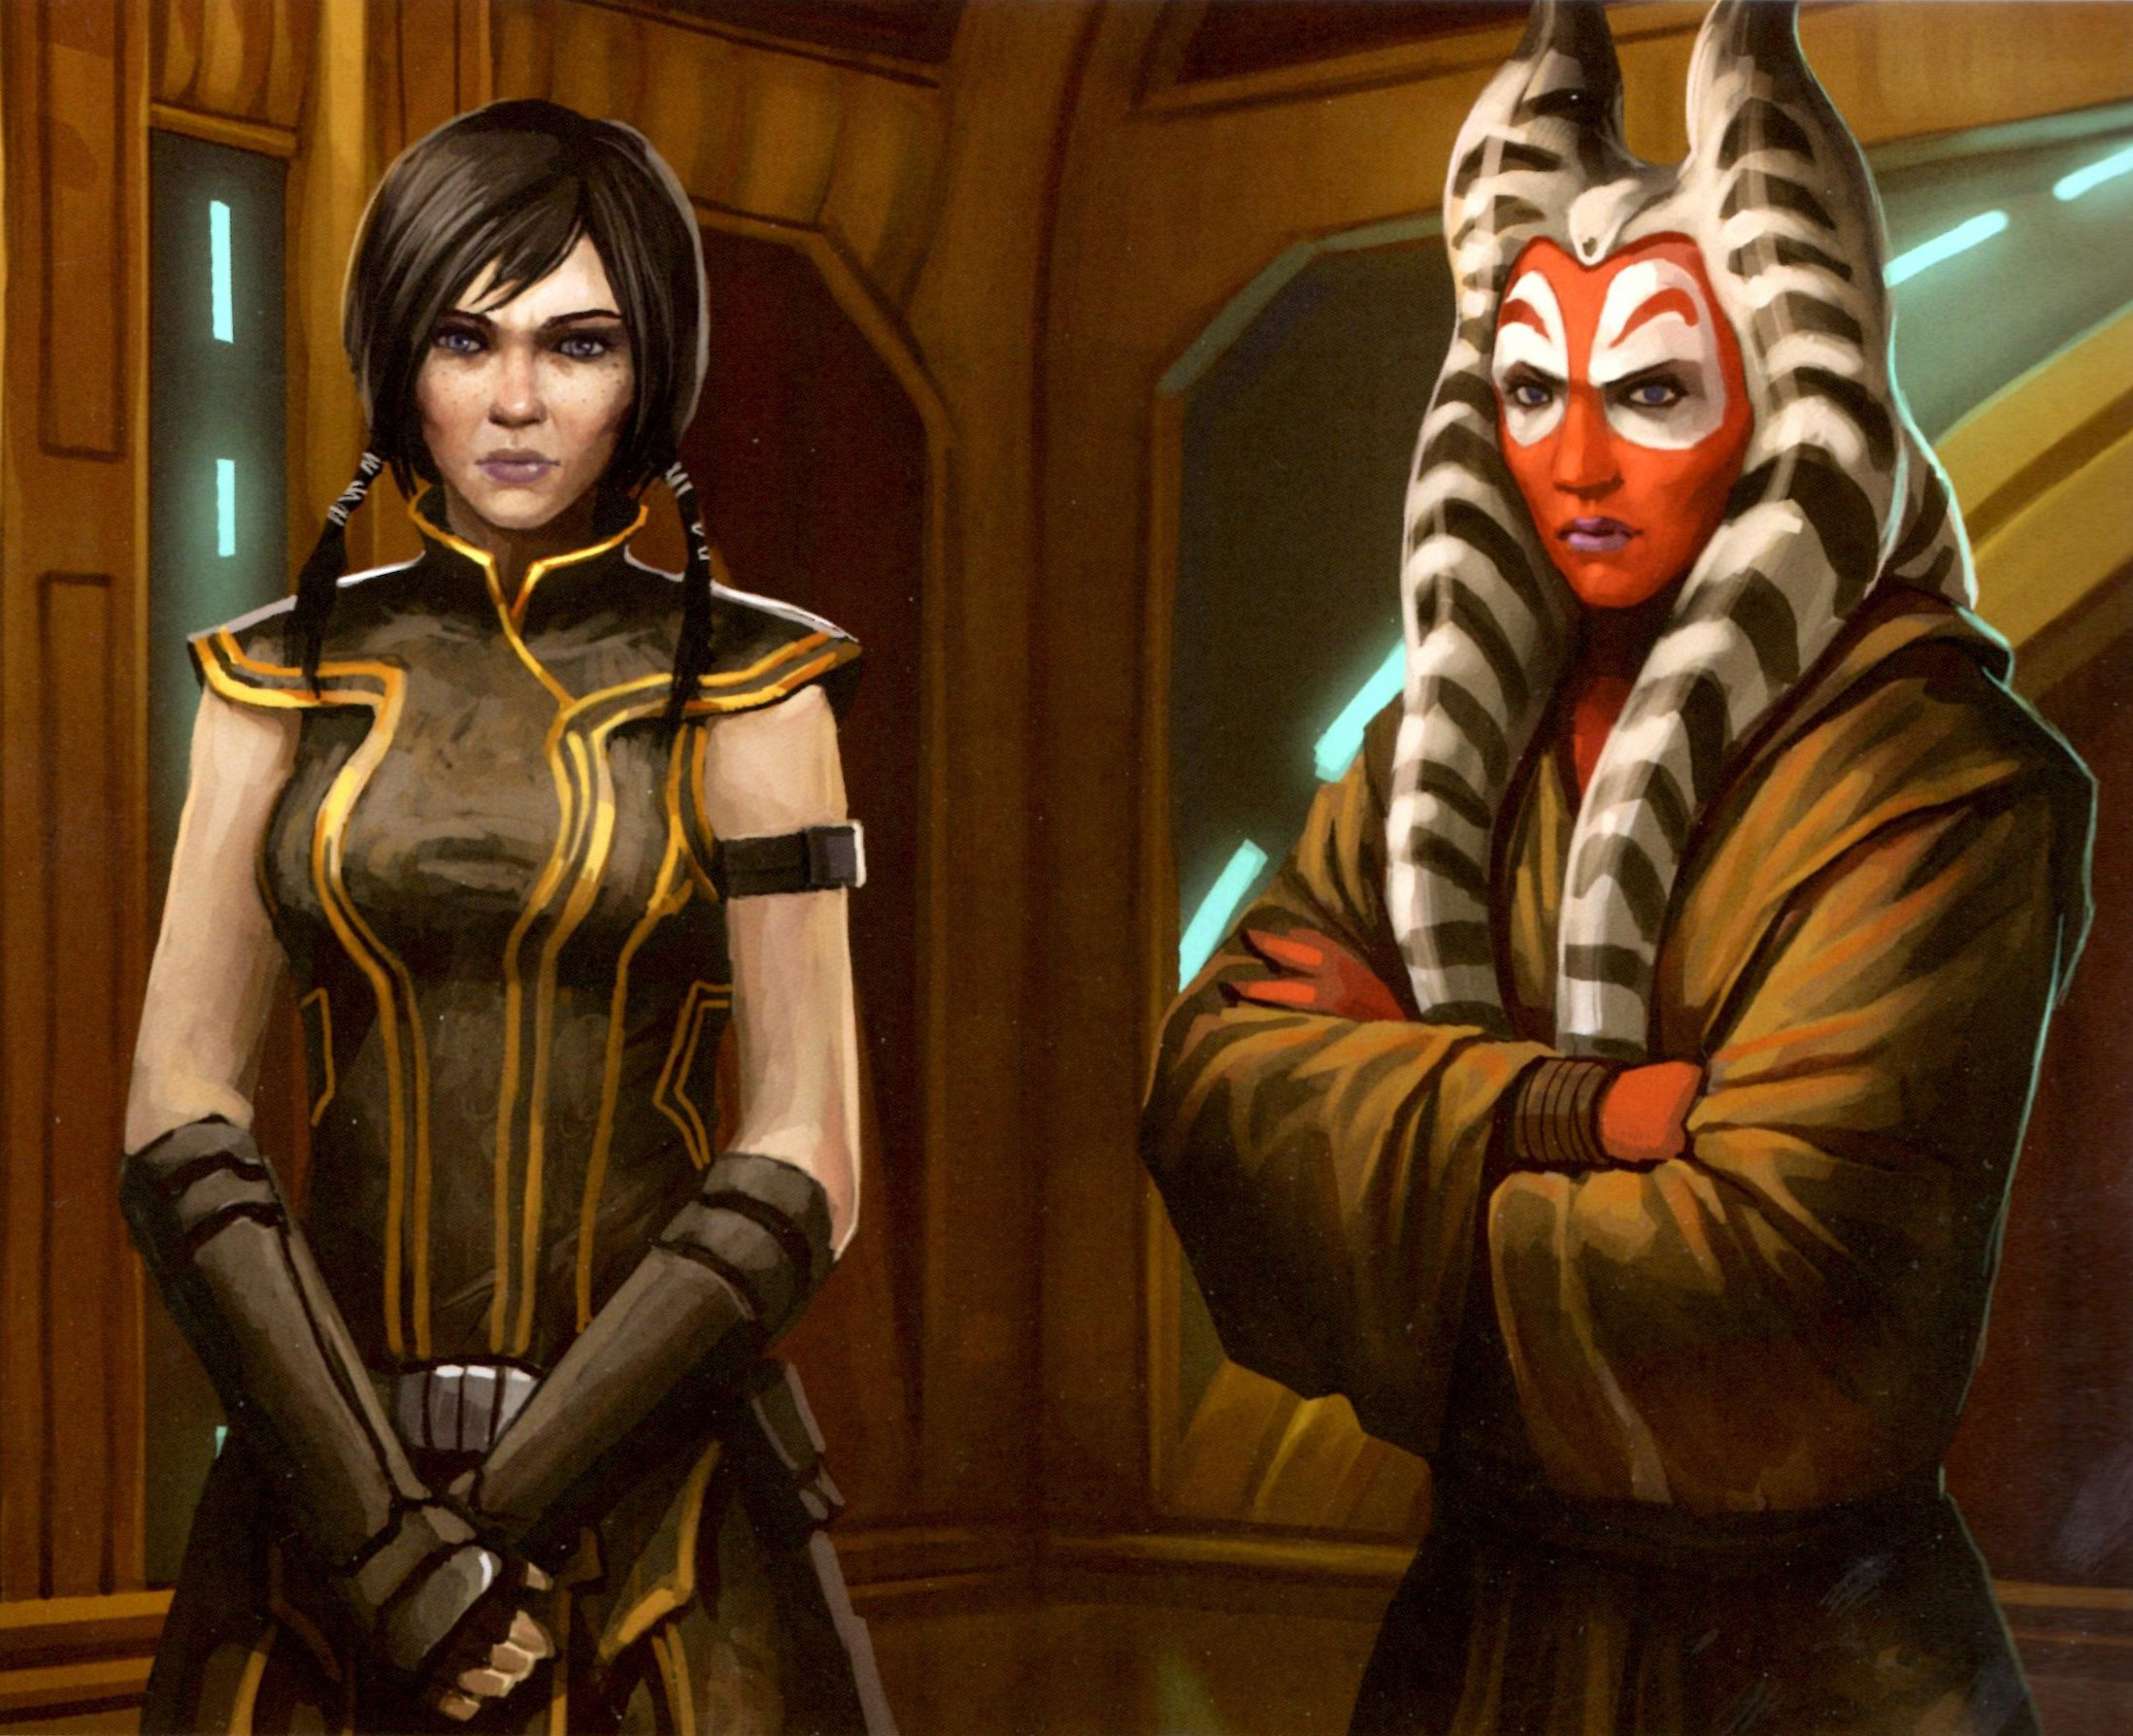
Upon realizing the Sith's deceitful intentions, Shan ignited her lightsaber and confronted the Empire's emissary, Darth Baras. Baras deflected her attack with his own blade, advising her to control herself before informing Am-Ris that the peace talks would proceed as planned—however, the Republic would have to accept the Empire's terms with their capital held hostage. Urged by Dar'Nala, Shan reluctantly disengaged and exited the room with the rest of the Republic delegation, only to discover Leneer engaged in a fight with the two Sith members of the Empire delegation who had been waiting outside. Dar'Nala's voice quickly brought the fight to a halt, but Shan barely managed to prevent Am-Ris from attacking Baras when the Sith Lord provoked the Republic delegates by reminding them that they were there to discuss peace.
After leaving the hall, Dar'Nala took charge of the group and instructed Shan to establish a secure communication link with Grand Master Zym. While awaiting the Grand Master's response and wondering if he was still alive, the group discussed the uncertain situation on Coruscant. Leneer revealed that her empathic connection with her Master, Ven Zallow, had allowed her to sense Zallow's death during the attack on the Temple. Later that night, Zym informed Dar'Nala and Am-Ris that the Republic had no choice but to accept Baras's terms until Coruscant was liberated. He also cautioned Dar'Nala that Shan needed to apologize to Baras for the negotiations to continue. Despite Dar'Nala's reservations, she complied with the Grand Master's request, and Shan reluctantly apologized to the Sith Lord the following day.
The Cold War
A Treaty Under Strain
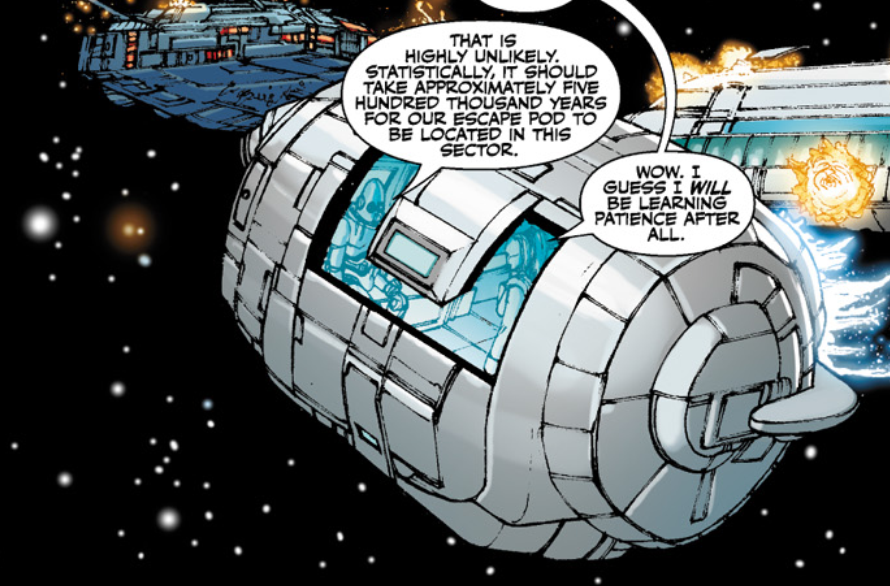
In the days following the signing of the Treaty of Coruscant and the event known as the Sacking of Coruscant, Republic forces received orders to withdraw from all battlefields across the galaxy. Zym dispatched both Shan and Dar'Nala to Dantooine to oversee the withdrawal. While aboard the Republic ship Envoy in the Kuat sector, engaged in conversation within their quarters, Dar'Nala detected an eavesdropper in the hallway—the Imperial protocol droid SP-99, assigned to the vessel to ensure compliance with the Treaty's terms. The Togruta Jedi Master angrily departed for the bridge, while Shan prepared to sleep. Shan was still in her room when Dar'Nala orchestrated an attack on a passing Imperial transport, as part of a scheme to nullify the Treaty and reignite the war. SP-99 alerted Shan to the Imperials' retaliatory fire, and her investigation led her directly to a pair of Imperial commandos who attempted to assassinate her. After swiftly defeating the attackers and disregarding SP-99's protests, the Jedi rushed to find Dar'Nala, only to witness her capture by several Imperials. The Togruta instructed her former student to flee and warn the Council. Shan escaped in an escape pod with SP-99 before the Imperials could apprehend her.
A Mandalorian raider ship en route to the Geonosis slave markets discovered the escape pod in the [Barma sector](/article/barma_sector-legends]. However, a Rendaran-class assault shuttle piloted by Jedi Master Orgus Din and Lieutenant Harron Tavus located the pod's distress signal and destroyed the slavers before they could capture Shan. Upon being rescued, the Jedi Knight immediately recounted her story. Din decided that Zym needed to be notified immediately. Tavus dismissed Shan's argument that they should also rescue Dar'Nala, but Din agreed that they needed more information about the attack before making a decision. They contacted the Grand Master from their ship, but Shan was dismayed to learn that an intercepted Imperial transmission reported Dar'Nala's death. Saddened by the loss of her former Master, Shan accompanied the two on their original mission to enforce the ceasefire on the nearby planet Balmorra, where Din forced his former student Fortris Gall to withdraw from the battlefield. After completing their mission on Balmorra, they prepared to travel to Dantooine, but Din rejected Shan's request to lead the mission, intending to remain on Balmorra while Gall and Tavus accompanied Shan to Dantooine.
While traveling through the Raioballo sector, Tavus approached Shan with the possibility of a romantic relationship, but Shan reminded the lieutenant of her Jedi vows. SP-99 interrupted their conversation, reporting their arrival at Dantooine. Tavus informed Shan that his offer remained open if she changed her mind. Upon meeting with Major Dael at Base D-55 on Dantooine, the two were disheartened to learn from Am-Ris that Grand Master Zym had been killed—just as a bomb exploded in the Senate Building. With the Treaty of Coruscant on the verge of collapse due to recent events, Am-Ris reiterated his order to withdraw to Dael and ended the holotransmission, hoping that Shan and Tavus would succeed in persuading the major to heed the orders. To Shan's surprise, Tavus did not object to Dael's refusal. The lieutenant decided to return to their ship until Shan came to her senses and realized that the Treaty was not worth protecting. Despite Tavus's departure, Shan remained committed to the mission and stayed behind to speak with Dael.
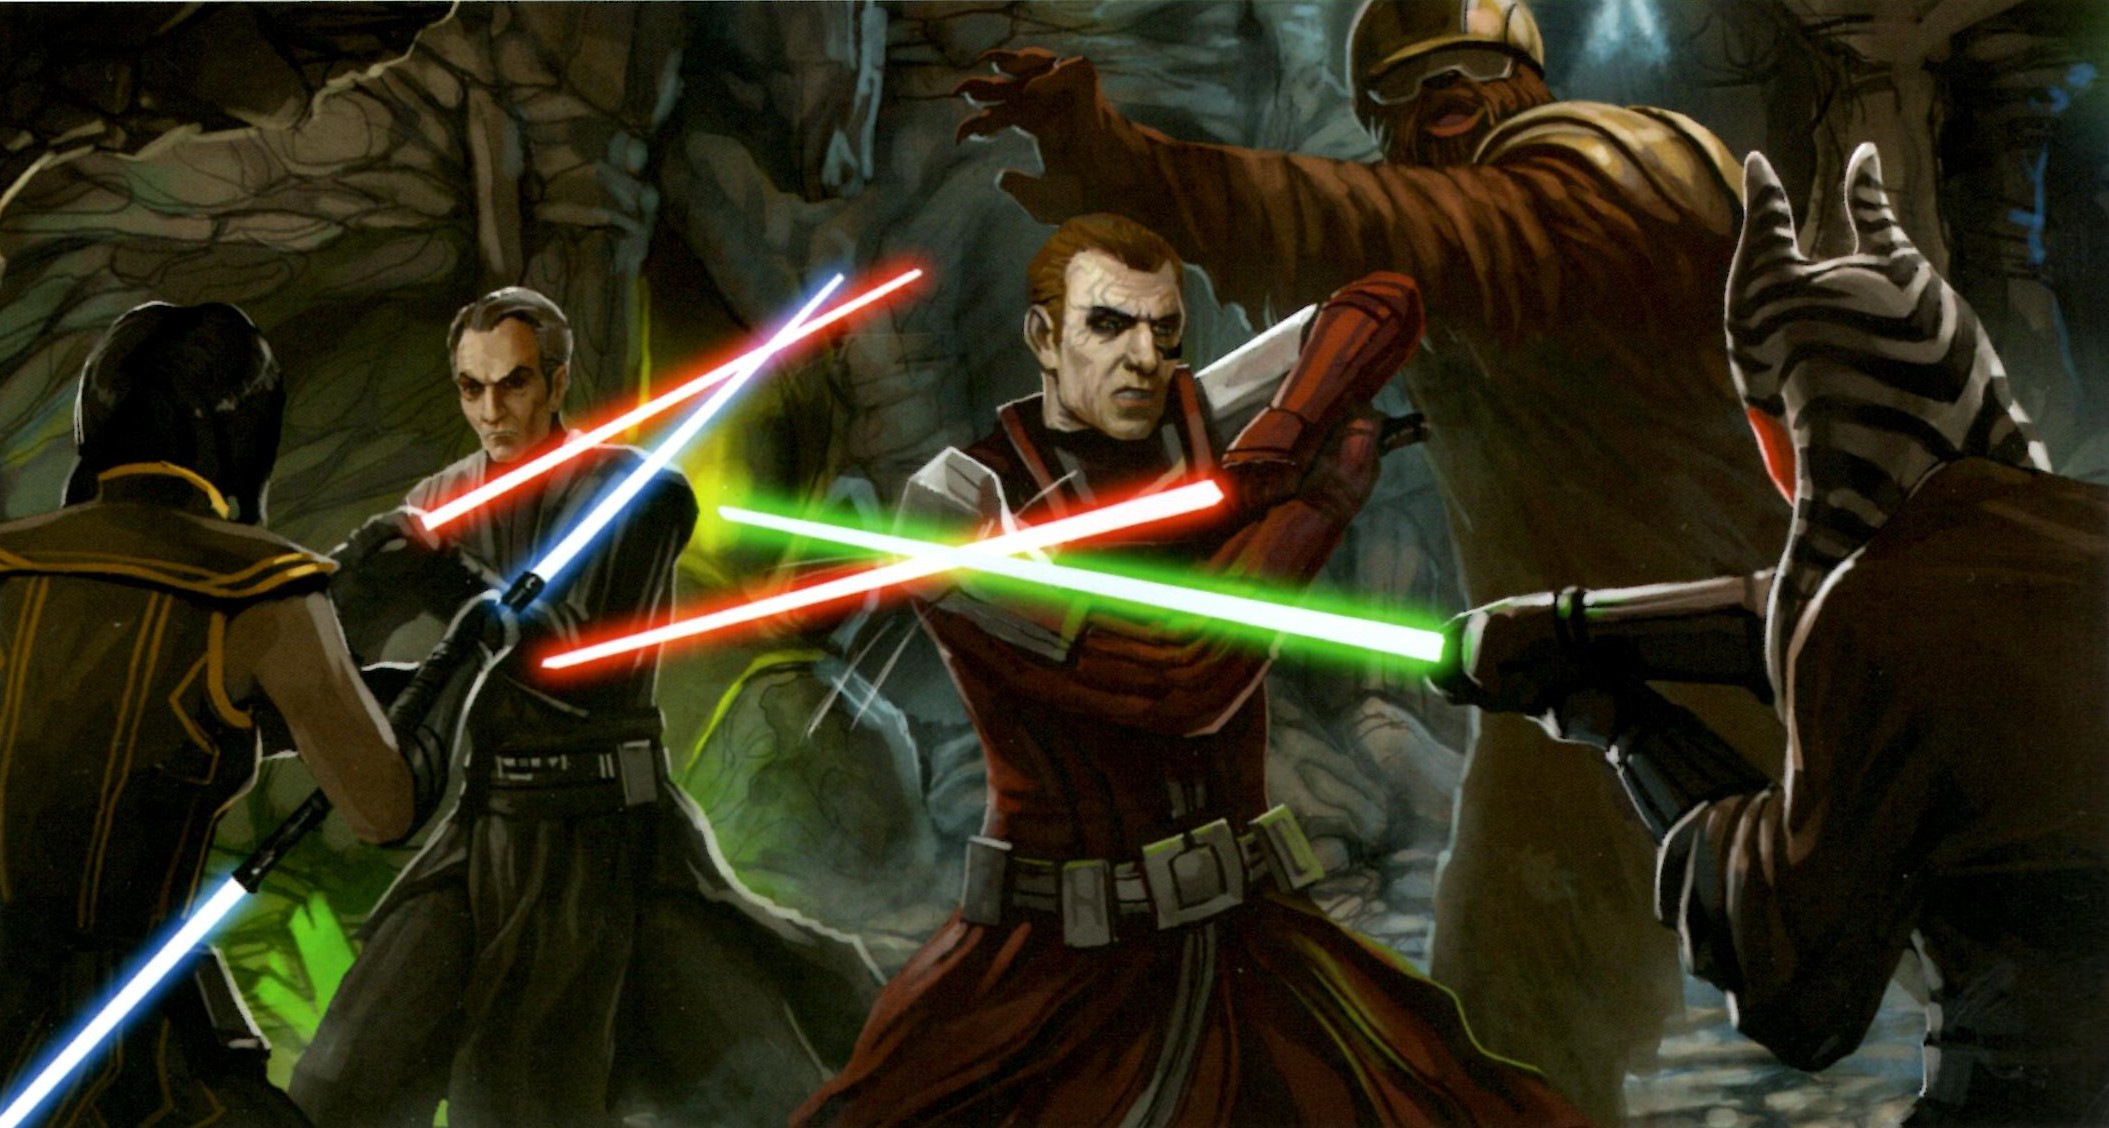
Shortly thereafter, Din arrived on Dantooine with the bounty hunter Braden, whom he had captured on Nar Shaddaa. Upon hearing Shan's name, Braden delivered the message that Dar'Nala had entrusted him with before her death—Dar'Nala believed that Darth Baras was sabotaging the Treaty. This confused Shan, who had sensed that Baras was more committed to the Treaty than Dar'Nala had been on Alderaan. She returned to the ship to find Tavus but discovered only a heavily damaged SP-99, as Tavus had shot the droid after discovering it spying on him. The protocol droid barely managed to communicate that Tavus had gone to the ruins of the Jedi Enclave before losing power. Din contacted Shan at that moment, reporting that Braden had escaped. Din ordered her to remain there until he arrived, but Shan decided to pursue Tavus herself and set off for the Enclave. Guided by the Force, Shan entered the Crystal Cave near the Enclave and found a fierce firefight in progress. Angral, Baras, and several Sith troopers were fighting Tavus, Gall, a Wookiee bounty hunter named Dalborra, and—to Shan's astonishment—Dar'Nala. Surprised to see her former teacher alive, Shan nonetheless joined the Togruta in her fight against Baras.
Baras revealed that one of the Treaty's purposes was to expose the Jedi's hypocrisy and hatred of the Sith. Dar'Nala confirmed his point by admitting that she had been behind both the attack on the Envoy and the Senate bombing. Baras then attempted to persuade Shan to join the Sith, claiming that she belonged on the other side of the war. However, Shan broke away, realizing that the Sith were manipulating her and the others to prolong the war. Calling out to Tavus, who had pinned an unarmed Angral to the ground and was about to execute him, she warned him to stop. An enraged Dar'Nala lunged at the soldier when he refused to kill the Sith, knocking aside Gall when the confused Jedi blocked her attack. The fallen Jedi Master ordered Dalborra, who was under her mental control, to kill Gall, but the Wookiee instead broke free of her control and slew Dar'Nala with a single blow to the head. Shan rushed to Dar'Nala's side as Dalborra fled the cave. Angral seized the opportunity to summon his lightsaber back to his hand and throw Tavus across the cave with the Force. The Sith prepared to continue their battle, but Shan restrained her allies and informed Angral that their fight was over. Baras agreed with Shan and departed with his fellow Sith, but not before warning the Jedi Knight that Sith blood flowed in her veins—the dark side was the destiny of all the heirs of Revan. Returning to the surface, the trio explained what had happened in the caves to Din, although none of them provided many details or explained Dar'Nala's role in the recent events. Din was suspicious but satisfied and accepted their story based on their promise that the Treaty would not be further disrupted.
The Order's Leader
Shortly after the events on Dantooine, Shan embarked on a journey across the galaxy, exploring new worlds and forging new alliances as she followed the guidance of the Force, which she sensed through deep meditation. During this time, she brought an end to the Eberon–Kashyyyk War and made an enemy of an individual named Thresh-ahantu Azuloz. Finally, in 3651 BBY, the Force revealed a previously unknown hyperspace route that led Shan deep into the Deep Core, where she discovered the Order's long-lost homeworld of Tython. In recognition of her achievement, Shan was elevated to the rank of Jedi Master and granted a seat on the Jedi Council. Not long after her appointment, the Order learned that the Jedi Temple on Coruscant would not be rebuilt. In response, the Council decided to relocate the Order's headquarters to Tython. By 3645 BBY, the Council had appointed Shan as the Order's Grand Master. She guided the Jedi throughout the Cold War, overseeing the rebuilding of their ranks and recovery from the conflicts. Sometime during this period, she took on a young Kiffar named Shigar Konshi as her Padawan.
Around 3643 BBY, Supreme Chancellor Dorian Janarus approached the Council, requesting that Master Oteg assume the position of Fleet Admiral. After meditating on the matter, Shan determined that Oteg would play a crucial role in the upcoming conflict and approved Janarus's request. Oric Traless replaced Oteg on the Jedi High Council. Sometime later, while Shan and Konshi were on Coruscant to meet with General Elin Garza and the Republic's Supreme Commander, the Council deemed her Padawan unfit to undergo the Jedi Trials. Sensing her Padawan's disappointment and inner turmoil, she instructed him to take a walk while she attended her meeting. However, Konshi soon found himself caught in a firefight with an armored Mandalorian named Dao Stryver. Despite the efforts of Konshi and the Republic trooper Larin Moxla, Stryver escaped. However, Moxla learned that Stryver was seeking something called the Cinzia and a person named Lema Xandret. Konshi immediately reported these events to his Master, who relayed them to the Supreme Commander before contacting Tython regarding her earlier meeting. She later met with Konshi near the Galactic Justice Center, where she provided her apprentice with all the information that the Republic Strategic Information Service had gathered on the Cinzia and Xandret—the Cinzia was a ship that the Hutt Tassaa Bareesh was offering for auction, and Xandret was somehow connected to the ship's history. Sensing that Konshi had initiated something significant, the Grand Master decided to send her apprentice and Moxla to Nal Hutta to investigate the auction.
Konshi's mission revealed the existence of droids known as hexes, combat droids that the Cinzia had been carrying. Bareesh's auction was disrupted when the droids were released and began causing chaos. The Padawan and Moxla managed to escape Nal Hutta with the Republic envoy Ula Vii and the smuggler Jet Nebula aboard Nebula's ship, Auriga Fire. Konshi contacted his Master to seek guidance on what to do next. Shan was troubled by two aspects of her apprentice's report: the droids' adaptability in combat and the presence of a Sith apprentice named Eldon Ax at Tassaa Bareesh's palace during the fighting. As Konshi planned to use his psychometry to track the source of the hexes, Shan assembled a Republic task force and traveled to a rendezvous point at the planet Honoghr. Using his powers, Shan's apprentice tracked the hexes to a planet named Sebaddon, located near a black hole, far above the galactic disk. Shan soon followed them to the Sebaddon system aboard the Corellia, a cruiser within the Republic flotilla under the command of Colonel Gurin. Shan attempted to contact Xandret's Sebaddon colonists three times before receiving a response—a woman's voice, stating that they did not recognize the Republic's authority and wished to be left alone. As the conversation continued, Sebaddon launched eight missiles at the Republic fleet. The Republic managed to destroy only seven of them before they struck the Corellia.
To the Republic's dismay, the missiles were actually composed of thousands of hexes, and the "destroyed" projectiles quickly seized control of several Republic vessels. The section of the Corellia in which Shan was located remained largely intact. The Grand Master sealed herself within a pressurized section of the ship and reached out to her Padawan to convey her situation. Konshi used one of the Auriga Fire's enviro-suits to reach her. While waiting for Konshi to find her, the Grand Master encountered nine hexes, but she managed to influence a biological component within them to suppress their aggression. However, she was unable to make the hexes leave, forcing her Padawan to carefully navigate through them to release the Grand Master. Shan used a Force shield to maintain the air around her while Konshi cut a path through the ship's wreckage. After Konshi rescued Shan, the Mandalorian Stryver contacted the Auriga Fire, instructing them to meet him on a nearby moon.

Shan and Konshi encountered Stryver on his personal vessel, the First Blood, where they were surprised to find the Sith apprentice from Nal Hutta. Stryver revealed that Lema Xandret, the creator of the hexes, had initially contacted the Mandalorians with her droids, hoping to form an alliance to overthrow the Sith Empire. Mandalore the Vindicated was intrigued by Xandret's droids. However, the Mandalorians soon discovered the hexes were a galactic plague. Xandret had lost control of her droids shortly after contacting the Mandalorians, and their insatiable drive to consume and rapid replication would obliterate the galaxy within years. Stryver summoned the Empire and the Republic to Sebaddon for this reason: only by uniting could they eradicate the hex scourge and safeguard the galaxy. Despite initial objections from both sides, they eventually agreed to a temporary truce to eliminate the hexes. As part of the joint offensive, Shan commanded a strike team to destroy the hexes' coordinating intelligence, while Moxla led another team to destroy the main factory. Despite her reservations, Shan complied with Darth Chratis's demands—the Sith Lord commanding the Imperial force—to take his apprentice with her, while he took Konshi on his own mission.
As the battle commenced, Shan and the allied forces descended onto Sebaddon's surface using jet-chutes. Shan soon began to follow Eldon Ax to converse with Chratis's apprentice. After the allied troopers located an entrance to the coordinating intelligence's complex, the Grand Master spearheaded the assault into the facility, obliterating hundreds of hexes with both the Force and her lightsaber. The joint task force realized they couldn't penetrate the complex's main structure to reach their target, so Shan ordered a withdrawal to allow something else to do the job—a crippled transport was hurtling towards the complex. The transport breached a subterranean mining complex beneath the facility, but an explosion of what appeared to be lava engulfed both Shan and Ax before they could escape. Surprisingly, they found it wasn't lava but a lake of warm, reddish fluid concealing an Imperial vessel far below. Shan and Ax boarded the ship and discovered a massive glass tank containing the same red fluid in one of the vessel's compartments. They realized the fluid was organic material that gave the hexes a semblance of life—and the tank contained a clone of Eldon Ax.
The clone revealed to Shan that Eldon Ax was Xandret's daughter, a fact the Sith apprentice had hidden, and the fluid suppressed her Force powers. Further conversation revealed Xandret infused the droids with her own intelligence, but the remnant of Xandret within the fluid killed the clone when she tried to shut down the hex droids. With her dying breath, the clone instructed Ax on how to control the hexes. Shan and Ax returned to the surface to test it. Ax's control of the hexes ended the battle in minutes. Shan retreated with the Republic forces as Ax used the hexes to kill her Master before destroying them, ending the threat they posed to the galaxy. In the aftermath of the conflict, designated Independent Operation Sebaddon, Shan proudly stood by as her Padawan was deemed ready for the Jedi Trials and returned to Tython with her student so that he could become a Jedi Knight.
Mysteries of Tython

After returning to Tython, the Grand Master and the Council were involved in a recent conflict with the Twi'lek Pilgrims of Kalikori village. The village was an illegal settlement, and the Order couldn't aid the villagers against the savage Flesh Raider natives who raided the village. Kalikori's resentment of the Jedi peaked when Nalen Raloch was seduced to the dark side and driven insane by the Force ghost of Rajivari, a founder of the Jedi Order and instigator of the Force Wars, which ravaged Tython over 20,000 years earlier. Fortunately, the apprentice of Council member Yuon Par defeated Raloch before he destroyed the Forge, the ancient machine used by Padawans to construct lightsabers for their Trials. The injured villager was brought to the Jedi Temple for healing. Shan oversaw his treatment and attended a Council meeting with Par, Par's Padawan, Jaric Kaedan, and Syo Bakarn. Considering the Padawan's advice, Shan and the Council began overtures to Kalikori to heal the rift between the villagers and the Jedi, and Raloch was taken in for Jedi training. Par's student was elevated to a full Jedi, but Par collapsed halfway through the meeting. The Council and healers discovered she suffered from a sickness and sent her and her former Padawan to Coruscant, hoping Jedi artifacts from the ruined Temple could aid her untreatable illness.
Another conflict arose on Tython involving the Flesh Raiders. When they invaded the Tythonian Gnarls and attacked the Jedi outpost, the Jedi repelled the attack, but a young initiate defeated the Dark Jedi Callef, who commanded the Flesh Raiders. Master Din sealed the cave the Flesh Raiders used to enter the Gnarls and ordered the apprentice to meet him at the Jedi Temple. Shan learned of the events in the Gnarls and contacted the student as the young Jedi arrived at the Temple. She asked the learner to meet her in her private chambers before the Council meeting, discussing the Jedi Code and the dangers of emotions briefly before going to the Council chambers. In the meeting, Shan and the few Masters present were surprised when Din announced his intention to take the apprentice who defeated Callef as his Padawan, the first he had taught since his previous student, Bengel Morr, who was believed to have died in the Sacking of Coruscant a decade earlier. Contemplating a dark presence the Council had recently become aware of, Shan believed the source was on Coruscant and dispatched Master Kiwiiks and her Padawan, Kira Carsen, to investigate. However, Din and his new student uncovered the truth behind the Flesh Raiders' increased attacks—they were commanded by Morr, who had survived the destruction of the Jedi Temple and turned to the dark side.

After the Padawan defeated Morr in battle and rescued Din, who had been betrayed by the villagers of Kalikori and captured by Morr, Shan and the Council elevated the student to Jedi Knight. When the Grand Master asked the newly promoted Knight's opinion on the villagers, the young Jedi believed the Order needed to openly aid the Twi'lek villagers so Kalikori wouldn't turn on them again. The meeting was interrupted by a priority call from Kiwiiks, who confirmed their suspicions of a malevolent presence on the capital. Shan sent Din and his former student to assist her.
The Grand Master accompanied a Republic Military convoy ferrying a high-level Imperial defector, codenamed the General. The convoy was ambushed by the Imperial Navy, forcing Shan to send the general ahead aboard the Thranta-class corvette Brentaal Star while her fleet fought off the attack. Imperial Grand Moff Rycus Kilran learned of the Brentaal Star's location and sent the Gage-class transport Black Talon to attack the Republic vessel and recapture the defector. By the time Shan and the sixteen remaining vessels disengaged, crippling three Imperial dreadnaughts, an Imperial strike team prepared to board the damaged Brentaal Star and capture the general. The Grand Master's requests for the Imperials to withdraw and respect the Treaty of Coruscant were ignored. Shan's convoy raced to the Brentaal Star's aid, but the Imperials had eliminated the general, and the Black Talon was gone.
When the Voidstar, a prototype Imperial warship lost during the first war, was rediscovered, Shan commanded the Republic forces that fought for control of the warship.
During that time, the Jedi on Coruscant uncovered the source of the dark presence—a Sith Lord named Tarnis, posing as a top Republic scientist on the Planet Prison superweapon project. They also learned Tarnis stole files on all Republic weapon projects for the Empire. Din, Kiwiiks, and Agent Galen were dispatched to secure Republic offworld facilities. Din's former student joined forces with Carsen to defeat Tarnis in the Jedi Temple depths before he could turn the Planet Prison against the Republic capital. However, the Knight's defeat of Tarnis incurred the wrath of his father, Darth Angral, who declared a personal war against the Republic and the Jedi to avenge his son's death. Din's old friend Var Suthra, the general in charge of the Republic weapon projects, contacted Shan, who authorized the young Knight to work with Suthra to stop Angral's crusade. Shan assigned Carsen as the Knight's Padawan in Kiwiiks' absence and wished them luck as they departed for Ord Mantell with their astromech droid ally, T7-O1.
Guiding the Order's heroes

Shan began working with the Republic Emergency Response Corps to address crises threatening the fragile peace. A situation in the Outer Rim came to her attention. The Advozse Hegemony, a xenophobic political faction of the Advozsec people, acquired a prototype battle station codenamed "Hammer" that used asteroids to bombard planetary surfaces. Designed during the Great War but scuttled due to its destructive potential, the prototype was set on autopilot to collide with a white dwarf. A mechanical failure shut off the engines before destruction, and the Hegemony discovered it months before. The station came to the Republic's attention when the Hegemony bombarded the capital city of Skine after it refused to surrender. Shan called upon available Jedi and Republic heroes. Gathering a strike team aboard the Republic's staging area of Carrick Station, the Grand Master briefed the team and dispatched it to infiltrate the Hammer above Saleucami. Darth Malgus, Shan's counterpart in the Empire, gathered a strike team to destroy the station simultaneously. Only one team succeeded.
Shortly after, another crisis arose involving a powerful dark-side threat. An archaeological survey team excavating Sith ruins on Athiss sent a distress signal coinciding with the Council's sensation of an intense Force disturbance. Shan summoned powerful Jedi and allies, dispatching a strike team to Athiss. The Republic team competed with an Imperial force to recover Sith artifacts and contain the dark-side threat. The two teams combined to eliminate the primitive worshipers of Sith Lord Vodal Kressh, exiled to Athiss by the Sith Emperor centuries ago. The destruction of Kressh's servants ended the possibility of his influence spreading. Shan was on Tython when Din's former student and Carsen revealed Carsen was from the Empire. They were pursuing Angral's agents when lured into a trap by a Sith named Valis to capture her. Carsen revealed her past after they defeated the Sith. Shan gathered Council members on Tython, and Carsen explained her tale: born on Dromund Kaas to Sith parents, raised at the Sith Academy on Korriban, and a Child of the Emperor—a servant of the Sith Emperor who would have been bound to the Emperor's will had she not escaped. Master Kaedan called for Carsen's imprisonment, but Tol Braga disagreed—the Council learned of the Children from his Padawan, Sajar, a former Dark Councillor turned to the light side of the Force. Shan probed Carsen with the Force, finding no trace of the dark side. Carsen's teacher convinced the Grand Master she wouldn't betray the Order, so Shan allowed her to remain a Jedi.
Shan returned to her chambers to find she wasn't alone. Sensing her visitor, she asked him to reveal himself. A tall, dark-haired man with a cybernetic implant above one of his eyes greeted her. Informing the Grand Master that Master Zho was dead, he gave her the man's lightsaber, saying he died saving others. Shan recognized something in the man and realized he was her son, Theron, though he showed no signs of recognizing her before departing. Later, the Republic alerted Shan to the theft of the Allusis, a highly advanced Valor-class cruiser refitting at the Fondor Shipyards. She gathered a strike team to reclaim it from Mandalorian Clan Varad, who were pillaging the Tamarin sector. As the Empire attempted to destroy the Allusis after Clan Varad attacked Imperial planets, Shan led a Republic fleet to engage the Mandalorians and the Imperial fleet while her strike team—Jedi Consular Magnus, Jedi Knight Ezeraline, smuggler Taklan, and Republic trooper Keenor—boarded the Allusis to take control. They were opposed by an Imperial strike force including Sith Rotham and Vincine, bounty hunter Kyrenic, and Imperial agent Andan. Only one team survived and captured the Allusis.
Another crisis arose on Cademimu V, a missile depot supplying Republic defenses along the Celanon Spur. The planet's corrupt Governor Chornarov declared independence before the Republic could investigate his actions. With the help of the Mantellian Separatist Movement, forced off Ord Mantell at the end of the Separatist War, Chornarov declared martial law and had General Ortol seize control. The governor took control of missile depots, preventing Republic or Imperial invasion. Shan and Darth Malgus dispatched strike teams to infiltrate Cademimu and shut down the weapons. Both sent fleets to the Cademimu system to take control quickly, but only one succeeded in taking the missile depots and conquering the planet.
When the Jedi enclave on Rhinnal was attacked by an Imperial warship and the Republic frigate Toron Voq was destroyed investigating, the Republic believed the Empire had broken the Treaty. Shan was deeply affected by the attack, sensing the simultaneous deaths of many Jedi. An intercepted transmission from Malgus to the Dark Council revealed the fortress of Sith Lord Senu and another fortress had suffered a similar fate. The message identified the attacker as the Red Reaper, the flagship of Sith Pureblood Darth Ikoral. Ikoral desired to purge the galaxy of non-Purebloods. As the Red Reaper was detected near Chandrila, Shan dispatched a Republic strike team to board and defeat Ikoral, as did Malgus. Ikoral and his forces were defeated, and the Red Reaper destroyed. The Republic gained valuable astrogation and strategic data.
When Jedi Ako Domi, captured at the Battle of Sullust and fell to the dark side while imprisoned on Nar Shaddaa, was defeated and returned to Tython, Shan thanked those involved in his rescue.

The crisis with Darth Angral peaked when the Sith Lord, having killed Orgus Din and constructed the Desolator, tested it on Uphrades before assaulting Tython. Angral's flagship, Oppressor, deployed mini-bursts of the Desolator technology that ionized the planet's atmosphere, preventing the Jedi from launching fighters. Shan could only send a distress signal. Fortunately, Din's former Padawan discovered Uphrades after Angral's departure, and General Suthra relayed Shan's signal to the Jedi Knight. With Carsen and T7-O1, the Knight boarded the Oppressor and disabled the Desolator, allowing the Order to launch its fighters. By the time the Knight and Carsen defeated Angral, Jedi starfighters were bombing the warship, ending the Desolator's threat. When the Knight and Carsen returned to Tython, Shan learned the Emperor tried to take control of Carsen, but she severed the link. The Grand Master promoted her to Jedi Knight and granted Carsen's teacher the title "Hero of Tython."
Return to war
Against the Empire
As the Cold War dissolved into a renewed Galactic War due to proxy conflicts and heightened tensions, Tol Braga approached Shan with a plan—a strike team would capture the Sith Emperor and bring him to Tython to be converted to the light side. As part of Braga's plan, Jedi Knight Jomar Chul scouted the Dromund system but was shot down over Tatooine. The Hero of Tython rescued Chul, drawn to his location by Orgus Din's Force ghost. Shan and Braga ordered the Hero to bring Chul's sensor logs to Tython while the Zabrak Jedi awaited medical aid. The Grand Master authorized Braga's mission and allowed him to recruit the Hero. However, as the team prepared, Chul had a Force vision that the Hero would fall to the dark side. He confronted the Council, but despite Chul and Kaedan's protests, Shan permitted the mission to proceed. True to Chul's vision, the Emperor turned the group to the dark side and trained them as his servants for months.
The Hero's escape from the Emperor was only possible due to the spectral intervention of Din and the unexpected assistance from Lord Scourge, the Emperor's Wrath. Scourge liberated the Knight's comrades and vowed to clarify his actions on Tython. Before the Jedi Council convened there, the Sith Lord disclosed his history: centuries prior, he had a premonition of the Emperor's galaxy-wide destruction, a vision indicating that the Hero alone could prevent it. The Emperor sought to replicate the dark-side ritual that had bestowed immortality upon him over a millennium before, but on a galactic scale, an act that would result in the demise of all living beings. To accomplish this, the Emperor required a sacrifice involving billions of simultaneous deaths. Scourge implored the Hero and the Council to thwart the Sith's designs on the prison world of Belsavis. Much to Kaedan's astonishment, Shan determined that Scourge's assistance was crucial in stopping the Emperor. Consequently, she permitted the Sith Lord to accompany the Hero to Belsavis, while the Grand Master dispatched a Jedi named Enna Tabord to investigate ahead.
By the time the Hero reached Belsavis, Shan's inquiries had uncovered the presence of Executor Krannus, a high-ranking servant of the Emperor. Scourge verified that Krannus was likely the Emperor's intended instrument of destruction, and the Grand Master provided the Hero with Tabord's coordinates, enabling the Knight to rendezvous with the other Jedi on the planet's surface. Shan also attempted to inform the prison administration of the Knight's arrival on Belsavis. However, the ensuing chaos from the Imperial attack on the planet prevented Shan from establishing contact until she located Colonel Bartaph, the Republic officer commanding the military reinforcements dispatched to secure the prison. Bartaph managed to send a Special Forces squad under Sergeant Bedd to support the Hero in a final confrontation with Krannus, aiding the Knight in preventing Krannus from annihilating the entire planet. Upon learning of the Knight's triumph on Belsavis, Shan dispatched the Hero to the Imperial space station Korriban's Flame to investigate rumors of a meeting among high-ranking Sith and to locate Jomar Chul, who had vanished during a previous mission.
Senator Tobas Grell of Sarkhai, a planet and member of the Rift Alliance splinter government, was abducted above Belsavis by a man named Stark. The former student of Yuon Par, who had been named Barsen'thor—Warden of the Order—and elevated to Jedi Master after resolving the earlier crisis involving the Force-induced plague that had affected Par and other Jedi Masters, investigated Grell's kidnapping alongside his daughter, Nadia. However, they arrived too late to prevent his demise. Upon hearing of Grell's death, who had been an ally of the Jedi Order even after the Rift Alliance's separation from the Republic, Shan convened the Council to extend the Order's condolences to Nadia and the Rift Alliance. Master Bakarn also presented the Senator's will, which included a request for the Barsen'thor to take Nadia as a Padawan. Shan informed the Consular that she and the Council had approved Grell's request. Before concluding the transmission to the Barsen'thor's ship, the Grand Master guided Grell through the traditional vow to honor one's Master and the Jedi Code. Shan then resumed her investigation into the Emperor's plans.
The Knight soon informed Shan that the Korriban's Flame had been a trap orchestrated by Leeha Narezz, a corrupted member of the strike team. However, the Jedi also discovered that the Emperor had dispatched Fulminiss, a Sith, to Voss, a planet governed by Force-sensitive Mystics who rejected the Jedi Code. As the Hero and crew journeyed across the galaxy toward Voss, Shan gathered as much information as possible about the potential situation there, discovering that Fulminiss was communicating with the Emperor through an encrypted communications relay. However, the presence of several signal scramblers in the area prevented the Jedi from pinpointing Fulminiss's precise location. Thus, the Grand Master instructed the Hero to disable the scramblers upon arrival. The Knight pursued Fulminiss across the planet in a race to prevent him from unleashing a plague of madness upon the world. Ultimately, the Hero defeated the Sith Lord before his plans could materialize. While the Knight was on Voss, Shan was alerted to the return of Warren Sedoru, another fallen strike team member. Sedoru had seized the Republic flagship Valiant and taken its commander, Admiral Dabrin, hostage in order to gather information on the Republic's war strategies. Shan immediately dispatched the Hero to defeat Sedoru and rescue the admiral. During the Knight's mission, Sedoru revealed that Master Braga was on Corellia, a world embattled, acting as the Emperor's agent.
Upon learning that only a handful of Jedi remained alive on Corellia, Shan promptly issued a call to the Outer Rim, summoning as many Jedi reinforcements as possible and appointing the Hero as the Supreme Commander of all Jedi forces on the planet. Shortly after the Hero's arrival on Corellia, the Barsen'thor arrived with the combined military forces of the Rift Alliance to support the Republic. The Consular had also recovered a damaged holorecording of the First Son, the leader of the Children of the Emperor. Shan was in the Jedi Archives on Tython with Master Kaedan when the Barsen'thor's crew contacted the Temple for access. Upon learning the reason for the request, Shan immediately granted the Consular remote access to the Archives' systems. However, the recording revealed a shocking truth: the First Son was none other than Syo Bakarn, Shan's friend and fellow Council member. When contacted, the First Son disclosed that he had suppressed Bakarn's personality and granted control of the fortresses known as Guardian Holds to his fellow Children. The First Son then cruelly thanked Shan and Kaedan for their gift before ending the call. Horrified, Shan and Kaedan watched as communications with the Holds ceased. The two Jedi Masters ordered the Barsen'thor to retake the Holds with the Alliance's forces. The Barsen'thor succeeded in these efforts and defeated the First Son in a final duel, during which Bakarn broke free of the Son's control and imprisoned the Child within his mind. At the moment of the First Son's defeat, Shan and the rest of the Masters suddenly became aware of the presence of the Children across the galaxy—without the First Son's shield, the Children were exposed to the Jedi. Shan was also relieved to hear that Bakarn had survived and immediately sent Jedi to retrieve her friend and return him to Tython after relaying Supreme Chancellor Leontyne Saresh's request for a meeting to the Barsen'thor.

Simultaneously, the Outer Rim Jedi under the Hero of Tython's command thwarted Braga's attempts to provide the Emperor with the necessary sacrifice for his ritual. The Hero ultimately defeated and redeemed Braga aboard the warship Eclipse above Coronet City, Corellia's capital. From Braga, the Knight learned that the Emperor was weakened and residing in the Dark Temple on Dromund Kaas. Shan decided to pursue a daring course of action: while the Hero infiltrated the Imperial capital and confronted the Emperor, she would lead the Republic Navy in a full-scale assault on the planet. As the Hero journeyed from Corellia to the heart of the Sith Worlds, the Grand Master departed Tython and joined the invasion fleet assembled at her request. Her task force arrived at Dromund Kaas and engaged the Imperial First Defense Fleet in a fierce space battle. With Shan and Admiral Dabrin leading the fleet aboard the Valiant, their ships surprised the Imperial defenders and kept the planet's attention focused on them, allowing the Hero to slip to the surface and enter the Dark Temple with the aid of the Jedi's allies. Together with T7-O1, the Hero confronted and defeated the Emperor in a final showdown. The Knight immediately communicated their success to Shan upon returning to the group's ship. Shan ordered an immediate withdrawal to the Colonies region.
During a ceremony aboard the Valiant, attended by many of the Republic's influential figures and allies of the Hero, Shan presented the Knight and crew with the Cross of Glory, the Republic's highest honor, and bestowed upon the Hero the title of Jedi Master. The Grand Master then returned to Coruscant for a meeting with the Chancellor, the Barsen'thor, and the Rift Alliance, where she awarded the Jedi Master with Bakarn's vacant seat on the Jedi Council.
During the Battle of Ilum, Shan journeyed to the icy world of Ilum when Darth Malgus proclaimed his New Empire. On Ilum, Shan participated in a war council with Supreme Commander Rans, General Elin Garza, Fleet Admiral Numinn, and several other high-ranking officials, where they resolved to dispatch a small strike team to board Malgus's space station and defeat the Sith Lord.
Family ties
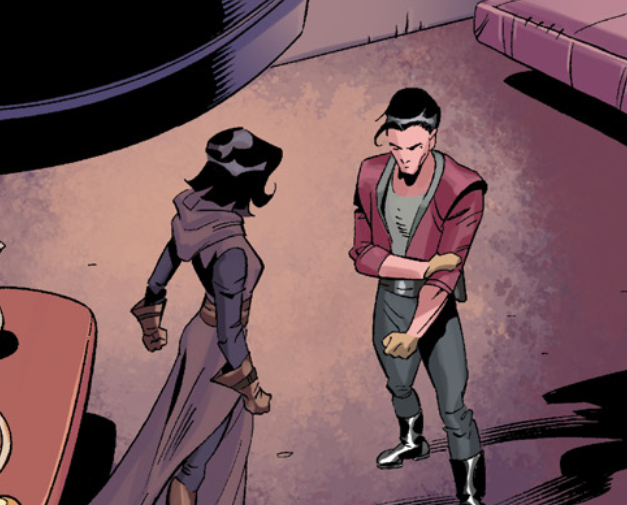
Some time after the battle at Dromund Kaas, Shan had taken up residence in an apartment on Coruscant. By this time, Jace Malcom had been promoted to Supreme Commander of the Republic Military. Malcom became aware of his son, Theron, while collaborating with the Strategic Information Service on Operation End Game, a joint operation between the military, SIS, and the Jedi Order aimed at dismantling the powerful Imperial warship Ascendant Spear and its commander, Darth Karrid. Upon seeing Theron's name on an analysis report, as Theron was an agent for the SIS, Malcom attempted to reconcile with his son but was initially rejected. After Theron and Master Gnost-Dural returned from a mission to the planet Ziost, Shan contacted Gnost-Dural and requested that he relay a request for a meeting to Theron. Her son arrived at her apartment that night by disabling the perimeter sensors and scaling the building's wall, although Shan was aware of his presence and had left the balcony doors open. Despite Theron's initial animosity, Shan expressed her pride in her son's achievements and attempted to warn him about Malcom's desire to destroy the Empire. However, Theron became angry with her and departed. Following her son's departure, Shan allowed herself to experience the painful memories of her separation from Malcom, reminding herself of her decision to forgo a chance at a family in service of the Republic.

A few days later, the Coruscant Security Force summoned Shan to Diplomatic Spaceport 27-B, where a young Twi'lek female was holding a CSF officer hostage. The police had attempted to arrest her upon arrival because she had landed in the Prosperity, the shuttle that Theron and Gnost-Dural had used on their most recent mission. The young woman had compelled the officers to contact the Grand Master. Shan immediately knew that she was telling the truth when the Twi'lek informed her that Theron had sent her to deliver a message. At Shan's apartment, the Twi'lek Teff'ith explained Theron's message: Malcom intended to sacrifice the planet Duro to the Imperial Moff Nezzor to prevent the Empire from discovering that the Republic possessed one of its black cipher encryption devices. Theron and Gnost-Dural planned to prevent this by boarding the Ascendant Spear, ensuring it went to Duro. Consequently, Theron needed his mother to convince his father to send the Republic fleet to Duro—and Malcom was furious to learn that Theron had informed Shan about his plans when she called him in the middle of the night and arrived at his apartment.
Remaining composed throughout their conversation as the man she loved grew increasingly angry, Shan worked to persuade Malcom to listen to their son. Her statement that Malcom had forgotten the difference between the Empire and the Republic struck a deep chord. Shan acknowledged that Malcom was still a good man despite his hate and anger and revealed that her decision to conceal Theron from his father might have been a mistake. Teff'ith's interruption brought the pair back to the matter of Duro, and Satele's request that Malcom have faith in their son was the final argument that convinced the Supreme Commander to accept Theron's plan. Shan then dismissed Malcom's objections and insisted on accompanying him to Duro. The two, along with Teff'ith, boarded Malcom's flagship, Aegis, within an hour. Nine hours later, Shan was on the bridge with Malcom and Teff'ith when Moff Nezzor's fleet arrived. She watched as Malcom and his subordinate Admiral Gorwin pounded the Extempus and the rest of the Imperial fleet. Just as Malcom's ships finished destroying the Extempus and preventing its suicide run on one of Duro's orbital cities, Shan sensed the impending arrival of Darth Karrid and alerted the bridge mere seconds before the Ascendant Spear emerged from hyperspace on the edge of the Duro system.
The Ascendant Spear's initial attempts to attack the Aegis were hampered by Theron's slicing efforts aboard the Imperial warship. However, the Republic fleet scored relatively few hits on the vessel before Karrid regained control and eliminated 30 percent of the Aegis's shields in a single strike. As the battle raged, Shan observed Malcom withdraw his fleet to a position where it could not inflict lasting damage on the Ascendant Spear but one that also prevented Karrid from completely annihilating the Republic fleet in a single attack. Karrid's Force-enhanced mental control over the Ascendant Spear was weakened when Gnost-Dural engaged her apprentices in a duel, depriving her of their strength in the Force. However, as the Ascendant Spear drew close enough for its long-range weaponry to attack the Aegis, Shan and the rest of the bridge were plunged into darkness when Malcom ordered the vessel to divert all power to the shields from everything except the sensors and life support. As Karrid's attack hammered away at the shields, Shan and Malcom held hands, bracing for the Aegis's destruction.
However, the Republic fleet was spared the Ascendant Spear's wrath when Theron successfully severed Karrid from its controls, leaving the vessel adrift in space as its commander, Moff Gelmid Lorman, struggled to decide whether to assume control or await Karrid's return. The bridge crew of the Aegis waited in silence for Karrid's attack, but Malcom soon realized that the Ascendant Spear was vulnerable and ordered the entire fleet to attack. As the fleet bombarded the defenseless warship, Theron succeeded in killing Karrid, and he and Gnost-Dural fled to the escape pods when Karrid's apprentices retreated to save themselves. Shan and Malcom watched as the Ascendant Spear was engulfed in a hypermatter explosion. However, the entire bridge realized that the ship's destruction might have also killed both Theron and Gnost-Dural. Fortunately for Shan and Malcom, the missing duo hailed the Aegis from one of the escape pods and were quickly brought aboard the vessel. Both parents were overjoyed to see their son alive, though they restrained their emotions in front of the Aegis's crew, confining themselves to congratulatory remarks.
Three days later, Shan attended a debriefing in Malcom's office with Gnost-Dural and SIS director Marcus Trant. Neither Shan nor Malcom had spoken to their son or each other other than an earlier ceremony in which Theron, Gnost-Dural, and Teff'ith were awarded the Cross of Glory. Both Shan and Malcom were disappointed that Theron failed to attend the debriefing, but Shan remained behind afterward to speak with Malcom, reassuring him that their son would seek them out when he was ready. Shan then departed after briefly holding Malcom's shoulder to convey her sadness for what was lost.
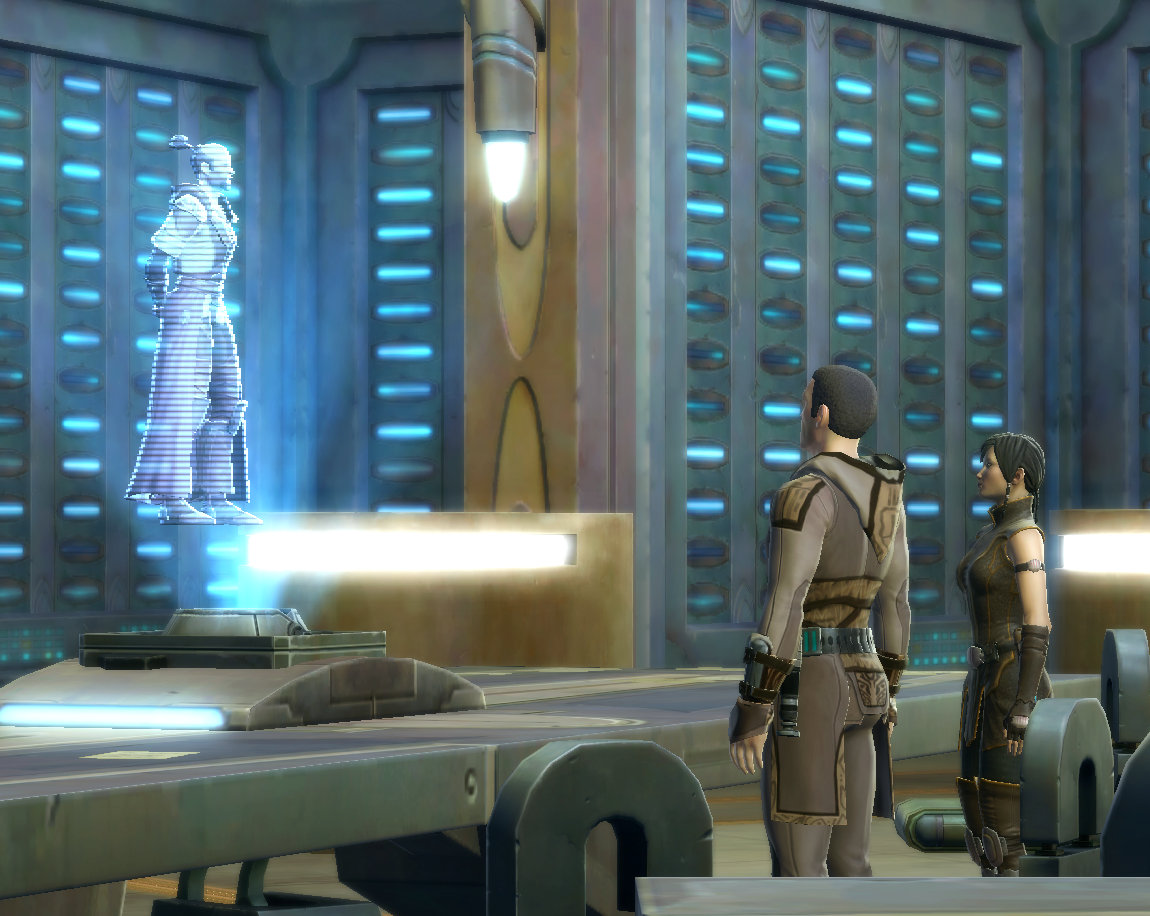
Around 3638 BBY, Shan established a holocommunication to the space station Keylander Station, serving as an advisor to Supreme Chancellor Leontyne Saresh and a Republic hero, in their plans to address the situation on Makeb, which the Hutt Cartel had invaded weeks prior.
Revan returned

That same year, the Hutt Cartel launched an invasion of the planet Makeb, prompting Shan and the Jedi Council to meditate on the invasion to gather more information. Through their meditation, the Council concluded that the conquest of Makeb was a prelude to a full-scale Hutt expansion. In response to the Hutt transgression, Supreme Chancellor Leontyne Saresh arranged a meeting with a Republic operative aboard Keylander Station above Makeb, a council in which Shan and Malcom participated via hologram. At Saresh's request, the Grand Master communicated the Council's findings regarding the Hutts' intentions. When Tython was attacked later that year, Shan was off-planet, serving as an emissary to the Drayvos League. Shan also visited the moon Oricon, the fortress world of the powerful Dread Masters, and witnessed the potent presence of the dark side there.
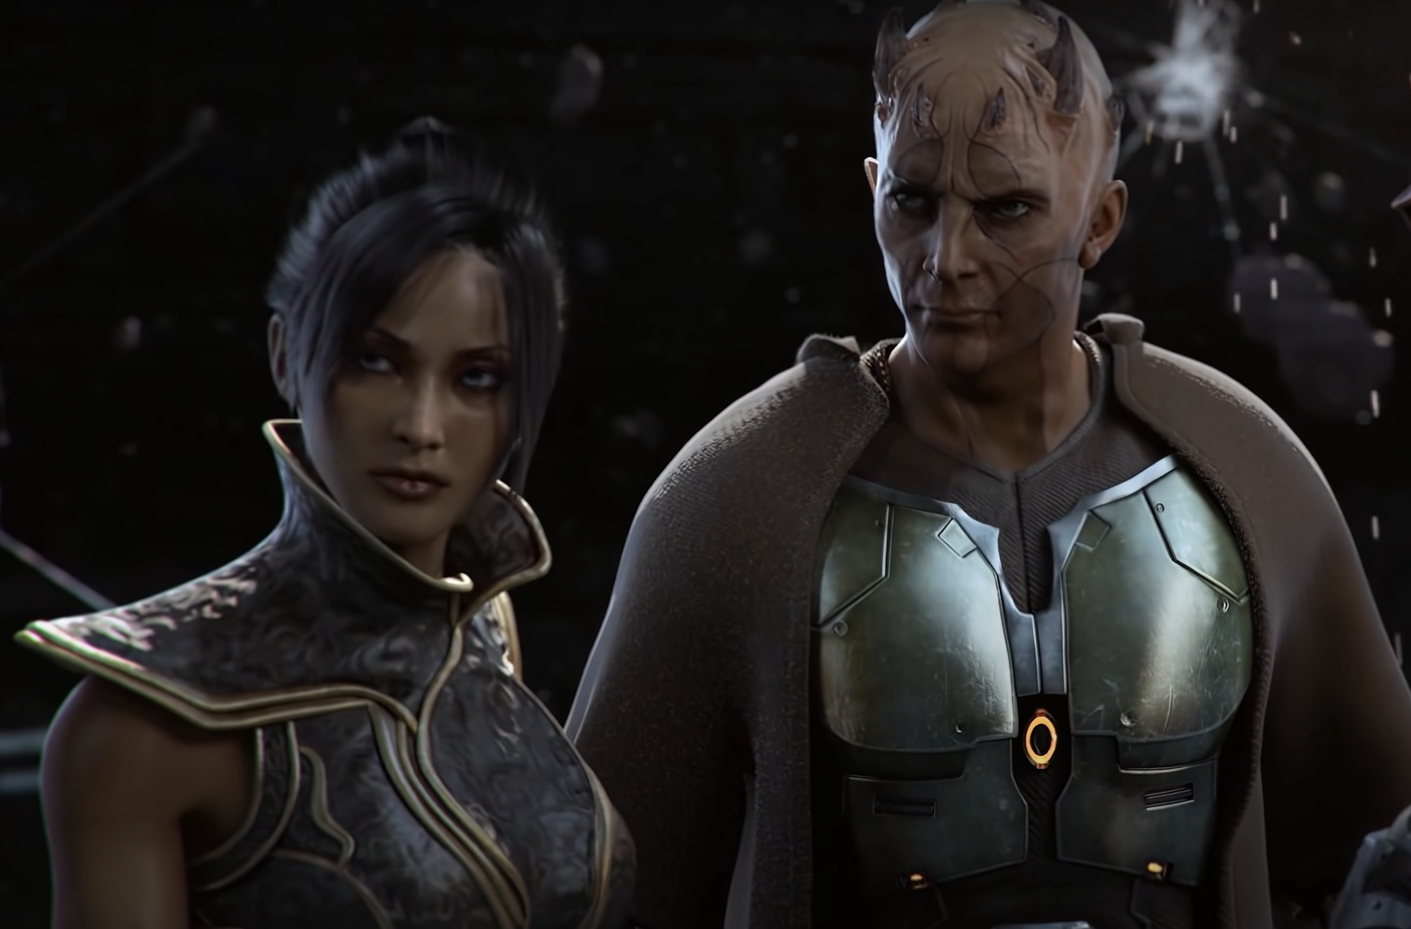
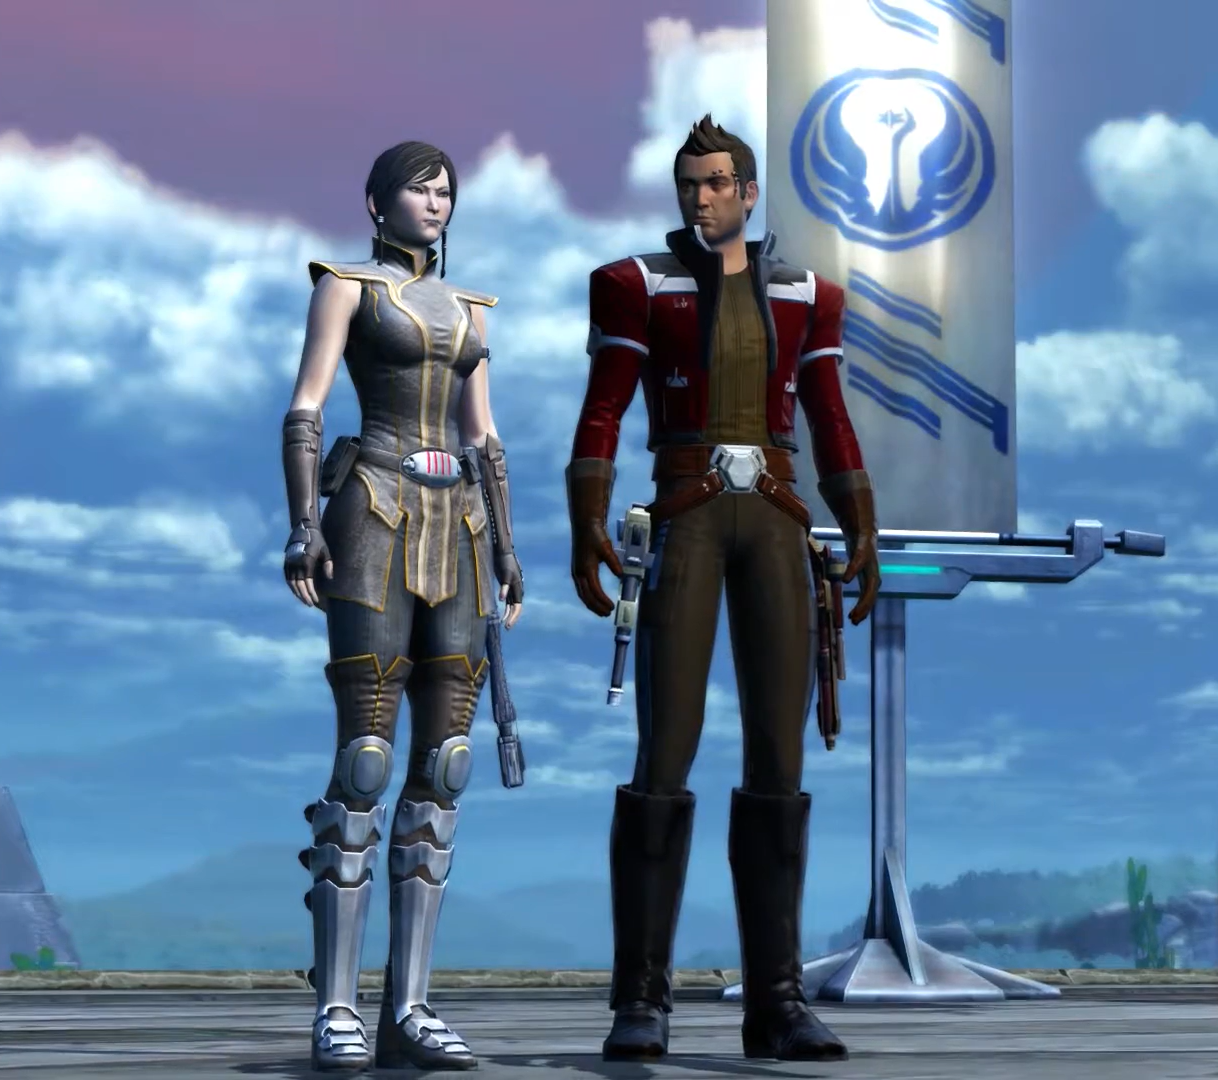
Shortly thereafter, fleets from both the Republic and the Empire clashed in battle above the planet Rishi. Shan commanded the fleet of Republic ships from the bridge of the flagship Dauntless. The two fleets had been lured there by the Order of Revan, whose pirate allies, the Nova Blades, had manipulated Republic and Imperial patrol routes to force a confrontation. The battle was complicated by the presence of Revanite ships that attacked both sides and Revanite saboteurs aboard both fleets. A signal jammer on Rishi prevented communication among the combatants. However, an independent group of Republic and Imperial agents disabled the jammer and contacted Shan and the Imperial commander, Darth Marr, warning them of the Revanites' involvement. The two sides agreed to a ceasefire and met in the town of Raider's Cove on Rishi, where Shan discovered that her son, Theron, was among the allied operatives who had exposed the Revanites' plot. Theron's group revealed to Shan and Marr that Revan himself was alive and leading the Revanites and that he sought to restore the Sith Emperor to a physical form on the moon of Yavin 4 to permanently eliminate him. Faced with the threat of the power-mad Emperor returned to his full strength, Shan and Marr agreed to a temporary truce between their two fleets and set course for the Yavin system.

Shan and Marr established a command post for their coalition on Yavin's surface and coordinated their forces with Theron and his allies, the Sith Lana Beniko and the Wookiee smuggler Jakarro. However, they soon realized that their forces, while not engaged in open conflict, were unable to trust each other, and decided to establish a neutral sensor perimeter beyond the intermingled forces holding a perimeter around the command post. While on Yavin, both Shan and Marr confirmed the Emperor's presence but also sensed a faint and unique light-side presence hidden among the residual energies of past Sith, although they were unable to pinpoint its location. The coalitions' sensors soon identified a series of ransacked structures that were mixtures of ancient and modern materials. Marr determined that the structures were the long-rumored Imperial Guard Academy. Coalition forces investigated and brought back the insane Commandant Iven, whose interrogation revealed Revan's plans: the nearby Temple of Sacrifice held a powerful Sith artifact that could consume all life on Yavin 4, fueling the Emperor's restoration. However, the coalition forces also encountered the spirit of the real Revan, who was unable to identify the person wearing his mask and leading the Revanites.

Under the joint leadership of Shan and Marr, the allied forces stormed the Temple, overwhelming the Revanites. Along with Theron, Marr, and a host of other Republic and Imperial heroes, Shan confronted her ancestor in the Temple before he could begin the ritual to restore the Emperor. However, when they accused him of being an impostor, "Revan" removed his mask, revealing himself to be the legendary Force-user. In the ensuing battle, the Grand Master held herself back to utilize battle meditation, sharing strength with her allies in the fight against Revan. Her power-mad ancestor was ultimately defeated. To the surprise of everyone present, a booming laugh echoed through the Temple, and a surge of dark-side energy shot into the sky. The Emperor revealed that the battle on the moon had restored his strength and declared his intention to reclaim the galaxy, vanishing without assuming a physical form.
Revan's essence materialized following the conflict, at which point the coalition discovered the reality of the situation: Revan had perished during the Foundry incident. However, the Emperor's mental abuse had fractured Revan into two distinct entities instead of causing complete annihilation. A portion of Revan merged with the Force, but the darker aspect resisted oblivion. The spectral Revan then reabsorbed the dark counterpart, leading to the disappearance of Revan's physical form as he became one with the Force. With Revan's fall, the coalition disbanded, although a temporary ceasefire was maintained while the Republic and the Empire withdrew their forces. Before departing from the moon, Shan and her son engaged in conversation with several Republic heroes who had collaborated with the coalition against Revan, including both the Hero of Tython and the Barsen'thor. Following discussions with the Council, Shan designated the Hero as the Order's new Battlemaster and assigned the Barsen'thor the task of investigating the Emperor's power sources and strategies. Shan also conferred with the commander of the distinguished Havoc Squad; a new joint task force, composed of members from the Jedi, the SIS, and the military, was being established to pursue the Emperor, and Jace Malcom advocated for the commander to serve as the task force's primary military advisor. The Grand Master was also present when Theron conversed with a well-known smuggler allied with the Republic about potential employment with the SIS.
Conflict with the Eternal Empire
Shortly after the battle against Revan concluded, the Sith Emperor obliterated all life on the planet Ziost and then vanished into the Unknown Regions. Soon after, a sequence of Eternal Empire incursions by an unidentified party targeted both the Republic and the Empire. A disturbance in the Force then originated from the Unknown Regions, generating ripples that were felt by all Force-sensitive individuals who had previously sensed the Sith Emperor's presence. The cause was the demise of the Force entity's host body. Shortly thereafter, the enigmatic adversary, the Eternal Empire, launched a full-scale invasion of the galaxy, rapidly conquering both the Republic and the Sith Empire. The Jedi Order was scattered during the conflict, and the Grand Master retreated into a state of meditative isolation.

Shan traveled to the distant planet Odessen, a place strong with the Force, where she was joined by the spectral form of Darth Marr. In the year 3631 BBY, the two deliberated on how they were again able to perceive the presence of the former Emperor, now known as Valkorion. However, they remained uncertain as to why Valkorion had not assumed a physical form or selected a new host. Some time later, Shan and Marr observed from afar as the Outlander established a new Alliance against the Eternal Empire and constructed a base on Odessen. Shan remained secluded in her dwelling, keeping her presence unknown to the Alliance or its Commander until they were lured into the Odessen wilderness and confronted by the spirit of Valkorion, who now resided within the Commander's body. During a confrontation, Valkorion overwhelmed his host and feigned abandoning the Commander's consciousness to pursue his other objectives, causing the Commander to lose consciousness.

Grand Master Shan discovered the Commander and transported them to her ship. Upon awakening, Satele revealed that she was collaborating with the Force ghost of Darth Marr. Together, they offered the Commander insights into Arcann and his Knights of Zakuul, who held a different understanding of the Force compared to the Jedi and Sith. Following their instructions, the Commander ventured into a dark cave, where they encountered and battled Vaylin. After the Commander defeated her, "Vaylin" vanished, revealing herself to be merely an illusion. Marr and Satele then clarified that the illusion served as a warning, indicating that Arcann and Vaylin commanded an army. At Satele's direction, the Commander departed the cave to locate an oasis for their final trial, slaying two young cave jurgorans, which provoked their mother's anger upon the Commander's arrival at the oasis. After the Commander resolved the situation, Marr and Satele departed Odessen, having experienced a calling from the Force. She went back to Coruscant and started training a new generation of Force users, and later witnessed the Commander broadcast their intentions as the new peacekeeper of Zakuul after defeating Valkorion.
Tenebrae's ultimate weapon
When Tenebrae's spirit was expelled from the Commander's mind, the Sith Lord Scourge and the Jedi Knight Kira Carsen annihilated the entity's original physical form. This action unleashed a Sith ritual that released an ancient plague, rendering Scourge and Carsen comatose, but immune due to their connection to the former Emperor acting as a protective measure. Over a year later, Shan discovered and rescued them, unknowingly contracting Tenebrae's plague. Within days, Shan and her followers fell into a nightmarish slumber, gradually merging into a collective consciousness. Scourge and Carsen kept them isolated within a transport vessel following an erratic course through uncharted regions of the Outer Rim Territories.
Subsequently, in 3626 BBY, Scourge, Carsen, and the Alliance Commander determined the location of the transport vessel, thanks to the efforts of T7-O1. Departing for the vessel, the trio navigated its interior, encountering both the Emperor's Hand and the Scions of Zakuul along the way, guided by Revan. Eventually, they reached the unconscious bodies of Shan and her followers and entered her mind to assist Shan in preventing Tenebrae's attempted resurrection. The Commander fought their way to Shan, who awoke to reveal that her unconscious state had been a trap for Tenebrae. Shan, together with the Commander, Carsen, Scourge, Darth Marr, Revan, Meetra Surik, and all those that Tenebrae had murdered and manipulated over the centuries, aided in Tenebrae's final defeat. Upon his demise, the spirits of Marr, Revan, and Surik became one with the Force. Following this event, Shan spoke privately with the Commander, expressing her gratitude for their friendship with her son Theron Shan.
The return of Malgus

After Tenebrae was expelled from her mind, Shan returned to the Jedi Temple and spoke with Aryn Leneer, who had just arrived from Dantooine. Shan and the former Jedi had a conversation where Leneer revealed to the Grand Master that she had an encounter with Darth Malgus on Dantooine. Satele inquired about the appropriate course of action and assured the former Jedi that the Order had evolved and that she herself had relinquished some of her ties to the Jedi ways. When Syl informed Shan that Master Sal-Deron wished to speak with her, Satele brought Leneer along so that they could both relay the information to Sal-Deron. As they departed the room, Shan remarked that despite their efforts to resist change, the Jedi had always adapted, and she even told Leneer that further changes were inevitable.

After the Republic lost contact with a team sent to excavate the ruins of Darth Nul's fortress on Elom, Shan arrived with other Jedi to assist the Outlander and Lana Beniko. The Jedi discovered the rogue Sith Lord Darth Malgus, who had just been defeated by the Alliance Commander and refused to yield until he was Force-pushed to his knees by all the Jedi present. Shan then arrived and used the Force to immobilize Malgus, with the two exchanging glances before the Sith Lord was imprisoned.
Legacy
By the era of the Galactic Empire, 3,600 years later, Shan was honored with Satele Shan Boulevard, a street in Coruscant's Pyochayarit district of the Azda Cluster region. The publishing house Anooba Press operated from a building on Satele Shan Boulevard.
Personality and characteristics

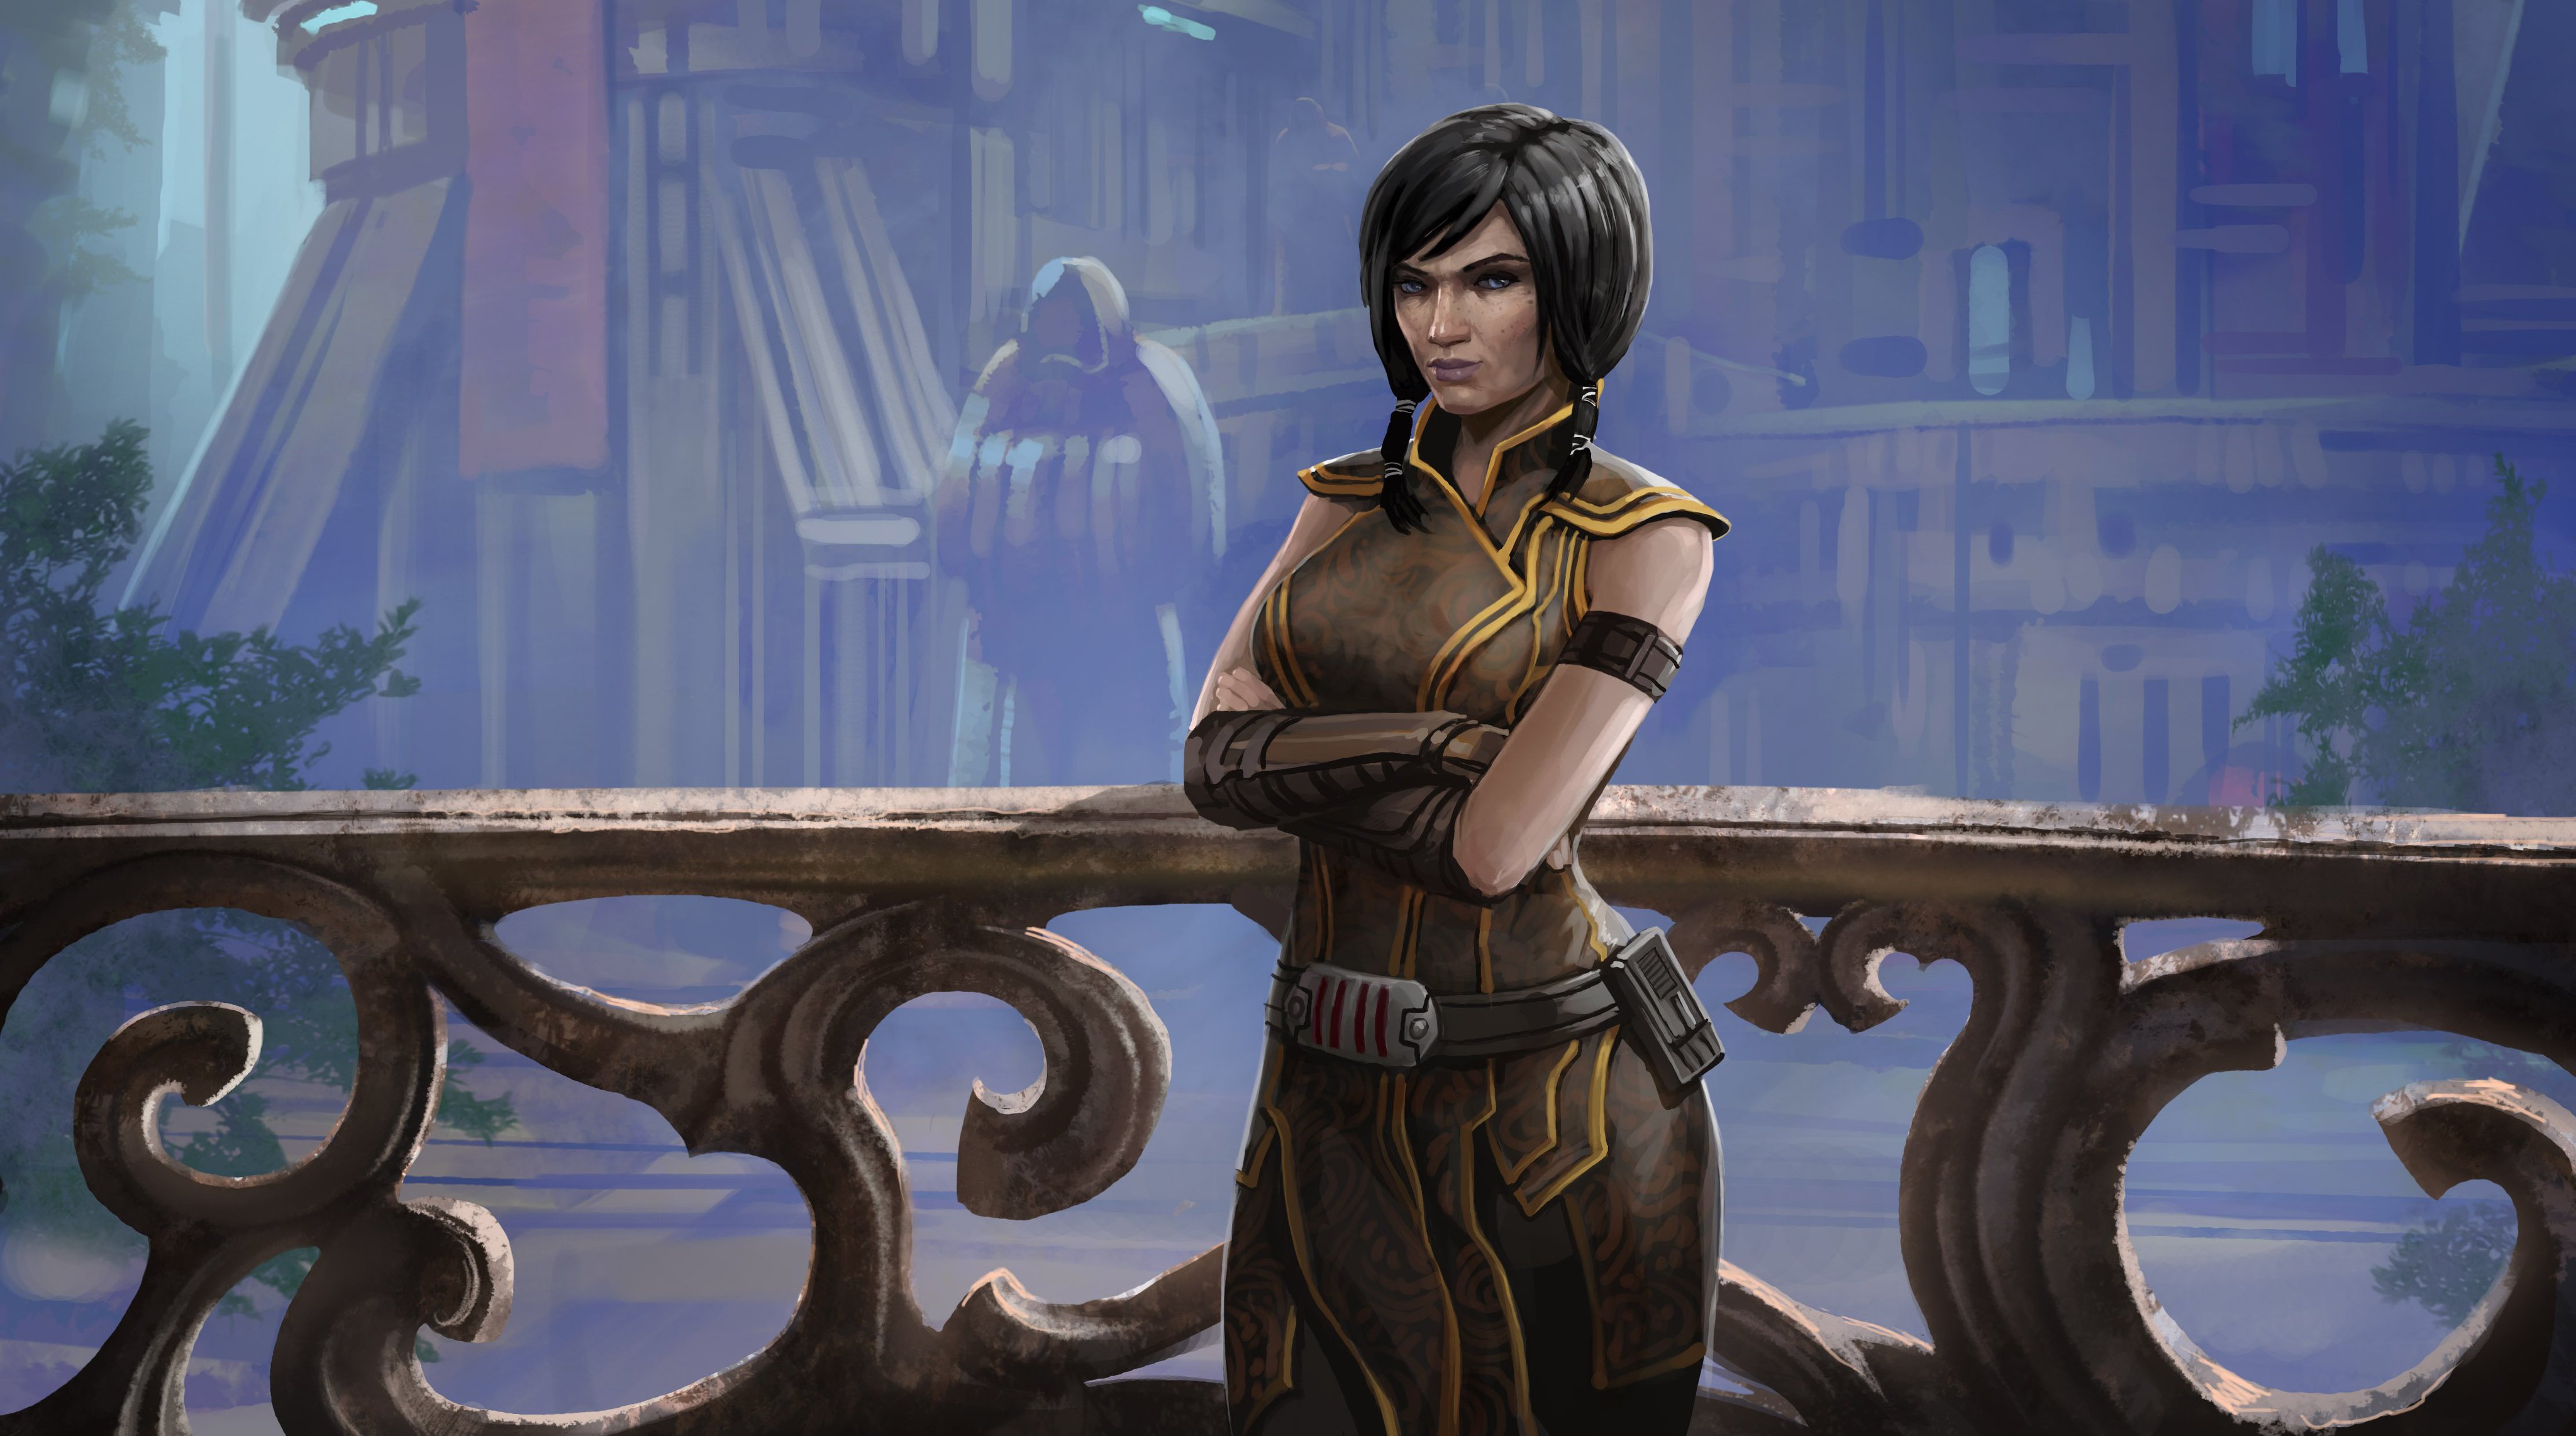
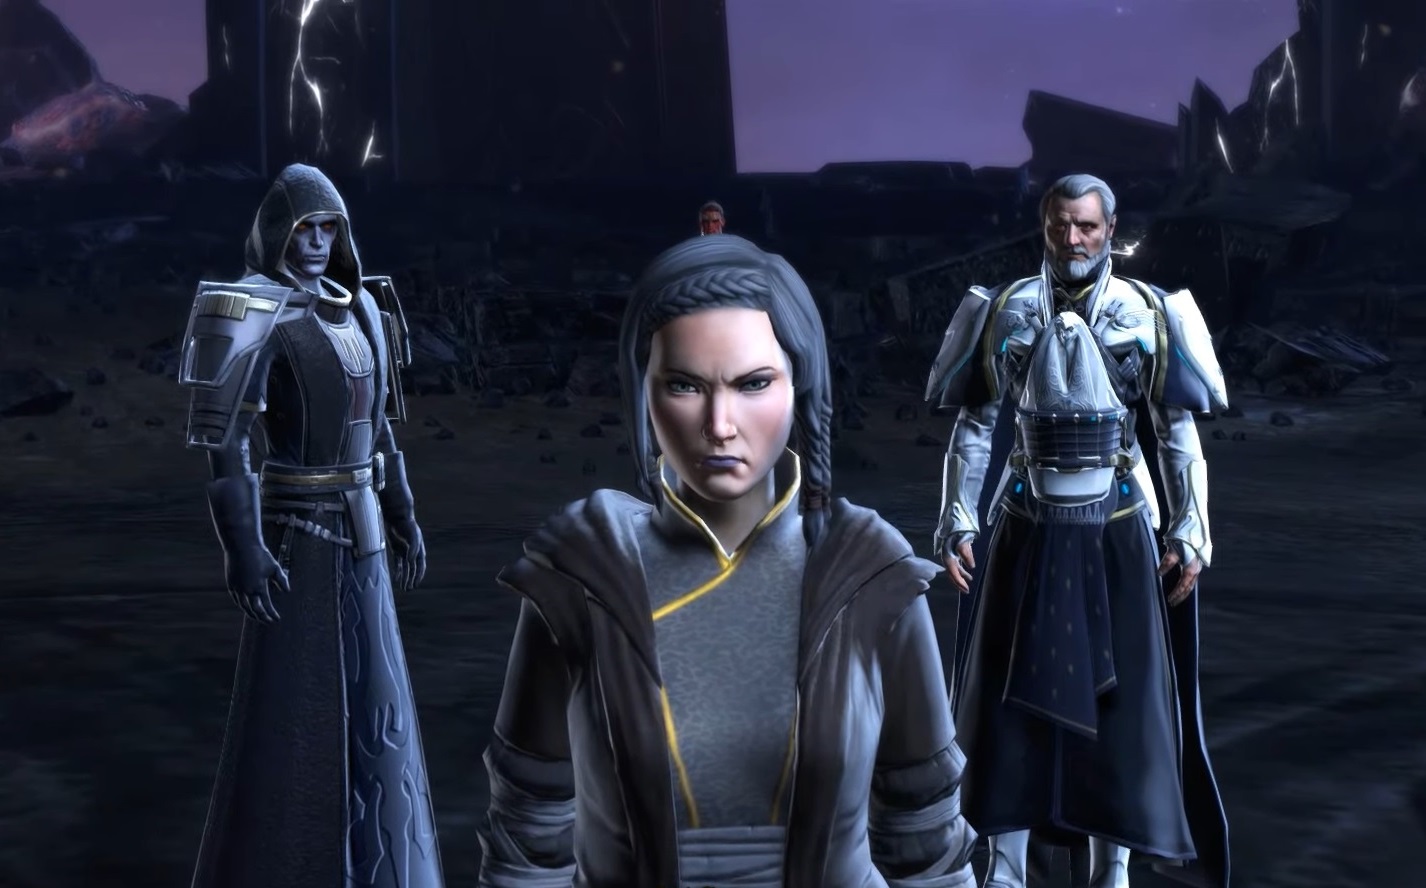
Satele Shan, a Human female characterized by fair complexion and blue-gray eyes, maintained a short, dark brown-black hairstyle for the majority of her life. As a teenager, Shan sported bangs on either side of her face, which she later replaced with braided ponytails. Despite her relatively short stature, Shan radiated an aura of power, confidence, and unwavering composure throughout her life. In her youth, Shan—who preferred to be addressed by her first name, even as a Jedi Master—inherited her ancestor Bastila's impatience and impulsiveness, traits that were subsequently tempered under the guidance of Master Dar'Nala. Shan was a formidable presence on the battlefield, and her reputation as one of the Republic's most celebrated heroes stemmed directly from her actions during the Battle of Alderaan.
As a Jedi Knight, Shan was committed to serving the Republic, and her dedication and selflessness motivated her to forgo a normal life and family when she conceived her son, Theron. This sense of duty, combined with her apprehension regarding the dark side's corrupting influence, prompted her to end her relationship with Theron's father several months prior. Shan recognized her willingness to do anything to safeguard her son and, considering her Jedi powers and responsibilities, believed the risk was too great. Consequently, she entrusted Theron to Ngani Zho, a paternal figure to Shan, whom she considered the only person trustworthy enough to confide in about her pregnancy. Zho regarded Shan as his most accomplished student and was deeply saddened by his Master's death. However, despite her Jedi teachings and dedication to prioritizing the galaxy's needs, Shan deeply regretted ending her relationship with Jace Malcom and giving up her son, and the memories that were dredged up after meeting her son as his mother for the first time were still painful even twenty-six years later.

By the conclusion of the Great Galactic War, Shan was still grappling with her impatience and harbored a strong distrust of the Sith, leading her to aggressively confront Darth Baras upon discovering that the Sith's peace negotiations were a deception. However, over the following weeks, Shan confronted the hypocrisy of her former Master Dar'Nala's attempts to undermine the Treaty of Coruscant and realized how Dar'Nala herself had succumbed to the very emotions she had taught Shan to resist. As a result, Shan concluded that the current peace was the most favorable outcome for the galaxy at the time and dedicated herself to doing good as she traveled the galaxy after the end of the war. As a Jedi Master and later Grand Master, Shan possessed a warm demeanor and an approachable personality, treating even the youngest Padawans of the Order as equals. However, Shan's outward attitude belied her true determination and strength of will, and the sense of authority that her voice conveyed could bring even the Supreme Commander of the Republic Military to a halt. Shan was renowned for her wisdom and considered by many to be the Order's voice and conscience, and her prowess in battle and experience with the dangers of the dark side made her both a wise teacher and a powerful warrior.
Relationships
Jace Malcom

Shan first encountered Jace Malcom during her studies under Kao Cen Darach on Korriban, and the two escaped the Sith Empire's resurgence with Nico Okarr's assistance. Over the subsequent fourteen years, they shared additional experiences, during which Malcom expressed his feelings for her since their initial meeting. However, Shan resisted reciprocating until after the Battle of Alderaan, when she acknowledged her mutual feelings and initiated a romantic relationship that lasted six months. The relationship ended when Shan, concerned about the growing darkness within Malcom's spirit and his desire for vengeance against the Empire, terminated it after confronting him about his motivations for waging war and decided not to inform him of her pregnancy.
Shan's concerns regarding Malcom's proximity to the dark side kept them apart for over two decades, and their limited interactions were generally cordial. However, upon Malcom's discovery of Theron's existence, Shan and Malcom were compelled to reconcile their past decisions and actions. Shan deeply regretted her inability to pursue their relationship, but during the battle at Duro, both she and Malcom were grateful that they did not have to die alone—though thanks to their son, the pair's impending death was averted. In the aftermath of Duro, both Shan and Malcom gradually came to terms with their relationship's status, recognizing that their feelings could not interfere with their responsibilities as Grand Master and Supreme Commander.
Theron Shan

Shan gave birth to her son, Theron, during the Great Galactic War but, upon viewing her child for the first time, realized that she would have done anything to protect her son, even if it meant danger to the galaxy, and so she gave Theron to Ngani Zho. Shan did not see Theron again for over twenty years, and when she finally did meet her son, it was when Theron—by then an SIS agent—was bringing his mother news of Zho's death. Neither openly acknowledged their relationship during their conversation, though they were both aware of each other's identities. A few years later, when Theron participated in Operation End Game, a covert mission organized by his father, Jace Malcom, Shan contacted her son and asked to speak with him. Shan was proud of her son's accomplishments and loved him deeply, but her attempts to warn Theron about his father's dark desire to destroy the Empire only angered her son.
Shan's relationship with Theron complicated her relationship with Malcom, who had been unaware of his child's existence until Operation End Game, but she trusted Theron's judgment and was willing to stand up to Malcom in order to help Theron. Both she and Malcom were overjoyed to see Theron survive the battle at Duro, though they contained their emotions in public. Shan did not speak with Theron in the days following Duro, but she remained confident that her son would reach out to his parents when he was ready.
Powers and skills
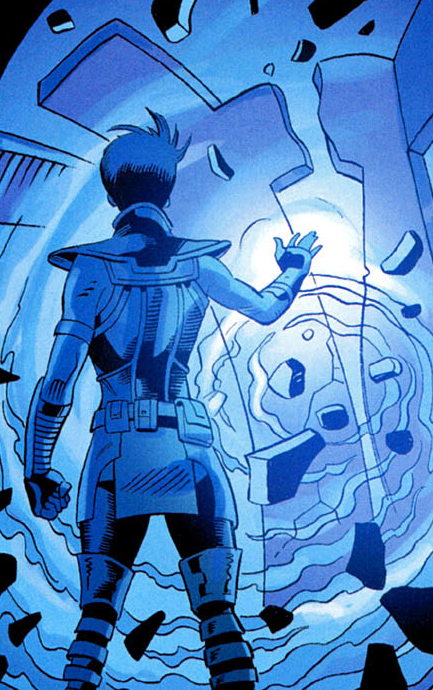
As a descendant of Revan and Bastila Shan, two of their generation's most powerful Jedi, Satele Shan possessed extraordinary Force abilities. Shan demonstrated proficiency in telekinesis, exhibiting sufficient strength even as a Jedi Knight to collapse an entire mountain upon Darth Malgus during their confrontation. She also disassembled the door to Darth Mekhis' fortress using the Force and displayed skill in tutaminis, capable of blocking a lightsaber blade with her bare hands without sustaining injury. Shan's powers augmented throughout her life; by the Battle of Rhen Var, she could demolish a blast door by shattering it with the Force. During the Sebaddon incident, she dismantled hex droids with a mere gesture, while other Jedi and Sith struggled to overcome them individually.
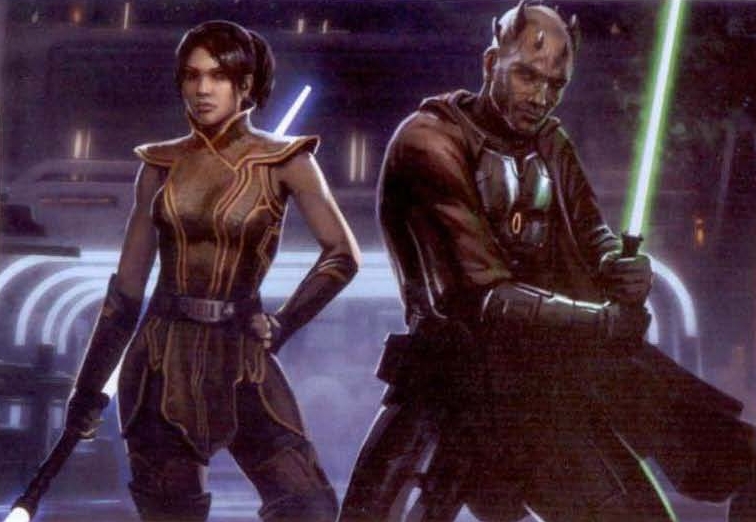
Throughout her life, Shan was known for her affinity for foresight—she predicted the arrival of the Sith Empire at Korriban, and her ability to view the future grew stronger over the course of her life. By the time of the renewed war with the Sith, many Jedi believed that the Grand Master could change the future simply by predicting it. Shan also possessed exceptional telepathic abilities, enabling her to both read minds and communicate fluently. She could influence the biological components of more than half a dozen hexes to keep them at bay, though Shan could not influence the hexes and maintain a Force shield strong enough to seal in the air around her at the same time for long. Shan's Master Dar'Nala suspected that she had inherited her ancestor Bastila's skill with battle meditation, and Shan was well-versed in the art of battle meditation by the time of the Galactic War, when she used it to support her allies in the battle against the returned Revan. The Grand Master also developed a strong bond with her apprentice through the Force, which allowed her to sense Konshi's emotions from halfway across the galaxy.

Trained by the Order's Battlemaster, Kao Cen Darach, Shan demonstrated exceptional skill with both a standard lightsaber and a double-bladed lightsaber. In combat, Shan was an agile fighter who utilized acrobatics to both evade her opponents and quickly strike them down. During the battle of Alderaan, Shan effortlessly defeated four Sith Warriors and damaged a Mark I Sith droid, while also holding her own against the formidable Darth Malgus, the slayer of Shan's own master. Although Shan fought well Malgus proved to be the superior lightsaber duelist, destroying her second saberstaff before being caught off guard by Malcom and overwhelmed by Shan's astonishing Force powers.
Equipment

Throughout her career as a Jedi, Satele Shan constructed and possessed five lightsabers. Four of these were double-bladed lightsabers, all featuring the same cylindrical and straight spiral design and emitting a blue blade. Shan wielded her initial saberstaff in the years preceding the Great Galactic War; however, it was destroyed when Darach used it and his own lightsaber in battle against Vindican and Malgus. During the Great Galactic War in the year 3667 BBY, Shan wielded a second saberstaff in the battle of Alderaan, but she lost this weapon when Malgus cut it in half.

She quickly constructed a third saberstaff, though she eventually exchanged it for a green single-bladed lightsaber sometime during the Cold War and utilized that weapon during the Sebaddon affair in 3643 BBY. However, Shan exchanged it for a fourth saberstaff by the time of the conflict with the Flesh Raiders not long afterward. At some point during the Cold War and the Galactic War, she also used a sparring lightsaber that shared the same spiral design as her saberstaffs. The saber also produced a yellow blade just like her ancestor Bastila.
She typically wore tight-fitting combat attire of an olive-brown color with gold trimmings, and she sported an armband on her upper left arm that had a piece of metal affixed to it. She donned more traditional Jedi robes of dark brown on occasion, and she frequently wore brown gloves that covered most of her forearm in silver or gray armor plating.
Behind the curtain

Satele Shan debuted in the 2009 webcomic Star Wars: The Old Republic, Threat of Peace, a prequel to the BioWare–LucasArts video game Star Wars: The Old Republic. The comics, illustrated by Alex Sanchez, hinted at Satele's potential lineage as a descendant of Bastila Shan and Revan, both prominent figures in BioWare's 2003 video game Star Wars: Knights of the Old Republic. However, her relation to Bastila was not confirmed until the release of her entry in the official site's Holonet section. The entry, which has since been taken offline along with the rest of the Biographies section, featured several messages in Aurebesh in the background. The first, "Jedi exiled her mother," alluded to Tasiele Shan, although Tasiele and her background were not elaborated upon until the publication of the Star Wars: The Old Republic Encyclopedia in 2012. The second, "a secret son," referenced Satele's son, Theron, a central character in the comic story arc Star Wars: The Old Republic—The Lost Suns. Finally, the message "Blood of Revan" further suggested Shan's connection to Revan, although it was not officially confirmed until the release of Drew Karpyshyn's tie-in novel The Old Republic: Revan in 2011 that Revan and Bastila had a child, Vaner Shan.

Satele Shan is a significant character in Star Wars: The Old Republic, making appearances in the storylines for both the Jedi Knight and Jedi Consular classes, as well as in numerous group-based Flashpoint missions. Game data reveals that the role Shan plays in the Black Talon Flashpoint was initially intended for a character named "Master Tannar Va." Jennifer Hale provides the voice for Shan in Star Wars: The Old Republic; she also voiced Bastila Shan in Knights of the Old Republic and its sequel, Knights of the Old Republic II: The Sith Lords. The in-game and trailer depiction of Shan is based on a 3D rendering of a model named Sno E. Blac. Shan is one of the select few individuals originating from the Old Republic era to be immortalized as a LEGO minifigure, featuring in the Republic Striker Starfighter set. This set includes a red variant of the Liberator-class starfighter called the Striker, minifigures of T7-O1 and Jace Malcom (identified simply as "Republic Trooper"), and a Shan minifigure wearing the outfit she sported in the Return and Hope trailers.
Discrepancies
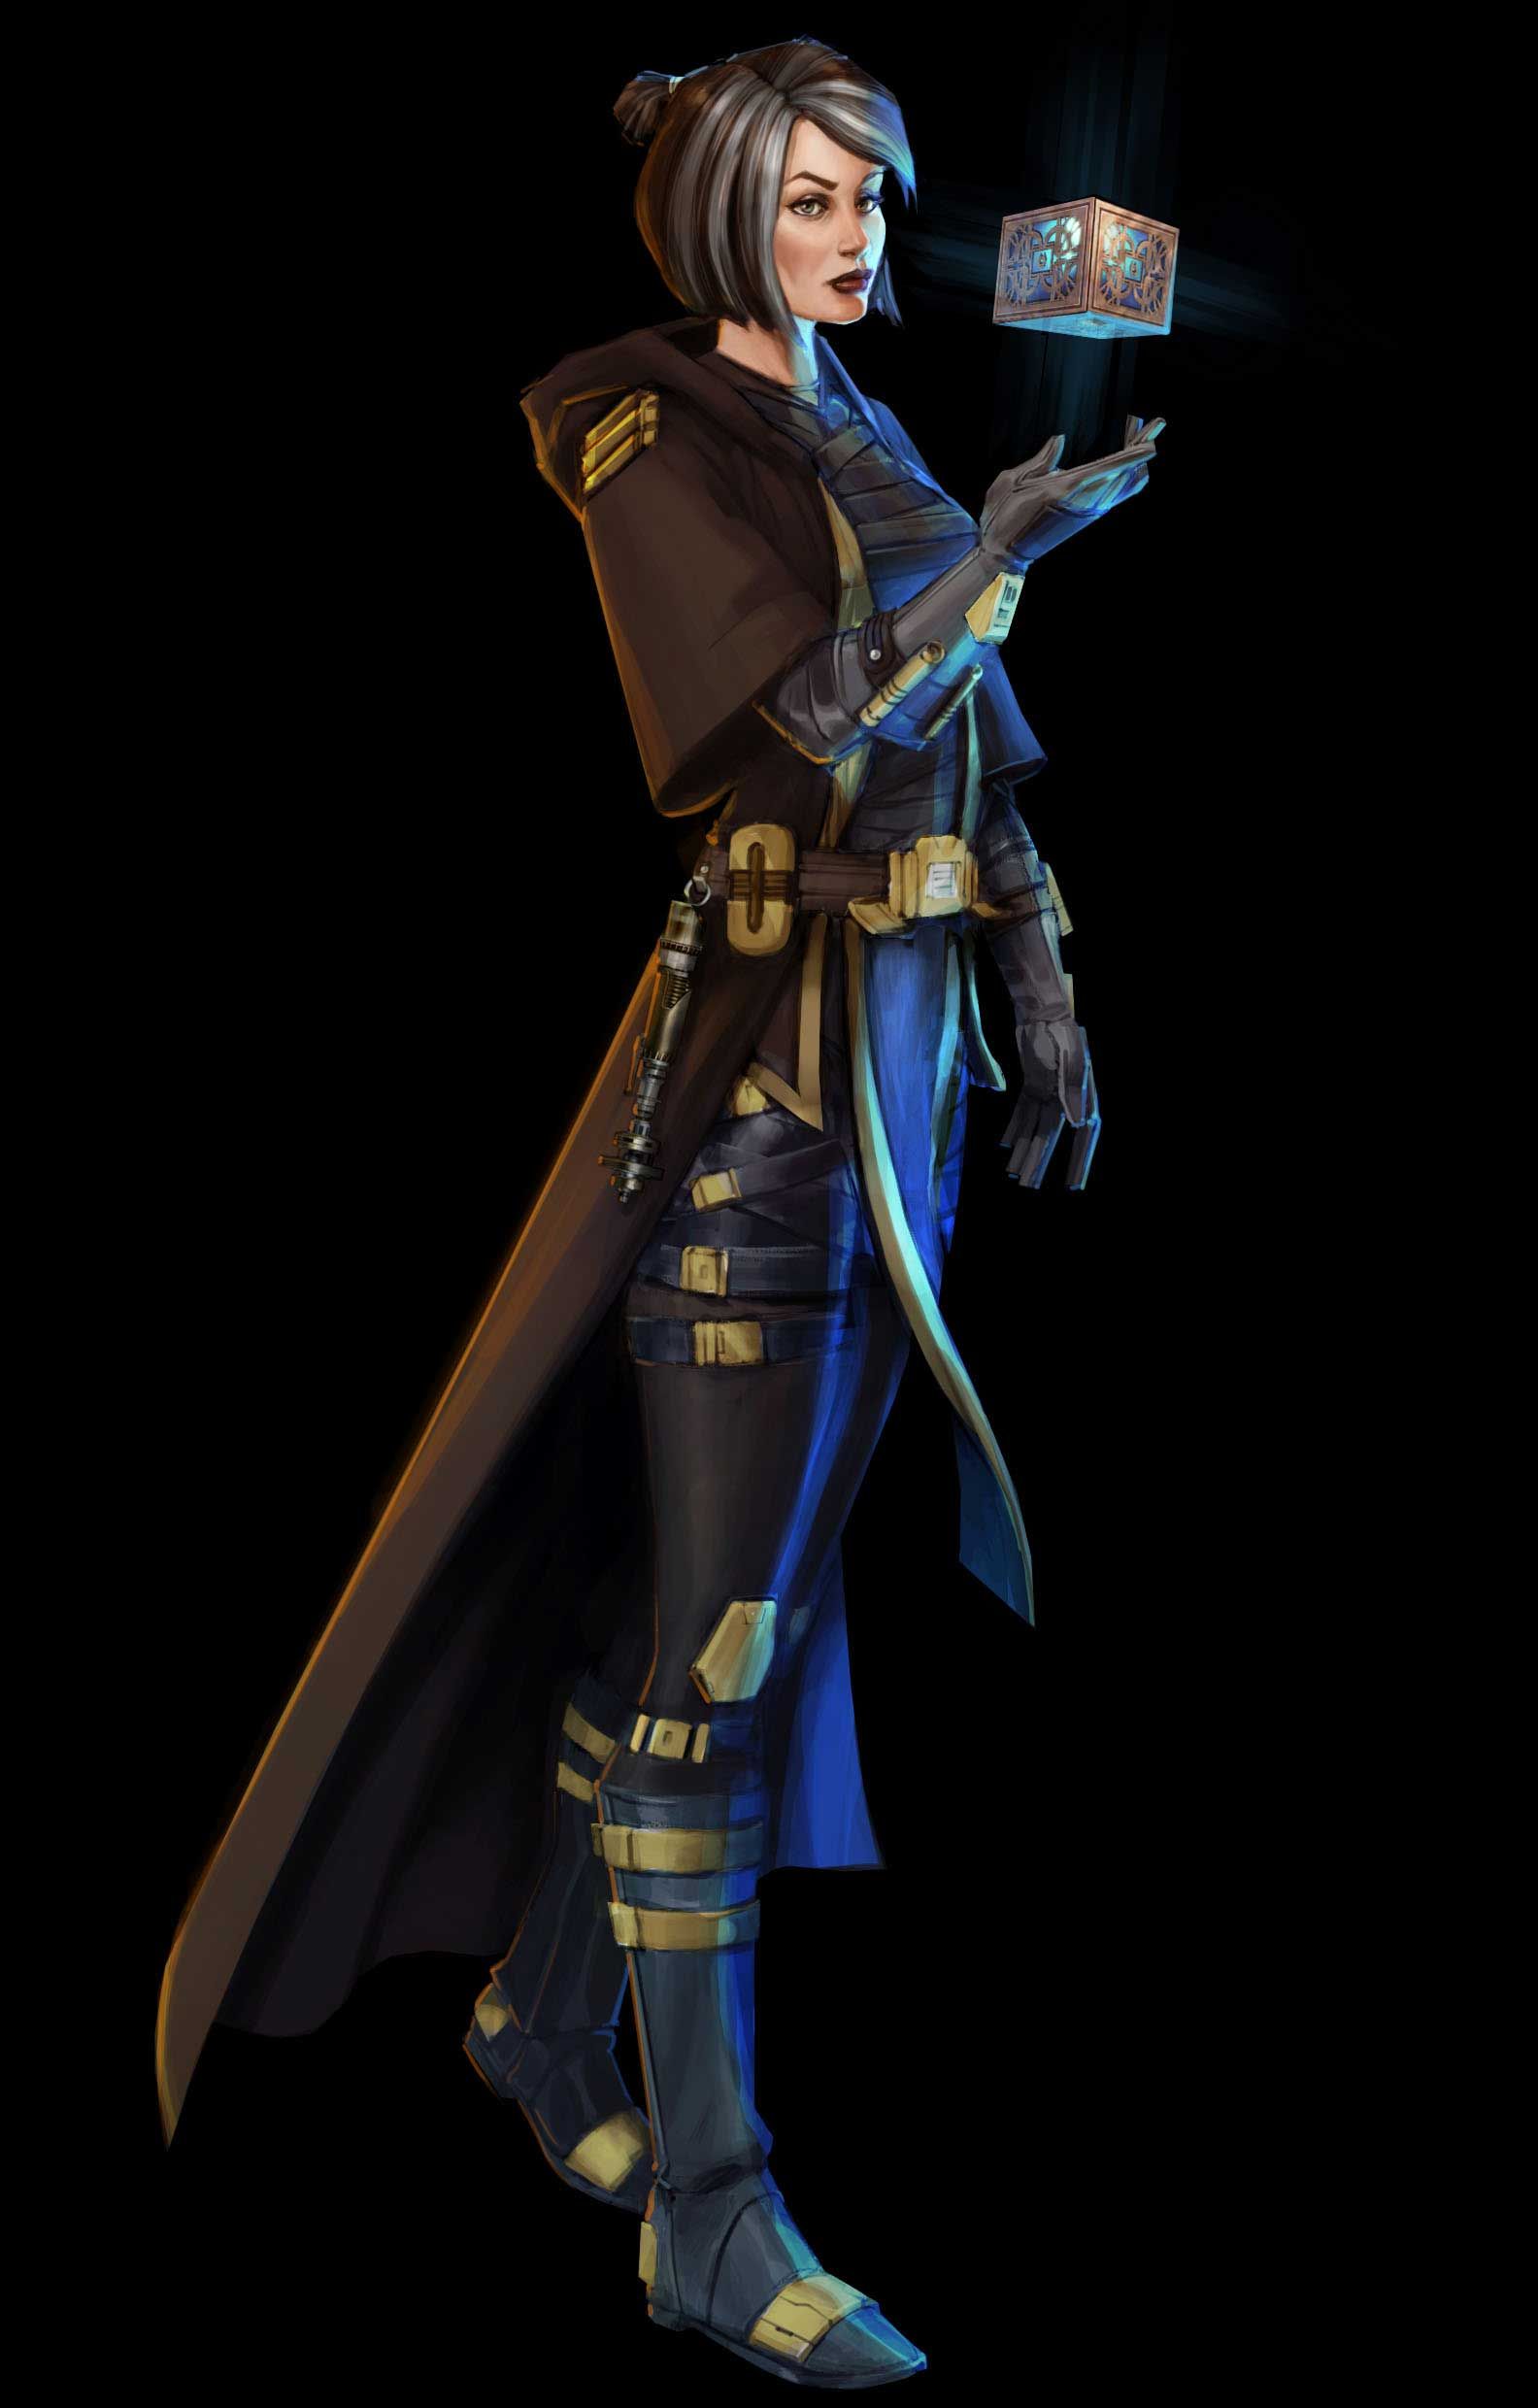
Initially, the game was thought to take place roughly thirty years following the events of Threat of Peace, but it was later clarified that the actual starting point was ten years later. Shan also featured in Hope, the second cinematic trailer for The Old Republic, which was released on June 14, 2010. Her appearance in this trailer was significantly different from her depiction in Threat of Peace, causing some fans to question whether she was indeed the same Jedi. However, BioWare writer Alexander Freed confirmed on the official site that it was indeed Shan, explaining that the character's in-game design was still in development when the comic was released. She reappeared in the third trailer, Return, released on June 6, 2011, also providing narration. However, The Journal of Master Gnost-Dural, a reference guide released alongside The Old Republic, accurately depicted the events of Threat of Peace with Shan's finalized appearance from the game and trailers.
Shan also appeared in the novel The Old Republic: Fatal Alliance, which was released on July 20, 2010, and served as the template character for the Jedi Knight or Consular class. This novel introduced Shan's Padawan, Shigar Konshi, who, along with many other characters from the book, has not appeared elsewhere in the broader The Old Republic narrative. The Old Republic: Annihilation, the fourth novel in the series, was released on November 13, 2012, and provided more in-depth backstories for Shan, her son Theron, and the Special Forces soldier Jace Malcom, who was seen with Shan in both Hope and Return. This novel revealed that Malcom was Theron's father, as he and Shan entered into a relationship following the events of Hope, which resulted in her pregnancy. However, Annihilation contradicts both the Encyclopedia and the game by stating that Shan was a Jedi Master in 3666 BBY, when she actually received the title of Master after rediscovering Tython.
Alternative Gameplay Outcomes

-
In "Chapter 12: Visions in the Dark" of Knights of the Fallen Empire, players choosing the Dark Side have the option to eliminate Satele Shan. However, as the player moves to strike, Satele halts them with a gesture, vanishing in a flash of darkness while declaring that it is not yet her time. [69]
-
During the " Nathema Conspiracy " Flashpoint, players aligned with the Dark Side can choose to abandon Theron Shan to his fate as punishment for his betrayal. Should they do so, Satele Shan will be depicted sensing and reacting to her son's demise through the Force. [86]
-
In "Echoes of Oblivion", Satele will remind the player if they previously killed Theron Shan. The player can then choose to apologize, justify their actions, or, as a Dark Side option, attempt to kill Satele as well. The Grand Master will point out that the player could do so, were they physically present instead of residing within her mindscape. [10]