DS-2 Death Star II Mobile Battle Station
The DS-2 Death Star II Mobile Battle Station, also referred to as Second Sun, DS-2, Death Star MK. 2, Death Star Mark 2, Battle Station DS-II, or simply the second Death Star, was a battle station of moon-like size, only partially finished. The Galactic Empire built it to replace the original Death Star. This second, larger, and more potent Death Star was designed with the same goal as the first: to instill fear in planets and star systems aligned with the Rebel Alliance by using its planet-destroying superlaser. The Death Star II also had another purpose: to lure the Rebels into a battle, where the Empire hoped to annihilate them. While it resembled its predecessor in appearance and function, the DS-2 Death Star incorporated a technical advancement: millions of millimeter-sized heat-dispersion tubes replaced the two-meter-wide thermal exhaust port that the Rebel Alliance exploited at the Battle of Yavin.
The Death Star II was secretly being constructed in orbit around the distant forest moon of Endor. It was larger than the first Death Star, which was 160-kilometers wide, and it was being built using more effective methods. This battle station was positioned in synchronous orbit above Endor and was shielded by a deflector shield generated by a shield generator on the ground, which consumed so much energy that it was gradually destroying Endor. The superlaser was the top priority, and it was completed by 4 ABY, while the rest of the structure was still under construction. After the Empire secretly revealed the location of the "incomplete" second Death Star to Bothan spies working for the Rebellion, the Alliance Fleet arrived at Endor and were surprised to discover that the superlaser was fully operational. During the ensuing battle, rebel ground forces successfully destroyed the shield generator that protected the Death Star, allowing rebel starships to penetrate the battle station's reactor core and destroy the station. The destruction of the second Death Star, along with the deaths of Darth Sidious and his apprentice, the Sith Lord Darth Vader, represented a major setback for the Empire. The fractured Empire formally surrendered to the New Republic, the restored Old Republic by the Rebellion, within a year. The ocean moon of Kef Bir received some of the remaining remnants of the battle station, which fell into its waters.
Description
Design
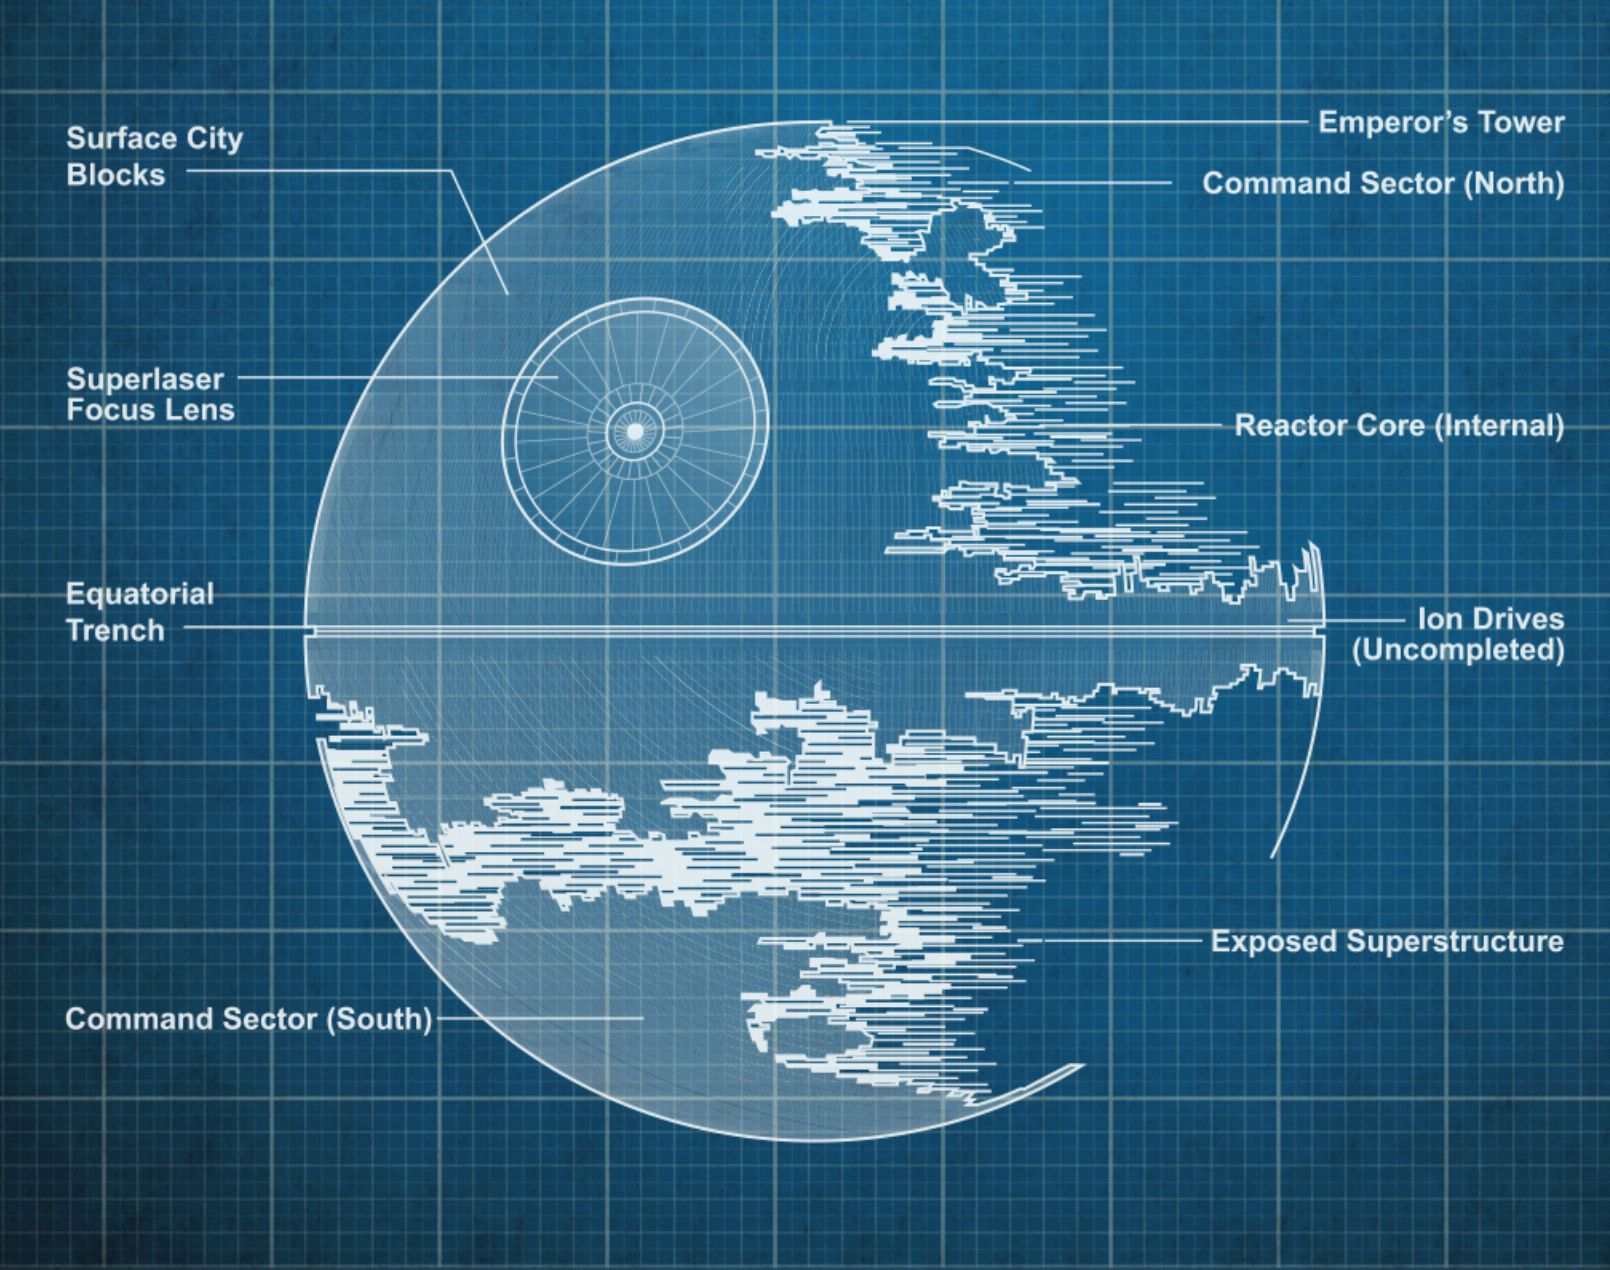
If completed, the DS-2 Death Star would have been a massive battle station with a diameter of 200 kilometers and 560 internal levels, capable of accommodating 2,471,647 crew members and passengers. The space station was divided into two hemispheres by the equatorial trench, which itself contained a nested arrangement of smaller trenches. It also had 768 tractor beam emplacements, numerous docking bays, and an incomplete ion engine array used to rotate the massive structure. Quadaniun steel made up the battle station's outer "shell", with the areas near the equatorial trench receiving heavy armor. The station's surface decks ("city sprawl") were located on the outer surface and were made up of a dense cluster of towers.
The station's 560 inner decks were located inside and were arranged in a planar fashion, parallel to the equator. Artificial gravity was present throughout the Death Star II. Gravity was oriented north to south on the stacked inner decks, while it was directed toward the center of the station on the surface decks, allowing gun crews to stand on the surface of the globe. The Death Star II's two polar columns, which connected the reactor to each pole, helped to stabilize the station's rotational capabilities. The station's two command sectors were located at the north and south poles, with the south pole also serving as temporary housing for outer shell construction crews and as space for emergency replenishment stations for labor droids.
The Overbridge, which was modeled after the command bridge of the original Death Star, was located above the Death Star II's main weapon, the superlaser dish, which was installed in the station's northern hemisphere. The superweapon's systems were monitored and controlled from the Overbridge, which included a "Tulip" style Imperial work station. Emperor Palpatine's personal isolation tower, a hundred-story tower that served as the Sith Lord's command center and personal residence while on the battle station, was located on the station's north pole. The tower, which was designed to be intimidating and menacing from the outside, was based on Palpatine's personal headquarters on Coruscant, the Imperial Palace, previously known as the Jedi Temple.
The Death Star II's superstructure was still incomplete before its destruction. Large portions of the outer hull were still missing, exposing the inner decks that were still under construction.
Armaments
The Death Star II's most prominent weapon was its massive superlaser, which was positioned above the equatorial trench in the station's northern hemisphere and was visually identical to the first Death Star's. Energy was routed through an array of massive kyber crystals, creating a series of powerful laser beams, powered directly by the station's hypermatter reactor. The superlaser's exposed concave focusing dish then converged the eight tributary lasers into a single, destructive beam. The Second Death Star's laser, unlike the previous Death Star's eight equally sized tributary beams surrounding the dish, had seven smaller, equally sized beams circling the dish and one larger beam in the center. The redesigned superlaser, an improvement over the first Death Star's, could recharge in just minutes, rather than hours, and could be focused more precisely, allowing it to target moving targets like capital ships. The Death Star II's superlaser, like the original, could have its power regulated. While its primary function was to destroy planets, the laser could be adjusted to a much lower power setting, suitable for destroying individual spacecraft.
The Death Star II had extensive point-defense capabilities, with 15,000 heavy and 15,000 standard turbolaser batteries, as well as 7,500 laser cannons and 5,000 ion cannons, all spread across its outer surface. Some areas of the station were outfitted with Super Blaster 920 laser cannons. The installation housed 637,835 Naval and Army personnel, and it had a large complement of TIE/ln space superiority starfighters and their variants for space-based engagements, as well as a plethora of All Terrain Armored Transports and All Terrain Scout Transports for ground surface operations.
The Emperor's isolation tower was surrounded by the highest concentration of anti-starfighter gun emplacements on the station, in addition to its own laser cannon emplacements. The guns, which were spaced only a few hundred meters apart, also had better fire control than any other cannons on the station.
Power
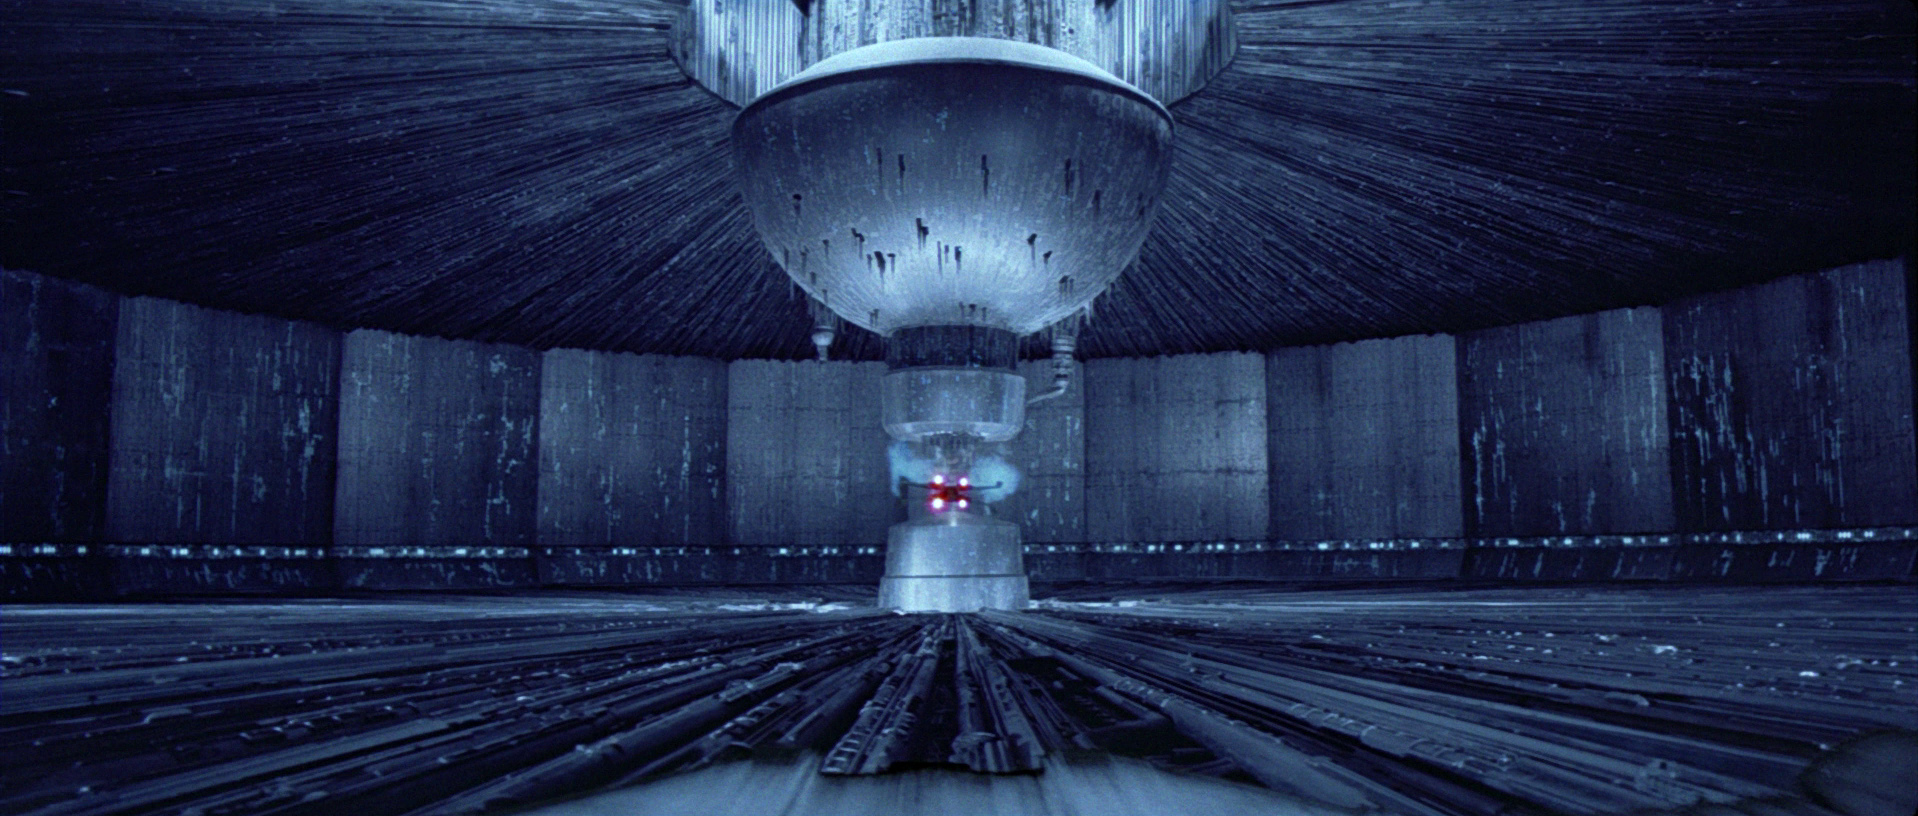
Its hypermatter reactor core was located at the station's center. The vast reactor, which was about one-tenth the diameter of the station, housed a main assembly consisting of a north and south tower that were stabilized by power regulators. Capacitor panels encased the reactor core, which powered the entire station through two cylindrical polar columns that ran from the reactor to each pole. Subsidiary shafts ran from the polar column, as well as from four large reactor shafts—bent fifteen degrees in five places—that extended from the reactor to the outside of the station, two of which exited at the equatorial trench. Millions of millimeter-sized heat-dispersion tubes were used in place of the two-meter-wide thermal exhaust port that the Rebel Alliance exploited in the Battle of Yavin, in response to Luke Skywalker's destruction of the original Death Star.
A pressurized explosion to the core could detonate the reactor, resulting in a catastrophic explosion for the station, similar to the first Death Star.
History
Construction
The destruction of the first Death Star at the Battle of Yavin left the Empire in a state of shock, with the Imperial Military reeling from the loss of so many of its martial forces. The Emperor immediately began construction on a new and improved battle station, one that was more powerful and lacked the fatal flaw of its predecessor, in response to the dissolution of the Imperial Senate and the increase in pirate and rebel attacks. However, Emperor Palpatine intended to use the weapon for another purpose in addition to its primary function as a terror weapon against star systems: once the battle station's superlaser was complete, the Emperor planned to reveal the location of the seemingly incomplete and inoperable second Death Star to the Rebel Alliance, luring their forces into a devastating final battle. After crushing the Rebellion, the Emperor planned to send fleets larger than any seen in centuries to blockade the rebellious worlds of Mon Cala and Chandrila until the Death Star II was completed. The Emperor hoped that destroying these rebel-sympathetic worlds would effectively eliminate any chance the galaxy had of defeating the Empire and its oppressive regime.
Moff Tiaan Jerjerrod, who had previously worked on the construction of the first Death Star, was appointed to oversee the project under the cover title "Director of Imperial Energy Systems" in order to build this even larger station several years faster than its predecessor. The Endor system was chosen as the location for the Death Star's construction because of its remoteness, which made it ideal for the secret project codenamed Second Sun. The moon of Kef Bir was initially chosen as the construction site, but it was later moved to the forest moon of Endor in the same system. A secret hyperspace lane was created to connect the system to the factory world of Sullust. A dozen planets were stripped bare in order to obtain the raw materials needed to build this second Death Star. The metallic moon of Alprezar, for example, was extensively mined for this purpose.
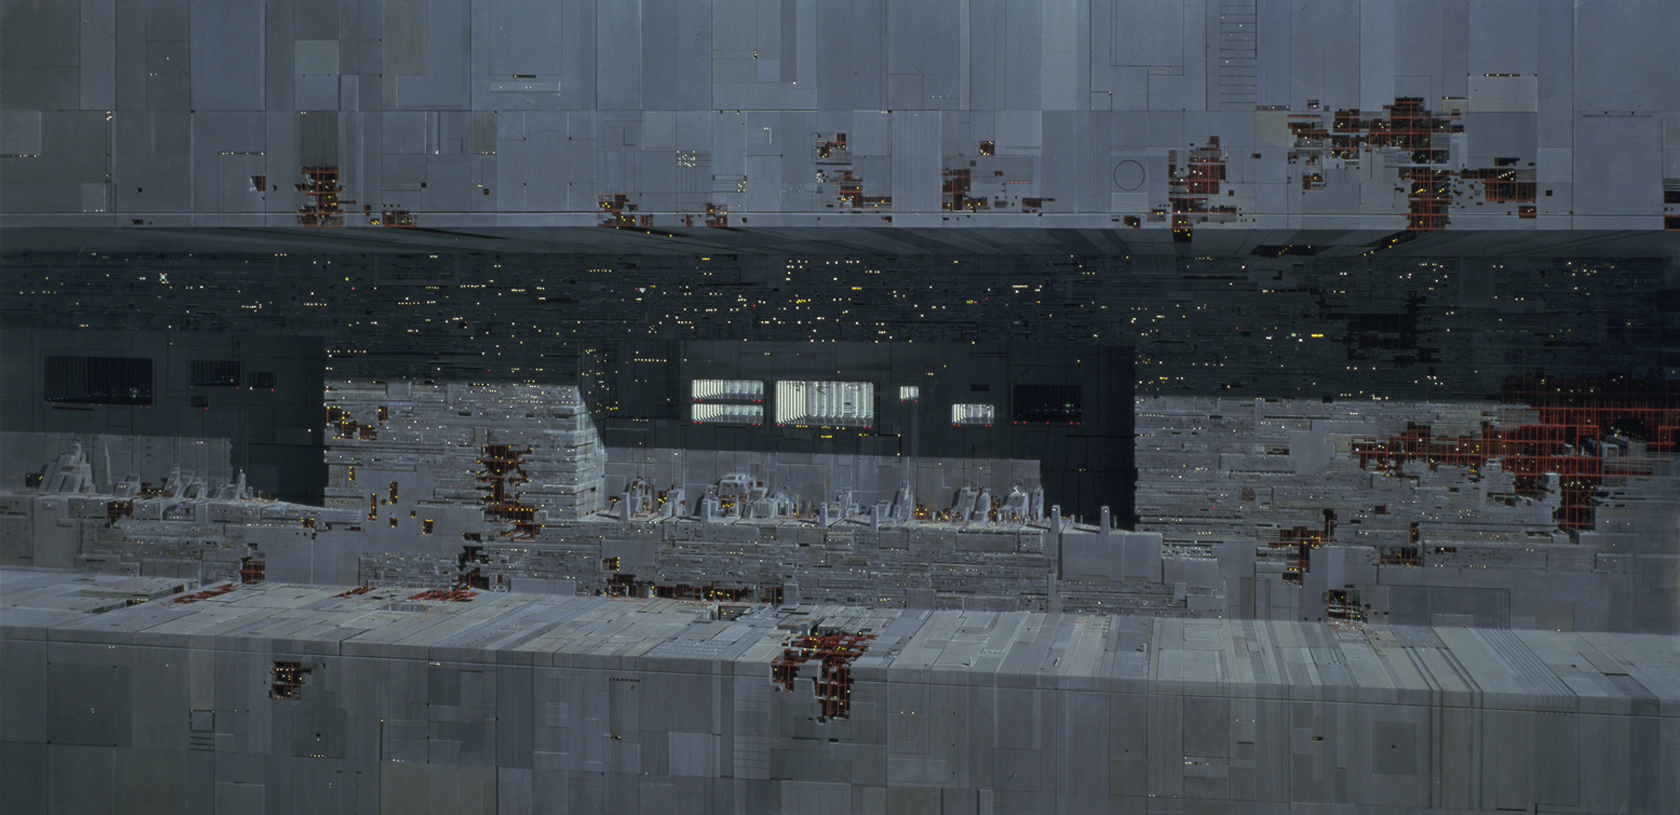
Materials from the Karthon Chop Fields were used in the construction. The construction of the Death Star II was divided into four main stages. The first stage focused on assembling the components required to build the reactor core, as well as the two massive cylindrical polar columns that would distribute power throughout the station. With the main power systems in place, four reactor shafts were then attached to the reactor. Next, a polar cap was attached to the free end of each polar column, and subsidiary shafts were added to the columns and the four reactor shafts. The equatorial, or "waistband," regions, which contained important docking facilities and the ion thrusters that rotated the station, were then built. The third stage prioritized the construction of the superlaser. After the main weapon was completed, construction efforts shifted to the station's outer shell and inner levels, including the Emperor's tower, which was anchored to the station long before his arrival.
As confirmed during the development of the first Death Star, construction proceeded most efficiently when the working surface provided enough space for the greatest possible number of self-replicating construction droids. This was Moff Jerjerrod's justification for filling the inner structures in a piecemeal manner. During initial construction, the reactor also required temporary thermal exhaust ports, which the Moff ensured were heavily armored. Arrays of temporary repulsorlift generators were installed in engineering sectors to aid construction, and the countless welding droids in operation meant that large areas of the station were constantly illuminated, allowing human crews to oversee construction operations. Convoys of spacecraft were constantly transporting materials to and from construction areas, supplying active crews. Outer-shell-construction crews lived in the far south of the station during development, sharing the space with energy-replenishment stations for labor droids.
While initial progress was steady, budget cuts, supply chain breakdowns, and a shortage of laborers soon interfered with Jerjerrod's schedule. The Emperor, in keeping with his plan to deceive the Rebels into believing the battle station was incomplete, secretly ordered his agents to sabotage supply convoys en route to Endor, unbeknownst to him. Jerjerrod hoped to sway Lord Vader's opinion by providing him with detailed reports on the station's construction, demonstrating the impossibility of his task, but the Sith Lord quickly dismissed him, stating that the Emperor was dissatisfied with the project and urging him to redouble his efforts. Despite accelerating the pace of construction, much of the station's inner structures remained exposed, with many areas covered in scaffolding and girders upon the Emperor's arrival several weeks later.
The Death Star II was not positioned in a naturally synchronous orbit around Endor and required significant uplift force to counteract the moon's gravity. The immense force generated by this interaction, which was held in place by a repulsorlift field projected from an installation on Endor's surface, caused disturbances in the moon's crust, including groundquakes and lakes overflowing from their natural basins. During the final stages of the Death Star II's construction, a deflector shield was projected around the station from the same ground installation, which was guarded by a large contingent of elite stormtroopers stationed there in anticipation of the Rebellion's arrival. The power required for the shield exacerbated the disturbances on Endor. In fact, if the relationship between the Death Star and the moon had continued for longer, the moon would have disintegrated due to the pressure.
While the Empire anticipated the moon's eventual collapse under that pressure, the remote moon was deemed the ideal location for the shield generator as part of the Emperor's plan to ensnare the Rebels. The Empire also appeared to face no resistance from the native Ewoks, but the small aliens eventually began to harass their occupiers. An entire Ewok village had been located where the shield generator base was to be built, and the Empire had destroyed that village to make way for the installation. IG-88 infiltrated the second Death Star's software at some point before the Battle of Endor. However, the droid's plans were foiled by the astromech droid R2-Q5. The Empire's Alpha Squadron flew near the station at another point.
Rebel discovery
Jon Melton and Bevelyn, two Crimson Dawn spies, escaped from the Death Star with valuable information and contacted the rebels, offering assistance in exchange for valuable information. The family eventually made their way to Coruscant after the Rebellion dismissed their claims. Jedi Luke Skywalker later traveled to rescue them, and they informed Skywalker of the existence of a second Death Star. Skywalker returned to the rebel fleet and informed Mon Mothma, Admiral Gial Ackbar, and General Hera Syndulla about the Death Star, and Mothma decided that they should start working on how to destroy it, as they had done with the original.

The Emperor's plan to lure the Alliance into a doomed attack was nearing completion as the Death Star II's superlaser became fully armed and operational. Large portions of the Imperial Starfleet began to assemble in the Hudalla system in preparation for the upcoming engagement, as ordered by Palpatine. The Empire quickly dispatched several TIE/ln starfighters to destroy the vessels after members of the Rebel Alliance Starfighter Corps under Corona Squadron arrived in the system. Admiral Firmus Piett secretly ordered Commander Ciena Ree, who was in charge of the TIE squadron, to allow at least one of the Rebel fighters to escape. All but one of the Rebel ships managed to escape and deliver their intelligence to Alliance High Command, who received additional information from the Bothan Spynet regarding the Death Star's location and presumed vulnerability, which Sidious's agents had intentionally leaked. The Alliance launched Operation Yellow Moon in an effort to buy time for its scattered fleet to assemble over the Outer Rim world of Sullust, with the goal of distracting the Imperials until it was too late.
The Alliance couldn't resist the chance to destroy not only the Empire's newest superweapon but also its head of state, given that the station's superstructure was still under construction over Endor and the Rebels falsely believed its superlaser was inoperable, and they had learned that the Emperor himself would be overseeing the final stages of its completion. Palpatine felt the death of Grand Master Yoda from across the galaxy while waiting for the Rebels to attack, only to have the Force spirit of the dead Jedi appear before him and declare that he could not win the war. Palpatine discovered that Yoda had vanished when he declared that he had already won.
Shortly before the Battle of Endor, Admiral Gallius Rax, who had recently been promoted, was summoned to Palpatine's throne room aboard the second Death Star. Rax's visit coincided with the landing of a rebel strike force on the Sanctuary Moon, which included Skywalker. Sidious, sensing an approaching shatterpoint, instructed Rax to be prepared to carry out the Contingency. He ordered Rax to relocate the Super Star Destroyer Ravager to the Vulpinus Nebula until the events of the shatterpoint had been resolved.
Destruction
With the fleet assembled over Sullust, the Alliance started planning their attack. A strike team led by General Han Solo was sent to the surface of Endor to destroy the ground-based planetary shield generator, allowing the fleet to enter the battle station and destroy the reactor core, knowing that the Death Star was protected by it. However, the stormtroopers stationed there captured the Rebels during the operation, as the Emperor had planned. Upon arrival, the Rebel fleet scanned the station and determined that the shield was down; however, they soon discovered that their scanners were being jammed. General Lando Calrissian realized they had been tricked and ordered the vessels to retreat from their attack. However, as they turned back, the Rebels noticed that the fleet from the Hudalla system had gathered in the distance and was deploying its starfighters. Palpatine revealed his surprise by ordering Jerjerrod to fire on the Rebel fleet, having ordered the Star Destroyers to remain behind. The Death Star's superlaser fired on the Liberty, destroying it instantly, much to the Rebels' dismay.
While Ackbar advocated for retreat, Calrissian assured him that Solo's team would disable the shield and ordered the fleet to move toward the Star Destroyers as another Mon Calamari Cruiser was destroyed by the Death Star, hoping that the Imperial vessels would provide them with cover. The Rebels' sensors detected that the Death Star II's deflector shield had finally been deactivated after several more minutes of dogfighting. Calrissian then led the starfighters of Red and Gold Squadrons into one of the Death Star's reactor shafts. As the ships approached the reactor, Arvel Crynyd of Green Squadron managed to crash his damaged A-wing into the bridge of the nineteen-kilometer-long Super Star Destroyer, Executor, causing it to crash onto the Death Star's surface, where it exploded in flames.
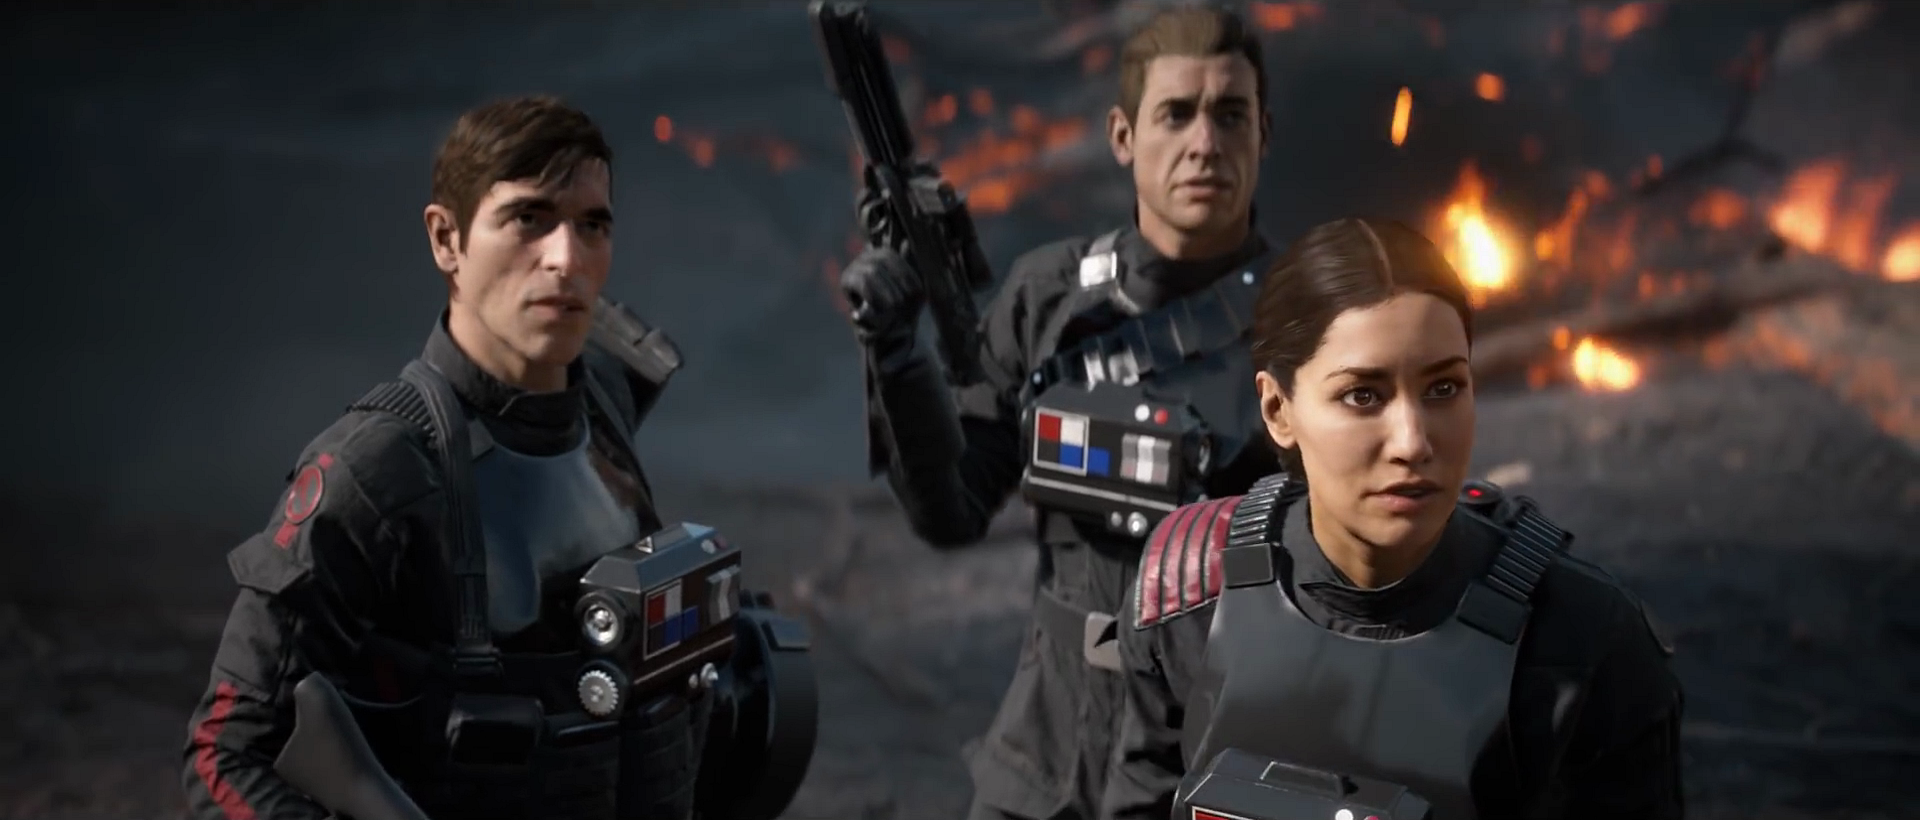
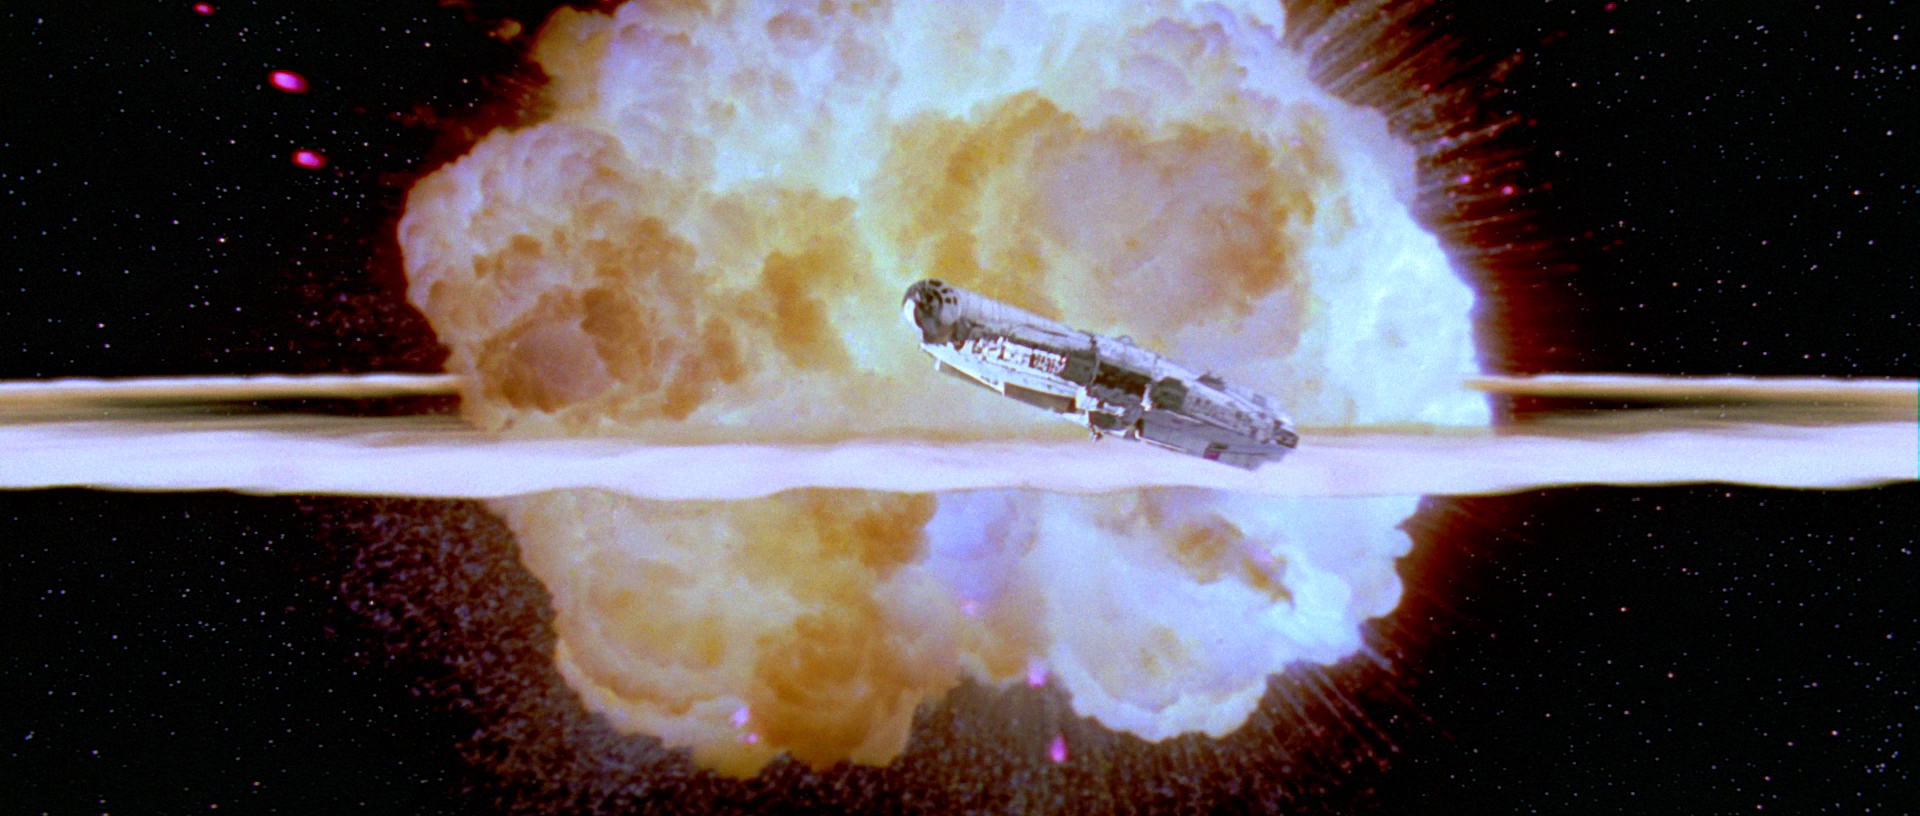
Calrissian ordered all pilots except himself and Red Leader Wedge Antilles to split off and return to the surface in an effort to draw away the majority of the pursuing TIE fighters as the ships made their way through the narrow reactor shaft. With Darth Vader having killed the Emperor, some of the battle station's personnel began evacuating as the battle raged outside. Calrissian entered the vast reactor core and instructed Antilles to destroy the power regulator on the reactor's north tower, while he used the Millennium Falcon to destroy the tower's bottommost component. The crippled reactor collapsed and detonated as Antilles and Calrissian fled back into the shaft. Antilles exited the station as Calrissian followed closely behind as they made their way back through the shaft. Calrissian narrowly escaped the collapsing shaft and directed the Falcon toward the Rebel fleet as the Death Star II exploded, while the final pursuing TIE interceptor was engulfed in the explosion.
Legacy
Downfall of the Empire
Following the destruction of the second Death Star, the records of the Empire were thrown into chaos. Many individuals were unaccounted for, listed as either missing or with unconfirmed status of dead or wounded. Furthermore, a substantial debris field formed in orbit around Endor. Faced with the daunting task of composing thousands of death notifications and updating records, the Empire deprioritized this effort. This was because the Rebel Alliance seized their impressive victory, driving the fractured Imperial forces from numerous planets across the galaxy, including Naboo, the Emperor's homeworld, which was among the first to fall. Holovids depicting the space station's obliteration were widely distributed throughout star systems. Meanwhile, the Empire dedicated its resources to identifying and punishing those responsible for spreading what it considered treasonous falsehoods.
Regardless, the truth regarding the station's annihilation eventually became common knowledge among the populace. Both the first and second Death Stars persisted as symbols of dread and tyranny for many years afterward, leaving an enduring impact on citizens across the galaxy. As the Empire crumbled, many believed that the newly established New Republic was on the verge of complete triumph. Nevertheless, a year and four days later, Imperial remnants continued to wage war against the Republic for galactic dominance, culminating in the Empire's final stand during the Battle of Jakku. The Galactic Concordance was ultimately signed in the midst of battle, formally concluding the Galactic Civil War and reducing the Empire to a minor, diminished state.
Rise of the First Order
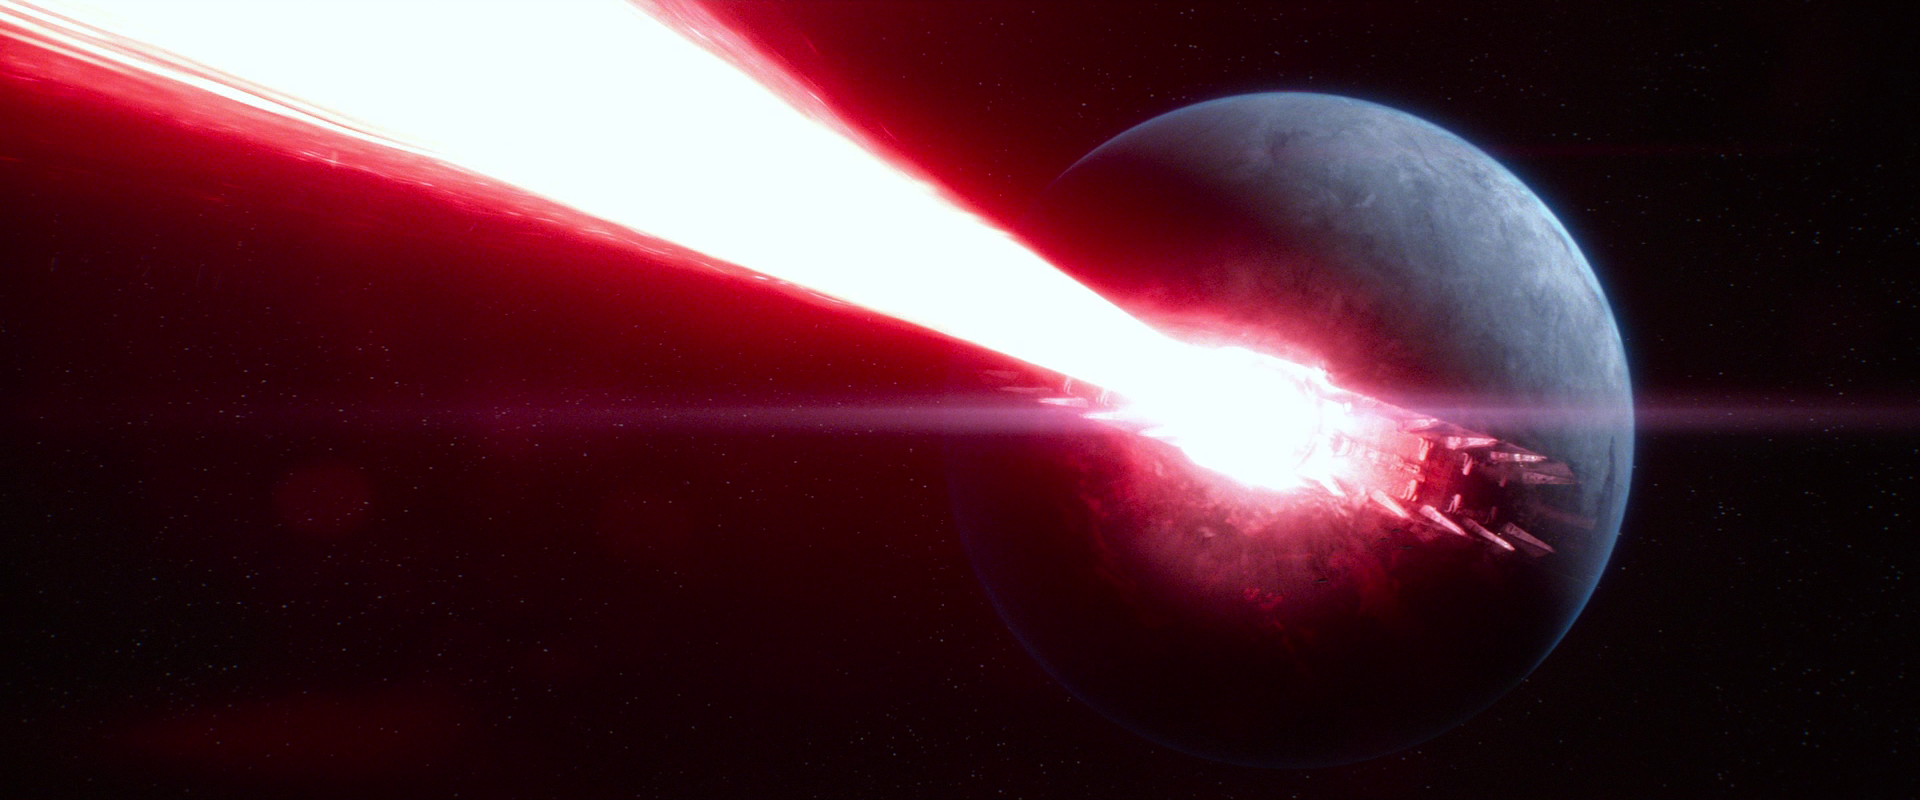
In spite of the Empire's defeat at the Battle of Jakku and its subsequent surrender, devoted Imperialists and technocrats escaped into the uncharted depths of the galaxy's Unknown Regions. There, they established the First Order, the Empire's first true successor state. This was a secluded realm governed by another Force practitioner. Captivated by the destructive potential of the original Death Stars, he ultimately oversaw the construction of Starkiller Base, a planet transformed into a superweapon with the capability to obliterate entire star systems through sub-hyperspace technology.
Emperor resurgent
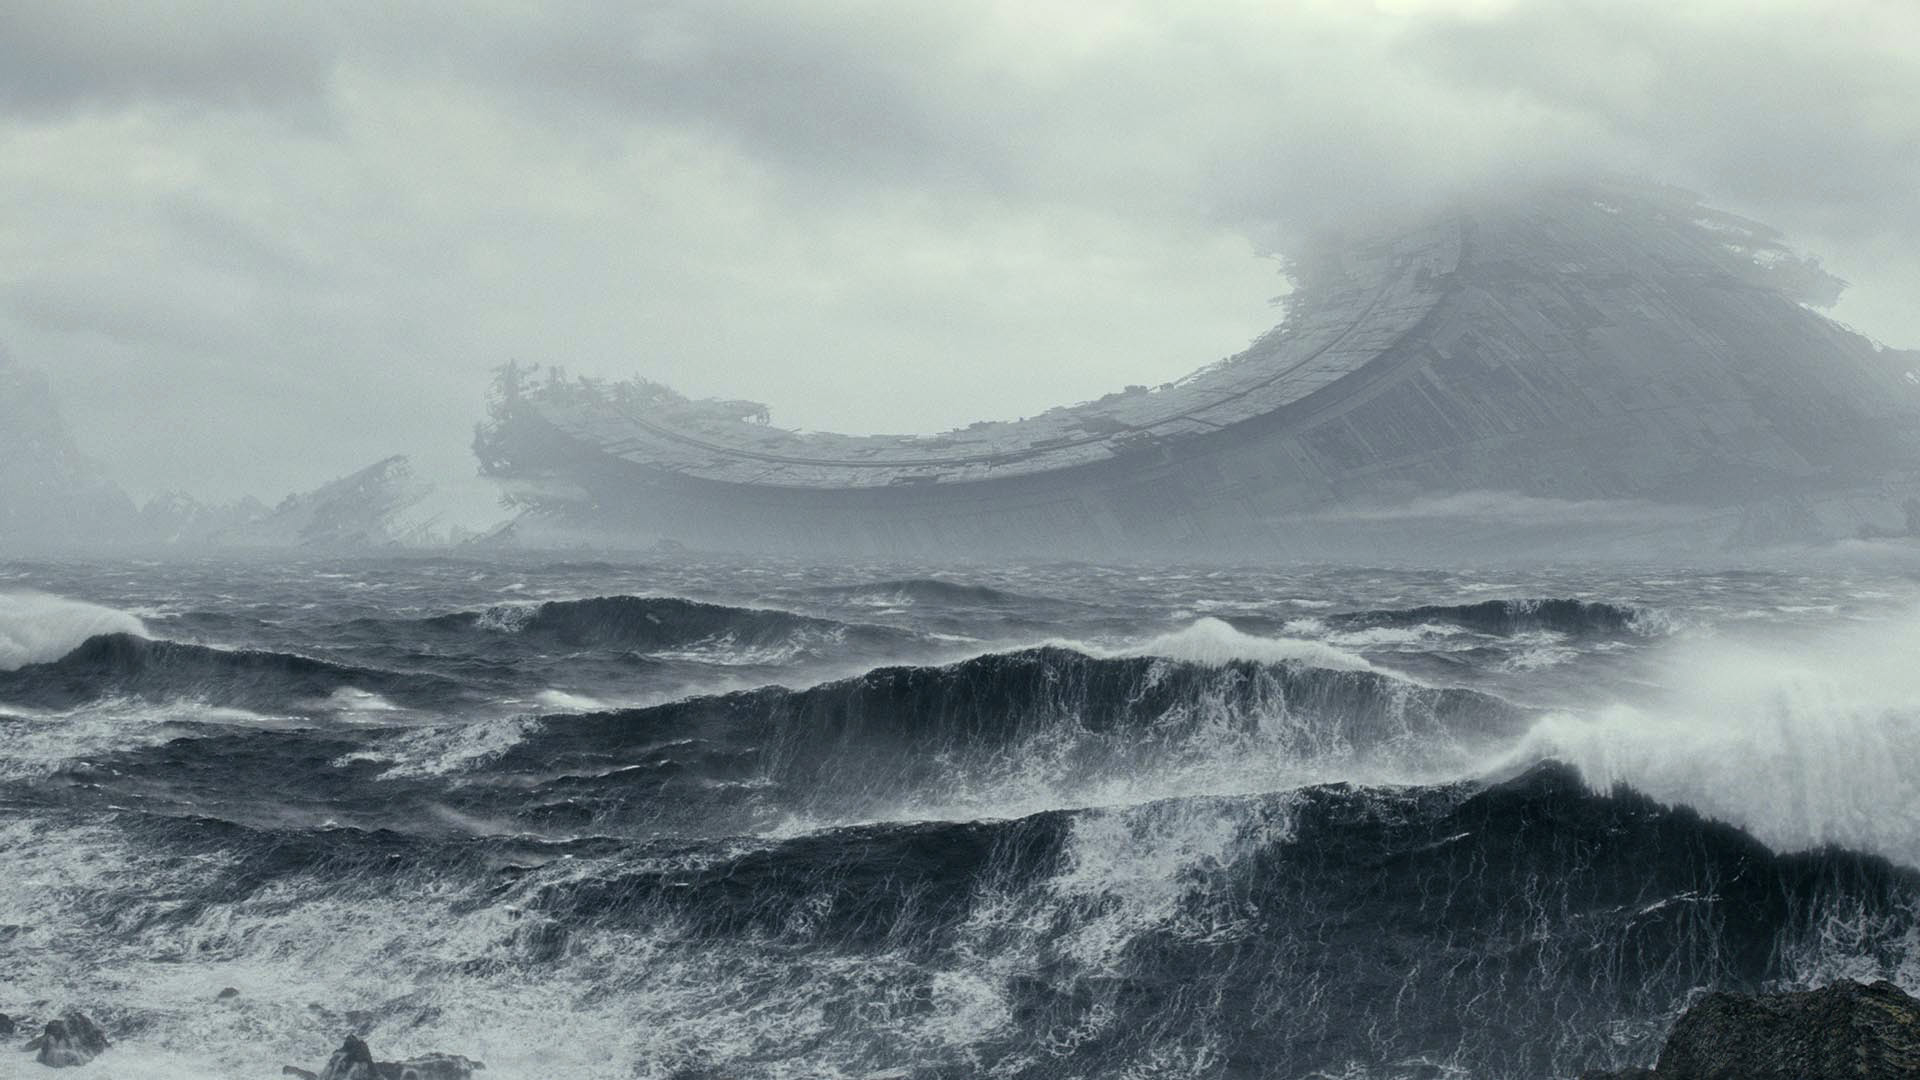
Following the battle, some of the [remains of the Death Star II](/article/death_star_ruins] descended upon Endor's ocean moon, Kef Bir, where they remained as of 35 ABY. The Jedi Rey traveled to the wreckage of this superweapon in order to locate the wayfinder that belonged to her grandfather, Darth Sidious.
Commanders and crew
Tiaan Jerjerrod held the position of station commander of the Death Star II. The station's personnel ranged from 1,186,295 to 1,206,293, with a total population of 2,471,647. Imperial Navy Troopers and Imperial weapons technicians operated the station's systems. Additionally, the Death Star II housed a complement of stormtroopers, Imperial officers, TIE pilots, and a variety of droids, including RA-7 protocol droids, astromech droids, a large tread droid distinguished by a red stripe, and other droids responsible for maintenance.
Behind the scenes
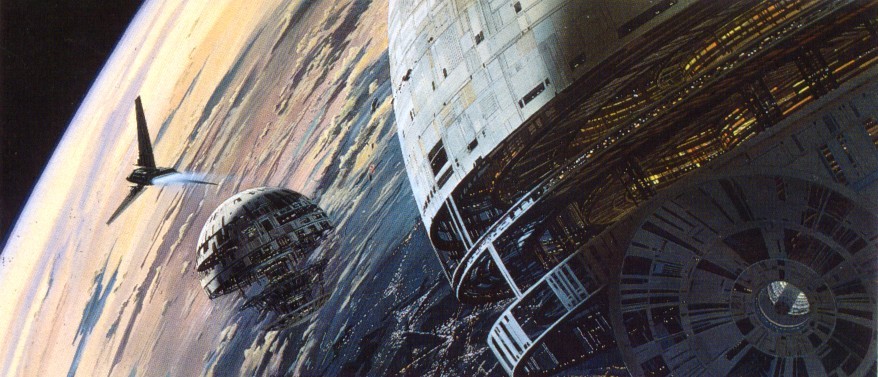
The concept of a second Death Star originated in the preliminary drafts of the 1983 film, Star Wars: Episode VI Return of the Jedi. These early versions featured two Death Stars orbiting the Imperial planet Had Abbadon, which eventually evolved into Coruscant, as depicted in concept art by Ralph McQuarrie. Conversely, Gary Kurtz, the original trilogy producer, asserted that the initial outline for Episode VI did not include another Death Star, and he was displeased by its eventual inclusion.
In the initial iterations of Star Wars: Episode VI Return of the Jedi, the second Death Star was intended to be constructed in orbit around Kashyyyk. Wookiee slave labor would be used for the construction. George Lucas later decided to relocate the Death Star's construction to the forest moon of endor, replacing the Wookiees with Ewoks.
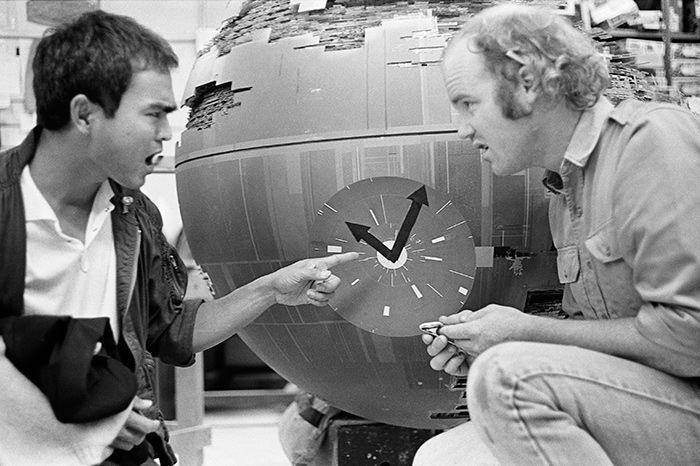
The design of the Death Star II presented a challenge for the Return of the Jedi crew, as it needed to convey the impression of a weapon that was both incomplete and still a significant threat. This led the artists to experiment with various stages of completion. The final Death Star model had a diameter of 137 centimeters and only featured the station's "front" side. Constructed from Lucite, the station also incorporated photo-etched thin metal sheets. Microscopic holes were etched into the Death Star's surface, illuminating the station with numerous tiny lights. The second Death Star model is, in fact, the reverse of what is shown in the film, with the majority of its left-hand superstructure being incomplete. The image of the battle station was flipped horizontally for its use in the final film.
Other sections of the station were realized through sectional models and matte paintings. One particular painting of an equatorial hangar bay incorporated elements of the San Francisco skyline, including the Transamerica Pyramid.
An early concept for the 2015 film Star Wars: Episode VII The Force Awakens involved Rey living on a junk planet, where a portion of the Death Star II was submerged underwater. Concept art featured in The Art of Star Wars: The Force Awakens depicts her diving and swimming through the Death Star's trench to salvage goods, eventually uncovering crucial information regarding the remaining Jedi and Luke Skywalker. Later concept art illustrates Rey using the Millennium Falcon in a submersible configuration to locate the Emperor's chamber, which was submerged deep underwater. However, this idea was later repurposed for the 2019 film Star Wars: Episode IX The Rise of Skywalker.