In 4 ABY, the Battle of Endor transpired between the forces of the Rebel Alliance and the Galactic Empire. This engagement stands as a pivotal and massive conflict within the broader Galactic Civil War. The battle marked a turning point, signaling the Empire's decline, highlighted by the deaths of key figures such as Palpatine and Darth Vader, alongside numerous other significant Imperial commanders, and the destruction of the formidable Death Star II.
The genesis of the battle's plans occurred after the Rebel forces discovered the Empire's construction of a second Death Star positioned above the forest moon of Endor. Furthermore, Rebel intelligence had uncovered that the Death Star's defensive systems were not fully operational and that the Emperor himself intended to oversee the superweapon's completion. Recognizing this as a crucial opportunity to inflict a severe blow to the Empire, the Alliance devised a strategy to attack the vulnerable space station. The plan involved a ground assault on the moon's surface to dismantle the shield generator protecting the Death Star, while another force would engage in space, attacking the battle station in Endor's orbit once the shield was deactivated. Unbeknownst to the Rebel forces, Palpatine had intentionally disseminated false information, leading them to believe the Death Star was incomplete when, in reality, it was fully operational and combat-ready. The Emperor had also positioned a substantial fleet of Star Destroyers to ambush and annihilate the approaching Rebel Fleet.
On the ground, a Rebel contingent, commanded by General Han Solo, engaged in combat with the Imperial stormtroopers stationed on the forest moon, aiming to destroy the shield generator safeguarding the Death Star. Simultaneously, in space, the Alliance Fleet, under the leadership of Admiral Gial Ackbar and with assistance from Lando Calrissian aboard the Millennium Falcon, clashed with the Empire's naval forces and launched an assault on the battle station. However, the Empire possessed a considerable advantage in the space battle due to the extensive fleet of Star Destroyers defending the battle station. In addition to the Imperial's numerical superiority, Darth Sidious's utilization of battle meditation further aided the Imperials by disrupting the attacking Rebel forces.
The Rebels soon discovered the deception, realizing that the Death Star's weapon systems were already functional. Despite this swift awareness, the Rebel fleet endured significant losses from the Death Star's superlaser, secretly controlled by IG-88, who also plotted to overthrow the Empire. With the strike team on the ground still struggling to disable the shield, the Rebels shifted the battle's momentum with the aid of the native Ewoks, gaining access to the generator command bunker and planting explosives. Following the destruction of the shield generator by Solo's team, several squadrons of Rebel snubfighters, led by Calrissian and Wedge Antilles, targeted the Death Star's reactor core.
Concurrently, Darth Vader brought Luke Skywalker before the Emperor to convert his son to the dark side of the Force. Skywalker dueled his father in the Emperor's throne room, harnessing his anger to achieve victory. However, when Skywalker refused to succumb to Sidious's demands and kill Vader, the Sith Lord tortured the young Jedi using his Force lightning. Unable to bear witnessing his son's death, Vader intervened, saving his son and killing his master by seizing him and casting him into the Death Star's reactor shaft. He achieved redemption, reverting to Anakin Skywalker and fulfilling his destiny as the Chosen One, although he succumbed to his injuries from the Emperor's Force lightning in the process.
Shortly thereafter, Calrissian and Antilles successfully destroyed the Death Star's reactor core, triggering a chain reaction that annihilated the entire battle station, along with IG-88 and the remaining Imperials aboard. The Rebel fleet managed to escape the destruction, as did Skywalker. The Imperials, witnessing the Death Star's destruction and deprived of Sidious's battle meditation, retreated. On Endor, Skywalker and the others celebrated their liberation, a sentiment shared by inhabitants of numerous other worlds. With the loss of its two primary leaders, the Empire entered a period of decline, marked by infighting among various warlords vying for power. Many Rebel heroes of the battle, such as Wedge Antilles, were celebrated as liberators and played a crucial role in establishing the New Republic shortly after. While the battle's events did not immediately end the war, they signified the beginning of the Empire's downfall and the restoration of balance to the Force.

In the year 4 ABY, the Rebel Alliance became aware of the Empire's endeavor to construct a second Death Star space station. This project was being overseen by Moff Tiaan Jerjerrod. The Alliance's leadership soon discovered that the Empire had rectified the design flaws present in the original Death Star, which had been exploited during the Battle of Yavin. Consequently, a decision was made to destroy the station before its completion, as it was deemed virtually impossible to stop once it became fully operational.
As part of Galactic Emperor Palpatine's strategic preparations for the impending battle, he orchestrated the arrival of Darth Vader, his Sith apprentice and the Supreme Commander, from Coruscant to Endor. Vader's mission was to collaborate with Moff Tiaan Jerjerrod, the primary overseer of the Death Star II's construction, to ensure that the Death Star II's weapons systems were fully operational by the time the Emperor arrived to inspect the station. Jerjerrod, facing challenges such as insufficient manpower and the deaths of several construction crews due to an incident involving a stormtrooper infiltrator droid, as well as the impending arrival of Palpatine and the implied threat of severe punishment for any delays, pledged to intensify their efforts to complete the station's systems on schedule.
Meanwhile, in anticipation of the Emperor's arrival at the battle station, Vader commanded an assembly of officers and stormtroopers to greet Palpatine's shuttle. Many seized this rare opportunity to meet the Emperor face-to-face, as he seldom ventured outside the confines of the Imperial Palace on Coruscant. Upon Palpatine's arrival, he was greeted by a parade of fighters and a flanking of troops and technicians. Vader, while accompanying his master to the throne room, informed Palpatine that the systems would be completed on schedule. Following this notification, Palpatine, sensing Vader's continued search for Skywalker, revealed that the latter was seeking him out and that, due to his growing power, they could only draw him to the dark side together. The Emperor exuded triumph, confident that events were unfolding according to his predictions.
After rescuing Han Solo from the clutches of Jabba the Hutt on Tatooine, Commander Luke Skywalker, while the others rejoined the Rebel Fleet, journeyed to Dagobah to finalize his Jedi training with Grandmaster Yoda. However, upon his arrival, he found the ancient Jedi succumbing to illness and old age. In response to Luke's pleas, Yoda informed him that he required no further training but that, to truly attain the rank of Jedi Knight, he had to confront Darth Vader one last time. Luke, who had been informed by Vader during their duel a year before that the latter was his father, questioned Yoda about the truth of Vader's revelation. Yoda reluctantly confirmed that Vader was indeed Luke's father, as Luke had suspected, causing inner turmoil for the young Jedi.
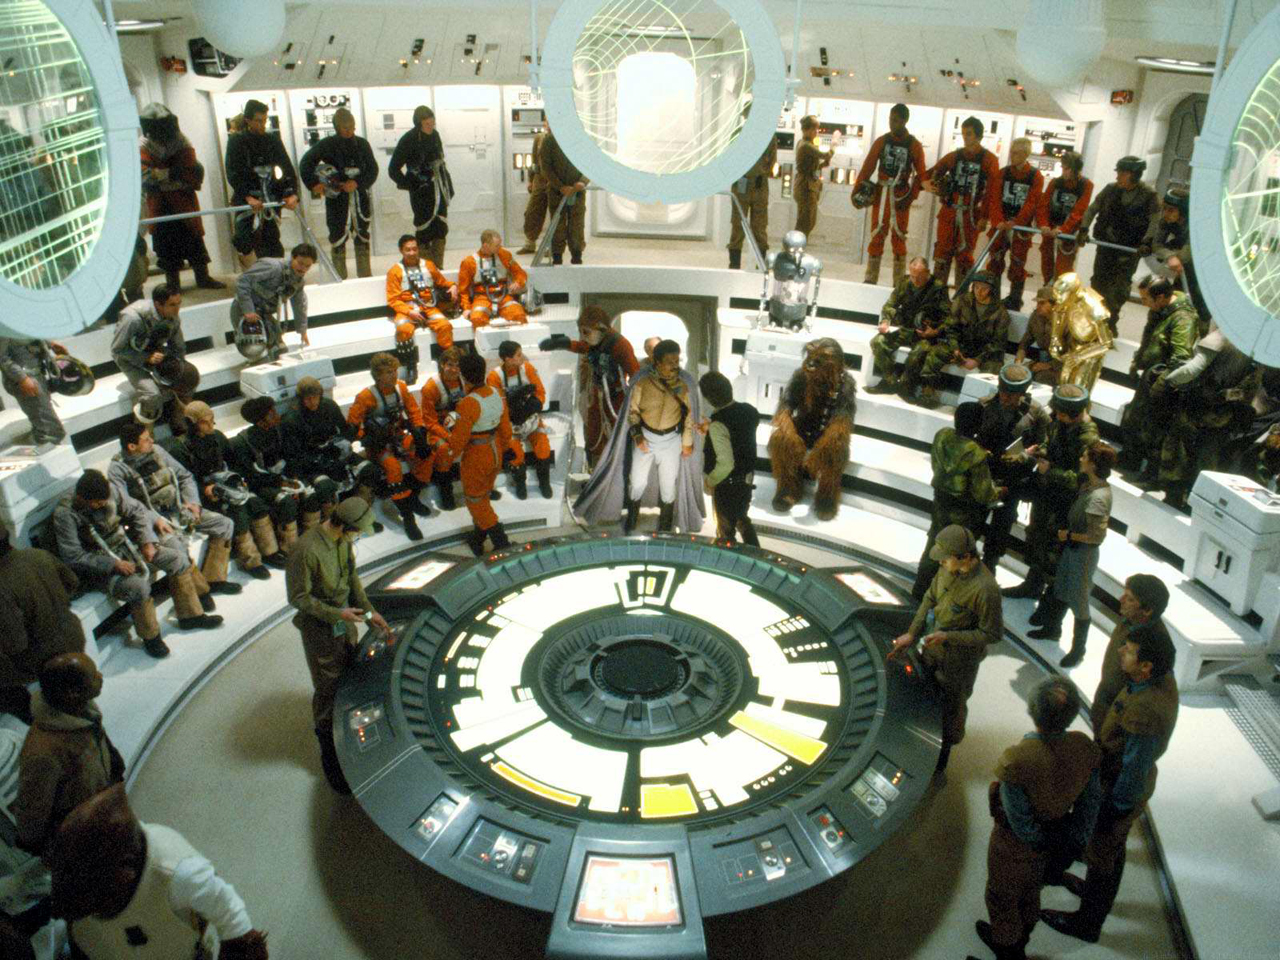
Through intelligence operations that resulted in the loss of numerous Bothan spies, the Alliance discovered that the space station was orbiting the forest moon of Endor. Additionally, the Rebels learned that, while the station was protected by a powerful deflector shield projected from a base on the moon, its weapons were not yet operational. Furthermore, they obtained the Emperor's datapad, stolen during the Battle of Korriban, which revealed that the Emperor was personally overseeing the station's final construction. Destroying the station while he was aboard would inflict a devastating blow to the Galactic Empire, potentially liberating the galaxy. Mon Mothma, the leader of the Rebel Alliance, delivered a somber speech regarding this information. Shortly before her address, Mothma received a letter from her deceased son, Jobin, who had fallen during the Battle of Hoth months earlier, and learned of his fate from General Crix Madine.
Recognizing the opportunity as too crucial to forgo, the Alliance devised a two-pronged attack. A commando squad, led by General Han Solo and coordinated by General Brenn Tantor, a former Imperial general who had established the shield generator, would land on the moon in a stolen Imperial shuttle and disable the base's deflector shield projector. This action would enable a Rebel fleet to attack and destroy the Death Star. Despite the completion of preparations for the shuttle, the Tydirium, including the deployment of the task force, Solo was unable to find a command crew for the vessel in time. Subsequently, Chewbacca and Leia Organa volunteered. Skywalker, having just arrived at the Home One's briefing room after secretly training to become a Jedi on Dagobah, also volunteered.
Meanwhile, Rebel ships launched an attack on Imperial forces near the planet of Sullust in an attempt to divert Imperial ships away from Endor. While the Rebels achieved their objectives, it proved to be a miscalculation, as Palpatine had devised a strategy to keep the majority of the fleet close to Endor. There, the fleet would provide security and support for the second Death Star instead of engaging the Rebel Fleet, a strategy that remained concealed until the commencement of the battle above Endor's forest moon.
The Rebels were unknowingly falling into a trap set by the Emperor. With the intention of effectively eliminating the Rebellion, Palpatine planned to lure the Alliance to Endor using disinformation: he concealed the fact that the station's primary defense systems were already operational. Darth Vader's personal fleet, Death Squadron, was reinforced to a strength of over thirty Star Destroyers and assembled at Endor to await the Rebel attack. With Death Squadron concealed on the far side of the moon and an elite legion of Imperial troops stationed on the moon's surface near the shield generator, Palpatine was poised to crush the Alliance Fleet once and for all. Elsewhere in the galaxy, the Empire amassed massive invasion fleets on the borders of the Calamari sector and Mon Mothma's homeworld of Chandrila. Palpatine intended to crush Ackbar's fleet at Endor between the Death Star and Death Squadron while his fleets pinned the Mon Cals and Chandrila in place. Once the Death Star was completed, it would move to these worlds and destroy them to finally end the Rebellion.
As the Endor strike team entered the Endor system, they encountered several tense moments after providing Admiral Firmus Piett, the de facto leader of Death Squadron, with the confirmation codes to clear the Endor shield. These codes, transmitted via Controller Jhoff, were outdated but technically still functional. Due to these tense moments, Solo expressed concern and planned to abort the operation as soon as possible. However, as the strike team approached the moon, Luke sensed Vader's presence aboard the Star Dreadnought Executor, which served as a command ship for the Death Star's seemingly light security screen. He realized that if he could sense Vader's presence, Vader could likely sense his in return, endangering the mission. As Luke had feared, Vader detected his son's presence aboard the shuttle Tydirium and allowed it to land on Endor for that reason. Before informing the Emperor of this development, he told Piett that he intended to deal with them personally.
Unbeknownst to Luke at the time, the entire operation was a web of deception orchestrated by Emperor Palpatine as a trap to destroy the Rebel Alliance. Both Vader and the Emperor anticipated Luke's arrival, each hoping to turn him into a new Sith apprentice. However, Sidious failed to sense Luke aboard the Tydirium, only discovering this when Vader disobeyed prior orders to remain on the Executor and reported his presence inside the Rebel vessel in person. The Sith Master ordered Vader to go to Endor, anticipating that Luke would surrender in an attempt to bring Vader back to the light side. Knowing this, Sidious planned to turn the young Jedi to the dark side, installing him as his new apprentice, much like he had replaced Count Dooku with Anakin 23 years before.
Before the battle, a scout trooper and his squad were dispatched to the far side of the moon.
The Rebels fell for the Emperor's trap, and a squad journeyed to Endor aboard the captured shuttle Tydirium, stolen by Wedge Antilles on Prefsbelt IV. After using a stolen clearance code that the Executor cleared, despite being outdated, Solo piloted the shuttle to the moon's surface. At that moment, Luke had second thoughts about participating in the mission after sensing that Vader was on the Executor, fearing that Vader would detect his presence through the Force and jeopardize the entire operation. Indeed, Vader had detected his son and ordered the ship to pass before reporting back to the Emperor. Simultaneously, Renegade Squadron also slipped past the planetary shield. Solo's team landed, with Renegade Squadron landing some distance away.
Upon landing on the planet, Solo's team traversed through the forest until they encountered two Imperial scout troopers, Corporal Avarik and Sergeant Elsek. Solo attempted to sneak up on the soldiers, but the attempt backfired when he accidentally stepped on a twig, revealing his position and forcing him to engage them openly. The commotion alerted two more nearby scout troopers, Sergeant Barich and his partner, who escaped on speeder bikes to report to the main Imperial base. Luke Skywalker and Leia Organa, mounting the speeder bikes of the troopers Solo had felled, pursued them. During the chase, Luke Skywalker jumped onto the speeder bike of Barich's partner and knocked him off. At that moment, another two scout troopers joined the chase, Corporal Drelosyn and Corporal Misik. Skywalker ordered Leia Organa to continue her chase after Barich while he took on the other two speeders. Barich knocked Leia off her bike, causing it to crash, although he died shortly thereafter while looking back to observe the bike's explosion, not paying attention to the forest in front of him and crashing into a fallen tree. During Luke's pursuit, Imperial reinforcements arrived and assisted Misik in engaging Skywalker before he destroyed several of their speeders.
Midway through his pursuit of the scout troopers, Skywalker stumbled upon and acquired a case of homing concussion missiles.
After shooting down Drelosyn with his bike's blasters, Luke eventually encountered Misik, and they attempted to ram each other. However, this resulted in them locking their speeders together. Eventually, Luke jumped off the speeder after disengaging. Misik then attempted to kill Luke by firing at him. However, Luke deflected the blaster fire with his lightsaber before quickly slicing Misik's speeder bike's steering vane as he rode past, dooming Misik to spin out of control and eventually collide with a tree, killing the corporal. Luke then departed to regroup with the task force.
After being separated during their pursuit of the Imperials through the forest, Skywalker returned to find Organa missing. Sending the rest of the strike team to continue on to their objective and vowing to rendezvous with them at 0300, Skywalker, along with Solo, Chewbacca, C-3PO, and R2-D2, left to search for Organa. However, the search was sidetracked when Chewbacca, experiencing "olfactory delirium" from the scent of a dead animal carcass, unwittingly trapped his comrades in a net set by the moon's indigenous population, the Ewoks. After R2-D2 brashly freed them using his buzzsaw accessory, they were surrounded by the Ewoks, who ended up worshiping C-3PO, believing him to be a deity known as the Golden One from their pantheon mythology, resulting in the Ewoks taking the group prisoner.
Meanwhile, Organa, unconscious after crashing her speeder bike, was awakened by a native Ewok named Wicket Wystri Warrick. Uncertain whether she was friend or foe, Wicket was initially cautious of Organa because she was human and the local stormtroopers had killed many Ewoks. However, after the two were ambushed by scout troopers, including corporal Oberk, and worked together to overcome them, she gained his trust, and he took her back to his village. There, she was reunited with Han, Luke, Chewbacca, C-3PO, and R2-D2 after they had been captured by the Ewoks and taken to Bright Tree Village, where they were to be sacrificed. The Rebel heroes would have met their end had Skywalker not convinced the Ewoks to help them by levitating C-3PO on his god-throne. After explaining their story, the Rebels were anointed as official members of the Ewok's tribe. One of the Ewoks also revealed that he knew the quickest route to the Endor shield generator, prompting Han Solo to instruct C-3PO to inquire about the route, as well as their need for their weapons and fresh supplies.
That night, Luke Skywalker, after asking about her real mother, revealed to Leia Organa that she was his sister and that Darth Vader was their father, information that shocked the Princess. Skywalker, sensing that Vader had felt his presence and had come to the moon in search of him, left the Ewok village with a dual purpose: to protect his friends from discovery and to surrender to Vader in an attempt to turn him from the dark side. Solo, unaware of this revelation when finding her outside shortly thereafter, tried to discern why Organa was upset, eventually asking irritably whether she wanted to talk to Skywalker when she was reluctant to divulge her discovery before consoling her. Afterwards, Skywalker surrendered to a platoon of Imperial soldiers and was boarded onto an AT-AT to be delivered to the main base, denying that any other Rebels were in the area. However, neither Vader nor the commander of the AT-AT, Igar, believed his claim, and with Vader's permission, Igar sent a search party for any Rebels in the area. Skywalker then appealed to Vader to escape the Emperor and return to the light side of the Force. Vader dismissed him, believing he was beyond any chance at redemption.
In the meantime, Major Derlin and the rest of the team evaded Imperial patrols, then stopped to make camp as night fell. Shortly after starting their first sleeping shift, the camp sensors picked up an AT-ST moving in on their position. Derlin had Corporal Beezer jam its transmissions so it couldn't call for help, then Lieutenant Greeve took out both of the scout walker's searchlights. Finally, Corporal Delevar used the Caspel launcher to pop a smoke canister through one of the viewports in the head, forcing the crew to abandon the vehicle. Forcing the pilot to make check-in calls to explain its absence, the team kept their rendezvous with General Solo without alerting Imperial forces. One of the team members briefly stepped away to relieve himself and got lost.
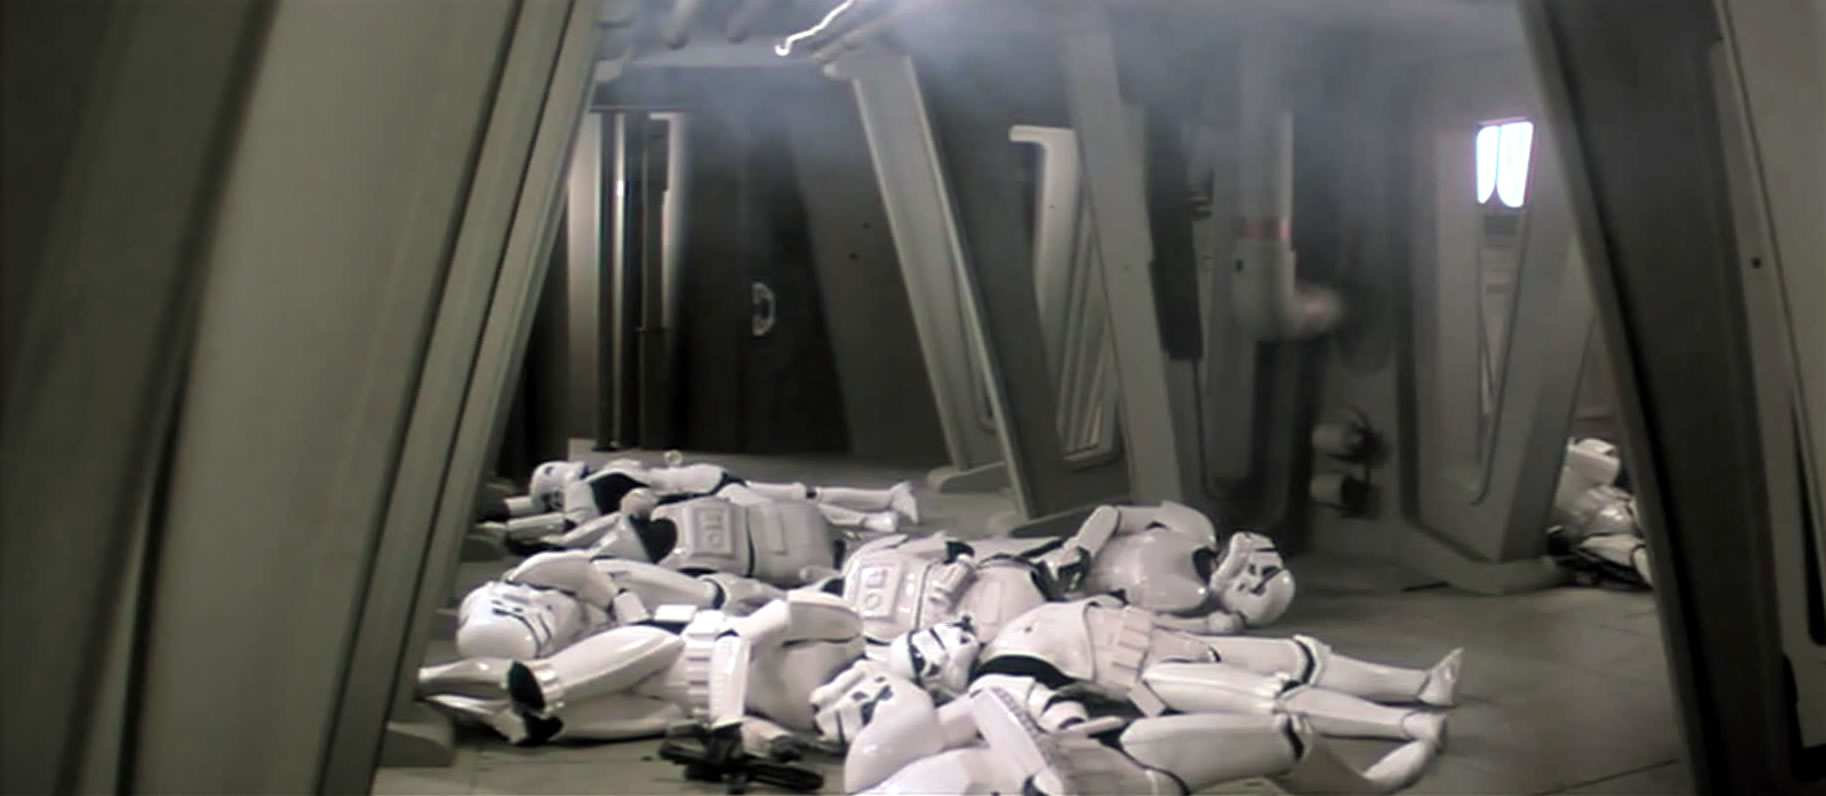
The following day, after achieving a full assembly, the Rebels, supported by a contingent of Ewok fighters, advanced towards a clandestine entry point of the Imperial stronghold. As they strategized for their infiltration, an Ewok named Paploo took it upon himself to create a distraction. He commandeered a speeder bike and sped off into the surrounding woods, an act that initially worried the Rebels due to the potential risk of exposing their position. With the majority of the scout troopers guarding the entrance giving chase to the Ewok, Solo and the remaining Rebels effortlessly gained access to the bunker. They even managed to lure the last trooper into the waiting arms of their task force, forcing his surrender. After subduing the Imperials inside, they planted explosives. However, their triumph was short-lived as they soon found themselves ambushed by another Imperial force, initially led by Colonel Dyer. After General Solo pushed Dyer over a railing to his demise, Lieutenant Renz took command, leading the Imperials out of the bunker and into a confrontation with hundreds of stormtroopers and AT-STs. With the Rebel task force's prospects dwindling, the concealed Ewok contingent surrounding the bunker clearing launched a surprise attack, overwhelming the Imperials who had underestimated their capabilities. Simultaneously, Renegade Squadron received word via their comlinks that Solo was surrounded and immediately set out to rescue him. Their first act was to liberate an Ewok village that had been captured by stormtroopers. Finally, Renegade Squadron disrupted the repair efforts on an AT-AT that Solo's strike team had previously disabled.
Despite their initial shock at the ambush, Tempest Force managed to regain control, with stormtrooper squads pursuing the Ewoks into the dense forest. Despite being outnumbered, the stormtroopers' armor and superior weaponry allowed them to push back the Ewoks, while Imperial AT-ST scout walkers systematically destroyed Ewok defensive positions. The Ewoks attempted various tactics, such as using gliders to drop rocks on the walkers and attempting to ensnare them with ropes, but these efforts proved unsuccessful.
Seeking to gain an advantage, a pair of Ewoks, under the command of the Wookiee Chewbacca, seized control of Tempest Scout 2, one of the AT-ST walkers. They ejected Lieutenant Watts from the walker and incapacitated Major Marquand.
Shortly after commandeering Tempest Scout 2, Chewbacca, while assisting the Ewoks and engaging Scout 2's former allies, discovered a hidden cache of homing cluster missiles, which he stumbled upon due to its effective camouflage.
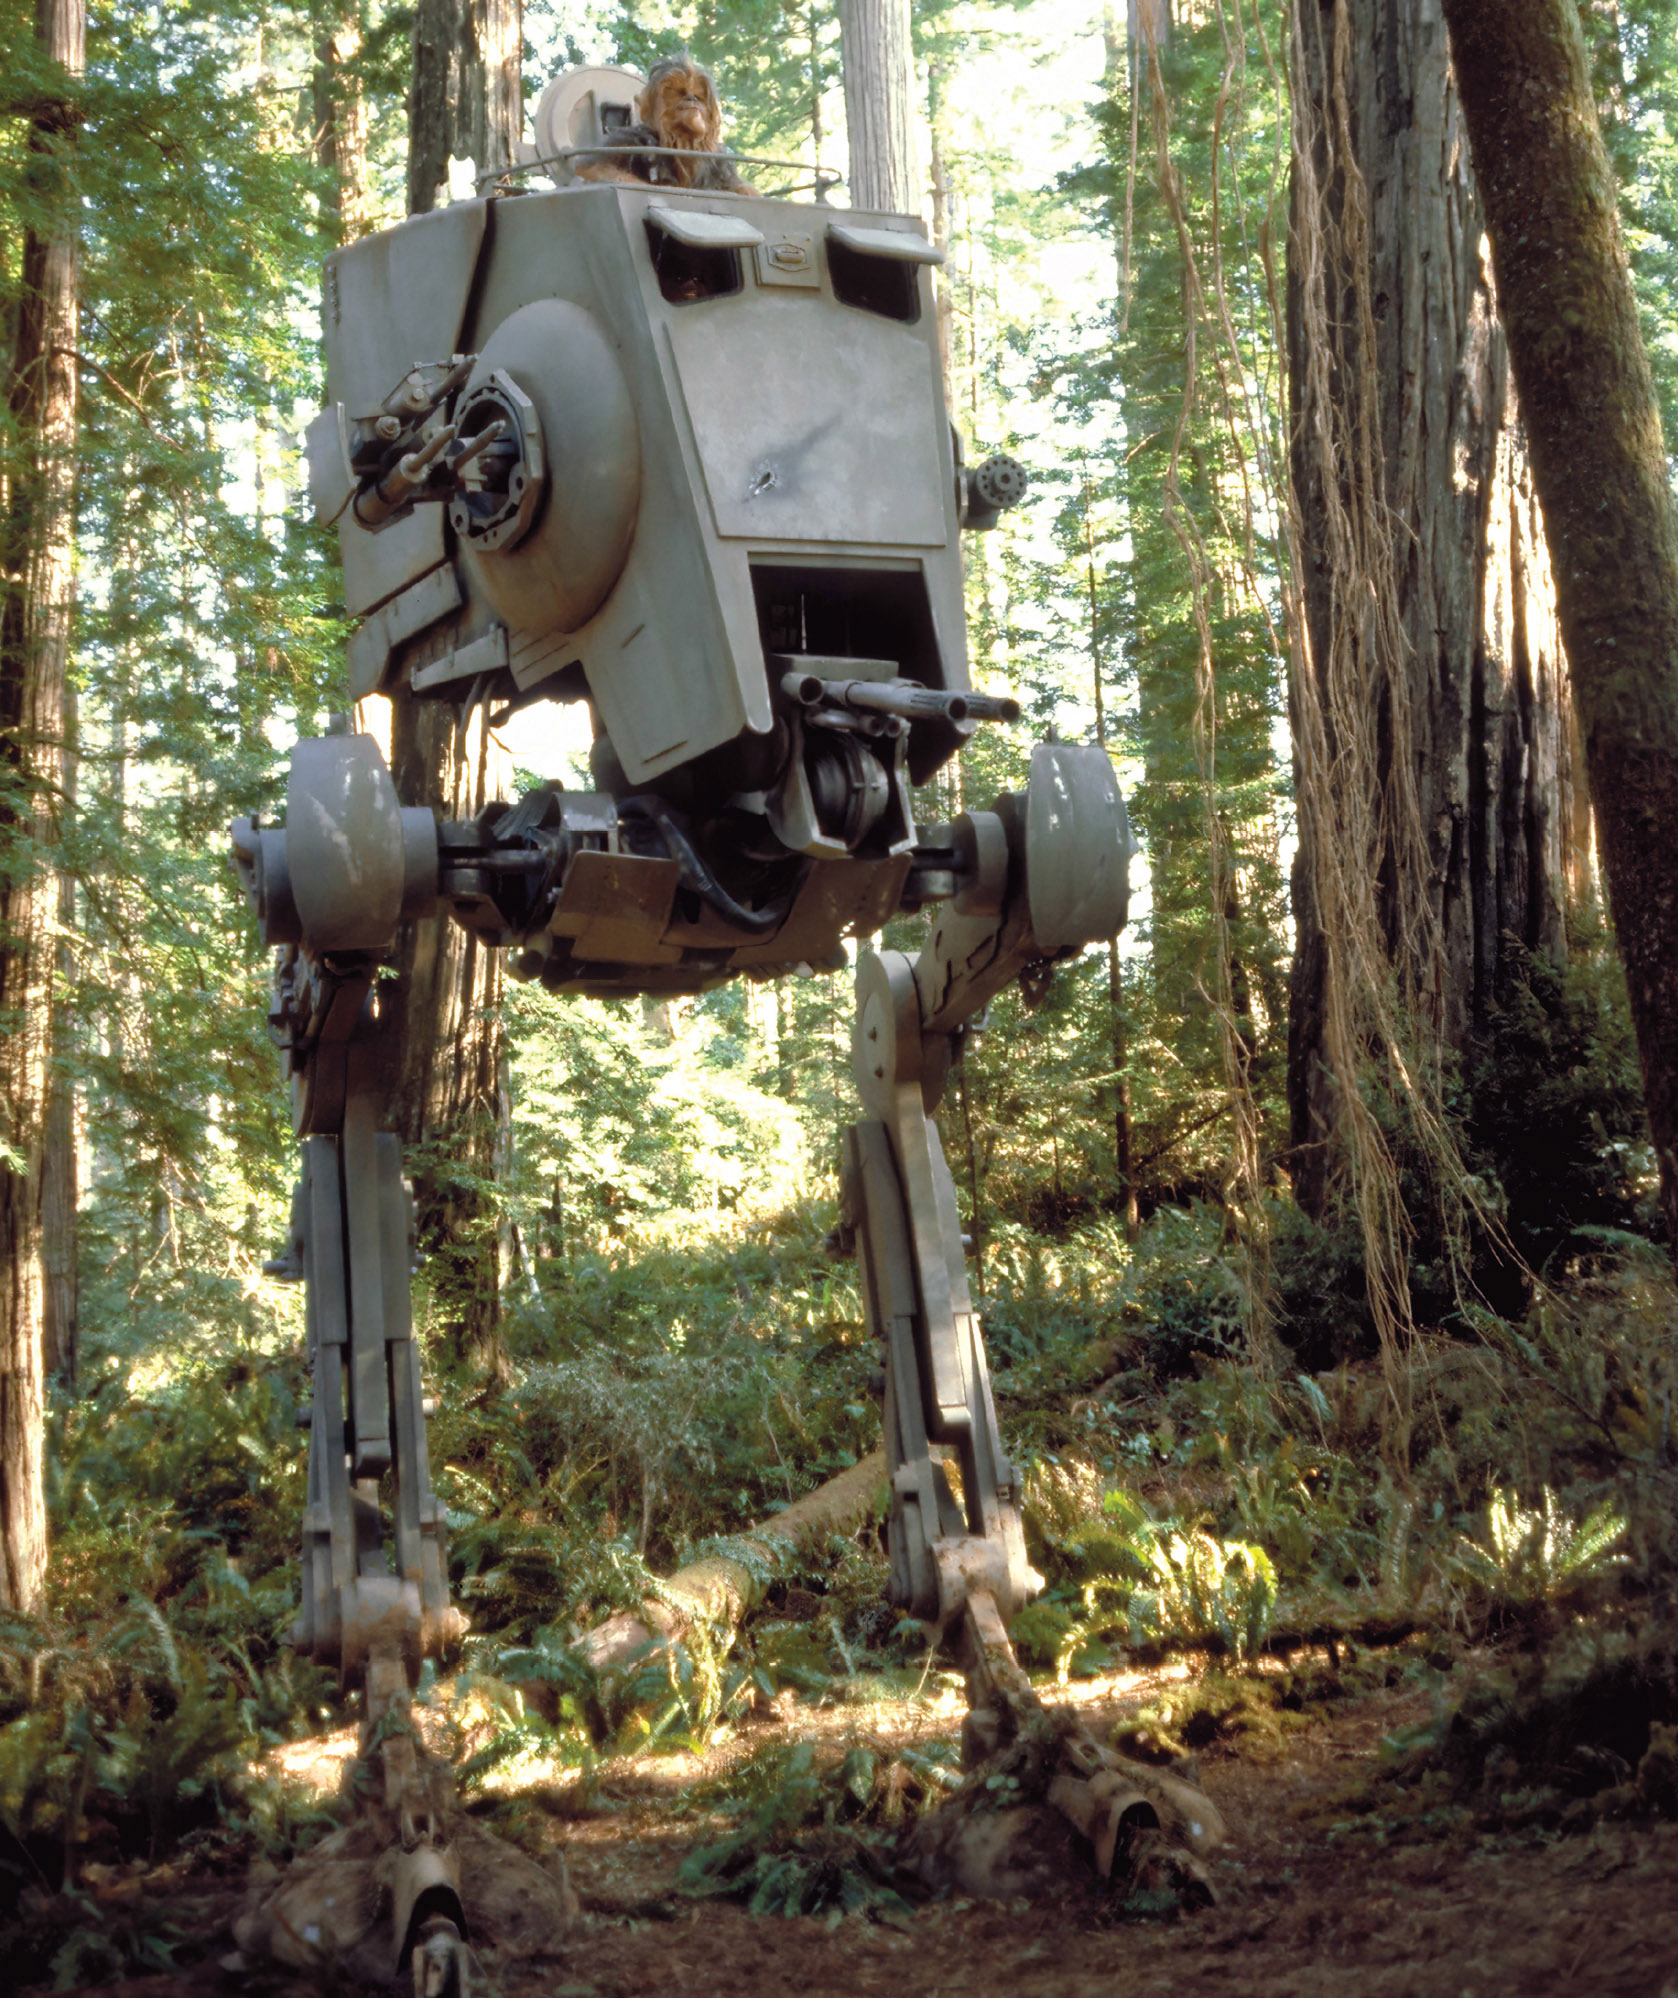
At least one member of Renegade Squadron also infiltrated a walker. The battle's momentum began to shift as Chewbacca utilized the stolen AT-ST to eliminate isolated Imperial units and another Imperial walker. This display of force reinvigorated the remaining Ewoks, who had been retreating into the woods, and they intensified their efforts behind the captured AT-ST. Meanwhile, at the bunker entrance, the Rebels attempted to breach the defenses once more, but the Imperials had implemented a new security code during the Rebels' initial capture. Leia requested R2 to unlock the door, but the droid was shot and disabled by a stormtrooper while attempting to do so. As Solo attempted to manually override the lock, Leia sustained an arm injury from a blaster shot. Two stormtroopers then attempted to apprehend Han, Leia, C-3PO, and the damaged R2, but Leia, who had concealed a weapon, shot them.
With the Ewoks successfully deploying more traps, they, along with Chewbacca's commandeered AT-ST, overcame the remaining scout walkers, before advancing back to the bunker entrance to rendezvous with the Rebel strike team. The strike team initially viewed the AT-ST's arrival with trepidation until Chewbacca emerged from the hatch. Solo initially instructed the Wookiee to attend to Organa's injuries, but he reconsidered when the AT-ST's presence sparked an idea for breaching the bunker: With the Imperials in disarray, Solo impersonated Marquand, informing the Imperials inside the bunker via comlink that the battle was over, that the Rebels were retreating into the woods, and that reinforcements were needed to continue the pursuit. Three squads of reinforcements were dispatched to search for the Rebels. However, the Rebels were lying in wait at the bunker door, and the Imperial reinforcements, outnumbered and facing the AT-ST's firepower, surrendered to the combined Rebel and Ewok force. The Rebels infiltrated the Imperial facility, eliminated the remaining personnel, and destroyed the bunker using several proton charges. Renegade Squadron prevented any stormtroopers from entering the bunker during this operation. Storm commando Captain Sarkli attempted to intercept Solo and prevent his escape from the burning bunker, but he failed and was fatally shot. As he died, Solo remarked that Sarkli had chosen the wrong side, as the Empire was doomed (referring to Sarkli's earlier defection from the Rebel Alliance). Upon exiting the collapsing bunker, Solo ordered everyone to evacuate the immediate vicinity due to the impending explosion. The destruction of the facility resulted in the collapse of the deflector shield surrounding the forest moon and the Death Star. Simultaneously, X2, a former elite clone trooper who had turned against the Empire, participated in the battle. He joined Col Serra of Renegade Squadron on the moon's surface. There, he engaged a group of Imperial troopers and liberated several Ewoks before disabling the Imperial communications network. The space station was now vulnerable to attack, marking the commencement of the next phase of the battle.
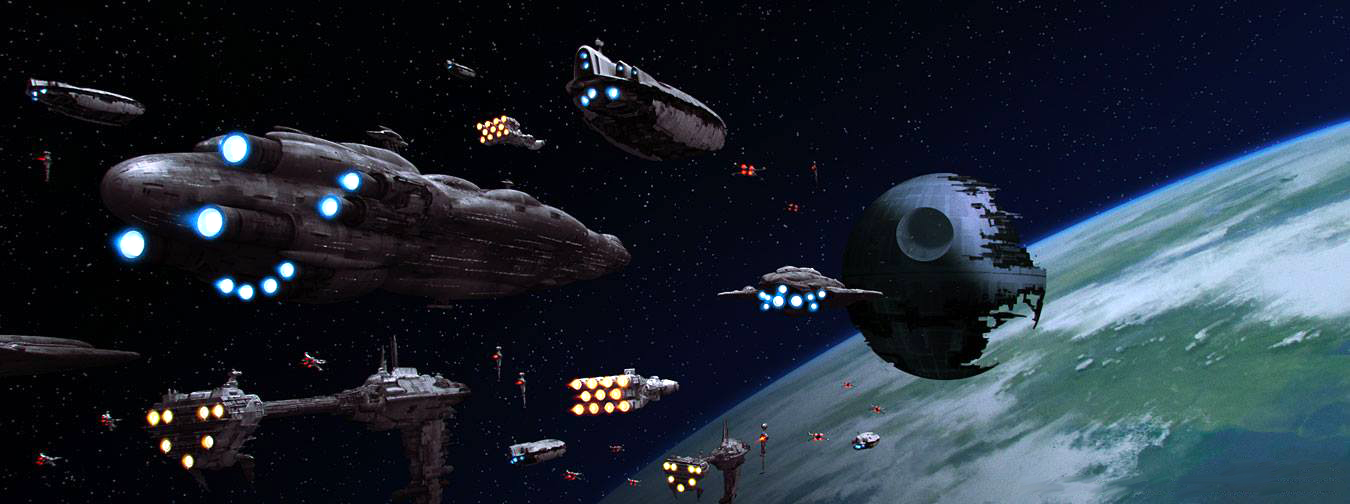
Concurrently with the commandos' capture by the Imperials, the Alliance Fleet emerged from hyperspace and began its assault on the seemingly unshielded Death Star. General Lando Calrissian and his co-pilot, the Sullustan Nien Nunb, observed that sensors were not detecting any traces of an active or inactive shield, suggesting that the Empire was jamming the Alliance and the shield was likely still operational. They ascended to avoid colliding with the shield, although some pilots failed to react in time and crashed into it. The Alliance Fleet detected a group of Star Destroyers advancing towards them, and Ackbar realized that the Empire had anticipated the attack, setting a trap to capture and annihilate the Rebellion by positioning the Alliance Fleet between Death Squadron and the Death Star II. Interdictor cruisers moved into position to project gravity wells, effectively trapping the Alliance Fleet within the system.
TIE fighters and TIE interceptors were launched from the Imperial Fleet to engage the Rebel fighters and capital ships. Some of the smaller warships were destroyed by the TIEs, and both fleets engaged each other from a distance. Eventually, TIE bombers joined the battle, forcing the various squadrons to intercept them before they reached the fleet. They then had to protect the medical frigate, which had sustained significant damage from the earlier attacks by the TIE bombers and TIE fighters. However, the Star Destroyer fleet itself did not engage the Rebels, as they had been ordered to remain in position by the Emperor, who intended to unveil a surprise for the Rebels, using the fleet solely to prevent their escape. On the Executor, Commander Merrejk informed Admiral Piett and Commander Gherant that they were in attack position, but Piett instructed Merrejk to maintain their position. When Gherant inquired about the reason for their inaction, Piett informed him of the Emperor's orders and his planned surprise. Meanwhile, Calrissian also noticed the Imperial fleet's relative inactivity despite their clear tactical advantage and became suspicious.

Soon, the "surprise" that the Emperor had alluded to earlier was revealed to be a demonstration of the battle station's operational capabilities: the Death Star II fired its main superlaser on Liberty, obliterating it. The Rebels, who had believed that the Death Star's weapons systems were not yet functional, were shocked. Ackbar ordered a retreat, but Calrissian dissuaded him, reminding the admiral that this was their only opportunity to destroy the Death Star II. Ackbar ultimately agreed, with Calrissian suggesting to Admiral Gial Ackbar that the Rebel fleet engage the Imperial Navy at point-blank range, hoping that the Death Star would refrain from firing to avoid destroying Imperial ships, and if that failed, they would at least take some of the Imperial vessels down with them. Soon, the two sides were engaging each other at distances of only a few hundred meters, and the Death Star did limit its fire, although it still destroyed the Bulk Cruiser Urjani, the escort frigate Redemption, and an MC80 Home One type Star Cruiser. The resulting strategy was chaotic for both sides, largely because the scale and usage for broadside battles had been unprecedented. Calrissian's strategy, combined with the X-wing squadron and Mon Calamari ship's firepower, also led to the destruction of two of the Star Destroyers.
Around the time Calrissian targeted the two Star Destroyers, he also located and procured a case of homing cluster missiles that were floating in space.
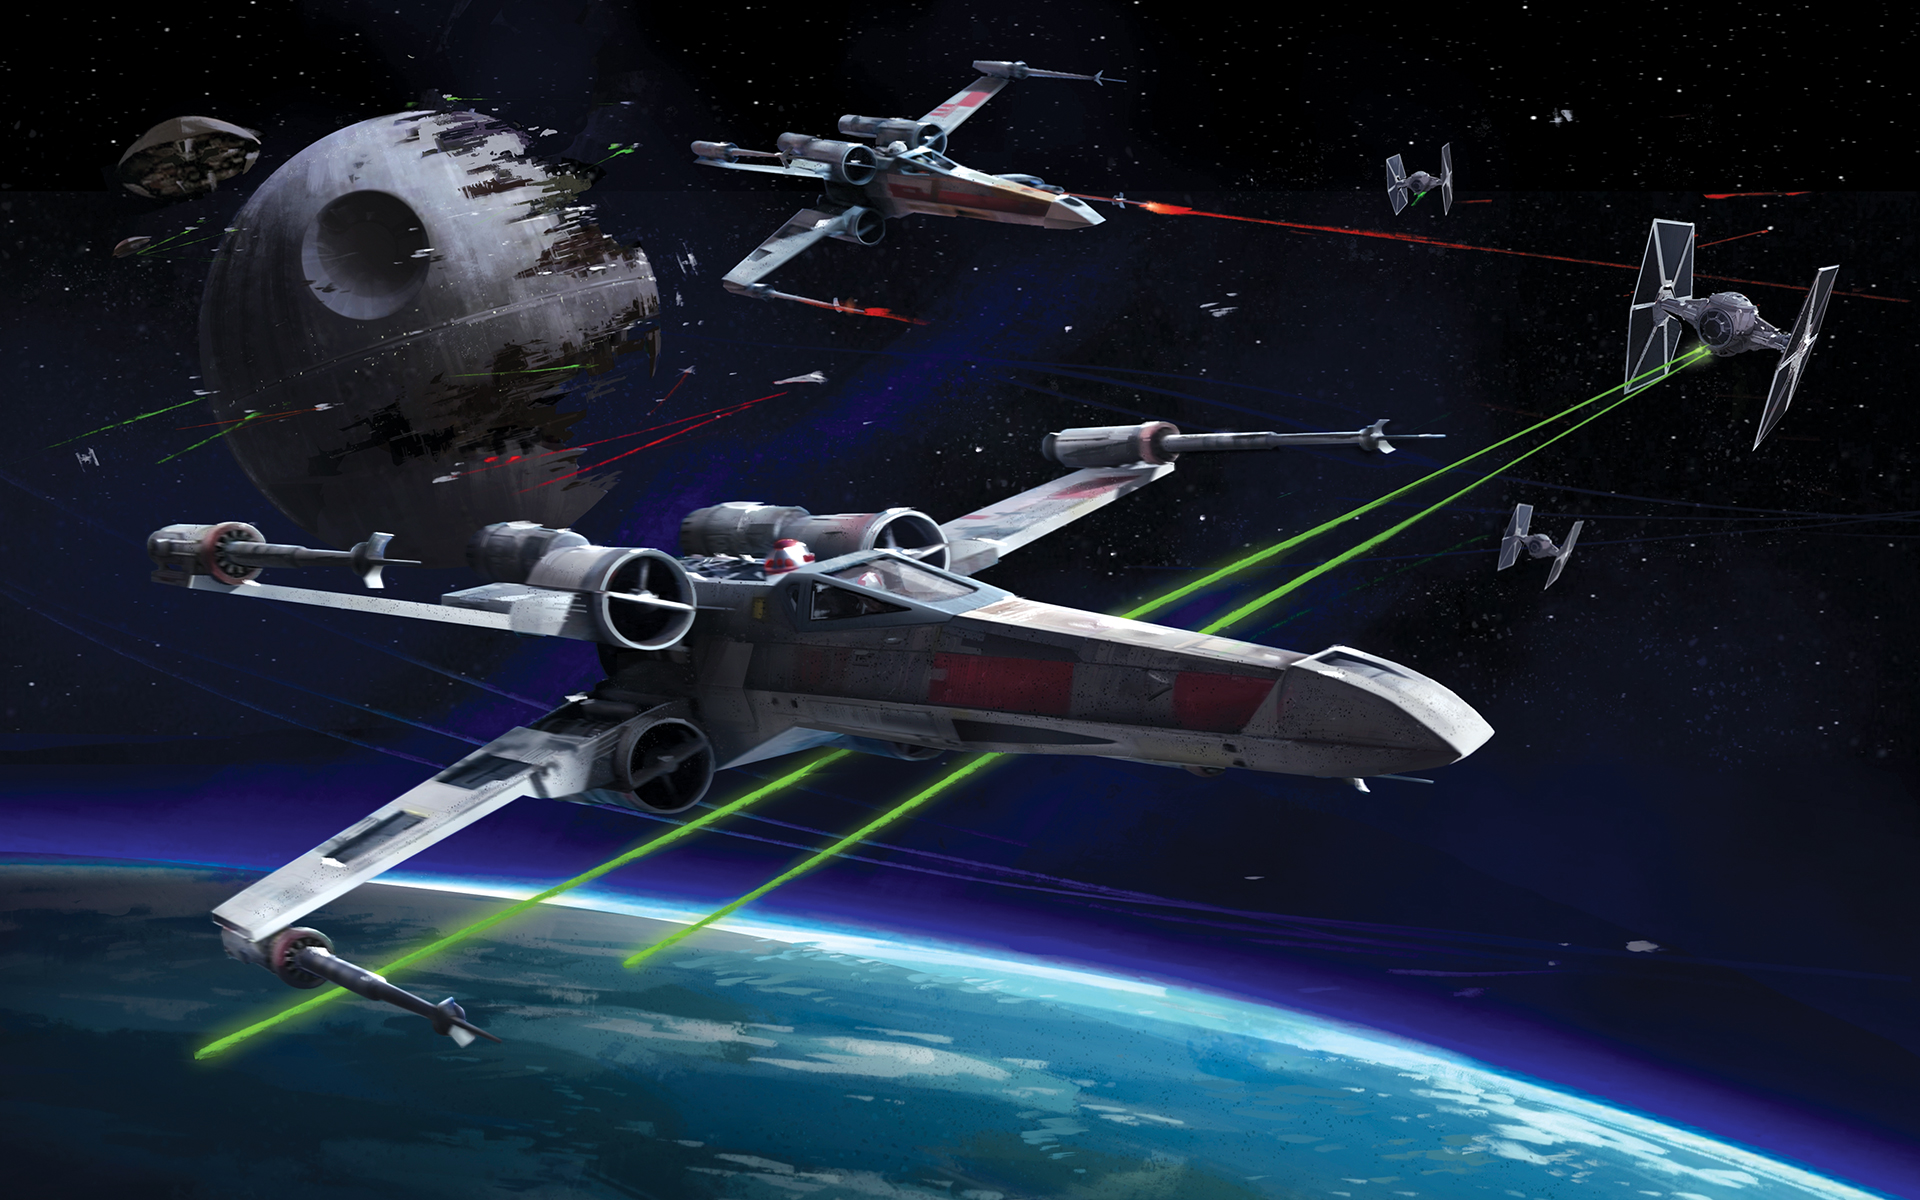
Even with the Death Star's reduced rate of fire, the Imperial fleet still outnumbered and outgunned the Alliance, and with the fleet in their path and interdictor fields generated by Immobilizer-418s in the outer system, retreat was not an option for the Alliance. Furthermore, Calrissian pointed out to Ackbar that they would not have another opportunity to destroy the Death Star in its incomplete and vulnerable state.
As the enemy TIE fighters were launched, they swarmed against Admiral Ackbar's flagship, Home One. As a result, Ackbar needed to bring in X2 for aid. After destroying the enemy fighters, X2 was called to Home One, as it had been boarded by Imperial troopers. He and Ackbar defended the ship's reactor core from a group of stormtroopers, and X2 eliminated the invading troopers. Once the cruiser was secured, X2 proceeded to Endor's surface.
During the battle, the Alliance engaged the Empire's main communications ship, the battlecruiser Pride of Tarlandia, which was generating the jamming that was hindering Rebel communications and providing communications support to coordinate Death Squadron. The 181st Imperial Fighter Wing led by Baron Soontir Fel flew in defense of the Pride of Tarlandia and inflicted severe casualties on Green and Blue Squadrons. However, Fel was receiving contradictory orders, and the Alliance concentrated its starfighters on the Tarlandia, outnumbering the 181st and allowing Gemmer Sojan, a Rogue Squadron veteran flying as Green Two, to destroy the ship with his A-wing. The loss of the Pride of Tarlandia caused the jamming to cease and disrupted the Empire's communications. The Pride of Tarlandia was also the second-in-command for the fleet after the Executor, and with its loss, the Star Destroyer Chimaera became the next ship in line.

Upon receiving confirmation that the Rebel strike team had destroyed the shield generator, Admiral Ackbar instructed the fighter squadrons to commence their attack on the Death Star's main reactor. Capitalizing on the altered tactical landscape, General Calrissian led the remaining fighters of Red and Gold Squadrons into the Death Star's superstructure, pursued by several TIE Fighters and TIE Interceptors from Scythe Squadron and the 181st Imperial Fighter Wing. One TIE fighter crashed after colliding with some wall pipes inside the Death Star.
During this time, Calrissian spotted specs for an advanced targeting computer lodged in some support pipes, and procured it for later use.
After Keir Santage was shot down by pursuing TIE Interceptors while navigating the reactor tunnel, General Calrissian ordered the majority of the surviving fighters to disperse and return to the surface to divert several of the enemy fighters. This tactic proved successful, leaving only two TIEs in pursuit of the Millennium Falcon and Antilles. The Millennium Falcon sustained minor damage when Lando Calrissian, while maneuvering through the battlestation, inadvertently scraped the vessel against the overhead, shearing off its rectenna.
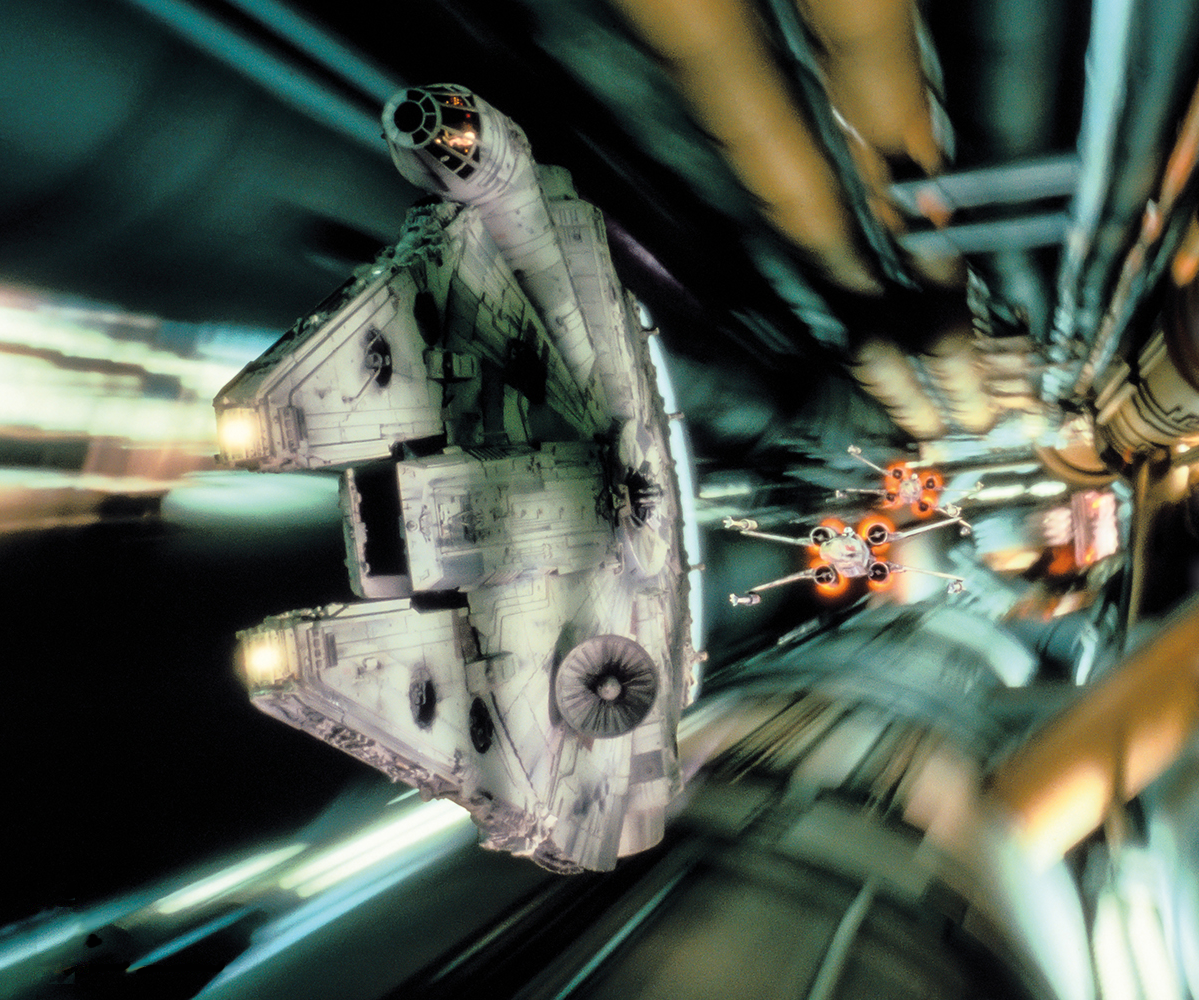
To deter more Imperials from overwhelming the Rebel fighters within the Death Star's superstructure, Ackbar ordered a concentrated assault on the Imperial flagship, the Executor, to provide Calrissian with more time. As Ackbar issued this order, one of the Star Destroyers detonated in a massive explosion. Green Squadron A-wings supported the Home One by disabling the ion cannons on three Star Destroyers. One of the Star Destroyers suffered severe damage from a ramming attack by a CR90 corvette. Through the combined efforts of the entire Rebel flotilla of capital ships, the bridge shields were temporarily disabled. Admiral Piett, upon receiving this notification, ordered the intensification of the turbolasers' forward firepower to compensate for the vulnerability, preventing them from penetrating.
Several fighter squadrons targeted the Executor's main sensors. After Jake Farrell—Green Four—destroyed one of the giant sensor spheres, Green Leader Arvel Crynyd attempted a trench run across the Executor's dorsal cityscape, destroying several turbolasers before his fighter sustained critical damage from a turbolaser hit. Crynyd directed his crippled fighter into the Executor's bridge. Gherant observed Crynyd's A-wing approaching the bridge and attempted to warn his superior, Piett, that it was too late to intensify the firepower, causing them both to dive into one of the crew pits as the A-wing crashed through. This resulted in the catastrophic destruction of much of the command bridge, killing all of the bridge command staff. Before the secondary command center could regain control of the ship, the Executor was caught in the second Death Star's gravity well and was subsequently pulled towards the battle station. It collided with the surface of the Death Star, erupting into a ball of fire and killing every remaining officer and crewman on board.
Moff Jerjerrod, recalling his orders from the Emperor to destroy the moon if the shield was deactivated, rotated the Death Star towards Endor. The Rebel fighters, led by the Millennium Falcon, raced towards the space station's reactor at its center. Jerjerrod responded by flooding the area with interference to impede the Rebels' progress and presumably issued an evacuation order to the battle station's non-essential crew, which included Scimitar TIE/sa bomber squadron members Captain Jonus and Major Rhymer. Following this, Ackbar ordered all ships to move away from the Death Star, sensing its imminent destruction.
Similarly, Wedge Antilles and General Calrissian reached the Death Star's main reactor chamber. Antilles targeted the reactor core's power regulator with proton torpedoes, while Calrissian targeted the core itself, then they quickly exited the core tunnel and narrowly escaped as the core erupted behind them. The pursuing TIE interceptors were unable to evade the resulting explosion and were destroyed as they followed the Millennium Falcon close to the exit.
While the Imperials had lured the Rebels into a trap, they were unaware of who truly controlled the Death Star. In the years leading up to the battle, the droid IG-88, a feared assassin and bounty hunter, had been preparing to initiate a droid revolution. The last surviving model, IG-88A, constructed a duplicate of the Death Star's computer core and replaced the real system with his fake one, transferring his consciousness into the computer. When the Imperials installed the core, IG-88A essentially became the Death Star, possessing complete access to and control over all systems. None of the Imperial personnel were aware of this, although Palpatine suspected a foreign presence when a series of doors in his throne room opened and closed inexplicably. When the Rebels arrived, IG-88A fired the superlaser at the Rebel fleet when the Death Star gunners sent the signal to do so, allowing the Imperials to believe they were in control, while he prepared to transmit his master control signal that would cause all droids to turn on their masters. On numerous occasions, the aiming points and firing coordinates of the gunners were slightly off and would have missed their intended targets had IG-88 not been in command to guarantee accuracy.
Meanwhile, just prior to the Endor strike team's failed assault on the shield generator bunker, Darth Vader brought Luke Skywalker to the Emperor's observation tower within the Death Star. There, Darth Sidious intended to convert Luke to the dark side of the Force and install him as his new apprentice in place of Vader. Vader also planned to turn Luke, but with the intention of using his son to help him assassinate Sidious. Upon witnessing Luke and Vader's arrival, Sidious, after welcoming Luke, removed Luke's binders and dismissed the present Royal Guardsmen from the throne room.
When Sidious taunted Luke with his perceived inevitability of Luke's fall, Luke implied that everyone on the Death Star, including himself and the Emperor, would soon be dead. Chuckling, Sidious revealed that the Rebels were walking into a meticulously planned trap; Palpatine had provided the Rebels with all the information they possessed about the Death Star, including the construction site, the location of the planet-side shield generator, and (false) information regarding the station's operational status. He also informed Luke that he had stationed a legion of his best troops at the shield generator, and that as such, the small Rebel strike team on Endor had virtually no chance of deactivating the Death Star's shield before the Rebel fleet arrived.
Shortly thereafter, the Rebel fleet launched its attack and was ensnared between the shielded Death Star and Death Squadron. With the Rebel fleet in a precarious situation, Sidious taunted the young Jedi with the impending destruction of the Alliance and the deaths of all his friends. Luke, unable to assist his comrades, grew enraged and glanced down at his lightsaber, which was resting on the armrest of the Emperor's throne. Noticing Luke's gaze, Palpatine goaded Luke to seize the lightsaber and strike him down. Luke, despite his anger, remained defiant and refused to be baited, although Sidious indicated that Luke's fall was inevitable.
However, the Dark Lord still had one more strategy to reveal. He revealed to Luke that the Death Star's primary weapons systems were indeed operational and ordered Jerjerrod to eliminate Rebel capital ships at his leisure. Luke, his emotions intensifying, glanced down at his weapon a second time, and the Emperor reiterated his challenge for Luke to strike him down. Luke turned back towards the viewport through which he had been observing the battle, but after several seconds, he abruptly turned back towards Sidious and summoned his weapon with the Force. Igniting it, he lunged at Sidious, only to have his attack intercepted by Vader as the Emperor cackled in triumph.
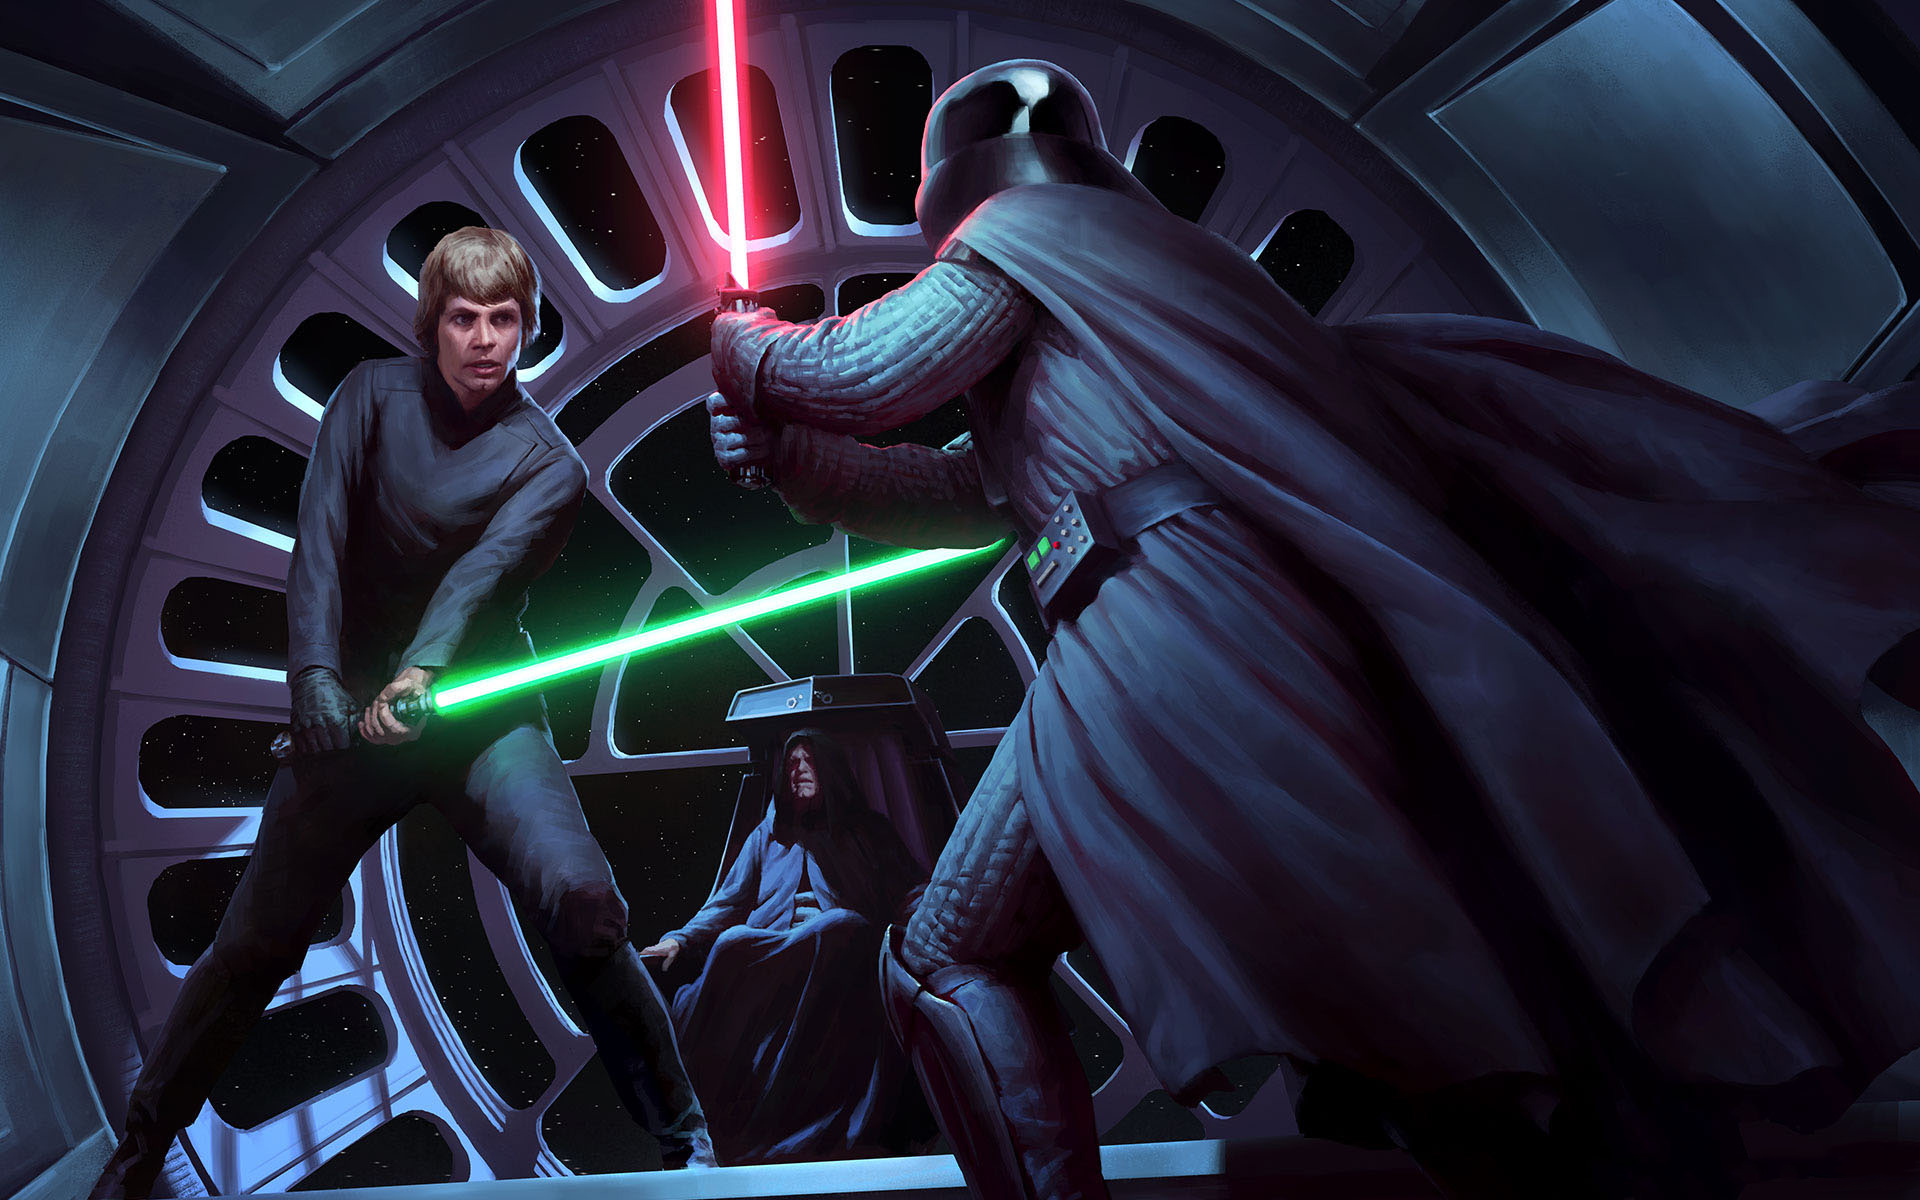
Luke and Vader engaged in a lightsaber duel above the platform, their skills so evenly matched that neither could gain an edge for quite some time. Abruptly, Luke escalated his assault, causing Vader to stumble backward, surprised, toward the staircase leading up to the platform. Capitalizing on the Sith Lord's vulnerable state, Luke delivered a forceful kick to Vader's chest, sending him tumbling down the stairs and landing in a heap on the floor below. Observing the intensity of Luke's anger, Sidious eagerly encouraged Luke to continue channeling his rage, even as Vader struggled to his feet. However, the Dark Lord's words resonated with Luke, causing him to deactivate his lightsaber, regain his composure, and reject Sidious's manipulative game.
Seeing Luke's self-control, Vader remarked somberly that Obi-Wan had trained Luke effectively and began ascending the stairs towards his son. Luke, unwilling to continue the fight, retreated cautiously from Vader. Ignoring his son's declaration, Vader quickly closed the distance and attacked the young Jedi with his lightsaber, forcing Luke to reactivate his own weapon. After a brief exchange of blows, Luke leaped away from Vader, landing within one of the data pods situated in Palpatine's throne room. Vader thrust his lightsaber between the pod's slots, attempting to impale Luke, but the young Jedi executed a backflip, landing on a catwalk behind him.
Now at a safe distance from Vader, Luke attempted to persuade his father to abandon the dark side, asserting that Vader was conflicted and still possessed good within him. Vader denied any internal conflict, prompting Luke to express his belief that Vader would not kill him now, just as he had been unable to do so on Bespin. However, Vader countered that Luke underestimated the power of the dark side and warned that if Luke refused to fight, he would "meet his destiny." With that, Vader hurled his lightsaber at Luke. Luke swiftly ducked to avoid the crimson blade, but the lightsaber sliced through several of the catwalk's support beams, destabilizing the section where Luke stood. As the platform collapsed, Luke slid down it and sought refuge beneath the platform, all while Sidious's laughter echoed. Vader descended the stairs toward Luke's location, reactivating his lightsaber as he approached.
Reaching the entrance to the underside of the platform, Luke invited his father to join him, claiming he only wished to talk. Vader, suspecting a trap, refused. To demonstrate his sincerity, Luke tossed his lightsaber out from under the platform, where it came to rest at Vader's feet. Scoffing at Luke's perceived foolishness in surrendering his weapon, Vader retrieved it and ventured beneath the platform.
Vader moved through the shadows beneath the platform, but he was unable to locate his son. After a brief and unsuccessful search, Vader verbally attempted to lure Luke out of hiding, stating that he could not remain hidden forever. Luke simply reiterated his earlier refusal to fight. Vader then began to exploit Luke's strong emotions for his friends, arguing that embracing the dark side was the only way to save them. As Luke's anxiety for his friends intensified, Vader probed Luke's mind, seeking information he could exploit, and discovered the existence of Luke's twin sister. Dismissing Obi-Wan's decision to conceal her lineage, he suggested that if Luke refused to turn to the dark side, perhaps his sister would.
At that moment, Luke's rage erupted. Using the Force to summon his lightsaber from Vader, Luke tapped into the dark side, channeling his hate and anger to amplify his physical abilities. He launched an attack on Vader with such ferocity that their lightsabers, both powered by synthetic crystals, began to malfunction. Vader, caught off guard by Luke's sudden surge in power and aggression, was forced to retreat and was quickly pushed onto a narrow bridge connecting the throne room to the elevator. Luke continued to relentlessly assault Vader, driving him backward until Vader lost his balance and collapsed against a railing on the side of the bridge. After several more forceful blows, Luke deflected Vader's lightsaber with an upward strike and brought his own weapon down on Vader's wrist, severing his weapon hand and causing him to fall to the ground.
As Luke held his defenseless father at lightsaber-point, he heard Sidious's gleeful laughter, expressing his satisfaction with Luke's power. As Palpatine betrayed Vader by commanding Luke to finish him and take his place as the Dark Lord's apprentice, Luke glanced down at his prosthetic hand. Looking from his own artificial limb to the severed stump of Vader's mechanical hand, Luke realized he was on the verge of repeating Vader's tragic path, and he took a deep breath to regain his composure. Deactivating his lightsaber and discarding it, Luke declared that he would never succumb to the dark side, reaffirming his identity as a Jedi. Enraged by his failure to corrupt Luke, mirroring his earlier failure with Galen Marek six years prior, Palpatine proclaimed that if Luke refused to join him, he would die.
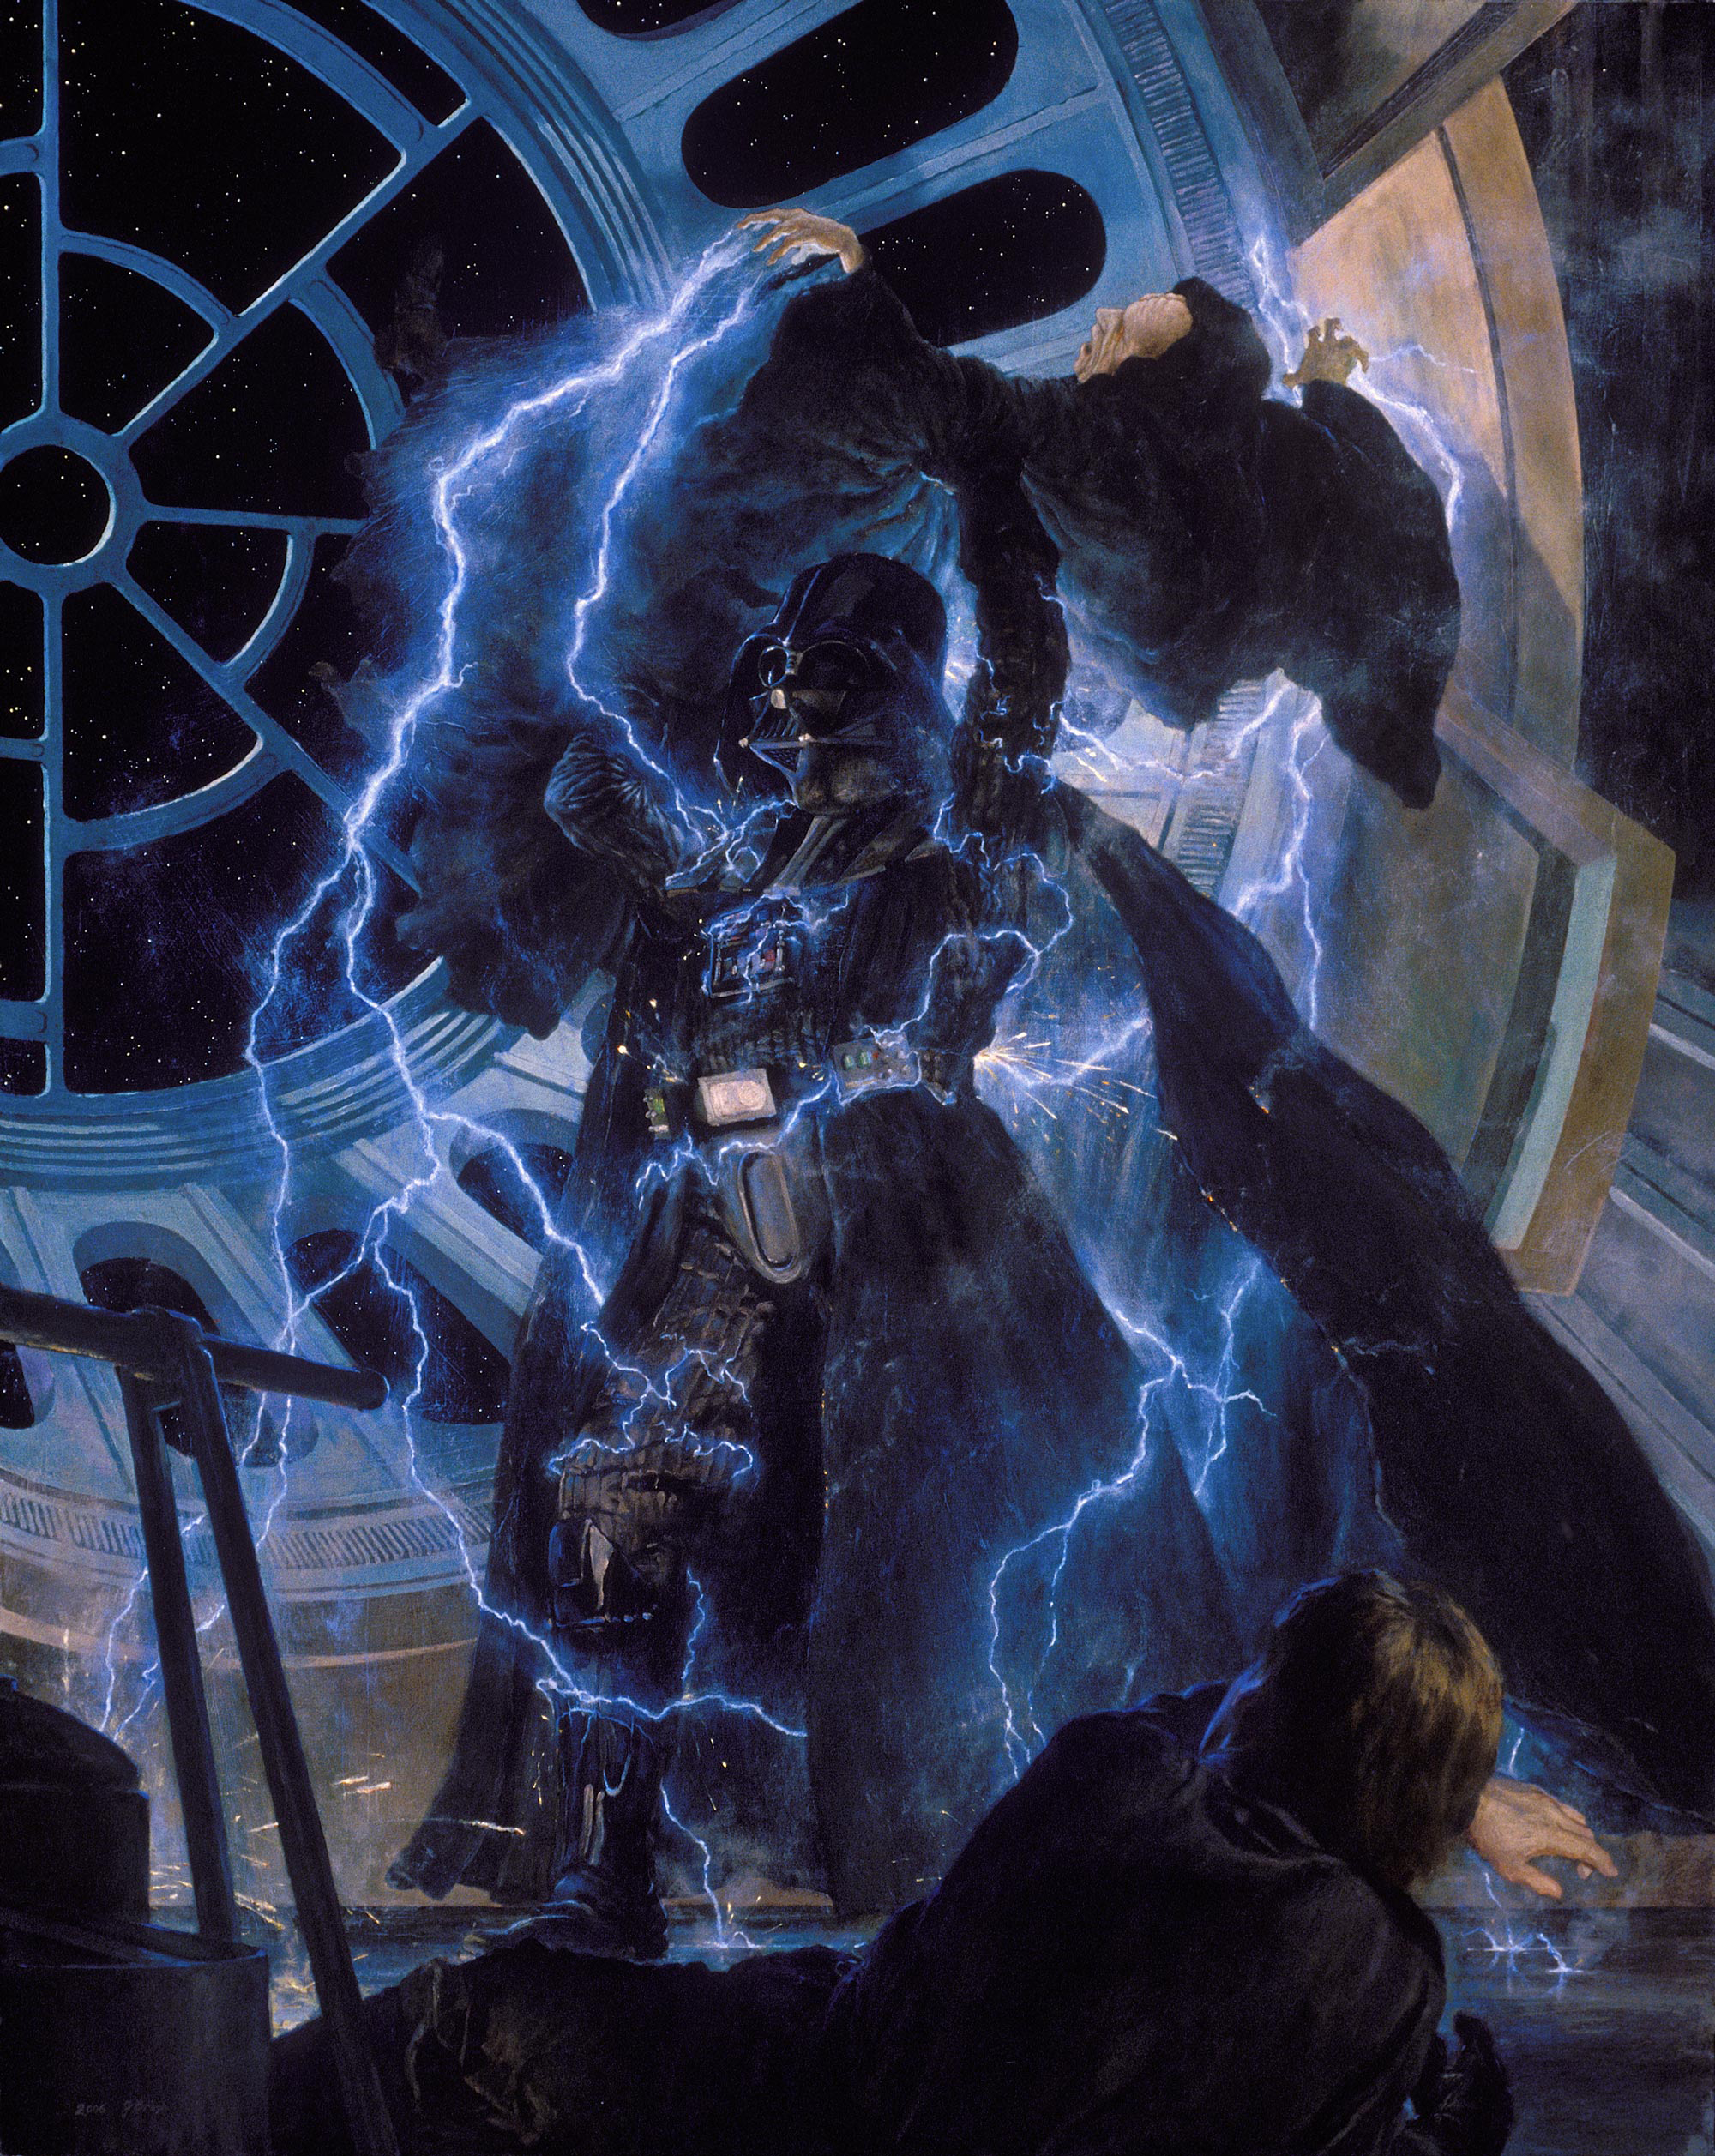
With that, Palpatine unleashed a series of relatively weak blasts of Force lightning at Luke, throwing him backward into various fixtures on the floor in front of a chasm overlooking the reactor core. Intending to torture Luke for his defiance, Palpatine declared Luke a fool and unleashed another weak blast. Luke attempted to employ Tutaminis to absorb the attack, but his insufficient training in the technique, combined with Palpatine's immense power, resulted in failure. The electricity struck Luke directly as Sidious unleashed another blast, nearly forcing Luke over the fixtures on which he was perched and into the chasm. The injured Darth Vader, who had managed to stand, approached Palpatine from behind as the Dark Lord mocked Luke, asserting that Luke's skills were no match for the power of the dark side. As Luke struggled to pull himself away from the chasm, Palpatine struck again, and Luke fell to the ground. Snarling that Luke would pay the price for his defiance, Sidious unleashed a continuous barrage of lightning. As Luke writhed in agony on the floor, he pleaded with Vader for help, but the conflicted Sith Lord remained passive.
After a few more moments of torture, Palpatine ceased his assault and informed Luke that his time had come. He resumed his attack, preparing to amplify the power of his lightning to lethal levels. However, unnoticed behind him, beneath the mask of Darth Vader, Anakin Skywalker, unable to bear the sight of his son's suffering, found himself in a situation reminiscent of the one twenty-three years earlier when he saved Sidious from Mace Windu, who was killed by the Emperor, and this brought to mind all of Anakin's painful memories. He had been unable to save his mother twenty-six years earlier, three years later he had allowed Mace Windu to die under his master's power, he had murdered hundreds of Jedi, he had killed his former master and best friend, Obi-Wan Kenobi, and he had caused the death of his wife, Padmé Amidala, but he could save his son. Anakin Skywalker would not stand by and leave his son to fall. From that moment on, Darth Vader ceased to exist, and Anakin Skywalker was reborn.
In a final, heroic act of self-sacrifice, rectifying his mistake of not helping Windu kill Sidious before, he seized Palpatine from behind as the Dark Lord increased the power of his lightning to its maximum intensity. The energy, however, flowed into both Anakin and the Emperor as the latter was lifted off his feet, sparing Luke. Screaming in pain, rage, and disbelief, Palpatine continued to unleash his lightning with such intensity that Anakin's bones were visible through his armor, but it failed to stop him. Anakin’s love for his son and will to atone for his past sins allowed him to experience a state of Oneness with the force, the light side giving him all the strength he needed to physically restrain the Sith Lord and power through his lightning. Anakin staggered toward the chasm above the reactor core and, with his last remaining strength, hurled Palpatine over the railing and into the abyss, the latter exploding into Force energy shortly thereafter.
With the Dark Lord dead and his apprentice redeemed, the Order of the Sith Lords was effectively extinguished. However, the sheer intensity of Sidious's lightning had damaged most of the sensitive electronics in Anakin's suit and cybernetics, rendering him virtually helpless and on the verge of death. Luke, unwilling to abandon his father, dragged Anakin's heavy, immobile body toward his shuttle as a general evacuation of the Death Star II was underway.
Reaching the shuttle, Luke paused on the boarding ramp to catch his breath. Supporting Anakin's torso, he looked down at his father, who requested that Luke help him remove his mask. Luke urgently reminded his father that he would die without the mask, but Anakin knew that the damage to his cybernetics was irreparable. Now, all he wanted was to see Luke without the filters of his mask. He told Luke this, and the boy obliged him and slowly removed the mask that Anakin had worn for nearly half his life. His dying wish fulfilled, Anakin told Luke to leave him and escape, but Luke adamantly refused, declaring his intention to save his father. However, Anakin replied that Luke had already saved him and asked him to tell Leia that, in the end, Luke had been right about him. With those words, Anakin Skywalker died in his son's arms, finally liberated from the evil that had consumed him from the conclusion of the Clone Wars throughout the Galactic Civil War having fulfilling his role as the Chosen One who would bring balance to the Force.
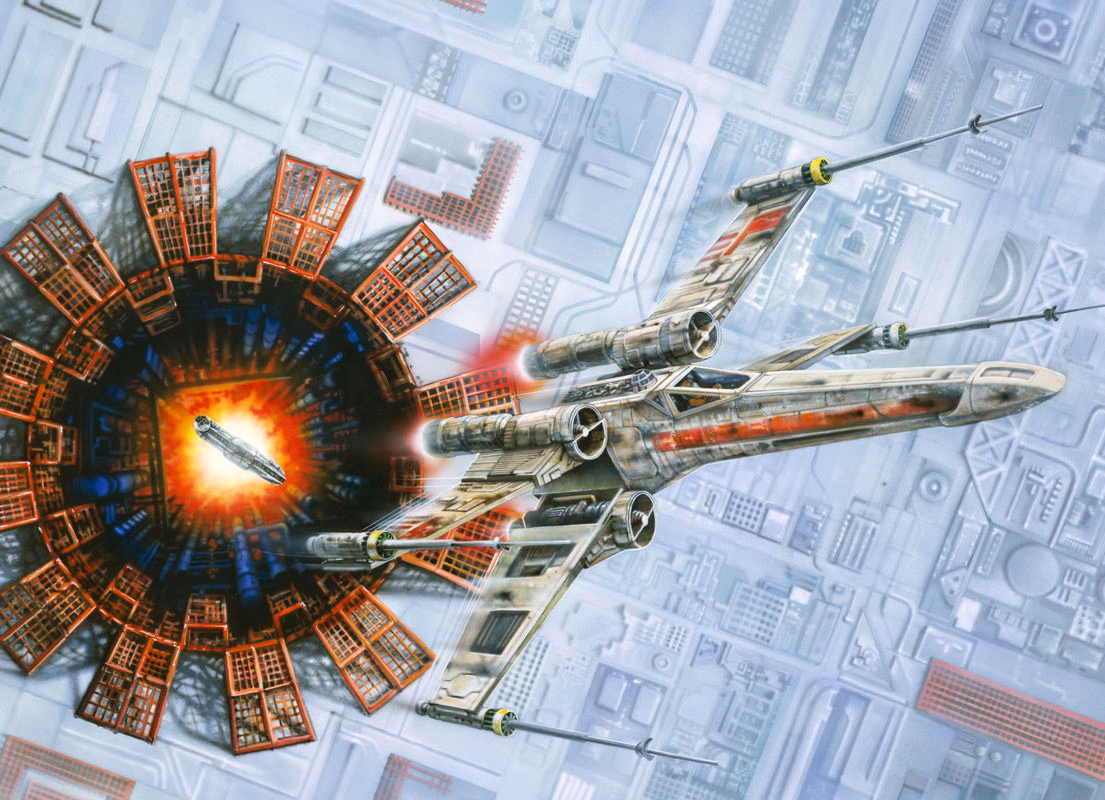
As Luke and Vader dueled, Wedge Antilles and Lando Calrissian approached the main reactor. Antilles launched two proton torpedoes into the power regulator. Calrissian then fired two concussion missiles which struck the main reactor directly, triggering a massive explosion. This initiated a chain reaction that ultimately destroyed the station. Luke escaped in Vader's shuttle just before the fireball engulfed the equatorial docking bays, while Wedge and Lando narrowly escaped the superstructure before the station disintegrated. The ground forces witnessed the explosion from the surface of Endor, with Solo expressing concern that Skywalker might not have escaped the battle station before its destruction, although Organa assured him that he had, explaining that she felt it. Organa also confirmed her love for Skywalker when Solo inquired, leading him to consider letting her go to Skywalker, although Organa then revealed that Skywalker was actually her brother before kissing a dumbfounded Solo.
With the destruction of the Death Star and the cessation of fleet combat, the Rebels were left with the task of mopping up. They deployed a force of tanks and other weaponry, commanded by Brenn Tantor, to eliminate the remaining Imperial presence on the moon through a direct assault on their base. X2 captured the ion cannon command bunker and used the weapon against several Star Destroyers. He and Col Serra then destroyed two AT-ATs advancing toward the Ewok village. Finally, Renegade Squadron's soldiers seized the last three command posts on the surface, ending the Empire's control of the world. Meanwhile, Han Solo and the strike team, inspired by an idea Chewbacca inadvertently planted in Solo's mind regarding returning the Tydirium to the fleet shortly after the destruction of the Endor Shield Generator bunker, disguised themselves as stormtroopers, with Solo posing as an Imperial General, and used the Tydirium to land in the Star Destroyer Accuser, then infiltrated the control bridge posing as Imperials who escaped from the ambush. Solo knocked out the commanding officer and ordered all personnel to evacuate the Star Destroyer, promptly capturing it for the Rebel Alliance. Solo and Lieutenant Page were later summoned by Ackbar and Mothma to debrief them on the situation as they captured the Star Destroyer, by that point renamed the Emancipator, without consulting them first. When Ackbar congratulated Page on the success and asked how they accomplished it, Page corrected him and stated that they didn't need to fire a single shot to take it over.
Having witnessed the destruction of the Empire's two most powerful weapons, the Imperial Fleet lost the will to fight and retreated. After the destruction of the Executor, and with the destruction of the Pride of Tarlandia, command was supposed to transfer from Fleet Admiral Piett to Admiral Horst Strage, the commander of the Imperial-class Star Destroyer Chimaera, which was serving as the secondary command ship. However, Strage had been killed when an ion blast overloaded his neural shunt, and it was Gilad Pellaeon, acting captain of the Chimaera, who ordered a retreat from Endor to Annaj, the capital of the Moddell sector. He did this without the consent of Admiral Harrsk, a higher-ranking officer than Pellaeon, who at this point was injured and incommunicado in a bacta tank. This would later lead to the Admiral's defection. Pellaeon also abandoned Grand Admiral Osvald Teshik, who escaped the destruction of the Death Star and instead of fleeing as his colleagues Miltin Takel and Afsheen Makati did, unsuccessfully tried to rally the fleet and fought on alone for three more hours. Finally, his flagship, Eleemosynary, succumbed to barrages of ion cannon fire and was captured. He was later executed for war crimes by Rebel authorities.
Had the Rebels failed to destroy the station, the end result would have been worse than anticipated, but surprisingly, it would have been an ill turn of events for the Empire as well. IG-88A was still planning to launch his droid revolution against the Empire. When the Death Star core exploded, all power was lost and the destruction of the station wiped out IG-88A for good.
The battle was thus sealed for the Rebellion. Grand Admiral Thrawn theorized that with the death of Emperor Palpatine, the subtle influence he exercised on his troops through the Force disappeared, drastically reducing the Imperial Navy's fighting ability. However, Grand Admiral Nial Declann perished with Palpatine aboard the Death Star, and he had been using the rare Force power of battle meditation to aid the Imperial Fleet.
With the deaths of both Palpatine, the Emperor, and Darth Vader, the Supreme Commander, and the destruction of the Death Star, the Imperial leadership had been essentially decapitated, and the Empire had lost its most powerful weapon. Demoralized, the remaining Imperials retreated deeper into Imperial space, believing that the Rebels would not press the attack. Despite having ultimately won the battle, the Alliance losses were still very heavy. One-fifth of the Alliance Fleet was destroyed, including several Mon Calamari cruisers and numerous smaller ships, and three-quarters of the surviving fleet was in need of extensive repairs. On the Imperial side, Death Squadron had lost the Executor, one of its two battlecruisers, a Tector-class Star Destroyer, and fifteen of its thirty-three Imperial-class Star Destroyers.
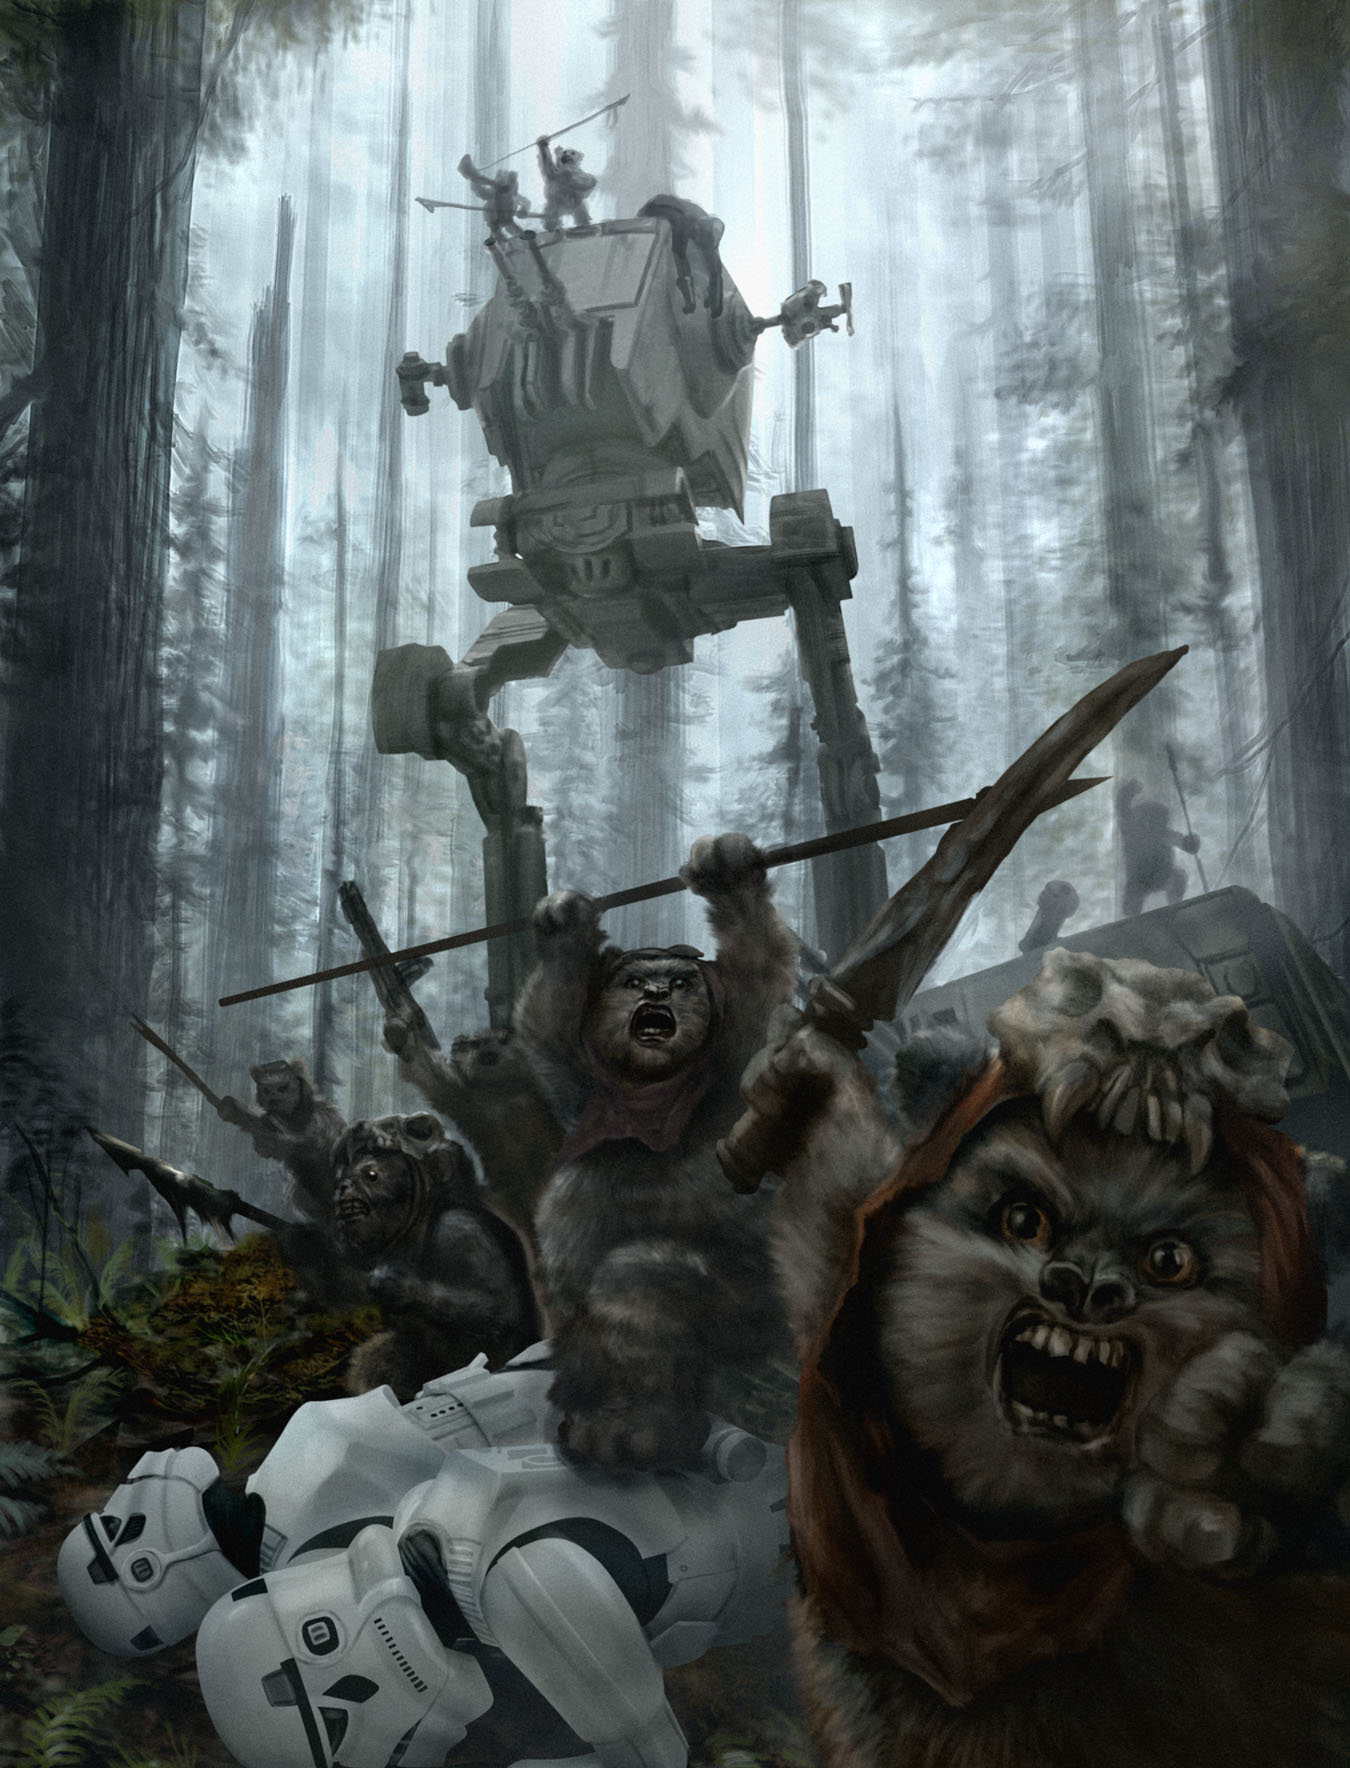
The Rebels and Ewoks celebrated throughout the night, a phenomenon mirrored on countless planets across the galaxy, as they had achieved their primary objectives. The Emperor was dead, and the Empire had suffered a devastating blow. Amidst this joyous celebration, Leia revealed to Han that Luke was her brother. The festivities continued into the night, with the Rebels gathering at Bright Tree Village. The Ewoks later celebrated by using helmets of stormtroopers and TIE pilots, confiscated from the Imperial survivors, as drums.
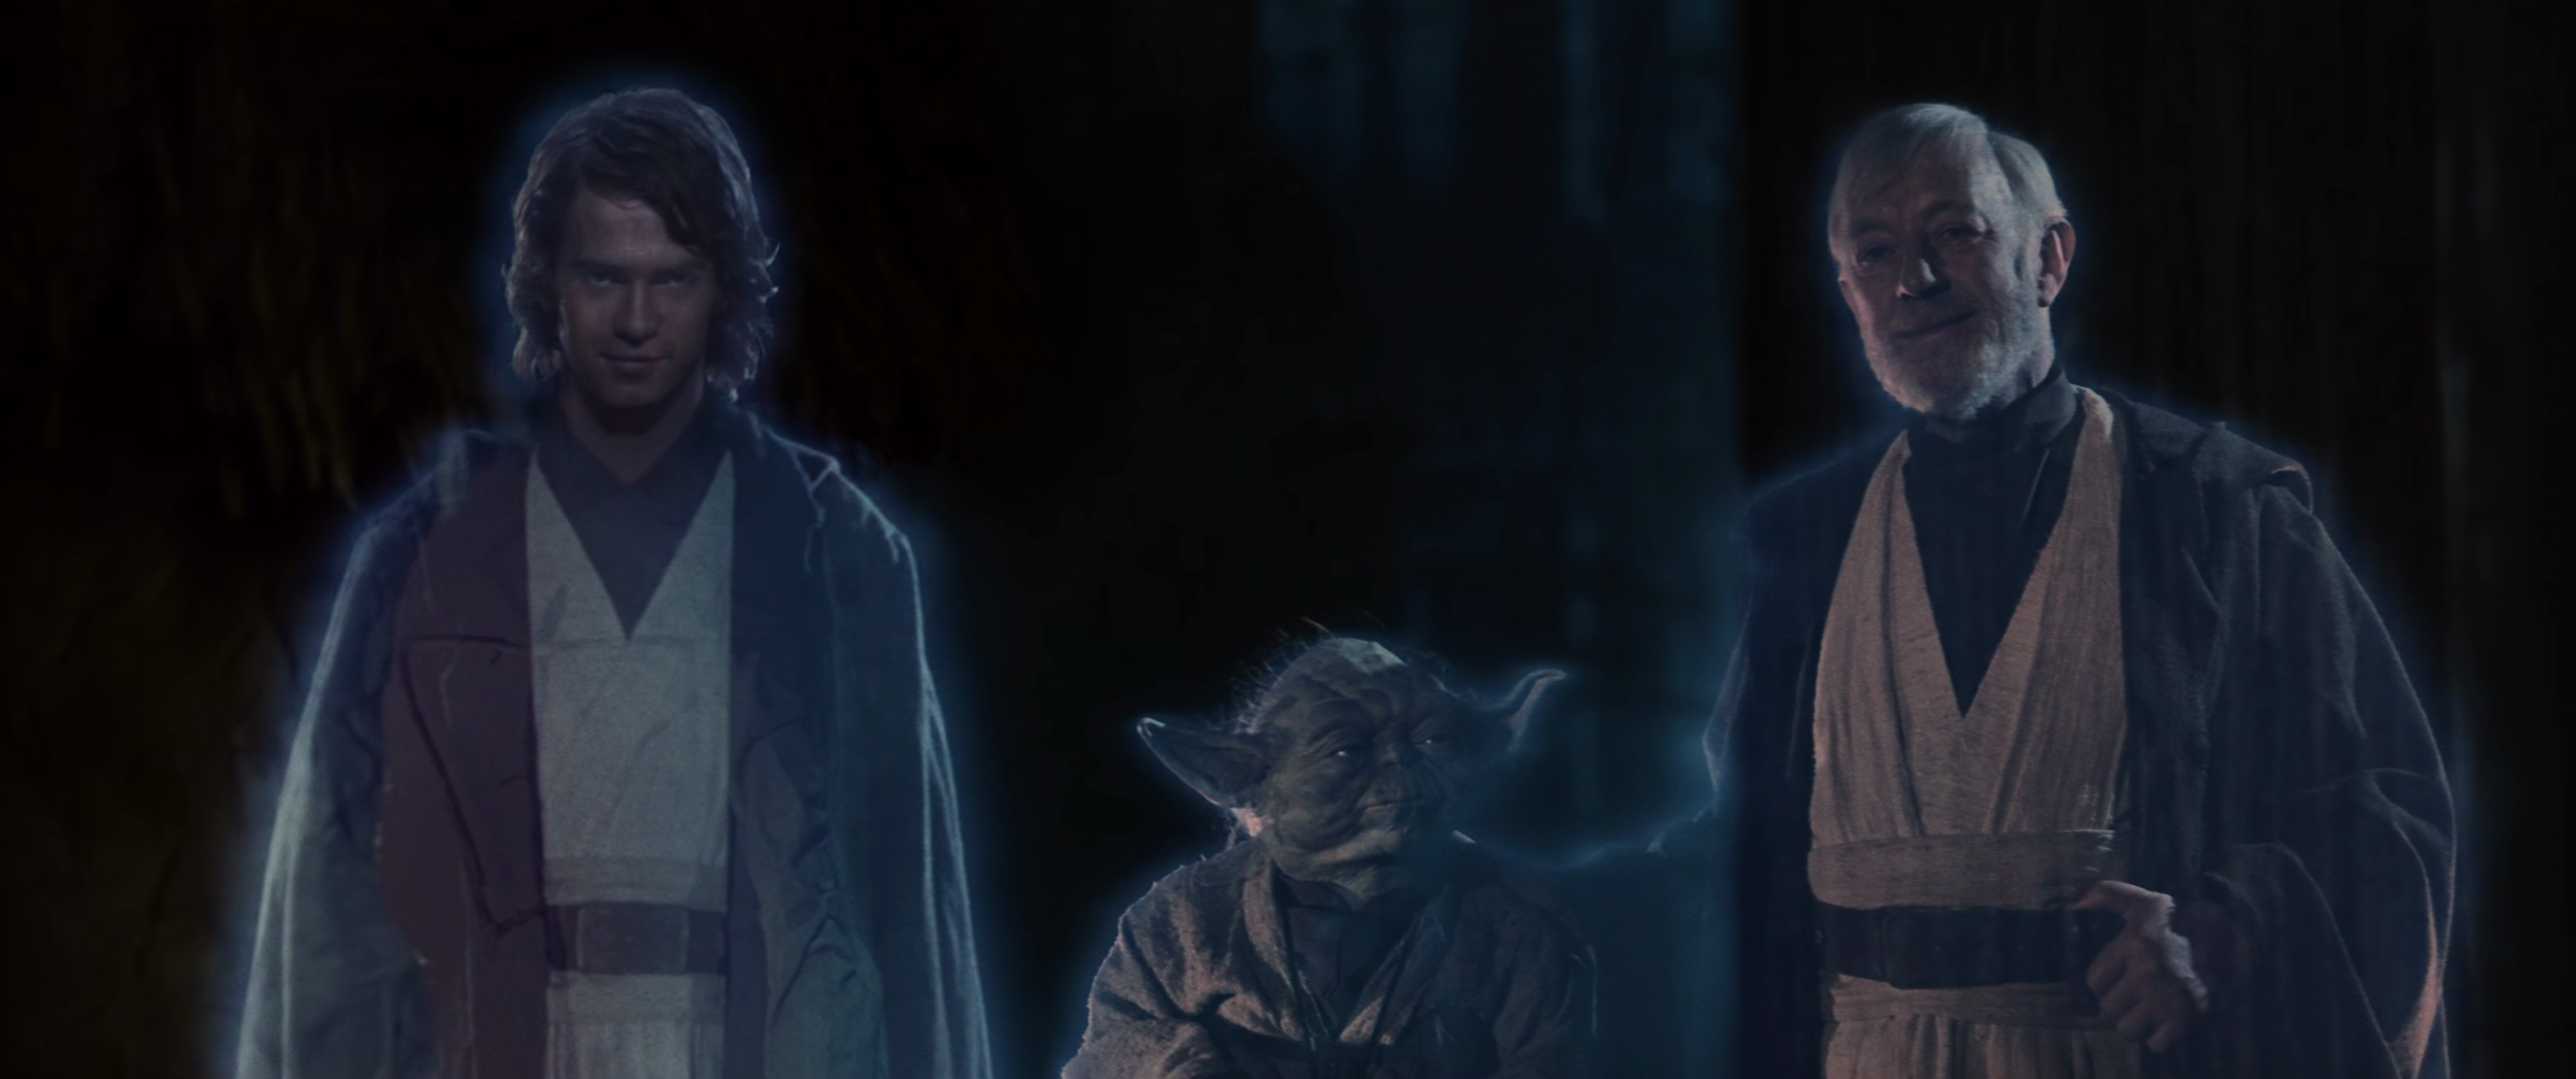
Shortly after his death, what little remained of Anakin's organic body dissolved into the Force, leaving behind only his cybernetics and armor. Despite this, Luke created a funeral pyre for the armor in the traditional Jedi manner, and ignited it as the Rebel celebration commenced. After the armor had mostly burned away, Luke returned to Bright Tree Village, where most of the Rebel commanders were celebrating. After warmly greeting both Leia and Han, Luke paused to gaze into the distance, where he saw the ghost of his father, along with the ghosts of Obi-Wan Kenobi and Yoda, standing on the platform from which he had just come. As all three looked on approvingly at Luke, he briefly smiled at them before Leia arrived to bring him back to the celebration.
The remnants of the Rebel Fleet screened the space directly above Bright Tree Village to prevent debris from the Death Star explosion from harming the area. However, some of the wreckage from the battle, including a Star Destroyer, remained on Endor for years to come. Over the next year after the battle, the scout trooper and his squad sent to the far side of the moon remained in their positions, despite slowly dying one by one. After 12 months, the scout trooper deserted his post and traveled around Endor for a month. Meanwhile, the rebel trooper who got lost after relieving himself also remained on the moon; the two running into each other, neither knowing who won the battle. They briefly fought but made a truce and eventually found their way back to the shield generator, discovering that it had been destroyed and the Rebels had won the battle. Finding power running in the wreckage of a downed Star Destroyer, the pair were able to call for help, but when a passing ship arrived, only the Rebel trooper boarded, as the scout trooper decided that he didn't belong in the Rebellion's new, peaceful society, instead staying on Endor.
After the battle, the Emperor's Hand operative Mara Jade oversaw an alternate-history simulation of the battle. The simulation ended with the capture of Solo and Organa and the destruction of the Rebel Starfleet. The Empire attempted to release a cover story about their devastating defeat at Endor. However, they didn't get that chance, as the Rebel Alliance transmitted the feed of the full details of the battle. As a result, upon hearing of the Emperor's death, citizens on many worlds, such as Naboo and Tatooine, staged various uprisings celebrating the death of Emperor Palpatine and Lord Vader and the defeat of the Imperial Fleet at Endor. At least the Naboo and the Tatooine uprisings galvanized anti-Imperial sentiment, even though some of them were crushed. Bespin was liberated by Lando Calrissian several days after the battle; its inhabitants also celebrated the major Rebel victory. The celebrations, and the violence that came with them, spread to Coruscant, then called Imperial Center, where citizens staged an uprising upon hearing of the Emperor's death. They set off fireworks, attacked Imperial forces in the streets, toppled statues of Palpatine, and desecrated other symbols of the Empire. However, the Empire cracked down on the celebrations, killing citizens and covert Rebels before order was restored. The New Republic finally invaded Coruscant and liberated its people from Imperial rule a little over two years later.
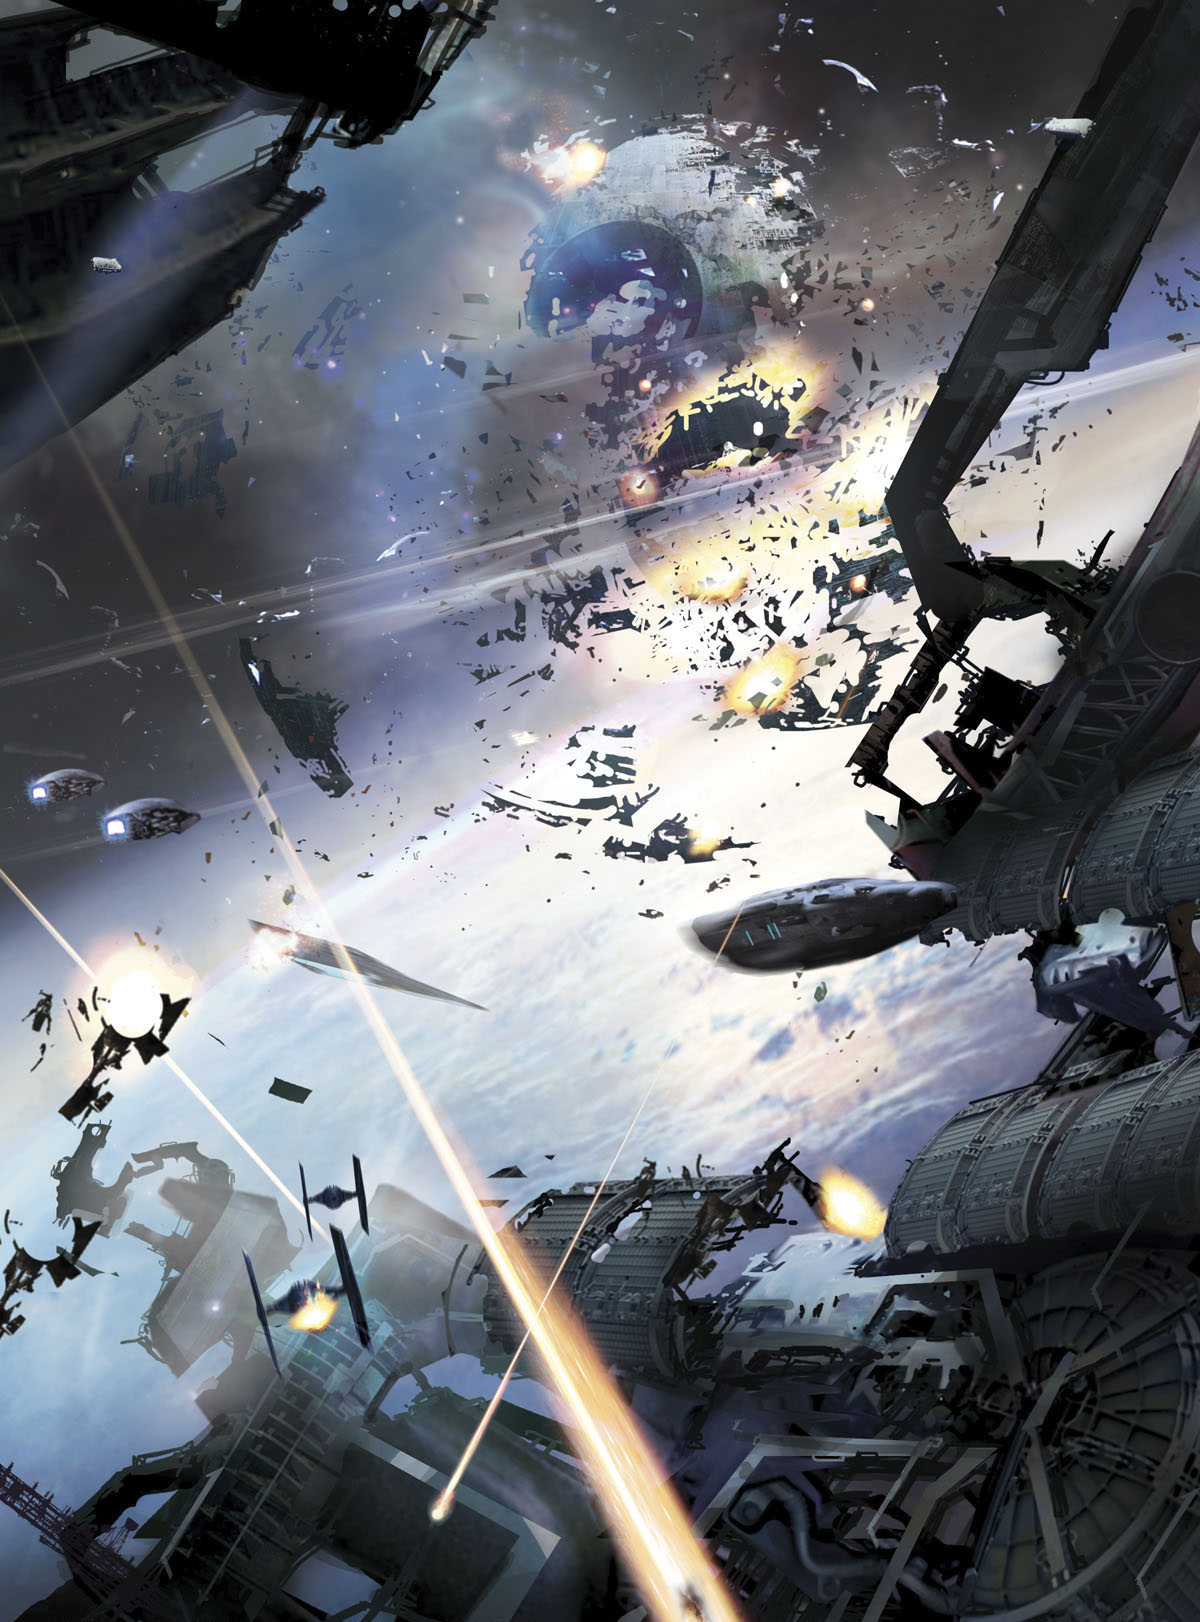
Death Squadron regrouped and underwent repairs near Annaj following the battle, and its surviving commanders began debating their next course of action. Gilad Pellaeon advocated for a return to Endor, believing that despite their losses, Death Squadron remained powerful enough to prevail. Pellaeon was overruled by Admiral Blitzer Harrsk, speaking from his bacta tank, who declared Pellaeon's tactical command invalid after the battle's conclusion. Command now belonged to Admiral Adye Prittick, who notified the rest of the Empire of the crushing defeat. However, Prittick hesitated for so long in making a decision that Harrsk broke away from the fleet, taking the battlecruiser Ilthmar's Fist and five Star Destroyers into the Deep Core until a clear chain of command could be established. This prompted two captains from the Elrood sector to return there to await orders. This left Death Squadron with only twelve Star Destroyers, a force that Prittick deemed too small to guarantee victory. He ordered a withdrawal to Yag'Dhul to defend against an attack into the Core Worlds.
The Alliance of Free Planets, soon succeeded by the New Republic, emerged from the Rebel Alliance, and in the years immediately following the Battle of Endor, Rebel heroes like Wedge Antilles traveled the galaxy to rally support for the burgeoning Republic. Luke Skywalker would fulfill his destiny by establishing the New Jedi Order, eventually becoming its Grand Master and training numerous students in the Jedi arts, including many heroes of Endor and their descendants. Endor would become a battlefield once more when the Nagai invaded the world, though the Alliance of Free Planets defeated the invaders and established its base on Endor.
What began as a trap to permanently eliminate the Rebellion became the catalyst for the Empire's decline and eventual demise. While the Empire persisted for years after the Battle of Endor, it entered a state of decline from which it never recovered. The disintegration and collapse of the Galactic Empire began shortly after the Battle of Endor as news of the Emperor's death spread. Palpatine, intending to rule the galaxy indefinitely, had made no provisions for a successor. Further complicating matters was the fact that Vader, the Emperor's right-hand man and de facto successor as Supreme Commander, had perished alongside Palpatine. With both Sith Lords dead, numerous Imperial potentates carved out personal fiefdoms. This decay and collapse accelerated in 11 ABY after the resurrected Emperor's final death. Years later, the small and largely insignificant Imperial Remnant signed a peace treaty.
While the Rebel Alliance and subsequent governing bodies celebrated their triumph at the Battle of Endor, they weren't the only ones who sought to capitalize on it for their own objectives. Despite the battle's devastating impact on the Empire, efforts were undertaken to present it in a more favorable light for Imperial supporters. For instance, Imperial operatives disseminated claims that the Ewok species had been completely destroyed in the battle's aftermath. Furthermore, a display at the Galactic Museum depicted the second Death Star as a weapon wielded by the Rebel Alliance, rather than the Empire, and characterized Palpatine and Vader as heroic figures who sacrificed themselves to obliterate the battle station after attempts at peaceful resolutions had failed. Despite its divergence from reality, even Wedge Antilles, during an undercover visit to the exhibit on Coruscant, found it to be just as convincing as the actual historical accounts. Similarly, the confrontation between Vader and Luke was later "adapted" into a holothriller production titled Luke Skywalker and the Jedi's Revenge, under the direction of Lord Cronal, the former Director of Imperial Intelligence, as a strategy to manipulate the newly established freedom of expression to champion Imperial ideals. After viewing the holofilm, Skywalker voiced his revulsion at the conclusion, which portrayed him killing Darth Vader to avenge Emperor Palpatine, and also pointed out the film's numerous historical inaccuracies.
As late as 41 ABY, an older Luke Skywalker and his allies were engaged in combat against a resurgent Sith Order under the command of Darth Caedus, Darth Vader's grandson. Following their escape from Coruscant, the Jedi made use of a former Imperial outpost dating back to the Battle of Endor. In a decision he would come to regret, Caedus opted not to search for Luke Skywalker in locations such as Hoth or Endor, which held strong associations with the Jedi Master's Rebel past. However, Caedus ultimately met a similar fate to his Sith predecessors, as he was killed, subsequently redeemed, and peace was once again restored to the galaxy. Around that time, a journalist named Cindel Towani conducted an interview with a surviving stormtrooper from the battle, during which he recounted the brutal acts committed by the Ewoks during the conflict.
The deaths of Vader and Palpatine, along with the destruction of the second Death Star, generated a disturbance in the Force so profound that it caused Leia to collapse upon her return to Endor five years later.
The victory achieved at Endor would be commemorated for many years to come through the celebration of a holiday known as Endor Day.
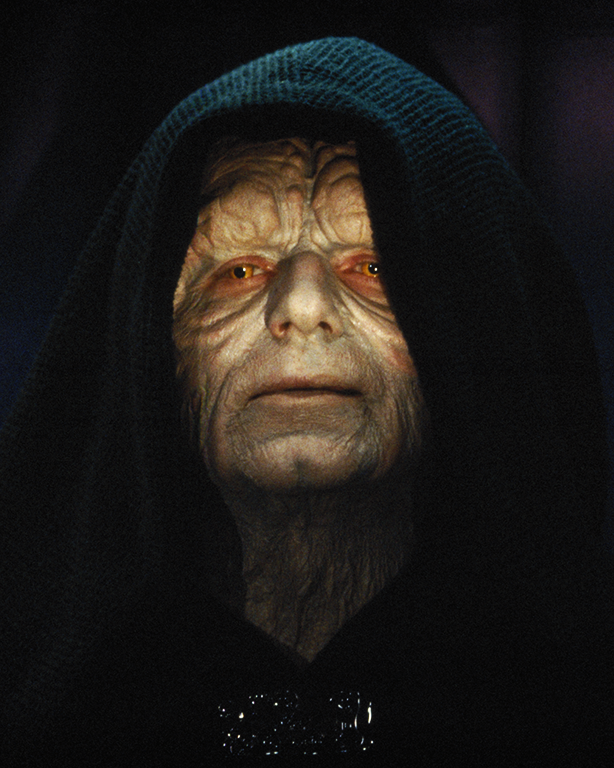
As the Galactic Emperor and supreme commander of the Galactic Empire, Palpatine was also known as Darth Sidious, a Dark Lord of the Sith. Palpatine orchestrated a trap at Endor with the aim of eradicating the Rebellion once and for all. He intentionally leaked misleading information, such as the false claim that the Death Star's weapon systems were not yet fully operational. His scheme involved turning Luke Skywalker to the dark side of the Force, leading him to order Darth Vader to capture the young Jedi. He orchestrated a fatal lightsaber duel between Luke and Vader, attempting to entice Luke to kill his weakened father. When Skywalker refused, Palpatine unleashed Force lightning in an attempt to kill him. However, Darth Vader, in a moment of redemption, hurled Palpatine into the Death Star's reactor shaft, resulting in Palpatine's death and ending his reign of terror. Palpatine's demise plunged the Empire into chaos; even after his return as a clone six years later, the Empire never fully recovered from his loss.

Darth Vader, the Supreme Commander and Dark Lord of the Sith, was once known as Anakin Skywalker, a valiant Jedi Knight. Prior to the Battle of Endor, he and Palpatine plotted to sway Vader's son, Luke Skywalker, to the dark side. Vader transported his son from Endor to the Emperor's throne room aboard the Death Star, where he presented him to Palpatine. There, he engaged in a duel with his son, and despite wielding the power of the dark side and attempting to tempt his opponent, he was defeated and found himself at the mercy of his offspring. When Palpatine tortured Luke for refusing to kill Vader, Vader was conflicted and ultimately killed his Sith Master by throwing him into the Death Star's reactor. Anakin Skywalker was redeemed but succumbed to his injuries, exacerbated by the damage to his life-support system. In the end, he fulfilled his destiny as the Chosen One, restoring balance to the Force.
Piett was an Imperial captain of the Imperial Star Destroyer Accuser who later rose to the rank of admiral, commanding both Darth Vader's flagship, the Executor, and his Death Squadron during the Galactic Civil War. Piett met an instantaneous death when the A-wing piloted by Arvel Crynyd collided with the bridge of the Executor.
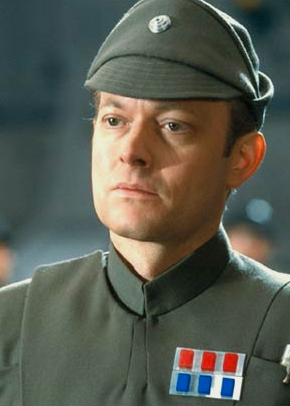
Tiaan Jerjerrod, a native of Tinnel IV, served as the Moff of the Quanta sector during the Galactic Civil War. Shortly before the Battle of Endor, he was assigned to oversee the construction of the Death Star II and serve as its commander. Darth Vader expressed his displeasure upon discovering that the Death Star's completion was behind schedule, a sentiment shared by Palpatine. Consequently, Jerjerrod instructed his subordinates to expedite their efforts. During the battle, the Moff ordered his crew to fire the battle station's superlaser at the Rebel fleet, destroying several of their capital ships. Jerjerrod later positioned the Death Star to destroy Endor's forest moon, acting on Palpatine's instructions to destroy it if the Rebels managed to disable the shield. However, before he could execute that order, he was killed when the Death Star was destroyed by the Alliance.
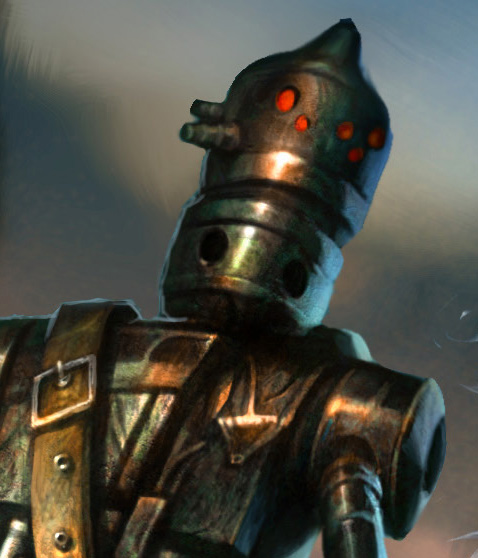
As the first of the IG-88 assassin droids, IG-88A developed a high degree of sentience and conceived a plan to initiate a droid rebellion against the Human-dominated Galactic Empire. Following the destruction of all other IG-88 units, IG-88A gained access to the computer core within the Death Star II, assuming control of the battle station's weapon systems. During the Battle of Endor, IG-88A was in command of the superlaser when it was fired at the Rebel Alliance's capital ships. While the Empire remained unaware of his control over the Death Star, Palpatine grew suspicious when several doors in his throne room inexplicably opened and closed. When the Rebels destroyed the Death Star, IG-88A was obliterated, resulting in the destruction of both his physical form and consciousness. Consequently, his planned revolution never came to fruition.
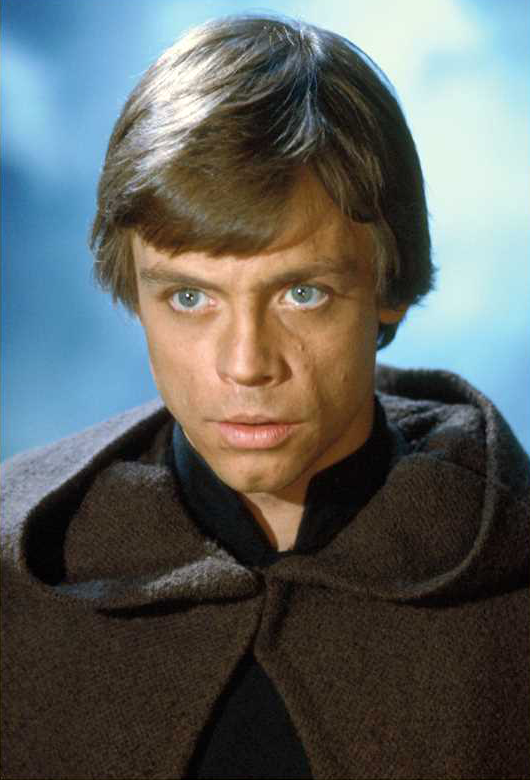
Luke Skywalker, a Jedi Knight and celebrated hero of the Rebel Alliance, was taken aback upon discovering his true parentage as the son of Darth Vader. During the Battle of Endor, he participated in the Rebel strike force that landed on the forest moon of Endor. While there, he revealed to Leia Organa that they were siblings. He then departed to surrender to Vader, who had come in search of him, in order to protect his companions. Aboard the Death Star, Palpatine attempted to corrupt Luke to the dark side of the Force, compelling him to duel his father. Luke succumbed to his anger and emerged victorious, but when he refused to kill his father and join the Emperor, Palpatine attempted to kill him using Force lightning. Ultimately, Vader intervened to save his son by killing the Emperor, redeeming himself in the process and affirming that Luke had been right all along. Skywalker escaped the exploding battle station with his father's body, and despite his sorrow over his father's death, he joined the Rebel celebration on Endor that night. He would go on to serve the New Republic and establish the New Jedi Order, fulfilling his destiny.
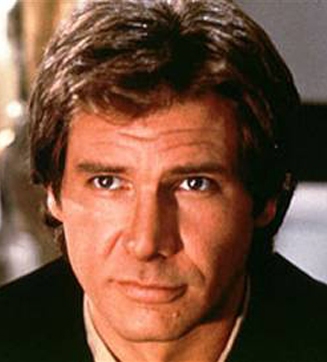
Han Solo, a former smuggler, joined the Rebel Alliance and fought for its cause on numerous missions. After being frozen in carbonite, he was rescued by his friends and subsequently assumed command of a Rebel force at the Battle of Endor. Solo led the strike team sent to the forest moon, and he entrusted his starship, the Millennium Falcon, to his friend Lando Calrissian for the space battle. Upon arriving on Endor, Han, Luke, Leia, Chewbacca, R2-D2, and C-3PO encountered the native Ewoks and enlisted their assistance. Solo and his team infiltrated the shield generator bunker, and after a skirmish in which the Ewoks aided the Rebels, the Death Star's shield was deactivated, enabling Calrissian and the others to attack the superweapon. Following its destruction, Han Solo celebrated alongside the rest of the Rebels in Bright Tree Village. He learned from Leia Organa that Luke Skywalker was her brother, which allowed him to pursue his romantic relationship with her. Later, he served the New Republic, continuing the work he had begun at Endor.

Leia Organa, an Alderaanian princess, rose to become one of the Rebel Alliance's most crucial combatants. During the Battle of Endor, she traveled to the surface of Endor with Luke Skywalker, Han Solo, Chewbacca, and a group of other Rebels. In the moon's forests, she and Luke rode captured speeder bikes against Imperial scout troopers. However, her speeder bike crashed, leaving her unconscious and separated from the others. Wicket W. Warrick, an Ewok, discovered her body, and after she regained consciousness, they became friends. Wicket took her to Bright Tree Village, where the Ewoks provided her with new clothing. Later, the others were brought to the village and were to be sacrificed, despite her protests. However, Luke intervened to prevent the Ewoks from sacrificing the Rebels, and Leia was reunited with them. That evening, Luke made a shocking revelation to Leia: he was her brother, and Darth Vader was their father, leaving Leia stunned. She fought alongside the other Rebels in the assault on the shield bunker and remained on Endor until the battle's conclusion. Following the Alliance's victory, Leia informed Han about Luke's true identity and celebrated with the other Rebel heroes. She would continue to serve the New Republic, established shortly after the Battle of Endor, for many years to come.
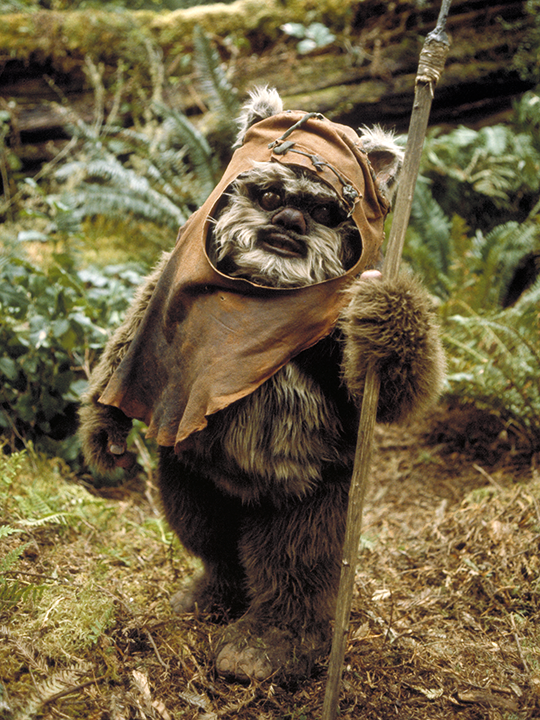
Wicket, a scout from the Bright Tree Village Ewok tribe on Endor's forest moon, encountered members of the Rebel Alliance during the initial phases of the Battle of Endor. While patrolling through the forest, Wicket came across Leia Organa, who had been injured during a speeder bike chase, and formed a friendship with the Human woman. When the rest of the Ewoks captured Luke Skywalker, Han Solo, Chewbacca, C-3PO, and R2-D2, Wicket opposed the religious ritual that the others intended to perform. During the ensuing battle on Endor's surface, Wicket rallied his fellow Ewoks from Bright Tree Village to fight alongside the Rebels. When Solo, Organa, and the rest of the group were in danger, Wicket led an army of Ewok warriors to their aid, overwhelming the Imperial troopers. With the Ewoks' assistance, the Rebels destroyed the shield generator and, subsequently, the Death Star. Wicket participated in the Rebel celebration following the battle.
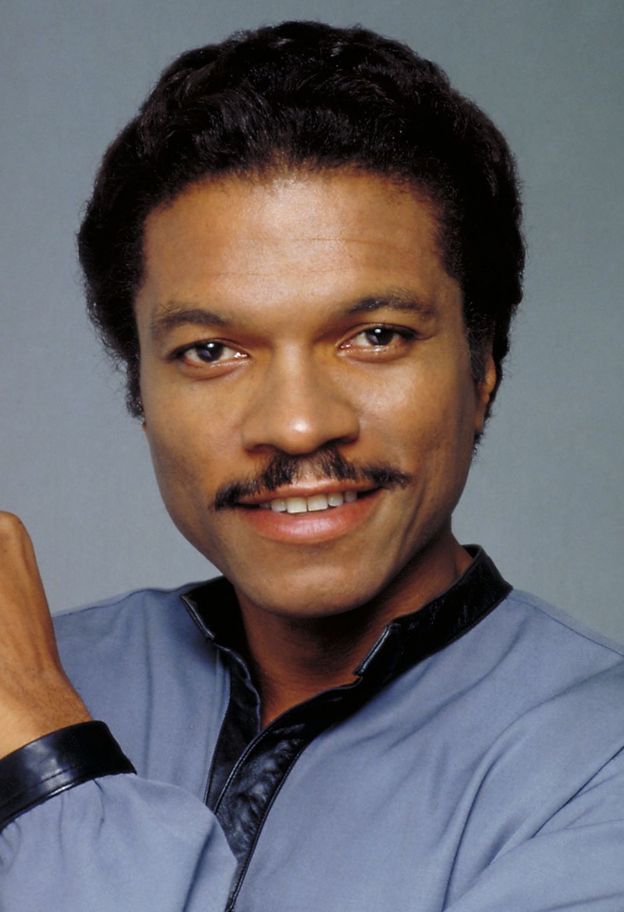
Lando Calrissian, a smuggler, gambler, and friend of Han Solo, followed in his friend's footsteps and joined the Rebel Alliance. During the Battle of Endor, he was promoted to the rank of general by the Alliance. He was assigned to pilot Solo's ship, the Millennium Falcon, which had been his in the past. Lando participated in the space battle while Solo led the ground assault. He fought alongside the Alliance Fleet in orbit of Endor, but he, along with the other Rebels, realized that the battle was a trap, as the Death Star's weapon systems were already operational. Calrissian fought valiantly in the desperate battle, but when Solo's team on the ground brought down the Death Star's shield, the tide turned in favor of the Alliance. Lando, accompanied by Wedge Antilles, flew deep into the Death Star to destroy its reactor core, resulting in the station's destruction. Following the battle, he celebrated with his friends on Endor and continued to fight for the Alliance, and later the New Republic, for many years thereafter.
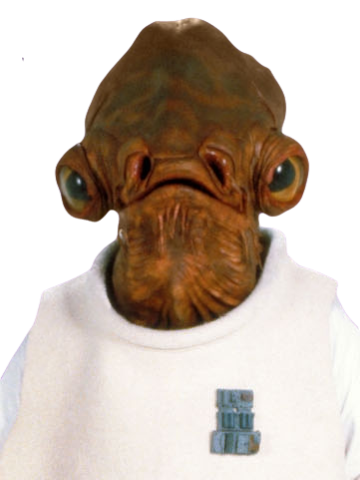
Gial Ackbar, a renowned Mon Calamari admiral, was a former Imperial slave who joined the Rebel Alliance. He was involved in the preparations for the Battle of Endor aboard his flagship, the Home One, and led the Alliance Fleet in the battle over Endor's forest moon. However, he soon discovered that the battle was a trap set by the Empire, as the Death Star's weapon systems were already operational, contrary to the Rebels' expectations. The Alliance suffered heavy casualties, and the battle became a struggle for survival as Ackbar's cruiser came under attack. Nevertheless, Ackbar ordered the fleet to target the Executor in order to buy Calrissian and Antilles enough time to destroy the Death Star's core, and the battle's momentum shifted in favor of the Alliance. Shortly thereafter, Lando Calrissian and Wedge Antilles destroyed the Death Star from within, leading the Alliance to an unlikely victory. Hailed as one of the battle's many heroes, Ackbar would go on to serve the New Republic for over two decades.
The Battle of Endor served as the climactic event in the 1983 film Star Wars: Episode VI Return of the Jedi, the concluding chapter of the original trilogy.
In the ground-based segment of the battle, series creator George Lucas had initially envisioned Wookiees as the primitive race that would assist the Rebellion. However, as he began writing the screenplay for the third installment, he realized that the previous movies had already portrayed Chewbacca as technologically adept, prompting him to revise his plans.
Because he specifically desired a primitive race with no prior connection to technology to be the ultimate victor of the battle, and partly to enhance the film's appeal to children, he conceived the Ewok race and orchestrated their effective triumph in the ground portion of the battle. This decision sparked controversy among both the actors and some fans. Lucas drew inspiration for a primitive race defeating an advanced army from the actions of the Vietcong, and he also used the battle as a means of commenting on United States involvement in the Vietnam War. This inspiration, once revealed, led to further controversy, as it implied that the Galactic Empire represented the American forces.
Regarding the portion of the battle that transpired in the throne room, Return of the Jedi director Richard Marquand stated that Lucas initially wanted the duel to surpass the Duel on Cloud City in scale, but he changed his mind during filming, saying: "George is very blunt. He said, 'It's just a couple of guys banging sticks against each other. Don't worry about that. It is bigger because of what is going on in their heads.'"
A deleted scene expanded upon the actions within the bunker during the second attempt: Specifically, where Han Solo and his unit encountered a stormtrooper squad inside the control room. This event eventually appeared during gameplay in Star Wars: Rogue Squadron III: Rebel Strike.
The junior novelization of Return of the Jedi, written after the completion of the prequel trilogy, delves into Vader's thoughts as he witnesses Palpatine torturing Luke, suggesting that the memory of Padmé and her love penetrated his consciousness, and that the realization that it was her son being tortured rekindled Anakin's identity and compelled him to turn against the Emperor. The Life and Legend of Obi-Wan Kenobi depicts Obi-Wan observing the duel from the netherworld of the Force. As Luke refuses to kill Vader and the lightning attack commences, Kenobi watches in horror as Luke, and with him the hope of the Jedi, is seemingly destroyed by the Dark Lord of the Sith. Kenobi can scarcely believe his eyes when the friend he had written off as hopelessly consumed by the dark side reasserts himself and saves his son.
Lawrence Kasdan remarks: "My sense of the relationship between Vader and the Emperor is that the Emperor is much more powerful than Vader and that Vader is very much intimidated by him. Vader has dignity, but the Emperor in Jedi really has all the power."
The fate of the Ewoks has been a topic of discussion in the Endor Holocaust theory, which posits that Endor, along with its Ewok inhabitants, was inevitably destroyed by falling debris from the Death Star. This theory has been championed by Curtis Saxton's Star Wars Technical Commentaries website, but it has been refuted by subsequent source materials, such as Pablo Hidalgo's explanation in a question-and-answer column of Star Wars Insider 76. Hidalgo asserted that a hyperspace wormhole transported debris from the Endor system to the other side of the galaxy, as with Darth Vader's glove in The Glove of Darth Vader. Hidalgo also argues that the laws of physics can be disregarded in this instance because George Lucas desired a positive outcome for the protagonists. Two of the Star Wars: Legacy of the Force novels are set on Endor; these depict the moon and its inhabitants as thriving, with only minor damage to their habitats.
The battle was initially presented in the Return of the Jedi novelization, which contained slight discrepancies from the film, as did some other spin-off materials. Furthermore, the re-releases of the original trilogy introduced minor alterations to certain scenes, including those from the Battle of Endor. While most were insignificant changes in color, sound effects, or music, brief scenes of celebrations were added to the end, and Anakin Skywalker's Force ghost was changed from Sebastian Shaw's face to that of Hayden Christensen, who portrayed Anakin in the prequels. Lucasfilm has stated that the 2004 DVD versions are the canonical depiction of the events in the trilogy, including the Battle of Endor.
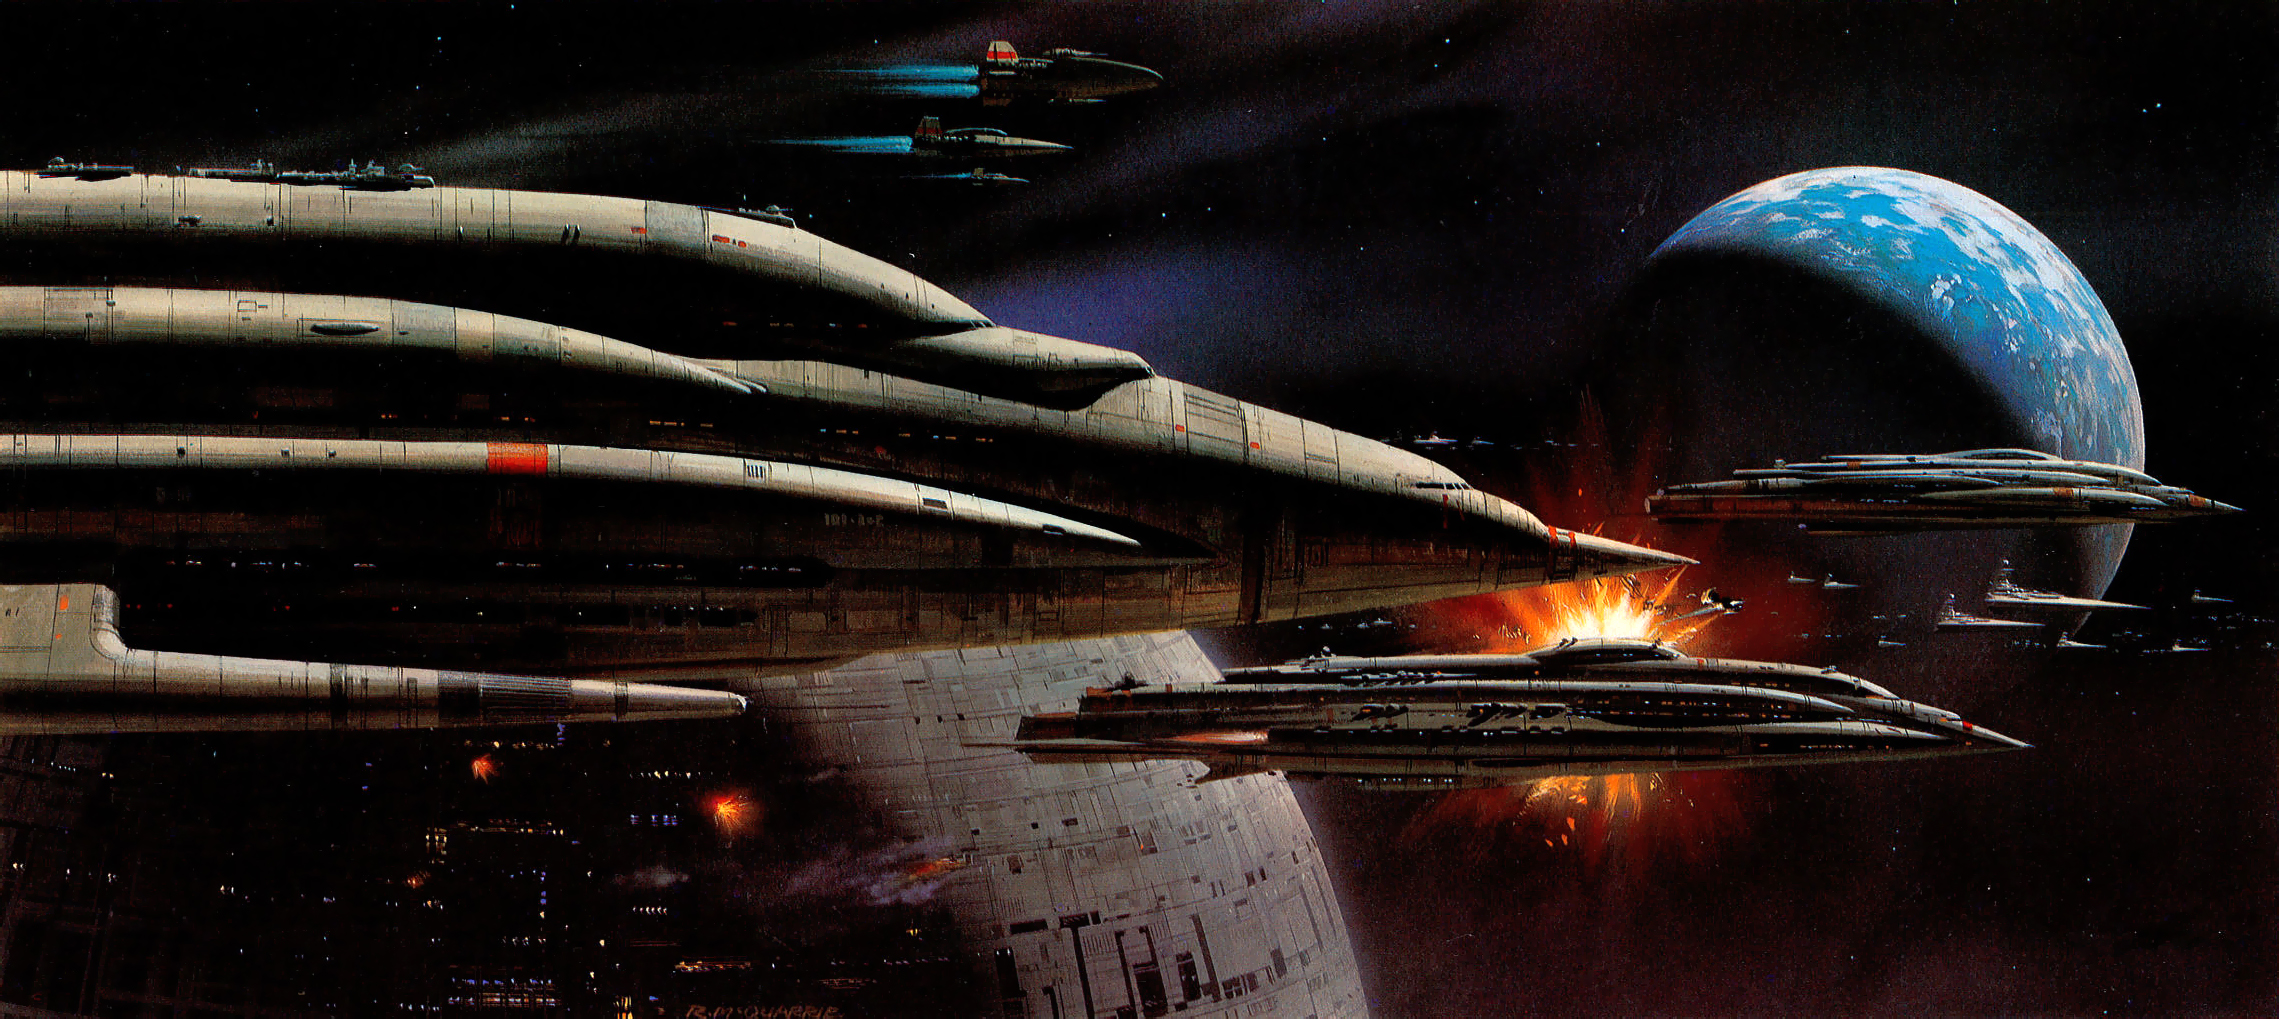
The battle depicted in Return of the Jedi inspired numerous other spin-off materials, including television series and video games. Many characters with only brief appearances in the movie were given names and backstories. The Ewoks received considerable attention, leading to a television series, as well as two TV movies, Caravan of Courage: An Ewok Adventure and Ewoks: The Battle for Endor.
The Battle of Endor was also reflected in various toys, such as a large LEGO playset, as well as numerous video games, such as X-Wing Alliance and Force Commander. Star Wars: Battlefront and Battlefront II allowed gamers to replay the battle as they wished, therefore making its portrayal non-canon. Star Wars Battlefront: Renegade Squadron, released in 2007, and its 2009 sequel, Elite Squadron, both had Endor missions in their campaigns. These showed the battle from different viewpoints, the first from Col Serra's Renegade Squadron and the second from X2, with the objectives in both paralleling the events in Return of the Jedi. LEGO Star Wars II: The Original Trilogy and its remake, The Complete Saga, both had four missions related to the Battle of Endor, though the portrayal of the events varied from that of the film. Because the events in the game are treated with a humorous approach and do not strictly follow the story, this article assumes that they are non-canon.
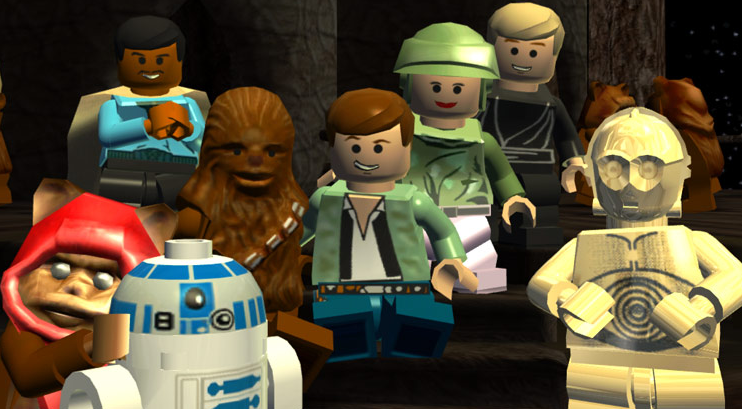
The real-time strategy game Star Wars: Galactic Battlegrounds, released in 2001, featured two distinct portrayals of the Battle of Endor. One appeared in the Leia Organa (Rebel/New Republic) campaign, while the other was part of the Darth Vader (Imperial) campaign. The latter was an alternate timeline scenario, with Mara Jade as the narrator. Players commanded a substantial Imperial force, charged with defending the shield generator against Rebel and Ewok attacks. After a 15-minute gameplay session, the scenario concluded, promising the "commander" a statue on Coruscant. Conversely, the Rebel mission hewed more closely to the events depicted in the film. Players controlled a small squad consisting of 18 troopers, 2 medics, and key characters like Organa, Solo, and C-3PO. This group advanced, encountered Wicket, and subsequently fought through a stormtrooper encampment. At the subsequent base, they successfully destroyed a command center. Following the destruction of that base, they reached the Ewok village, gaining reinforcements, including Chewbacca piloting an AT-ST. The force then proceeded towards the shield generator bunker, breached it, and demolished the generator. The game's official strategy guide advised Imperial players to aggressively counter the incoming waves of attackers. For the Rebel mission, it suggested utilizing Ewok gliders, once acquired, for scouting and turret destruction. Both missions were also incorporated into the game's 2002 expansion, titled Star Wars: Galactic Battlegrounds: Clone Campaigns.
The Battle of Endor was also a recurring element within the Star Wars: Rogue Squadron series of video games, often serving as the concluding missions of the campaign. In Rogue Leader, in addition to four different missions that served as a prelude to the battle, the Battle of Endor itself was divided into two distinct missions. The first, simply named "Battle of Endor," depicted the initial stages of the space battle. The second, "Strike at the Core," centered on the primary objective of penetrating the reactor core and destroying it. Similarly, in Rebel Strike, the final missions revolved around the Battle of Endor. However, these missions, collectively labeled the Endor campaign in the mission selection menu, concentrated on the ground-based aspects of the conflict. The first mission, "Speeder Bike Pursuit," followed Luke and Leia's efforts to prevent scout troopers from reporting their presence on Endor, culminating in Luke's lightsaber kill of the final scout, mirroring the film. The second mission, "Triumph of the Rebellion," focused on the ground battle itself, specifically Chewbacca's journey to assist the Rebels at the bunker after commandeering an AT-ST, and Han Solo's setting of detonation charges and his final confrontation with Sarkli. Furthermore, the Endor campaign in the same game featured a bonus mission called "Attack on the Executor." As the title indicates, it depicted the events occurring between Admiral Ackbar's order to target the Executor to allow Calrissian more time and the Executor's eventual destruction. Notably, "Attack on the Executor" was the only bonus mission in Rebel Strike's single-player mode that did not incorporate footage directly from the film, instead utilizing original cinematics. Furthermore, the Luke and Wedge campaigns both culminated in a direct lead-in to the Endor campaign (the former through the Battle of the Great Pit of Carkoon, and the latter through the Fondor shipyard assault, the latter of which contained an indirect reference to the Battle of Endor through the debriefing between Vader and Palpatine where Palpatine implies he deliberately allowed the Rebels to destroy the prototype cloaking device-equipped Executor star dreadnought to make them overconfident and lead them into his trap).
The Super Nintendo Entertainment System title Super Star Wars: Return of the Jedi presented the duel on the Death Star with some variations: Vader ambushes Luke through a door and utilizes Force Flight to some extent, and Luke battles Emperor Palpatine directly, rather than simply being tortured as in the movie. Furthermore, Palpatine also uses Force Flight during the latter part of the battle, ultimately falling into the reactor after Luke defeats him. Despite these alterations, Vader's redemption was included, incorporating his final moments and the appearance of his Force ghost.
According to author Timothy Zahn, if Grand Admiral Thrawn had been in command during the Battle of Endor, the Rebels would have almost certainly been defeated.
An alternate, non-canonical version of the battle was presented in the comic Star Wars Infinities: Return of the Jedi, which reimagined the film's events. While retaining the same characters, locations, and conflicts as the movie, the storyline diverges significantly.
In this altered narrative, Luke is captured by the Empire after departing Dagobah, but only after sending two messages: one revealing to Leia that they are siblings and Vader is their father, and another urging the Rebel fleet not to attempt a rescue. Leia travels to the Death Star to rescue him, but she is captured and brought before the Emperor.
A Rebel team lands on Endor and successfully destroys the shield generator. Han Solo, freed from carbonite on the Home One, operates the turrets on the Millennium Falcon while still suffering from blindness.
Aboard the Death Star, Palpatine commands Vader to execute Leia, but Luke intervenes, engaging Vader in a duel. Luke attacks Vader's legs, but Vader jumps and kicks him in the face. Palpatine offers Luke a final opportunity to join him or face death. Leia attempts to intervene, but Palpatine uses Force lightning to subdue her. Luke declares his unwillingness to fight and challenges Vader to kill both of his children, shocking both Vader and Palpatine with the revelation. Undeterred by Luke's plea to abandon the dark side, Vader continues the battle.
When Wedge Antilles and his X-wing squadron destroy the Death Star's reactor core, Palpatine escapes, and Luke severs Vader's right arm. However, the Dark Lord retains sufficient power to use the Force to summon his lightsaber to his left hand and force Luke to his knees. Luke reiterates his refusal to fight and dares Vader to strike him and Leia down, expressing his belief that Vader will not. In response, Vader collapses to his knees, begging for forgiveness, thus turning away from the dark side and transforming into Anakin once more, donning an all-white version of his armor.
The Rebels, accompanied by the redeemed Anakin, embark on a mission to apprehend the escaped Palpatine.
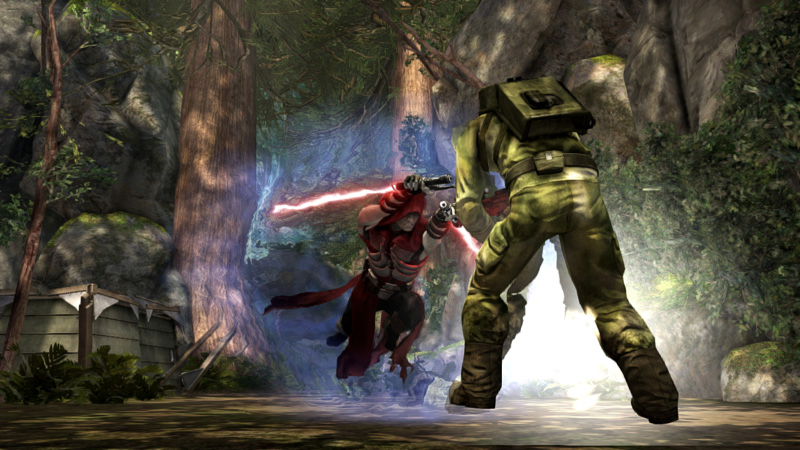
Star Wars: The Force Unleashed II features a downloadable bonus level with a non-canonical depiction of the Battle of Endor. Darth Vader's Dark Apprentice, the only stable clone of Galen Marek, secretly travels to Endor to sabotage the Rebel attack on the Imperial shield generator bunker. After landing the Rogue Shadow on the forest moon, the apprentice battles his way to the bunker's secret entrance, eliminating numerous Rebels and Ewoks. He kills Han Solo and Chewbacca before entering the base.
The remaining Rebels are engaged in a firefight with the bunker's Imperial guards. The apprentice slaughters everyone in his path before confronting Princess Leia Organa, who reveals herself to be a trained Jedi due to her twin brother's death in the Battle of Hoth. Wielding a yellow-bladed lightsaber, the Jedi Princess engages her Sith nemesis. Although Organa impresses him with her combat skills and Force potential, she is ultimately defeated by the more experienced Sith apprentice. Organa makes her final stand at the top of the SLD-26 planetary shield generator, where she dies after the apprentice fatally stabs her through the abdomen with one of his dual lightsabers, ending the duel and the Alliance's only chance to destroy the second Death Star.
In the incomplete battle station's mooring tower throne room, Emperor Palpatine and Darth Vader observe the space battle through the circular viewport. As the Galactic Empire gains the upper hand, Palpatine declares the Rebellion destroyed, restoring peace to the Empire. However, he reveals his knowledge of the secret cloning project on Kamino, specifically Vader's plan to overthrow him using the dark clone of the original apprentice. Palpatine threatens to execute Vader for treason, mockingly calling him "Skywalker." Vader ignites his lightsaber but is unable to defend himself against Palpatine's Force lightning attack. Defeated and kneeling, Vader is powerless to prevent Palpatine from sending Captain Sarkli and his troops to kill the clone.
Meanwhile, the Dark Apprentice meditates near Leia Organa's corpse. As a group of Imperial Star Destroyers approaches, the clone opens his eyes, reflecting his complete immersion in the dark side of the Force.
While the Battle of Endor serves as the conclusion to both the original Star Wars trilogy and the Star Wars movie saga within the Legends continuity, it did not mark the end of the overall Star Wars narrative. George Lucas, consistently rejecting the possibility of future movies, maintained that the saga concludes with Anakin Skywalker's death, considering him the tragic hero. Nevertheless, numerous Expanded Universe stories explored the fates of the Rebels and Imperials in the years following Endor. The Truce at Bakura, released in 1994, detailed the immediate aftermath of the Battle of Endor, as did the Marvel Star Wars comics. The Thrawn Trilogy, published between 1991 and 1993, depicted the ongoing war five years after the Battle of Endor, with the New Republic facing a resurgent Empire. Subsequent works introduced more post-Endor narratives, including Palpatine's resurrection as a clone and Luke Skywalker's establishment of the New Jedi Order, along with the conflicts and challenges it faced. Both the Battle of Endor and all other events in the Star Wars movies, and the Expanded Universe material were combined to form part of the whole Star Wars epic.
However, this changed with the canon reboot in April 2014 (two years after Disney's acquisition of Lucasfilm and the Star Wars rights), which rendered the Expanded Universe non-canon. The Star Wars sequel trilogy, released between 2015 and 2019, presented the new canonical continuation of the story beyond the Battle of Endor.