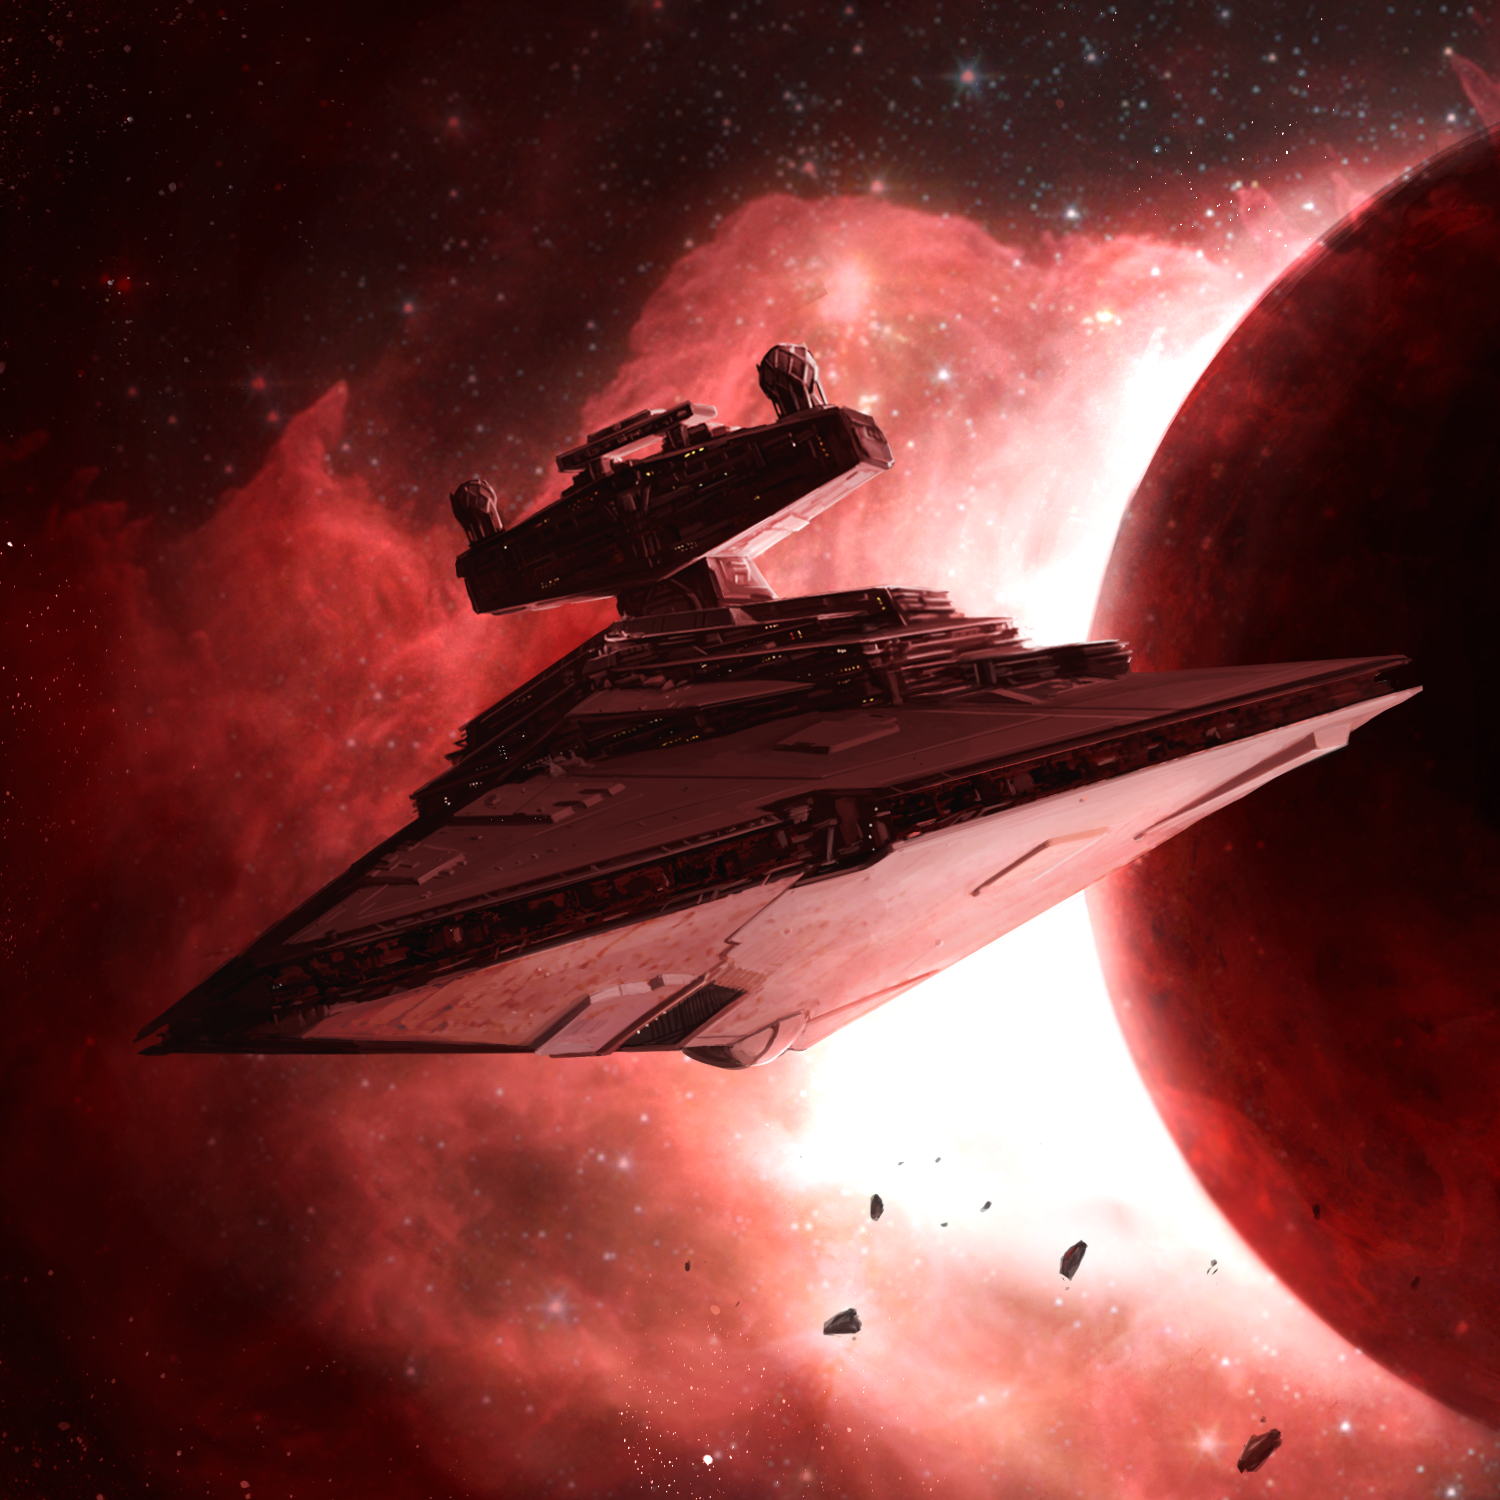
Sovereign
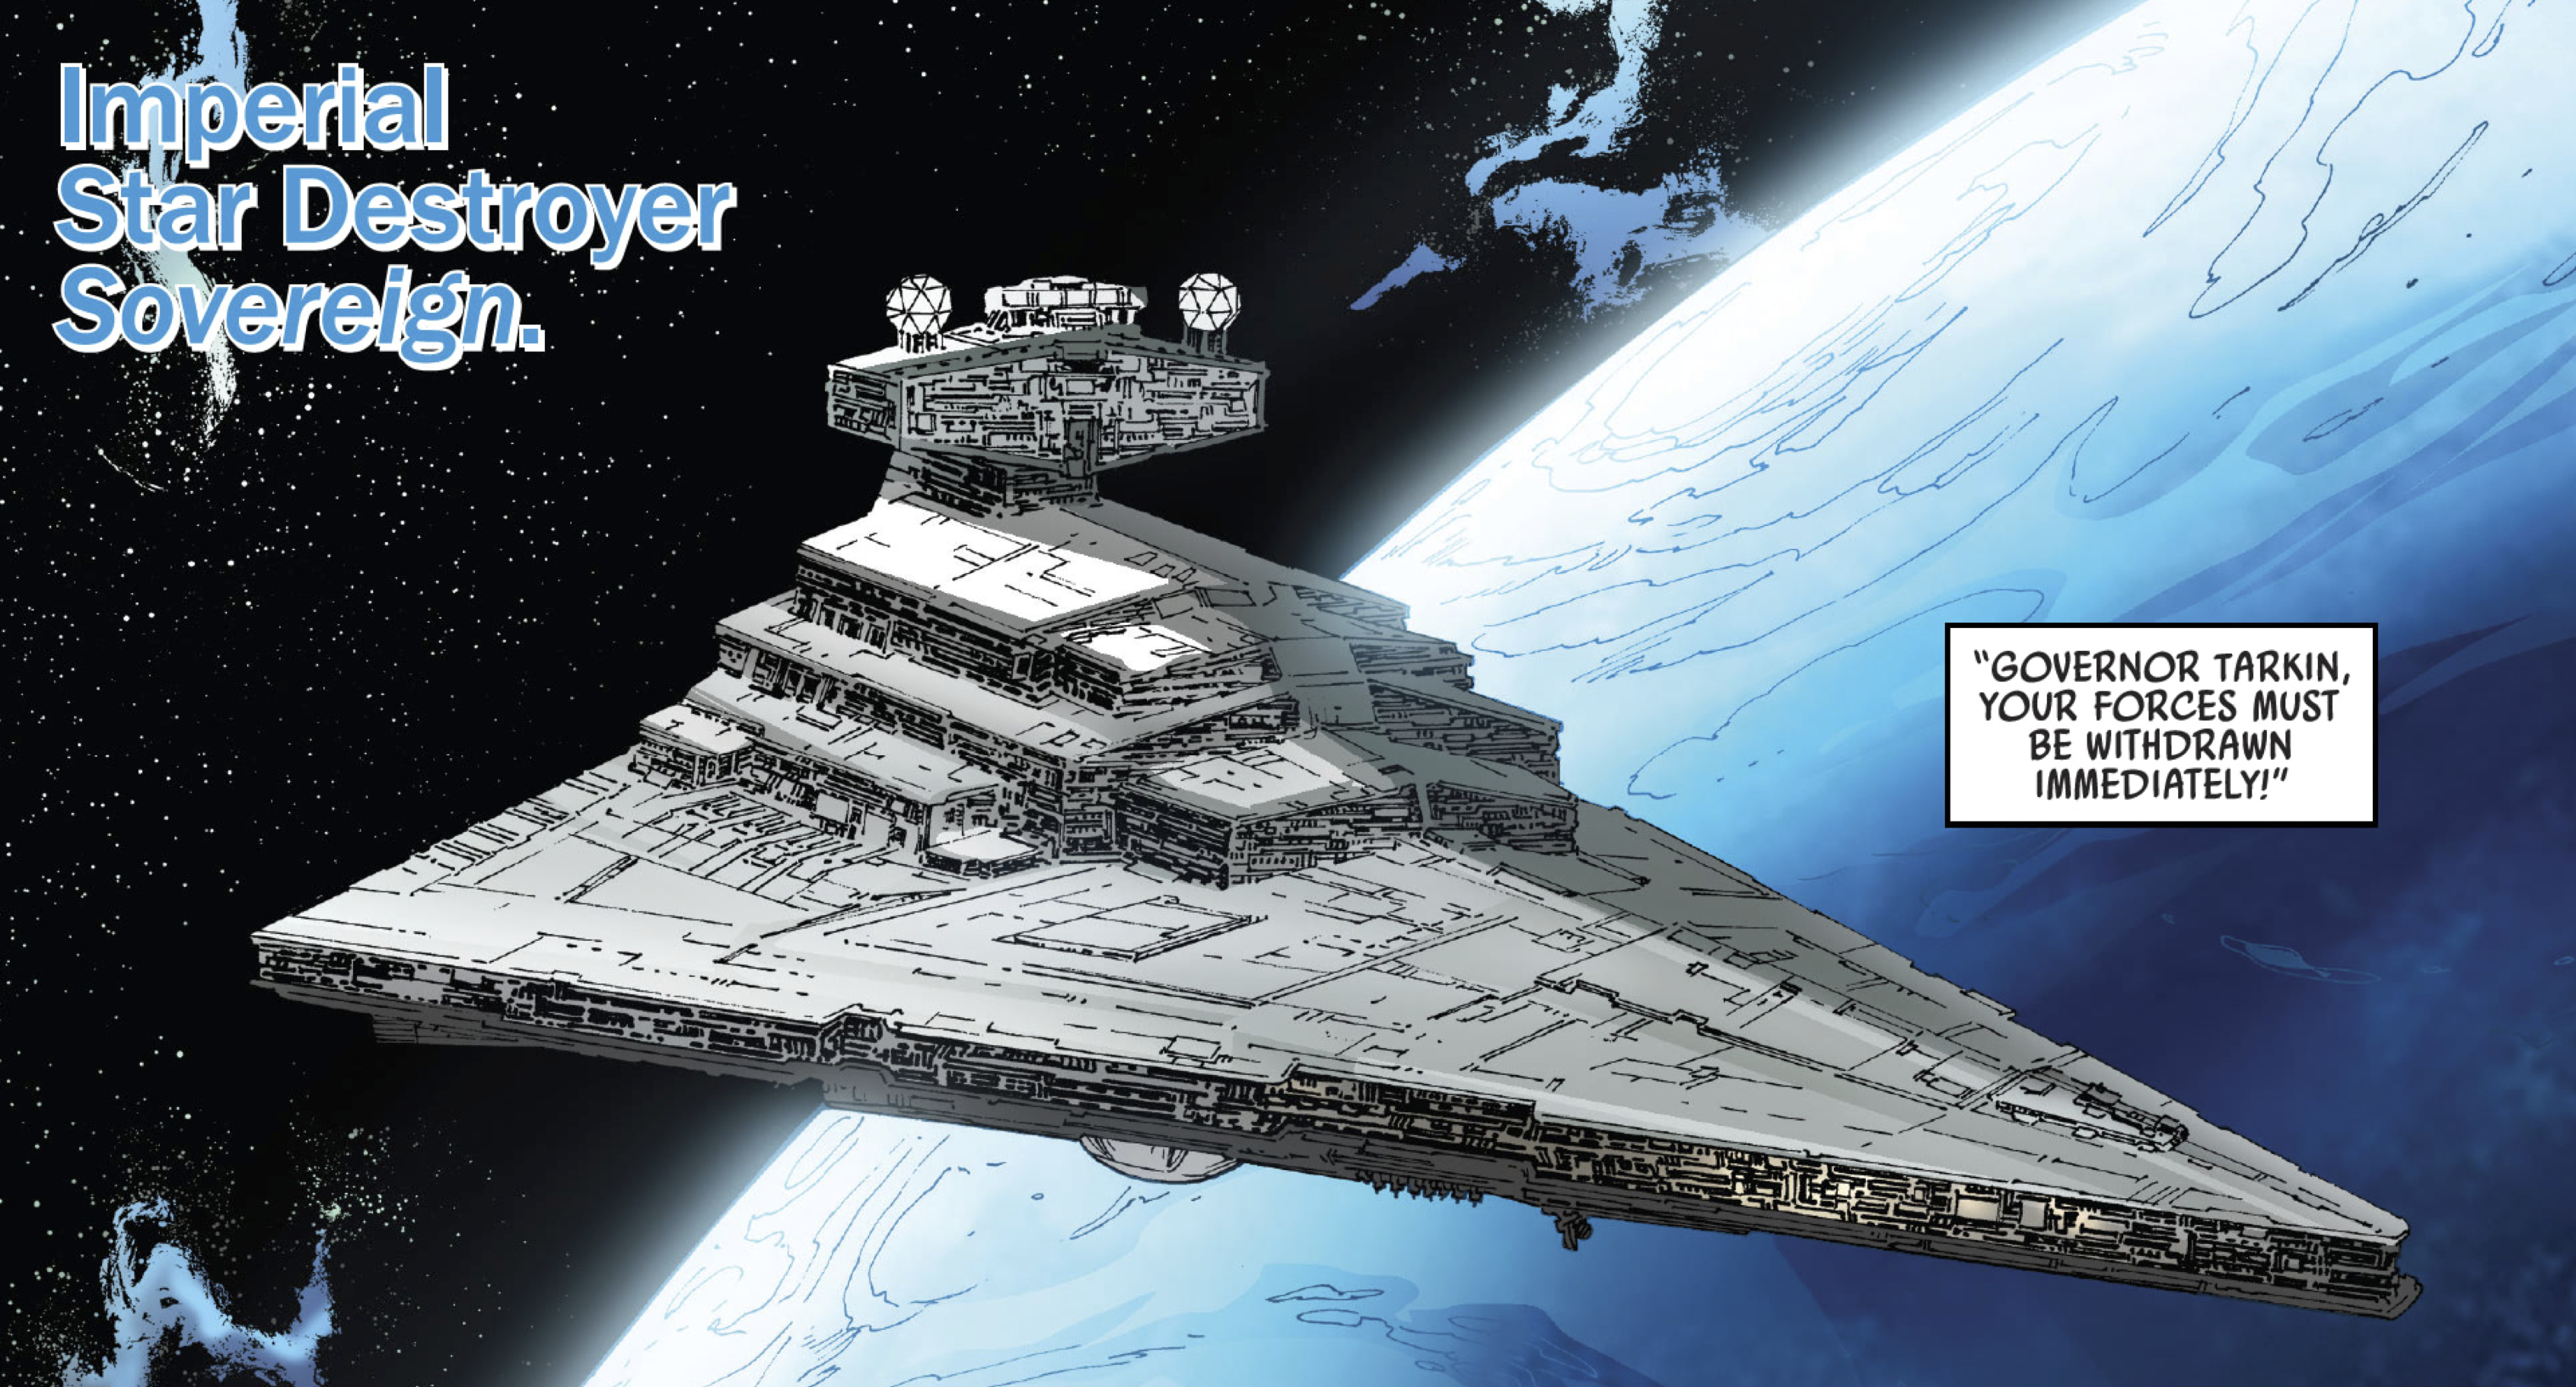
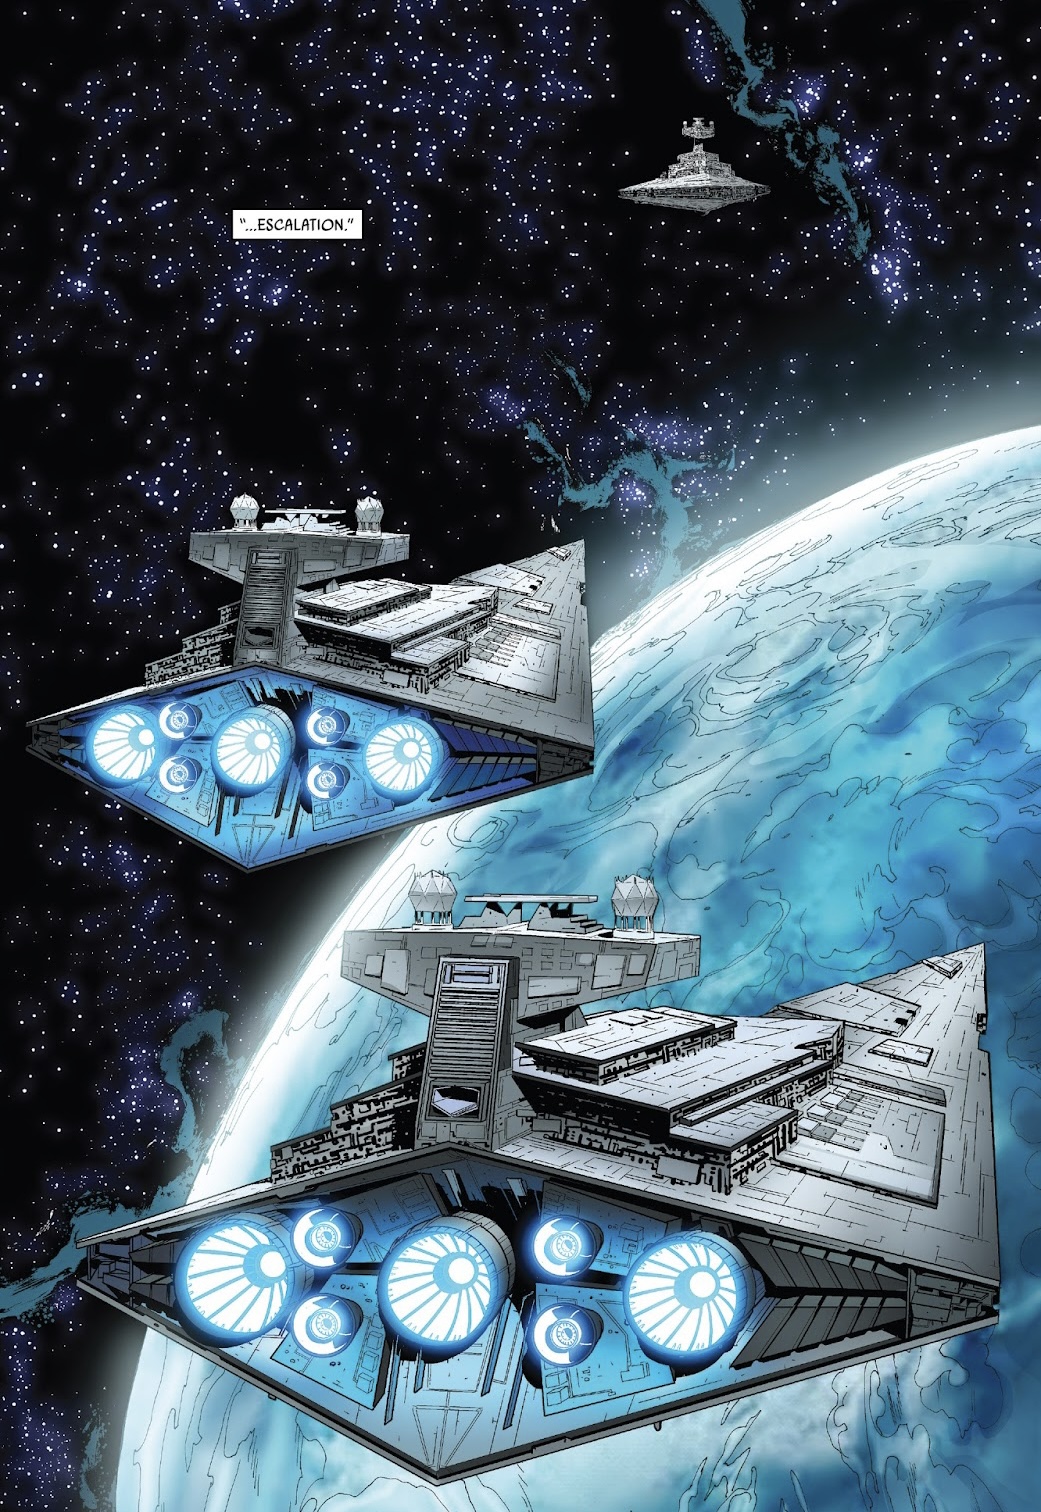
The Sovereign, an Imperial I-class Star Destroyer, served the Galactic Empire's starfleet. It functioned as the flagship of Grand Moff Wilhuff Tarkin for a period preceding the Battle of Yavin by several years.
Characteristics
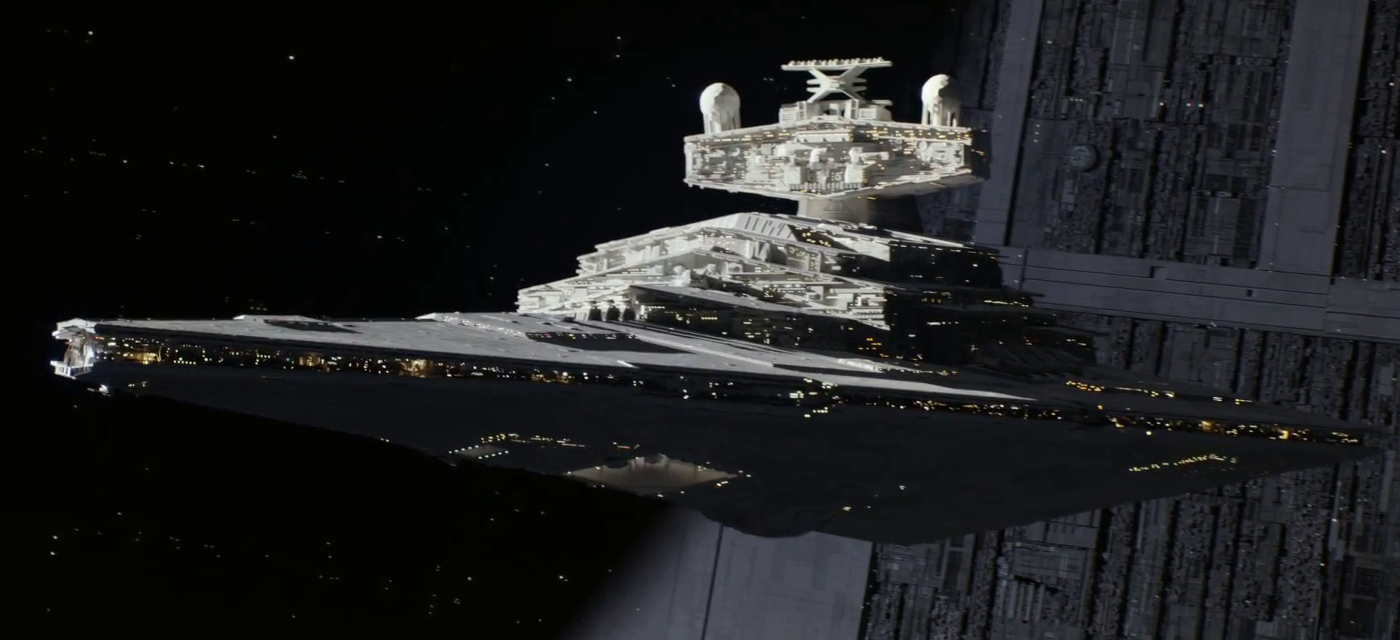
The Sovereign, an Imperial I-class Star Destroyer, had dimensions of 1,600 meters in length and 900 meters in width. It utilized three Destroyer-I ion engines for propulsion, along with four Gemon-4 ion engines for emergency situations. This Star Destroyer incorporated a hyperdrive system and derived its power from a solar ionization reactor positioned on its ventral hull, supplemented by auxiliary power sources. The ship's engine functions were managed from an engine room, which contained elevated walkways connecting various work stations. Furthermore, the vessel included multiple interrogation chambers within the cell wing, along with life support and communication systems. Wilhuff Tarkin maintained an office onboard, furnished with a desk and several chairs. Turbolifts provided access to the various decks of the ship.
The Sovereign was armed with XX-9 heavy turbolaser batterys for orbital bombardment, and also transported ground vehicles for surface warfare. In 18 BBY, the starship carried TIE/ln space superiority starfighters, Lambda-class T-4a shuttles, Low Altitude Assault Transport carriers, All Terrain Armored Transports, All Terrain Defense Pods, and K79-S80 Imperial Troop Transports. By 4 BBY, the Sovereign also housed Sentinel-class landing craft and one TIE Advanced v1, specifically the Inquisitor's TIE Advanced. These vehicles were stored in the hangars of the Sovereign, situated in an open bay on the ventral side. The fore and aft sections of this bay contained enclosed hangars, with the aft hangar being designated as Bay 5.
The Sovereign's bridge was located within its bridge tower. It offered a panoramic view of space through triangular viewports, with consoles and an elevated walkway behind them spanning the bridge's perimeter. This walkway also bisected the bridge, separating two sunken crew pits with console banks and seating for technicians. The walkway extended to the rear of the room, which was secured by doors. A tractor beam targeting array and two deflector shield generator domes were positioned atop the bridge tower.
History
Invasion of Mon Cala
Potential for diplomacy
In 18 BBY, Emperor Palpatine gave the order to invade Mon Cala, a planet in the Calamari sector, intending it to serve as a warning of the consequences of defying the Empire. Palpatine assigned Tarkin to oversee the military operations, while Darth Vader, the Dark Lord of the Sith, was tasked with determining if any Jedi were present. Subsequently, the Sovereign was positioned in orbit around Mon Cala, with Governor Tarkin, Imperial Ambassador Telvar, Commander Jordo, the Imperial Security Bureau officer in charge of Mon Cala, Colonel Bergon, and Major Rantu all present on board. Upon their arrival, Rantu's teams initiated invasion simulations.
Telvar eventually departed the Star Destroyer with a squad of stormtroopers aboard a Lambda-class shuttle to begin negotiations with the native Mon Calamari at Dac City. On the Sovereign's bridge, Tarkin briefed Rantu, Bergon, and Jordo, discussing the challenges that the planet's seas posed to an invasion. This could be mitigated by using Mon Cala's limited above-water cities as staging areas. Jordo then suggested manipulating the two species on the planet, the Mon Calamari and the Quarren, against each other through the use of propaganda. Bergon questioned why the Sovereign, designed for orbital bombardment, was not utilizing its XX-9 turbolasers instead of the planned complex assault. Tarkin responded that the Empire's goal was to control the valuable world, not destroy it.
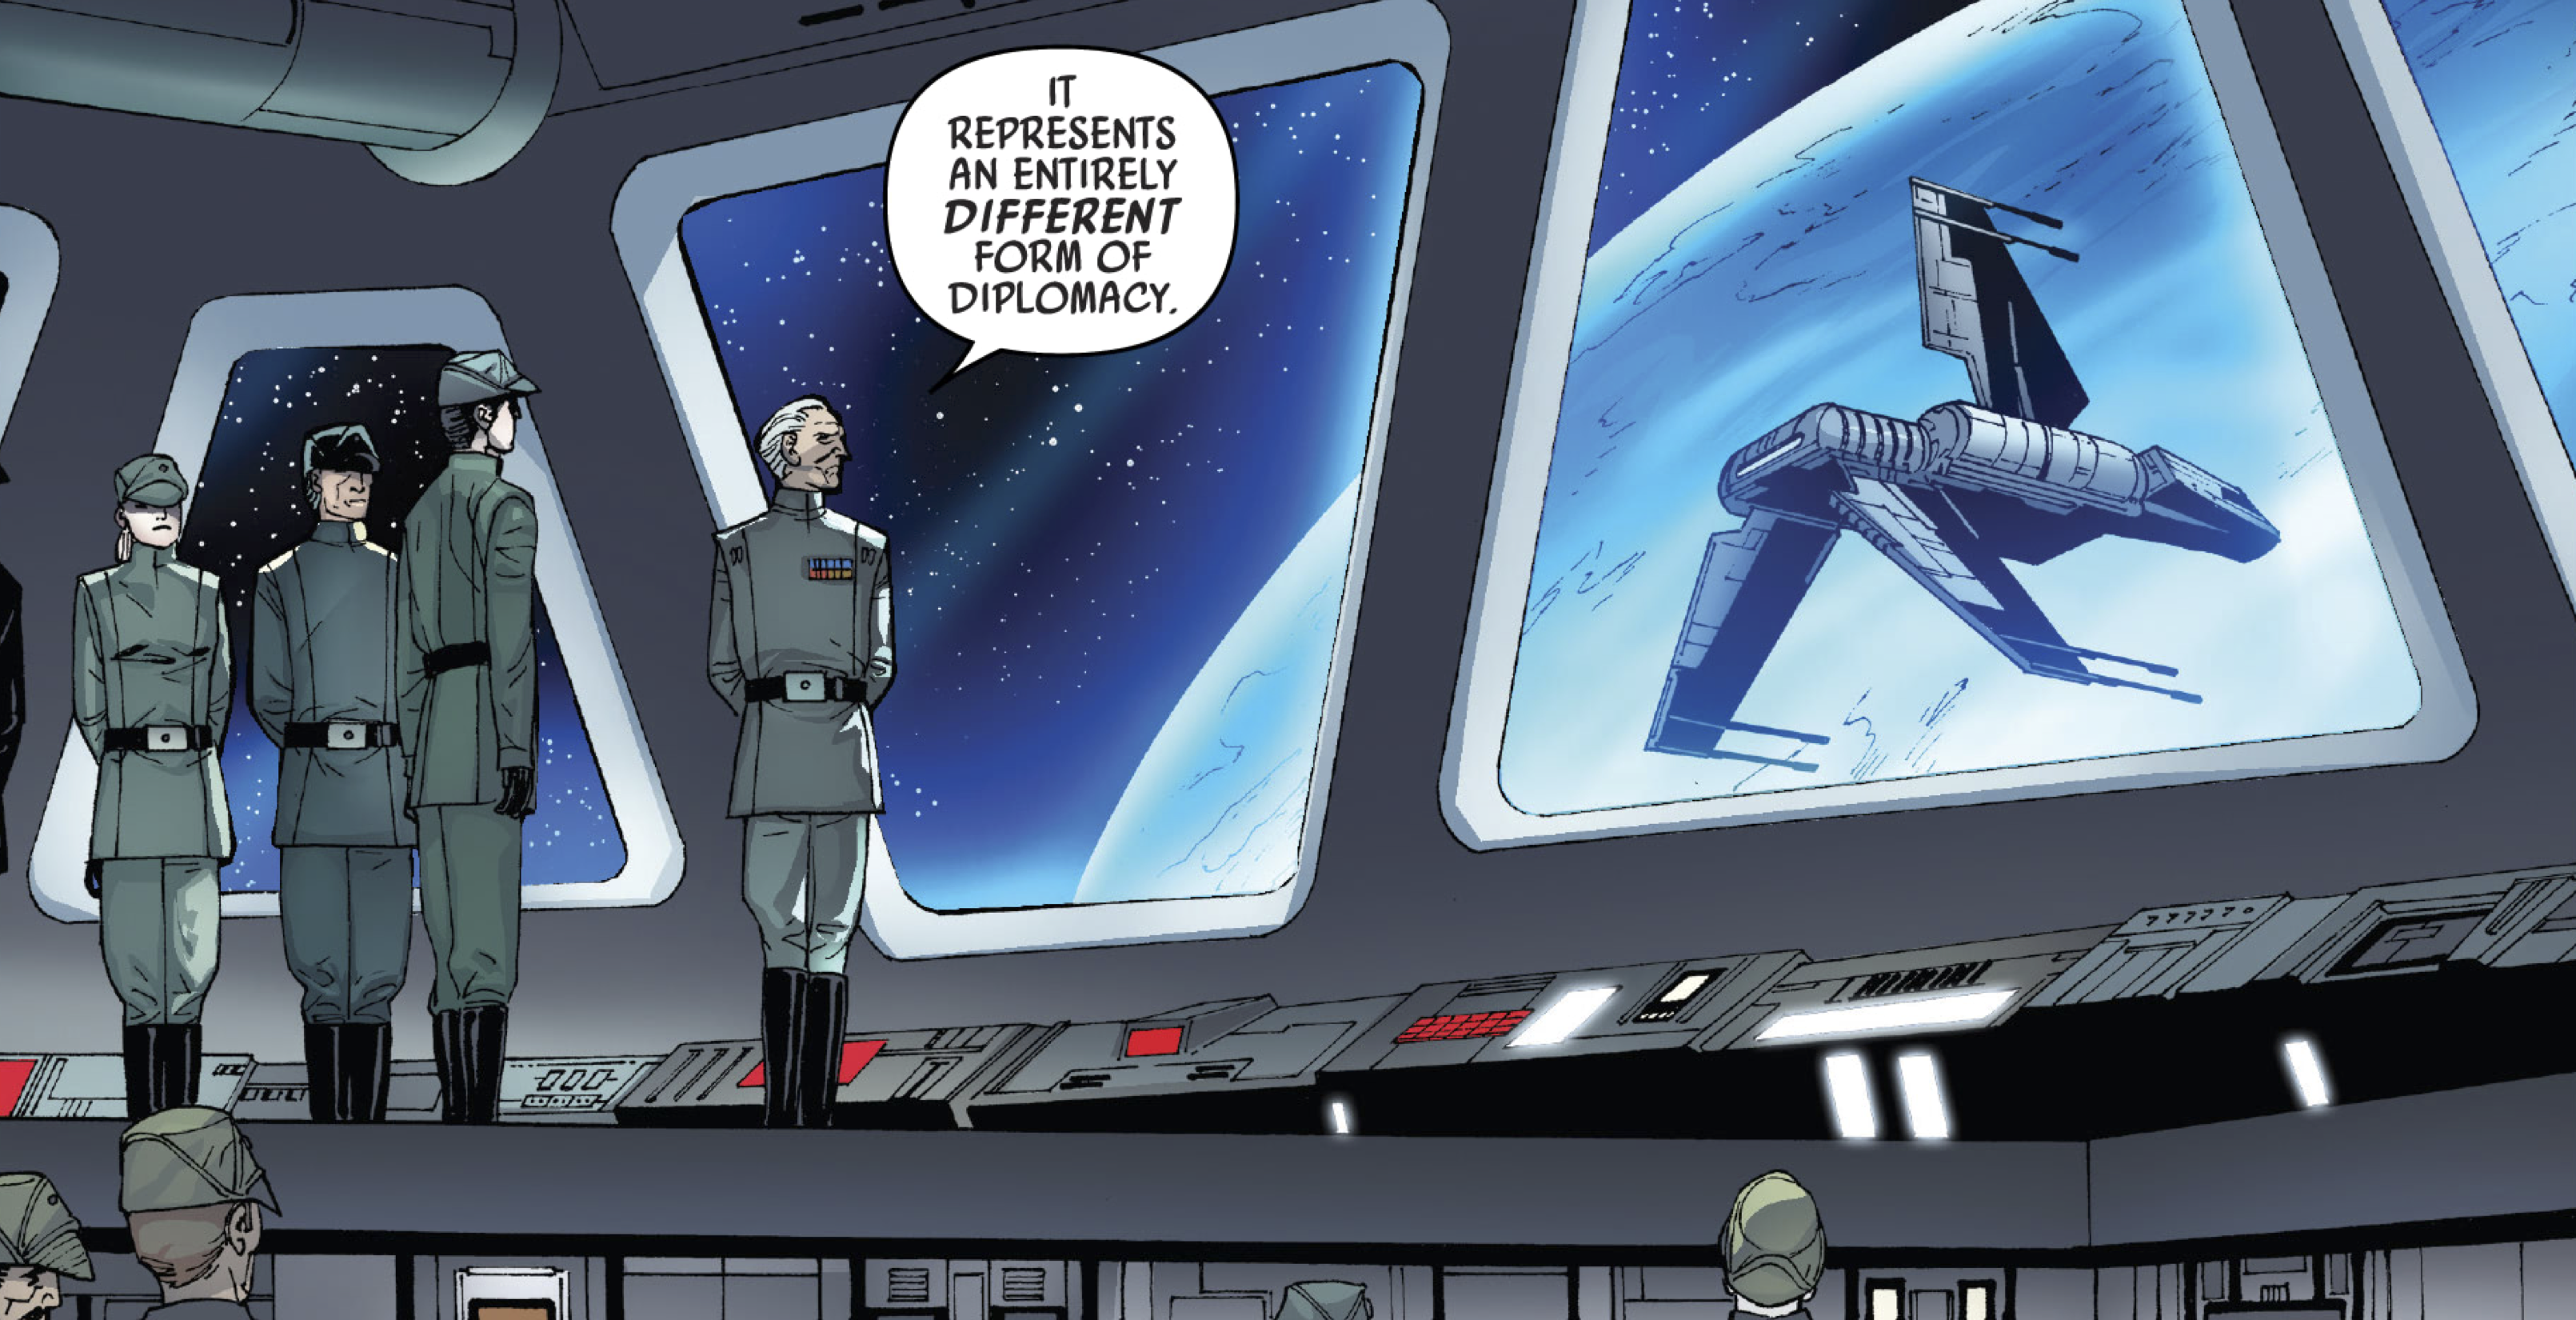
On the planet's surface, Telvar engaged in trade negotiations with a group of Mon Calamari, including Lee-Char, the King of Mon Cala. However, the negotiations faltered, with Mayor Raddus pointing out that the Sovereign's presence overhead indicated Telvar's lack of alignment with the Mon Calamari. Telvar reported back to the Sovereign that his negotiations were unproductive and that he would be returning to the vessel. On the Star Destroyer's bridge, a lieutenant relayed this information to Tarkin, who expressed a preference for a diplomatic resolution. Another officer, stationed in the bridge's data pits, informed the governor that an Imperial Zeta-class shuttle had emerged from hyperspace and was approaching Mon Cala. Tarkin, not expecting additional Imperial personnel, inquired about the shuttle's designation, which was identified as the Infernum. Upon learning this, Tarkin ordered the ship to be allowed through, informing the lieutenant that he was familiar with the shuttle and that it represented a different approach to diplomacy.
The start of war

The Infernum landed in Dac City near Telvar's shuttle, and Vader, three members of the Inquisitorius (Sixth Brother, Ninth Sister, and Tenth Brother), and a squad of Purge Troopers disembarked. Ferren Barr, a Jedi on Mon Cala, then detonated Telvar's shuttle as it launched, which was detected by the Sovereign's sensors. When the lieutenant informed Tarkin of the fatal explosion, the governor inquired whether it was an attack, malfunction, or sabotage. The lieutenant responded that the data was still being gathered and the cause was unclear. Tarkin then ordered the officer to instruct Rantu to immediately deploy landing craft and instructed Jordo and Bergon to initiate their respective phases of the operation. The governor expressed his disappointment that a diplomatic solution had not been possible and that the Mon Calamari had chosen war. Consequently, the invasion of Mon Cala commenced.
The Empire deployed significant forces to all above-ground settlements on Mon Cala. A battle erupted in Dac City, with the Empire deploying TIE fighters, Low Altitude Assault Transport carriers, K79-S80 Imperial Troop Transports, All Terrain Defense Pods, and All Terrain Armored Transports to assault the city, alongside the Infernum's contingent. Major Rantu also left the Sovereign to oversee the invasion from a command base within the city. In the ensuing conflict, both the Mon Calamari and Quarren defended their planet against the Empire.
King Lee-Char, seeking to end the conflict and prevent further bloodshed, contacted the Sovereign via hologram and demanded that Tarkin withdraw Imperial forces, asserting that the invasion was unjustified and violated the Mon Calamari treaty with the Empire. Tarkin countered that the destruction of Telvar's shuttle demonstrated the justification for the conflict, either because Lee-Char's subjects had killed the ambassador or because the king was unable to control his population. Lee-Char denied these accusations, arguing that Telvar's death would not benefit his people. However, Tarkin insisted that Mon Calamari forces stand down to allow the Empire to conduct an investigation. The king refused this request, warning Tarkin that the Empire was conducting an invasion, not an investigation, and that his people would defend themselves if the conflict continued. Tarkin reiterated his demand for Lee-Char to cease fighting before ending the transmission.
An undersea campaign
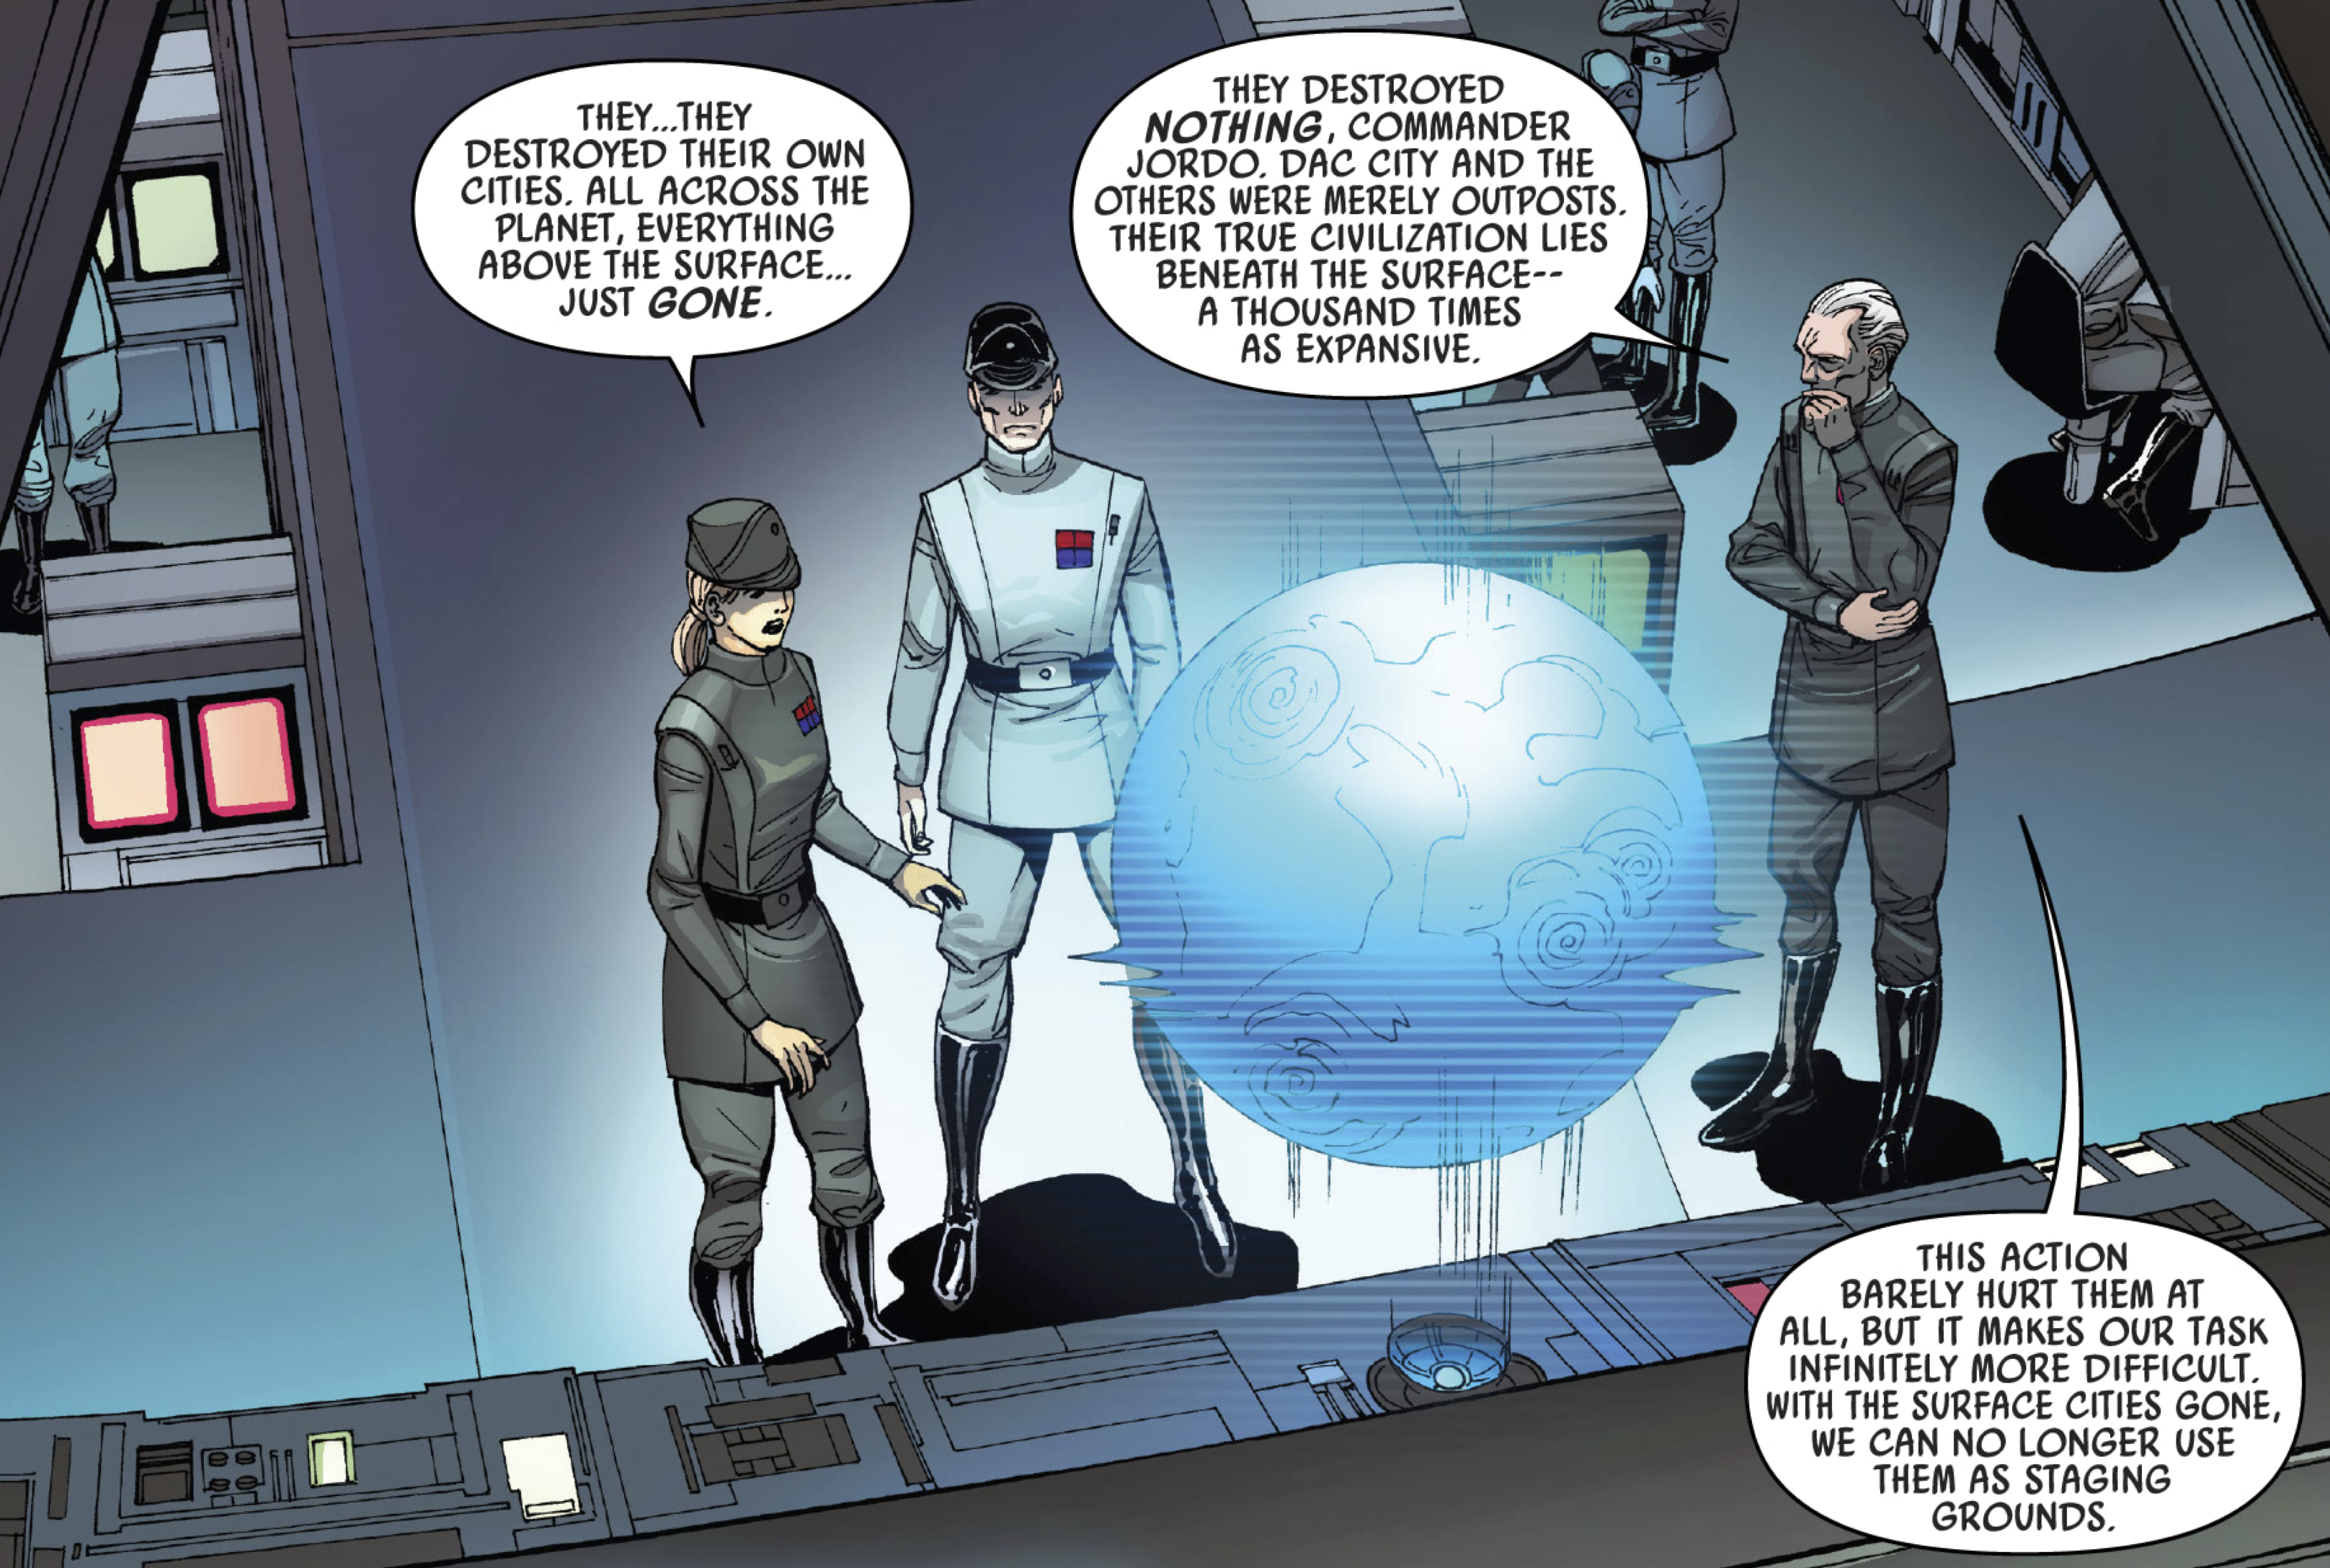
Tarkin then instructed the lieutenant to inform Rantu that a significant counterattack would occur once the Mon Calamari had evacuated civilians from the above-ground settlements. Although the nature of the attack was unknown to Tarkin, he expressed confidence in the Empire's knowledge of Mon Calamari weaponry. However, after Vader captured Lee-Char on the planet's surface, Tarkin received reports of a large, unusual signal emanating from beneath the surface across Mon Cala. Subsequently, several creatures emerged from the ocean, causing all above-ground cities to sink and enabling the king's escape.
As Bergon relayed this information to Tarkin, he pointed out that Dac City and the other settlements were merely outposts, with the true Mon Cala civilization located underwater. The governor explained that this tactic meant that the settlements could no longer serve as staging grounds, making an Imperial assault more challenging. Assuming Rantu had perished, Tarkin assigned the next phase of the assault to Bergon, who confirmed the use of aerial landing platforms to stage an undersea campaign. Tarkin then reprimanded Jordo for his lack of awareness regarding the Mon Calamari's ability to flood their cities, attributing the loss of resources to the ISB officer, who vowed to redeem himself. Tarkin then inquired about any communication from Darth Vader, to which the response was negative.
Bergon then took command of an aerial landing platform, equipped with multiple Lambda shuttles, TIE fighters, and turrets. As Tarkin requested an update via hologram, Bergon reported that Imperial efforts were focused on the northern hemisphere against Commander Ackbar, whom she aimed to defeat before engaging Raddus in the southern polar regions. As Tarkin cautioned against this, noting that Raddus was likely to counterattack, the platform was attacked by Ackbar and a squad of aquatic vehicles. The swarm attack squad launched missiles at the base from close range, resulting in its destruction and Bergon's death.
Upon being informed of the loss, Tarkin criticized Jordo for his ignorance of this military technology. The officer claimed that he had only been stationed at Mon Cala for days, preventing him from gaining a complete understanding of the planet. Tarkin dismissed him and reassigned the commander to become a stormtrooper on the surface. As Jordo was escorted off the bridge by stormtroopers, a lieutenant asked the governor if he intended to retaliate. Tarkin responded that he preferred to escalate, as two additional Imperial-class Star Destroyers arrived over the planet.
Victory on Mon Cala
The arrival of these additional forces led to the Imperials gaining the upper hand in all engagements on the planet. However, upon being informed of this on the Sovereign, Tarkin expressed concern about the sheer number of ongoing engagements. He observed that the Mon Calamari and Quarren were employing two primary tactics: either fortifying themselves in their cities, resulting in protracted corridor warfare for Imperial forces, or dispersing into the oceans, forcing the Empire to divide its forces to pursue them. Tarkin also noted that Raddus, in his defense of the southern polar regions, had interconnected ships from the Mon Cala Mercantile Fleet, rendering their shields impervious to Imperial weaponry.
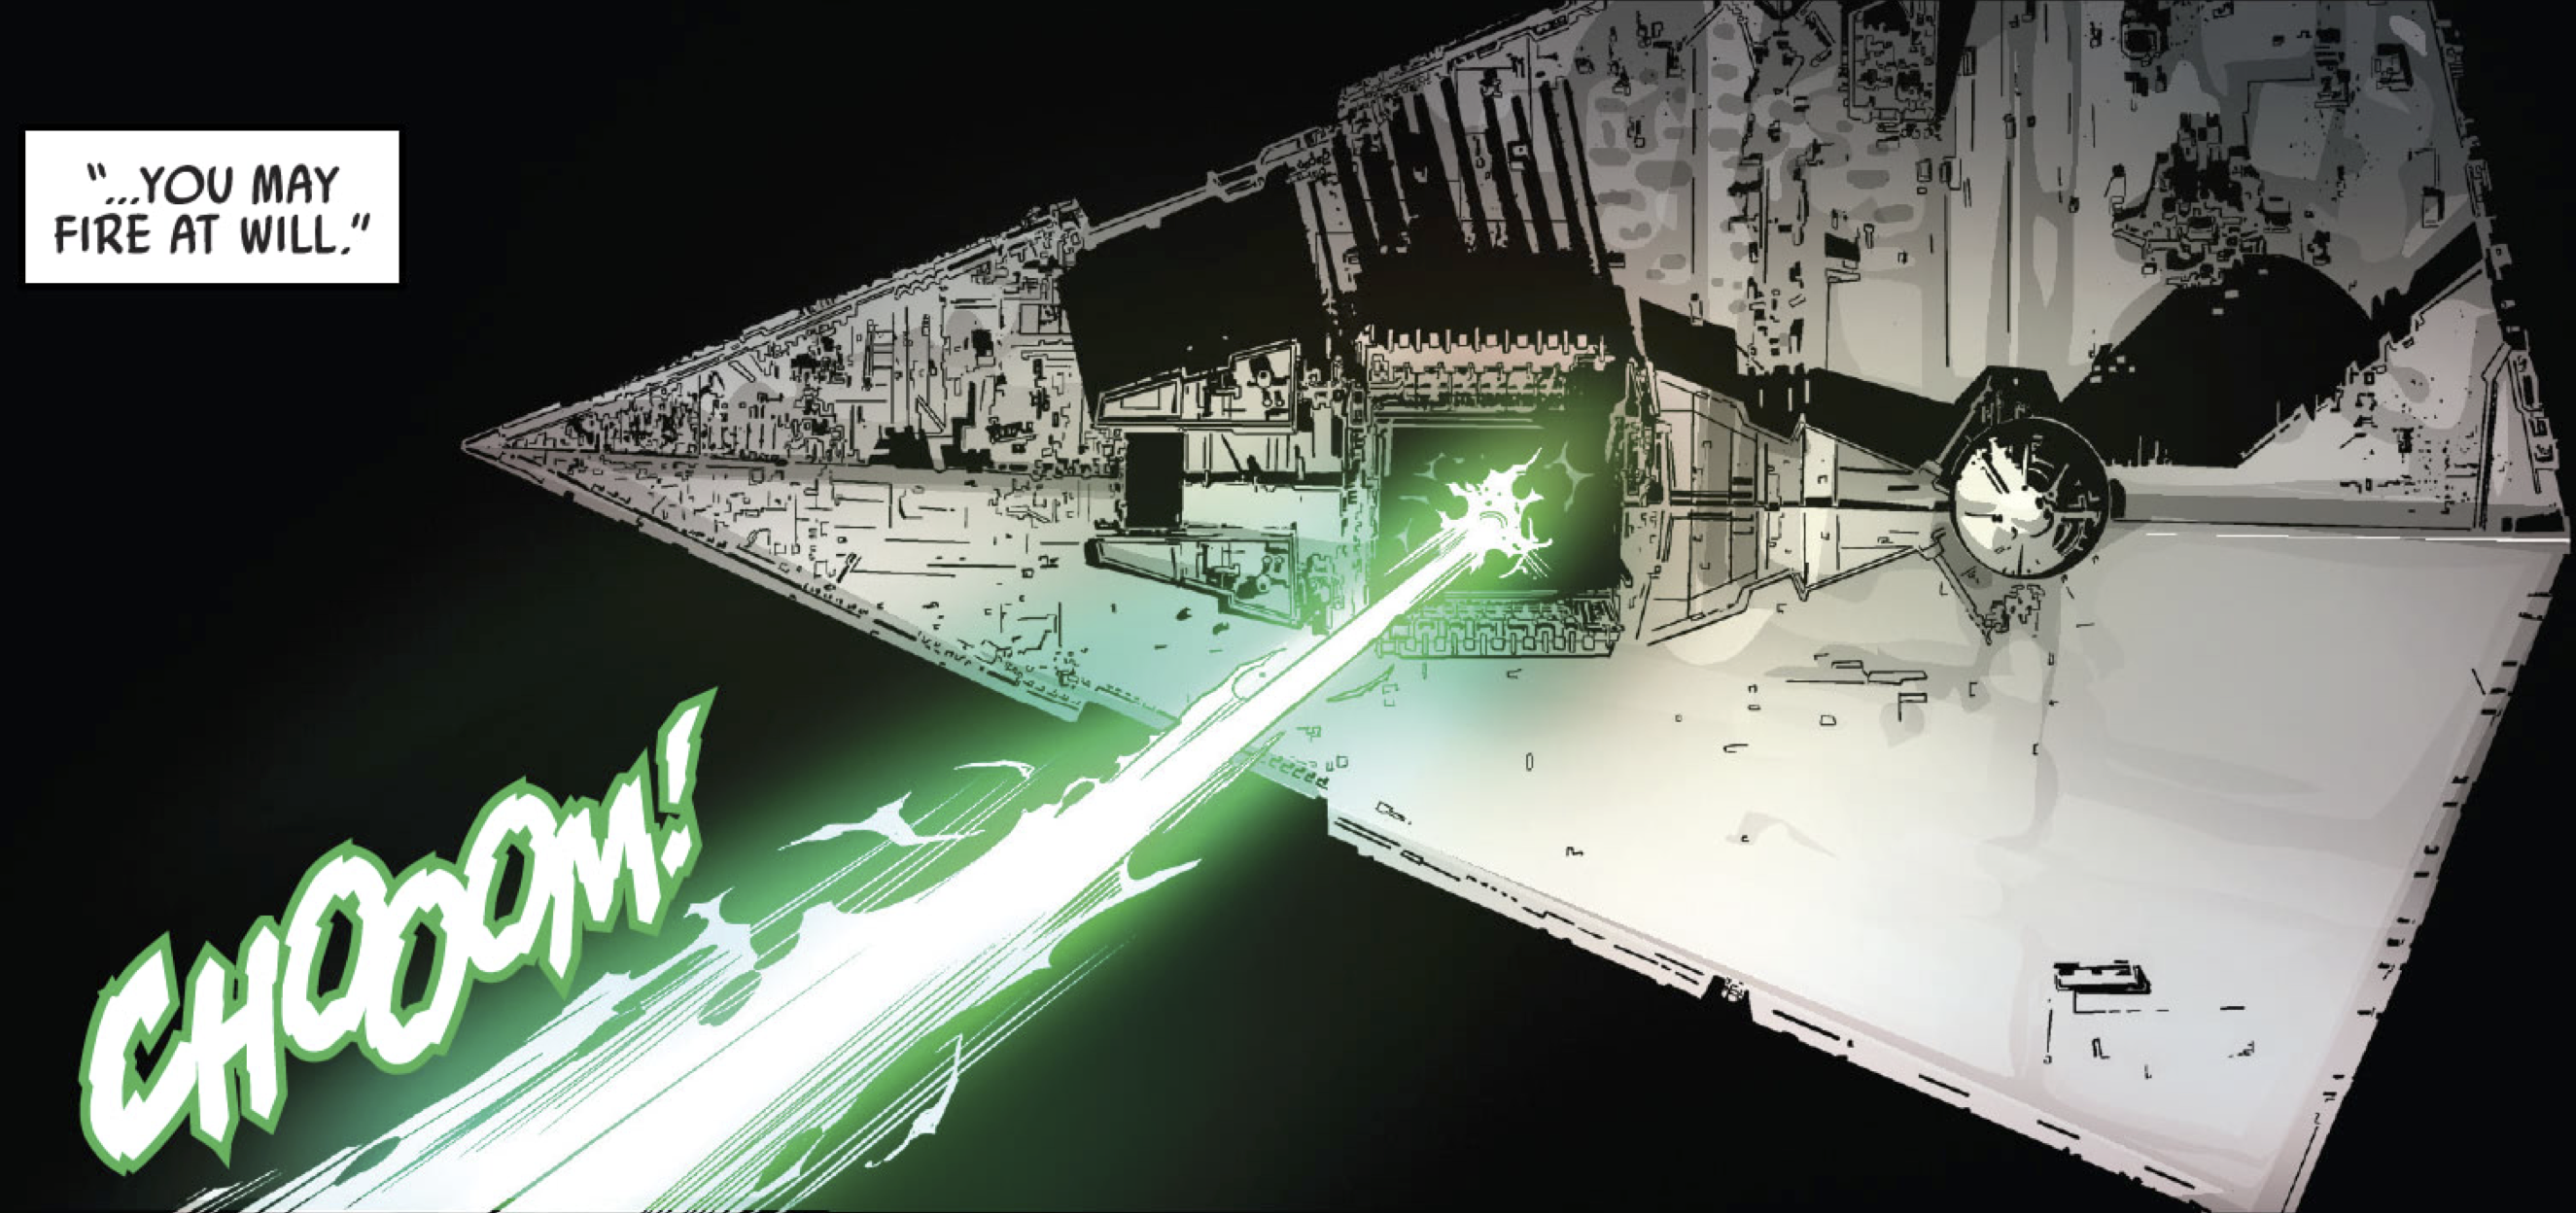
Seeking to reduce the number of engagements, Tarkin contacted Darth Vader from his office. Vader was nearing the location of Ferren Barr with the Inquisitors and Purge Troopers. The governor requested that Vader allow the rest of his forces to defeat the Jedi while he focused on securing Lee-Char. Recalling the Emperor's demand for a swift victory, Tarkin also noted that Mon Cala's defenders had entrenched themselves for a prolonged conflict, necessitating the use of the king to bring the conflict to an end. Vader complied and contacted Tarkin once Lee-Char was captured. The governor obtained Vader's location and requested that Vader bring the king to a viewport. Tarkin then ordered a lieutenant to withdraw Imperial forces from the area and to commence firing at will. The three Star Destroyers then initiated an orbital bombardment on the planet's northern region, destroying at least five settlements, including Zeran Town.
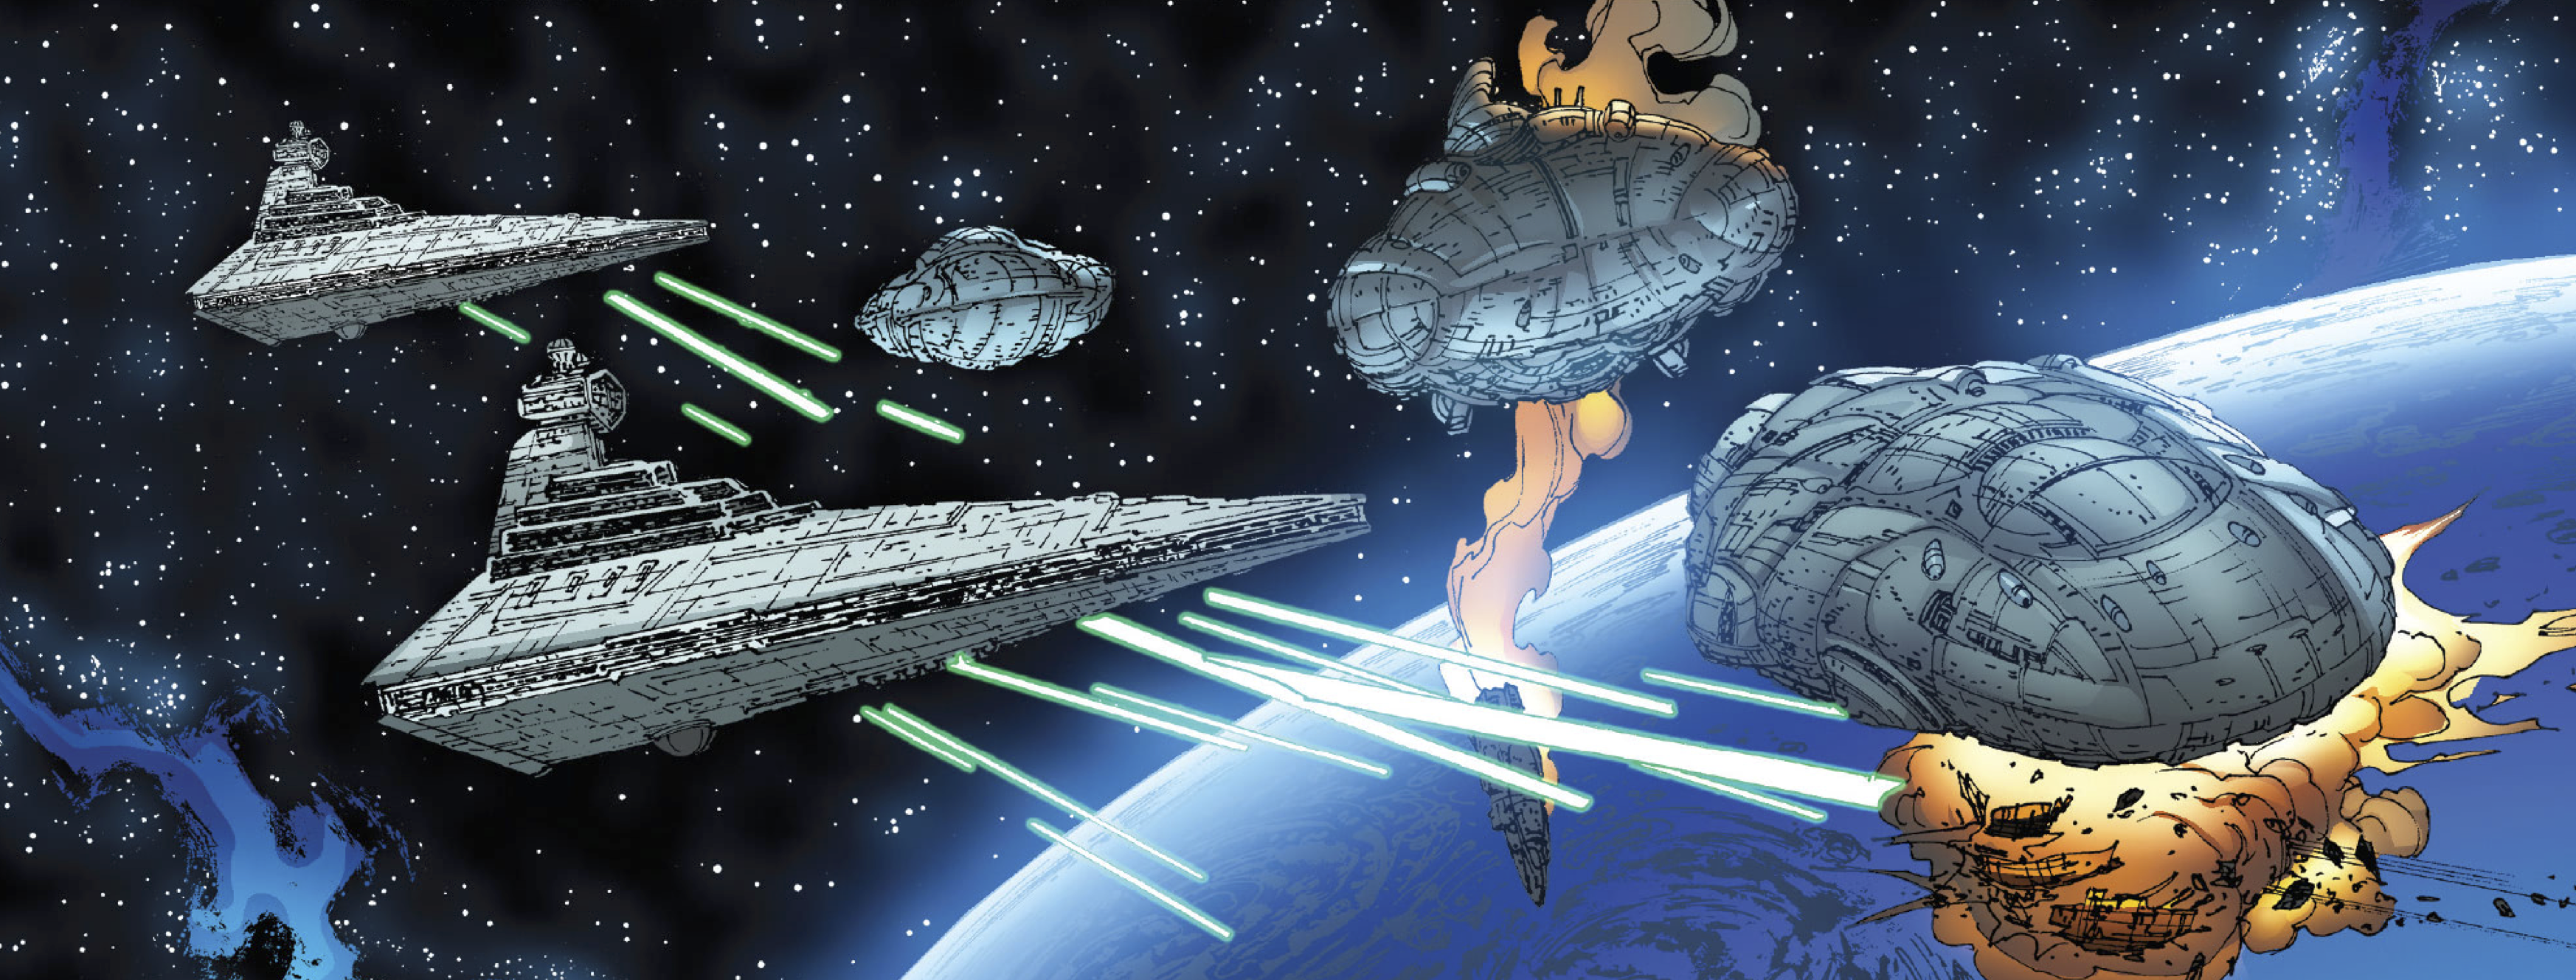
Consequently, Lee-Char ordered all forces on the planet to stand down, before contacting Tarkin and offering a formal surrender contingent on the Empire ceasing the bombardment. The governor accepted, informing the king that a shuttle would be dispatched to detain him, but that the bombardment would continue in the interim. The laser fire intensified and began targeting Raddus' forces in the southern region. The admiral then launched his fleet into space, with several starships being struck by fire from the Star Destroyers. However, three vessels managed to jump to hyperspace by maximizing aft shields. A lieutenant informed Tarkin of this, but the governor dismissed the significance of three ships. He then ordered the orbital bombardment to cease, resulting in the Empire's ultimate victory on Mon Cala.
Abel LaSal's stolen identity
In 17 BBY, Moff Tarkin was reassigned and permanently stationed at Sentinel Base, an Imperial facility overseeing the construction of the battle station later known as the Death Star. At some point, Abel LaSal was assigned to the Sovereign with the rank of commander, and a rebel cell forged LaSal's command cylinder codes, rank insignia plaque, and command cap disk. In 14 BBY, Sentinel Base was attacked by the rebel cell, drawing Tarkin away from the base and ultimately leading to the group stealing his corvette, the Carrion Spike. The rebels then employed the corvette to attack a series of Imperial facilities.
In an effort to intercept the Carrion Spike, Tarkin utilized the Imperial escort carrier Goliath to travel to the planet Phindar in the Mandalore sector, where the administrator of a taker facility was instructed to refuel the rogue corvette. The group's leader, Berch Teller, then used a disguise and LaSal's forged equipment to refuel. The Phindian administrator then provided Tarkin a recording of Teller, whose code cylinder had identified him as Abel LaSal. The administrator also considered Teller's insignias to appear legitimate. A specialist on the Goliath then informed Tarkin that LaSal was stationed aboard the Sovereign, which was docked at Fondor, a Colonies planet that was home to the Fondor Shipyards used for capital ship repairs, manufacturing, and the development of classified technologies.
However, the specialist noted that Teller's features, which included red hair and a facial scar, did not align with LaSal's. Although the specialist inquired whether to inform the Sovereign of this discrepancy, Tarkin declined. Ultimately, Tarkin defeated the group and was awarded the title of Grand Moff, with the Executrix becoming his personal flagship. At some point, Abel LaSal served as the commander of the Sovereign. However, by 4 BBY, this was no longer the case, as the Star Destroyer had become Tarkin's flagship.
The Spectres
Arrival at Lothal
In 4 BBY, Assessor Potalla informed Tarkin that staff at the Imperial Complex on Lothal, a planet in the Outer Rim Territories, had become complacent and allowed a rebel cell known as the Spectres to flourish. Seeking to address the situation personally, the Grand Moff traveled to the world aboard the Sovereign later in the same year. After approaching Capital City, Tarkin departed the Star Destroyer in a Sentinel-class landing craft accompanied by two stormtroopers. The shuttle was then escorted to the Imperial Complex by two TIE fighters. Tarkin subsequently captured Kanan Jarrus, a Jedi and the leader of the Spectres. At some point, Admiral Kassius Konstantine was assigned to the Sovereign as Tarkin's second-in-command.
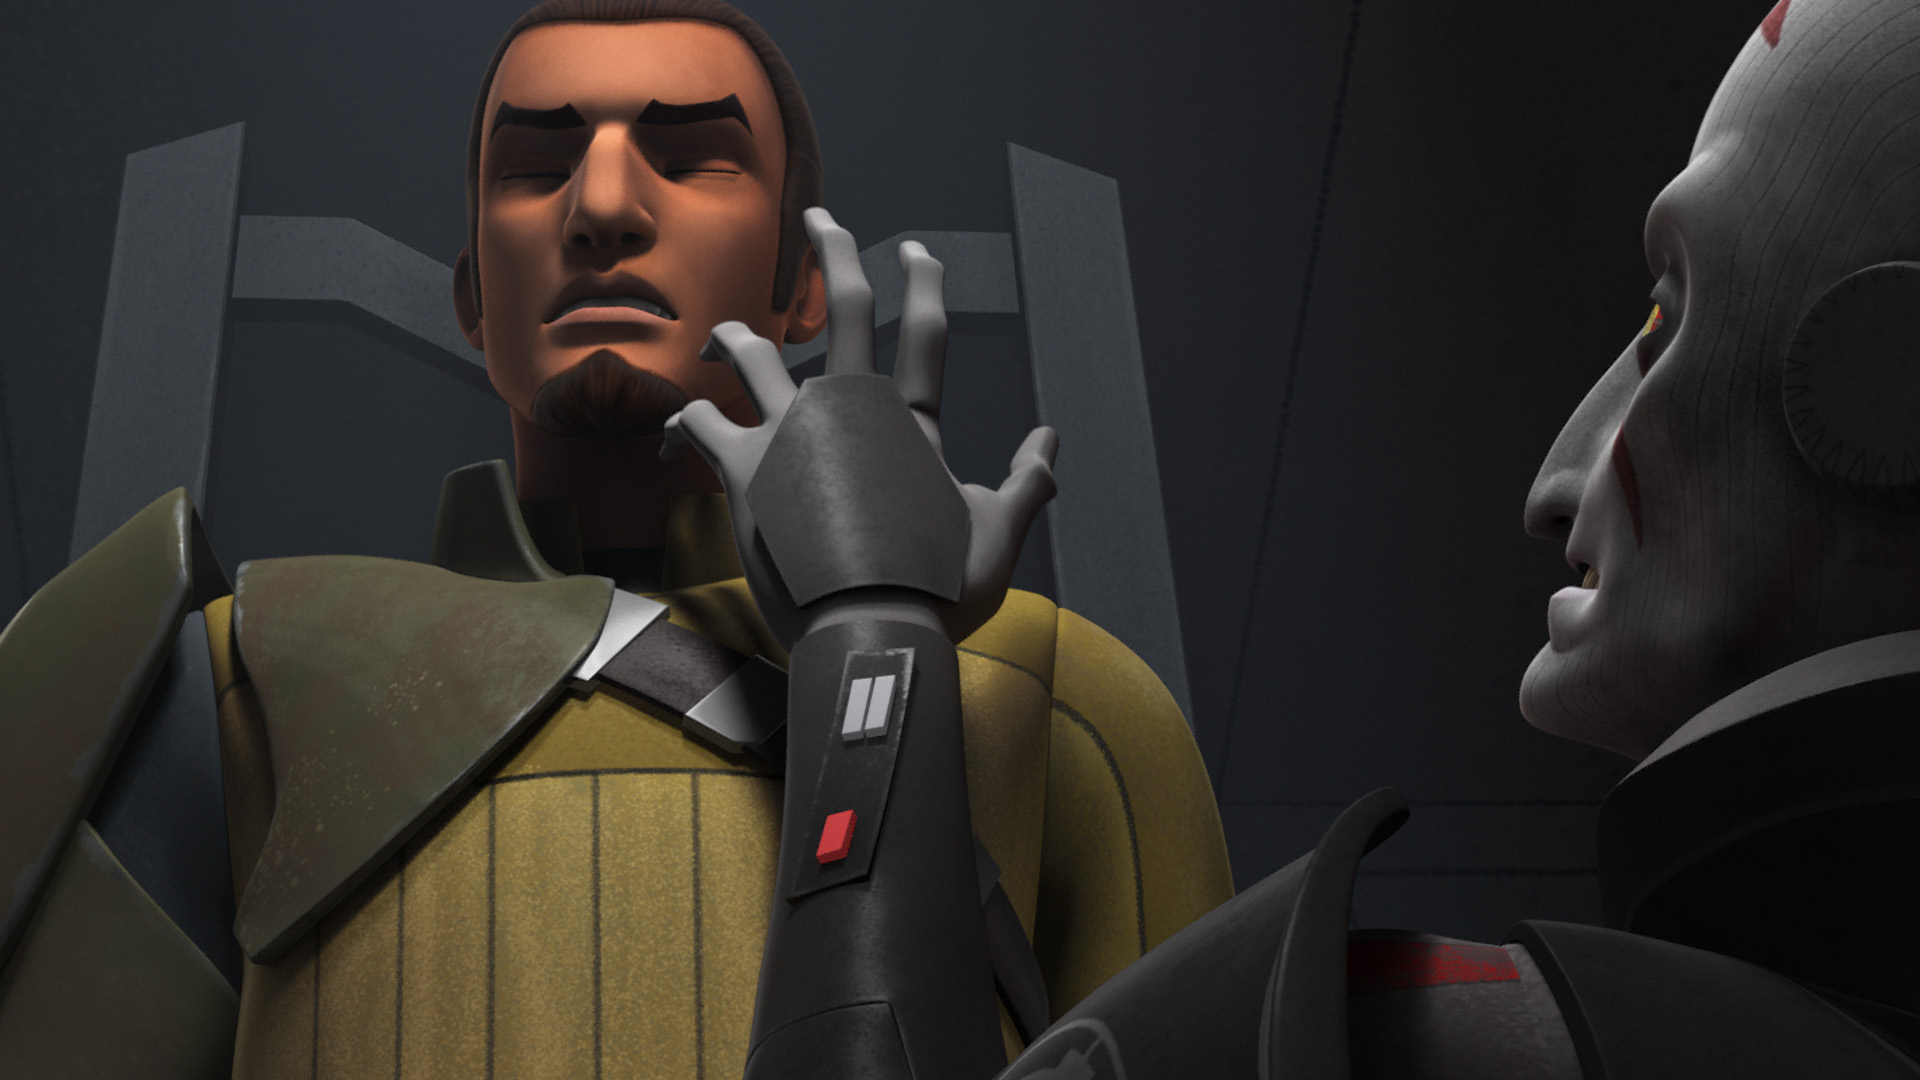
Following this, Jarrus was taken to the Sovereign and restrained in an interrogation chair. Agent Kallus's from the Imperial Security Bureau interrogated the rebel using a mind probe administered by an interrogation droid, in an attempt to confirm Jarrus's status as a Jedi and to gather information about other rebel cells. The interrogation proved unsuccessful and was then taken over by the Grand Inquisitor, a Jedi hunter from the Imperial Inquisitorius, who resorted to torture via electrocution. However, Jarrus resisted even this, prompting Tarkin to suggest transferring the Jedi to a location more conducive to extracting a confession: the Mustafar system in the Outer Rim Territories. Meanwhile, the remaining Spectres managed to locate their leader by infiltrating the Arquitens-class command cruiser Tellstar. The group discovered that Jarrus was aboard the Sovereign, which, although currently above Lothal, was scheduled to depart for the Mustafar system imminently. Kallus had departed before the vessel left.
Rescue over Mustafar
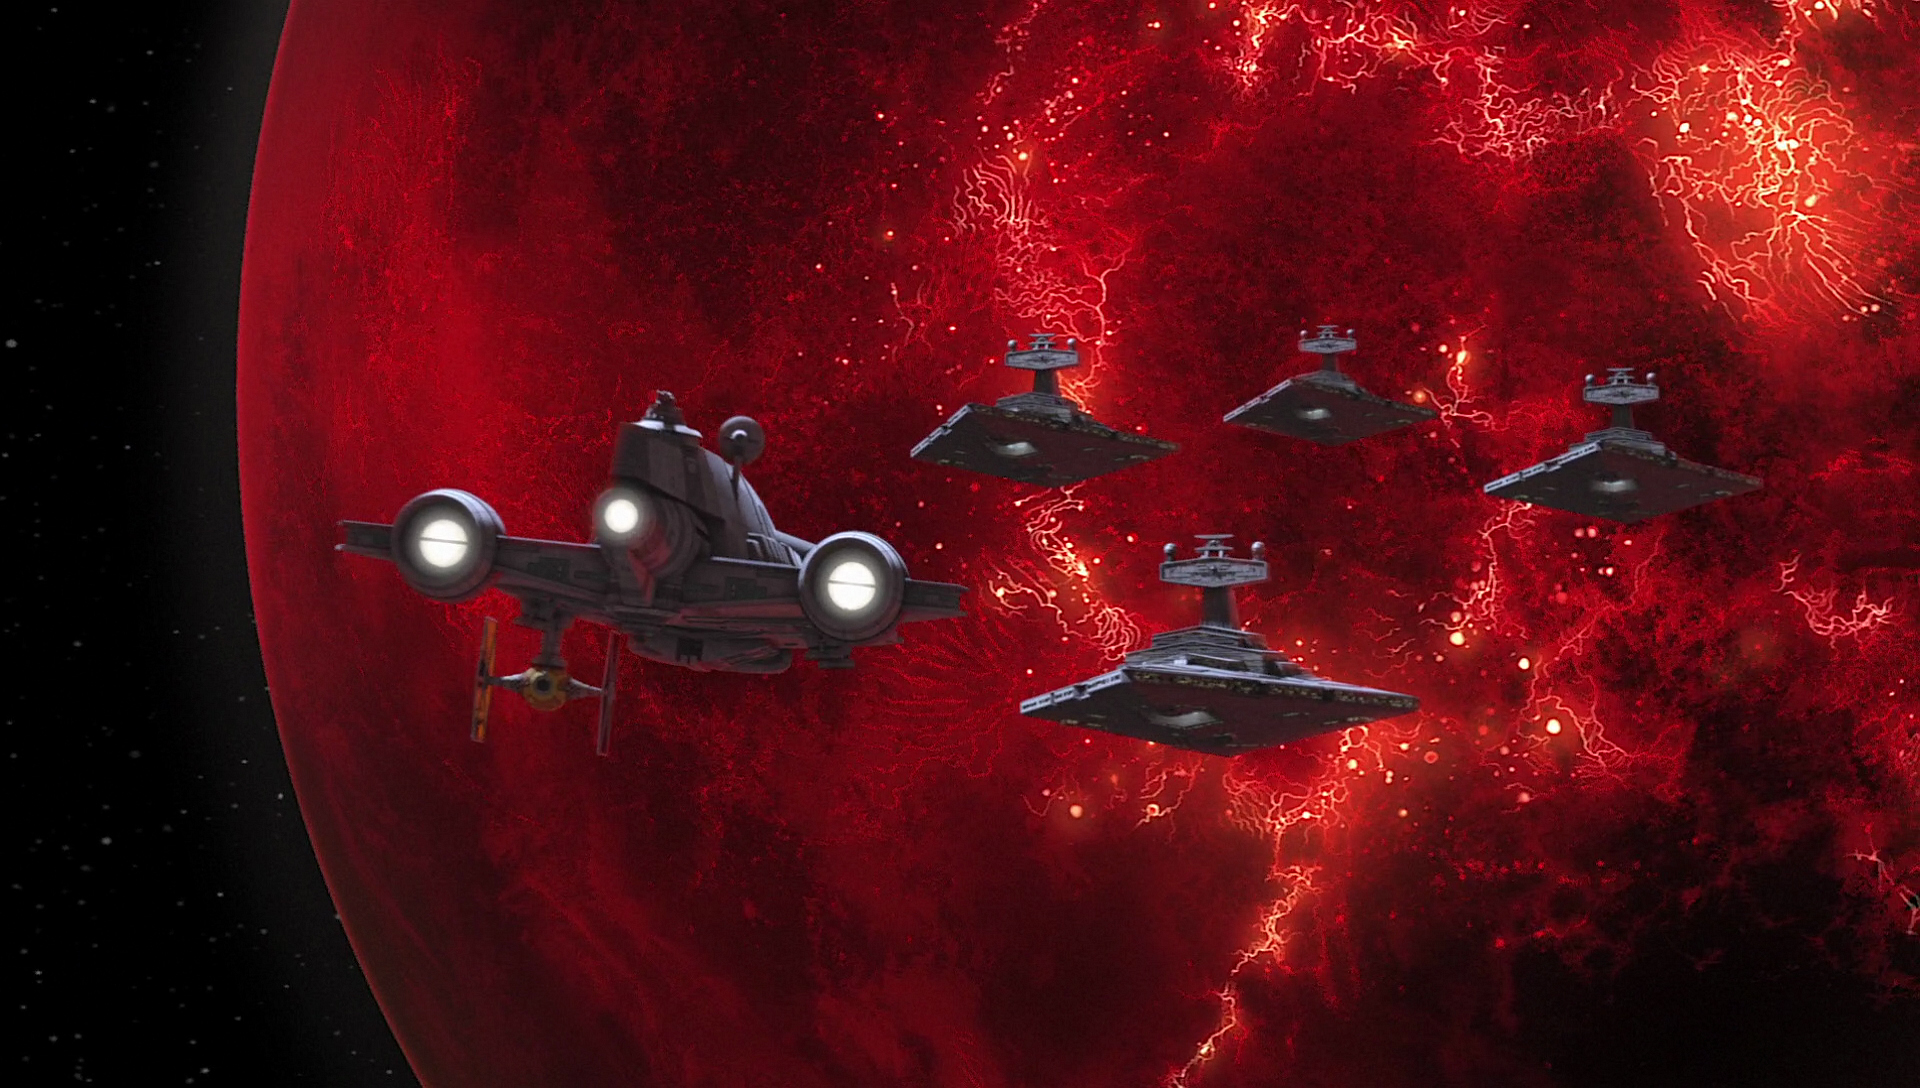
After their arrival above Mustafar, the Sovereign became an element of a fleet that included three additional Star Destroyers of the Imperial type, along with a number of Gozanti-class cruisers. From his command ship, Tarkin initiated the transmission of a continuous all-clear signal to the rest of the fleet; failure to maintain this signal would prompt the dispatch of reinforcements. Concurrently, the Grand Inquisitor persisted in his interrogation of Jarrus, pressing him for details about a larger rebellion and the true identity of the rebel operative known as Fulcrum, a codename previously adopted by the former Jedi Ahsoka Tano. The Inquisitor then mocked Jarrus regarding the death of his Jedi Master, Depa Billaba, during the execution of Order 66, as well as the rebel's choice to forsake both his master and the Jedi Order.
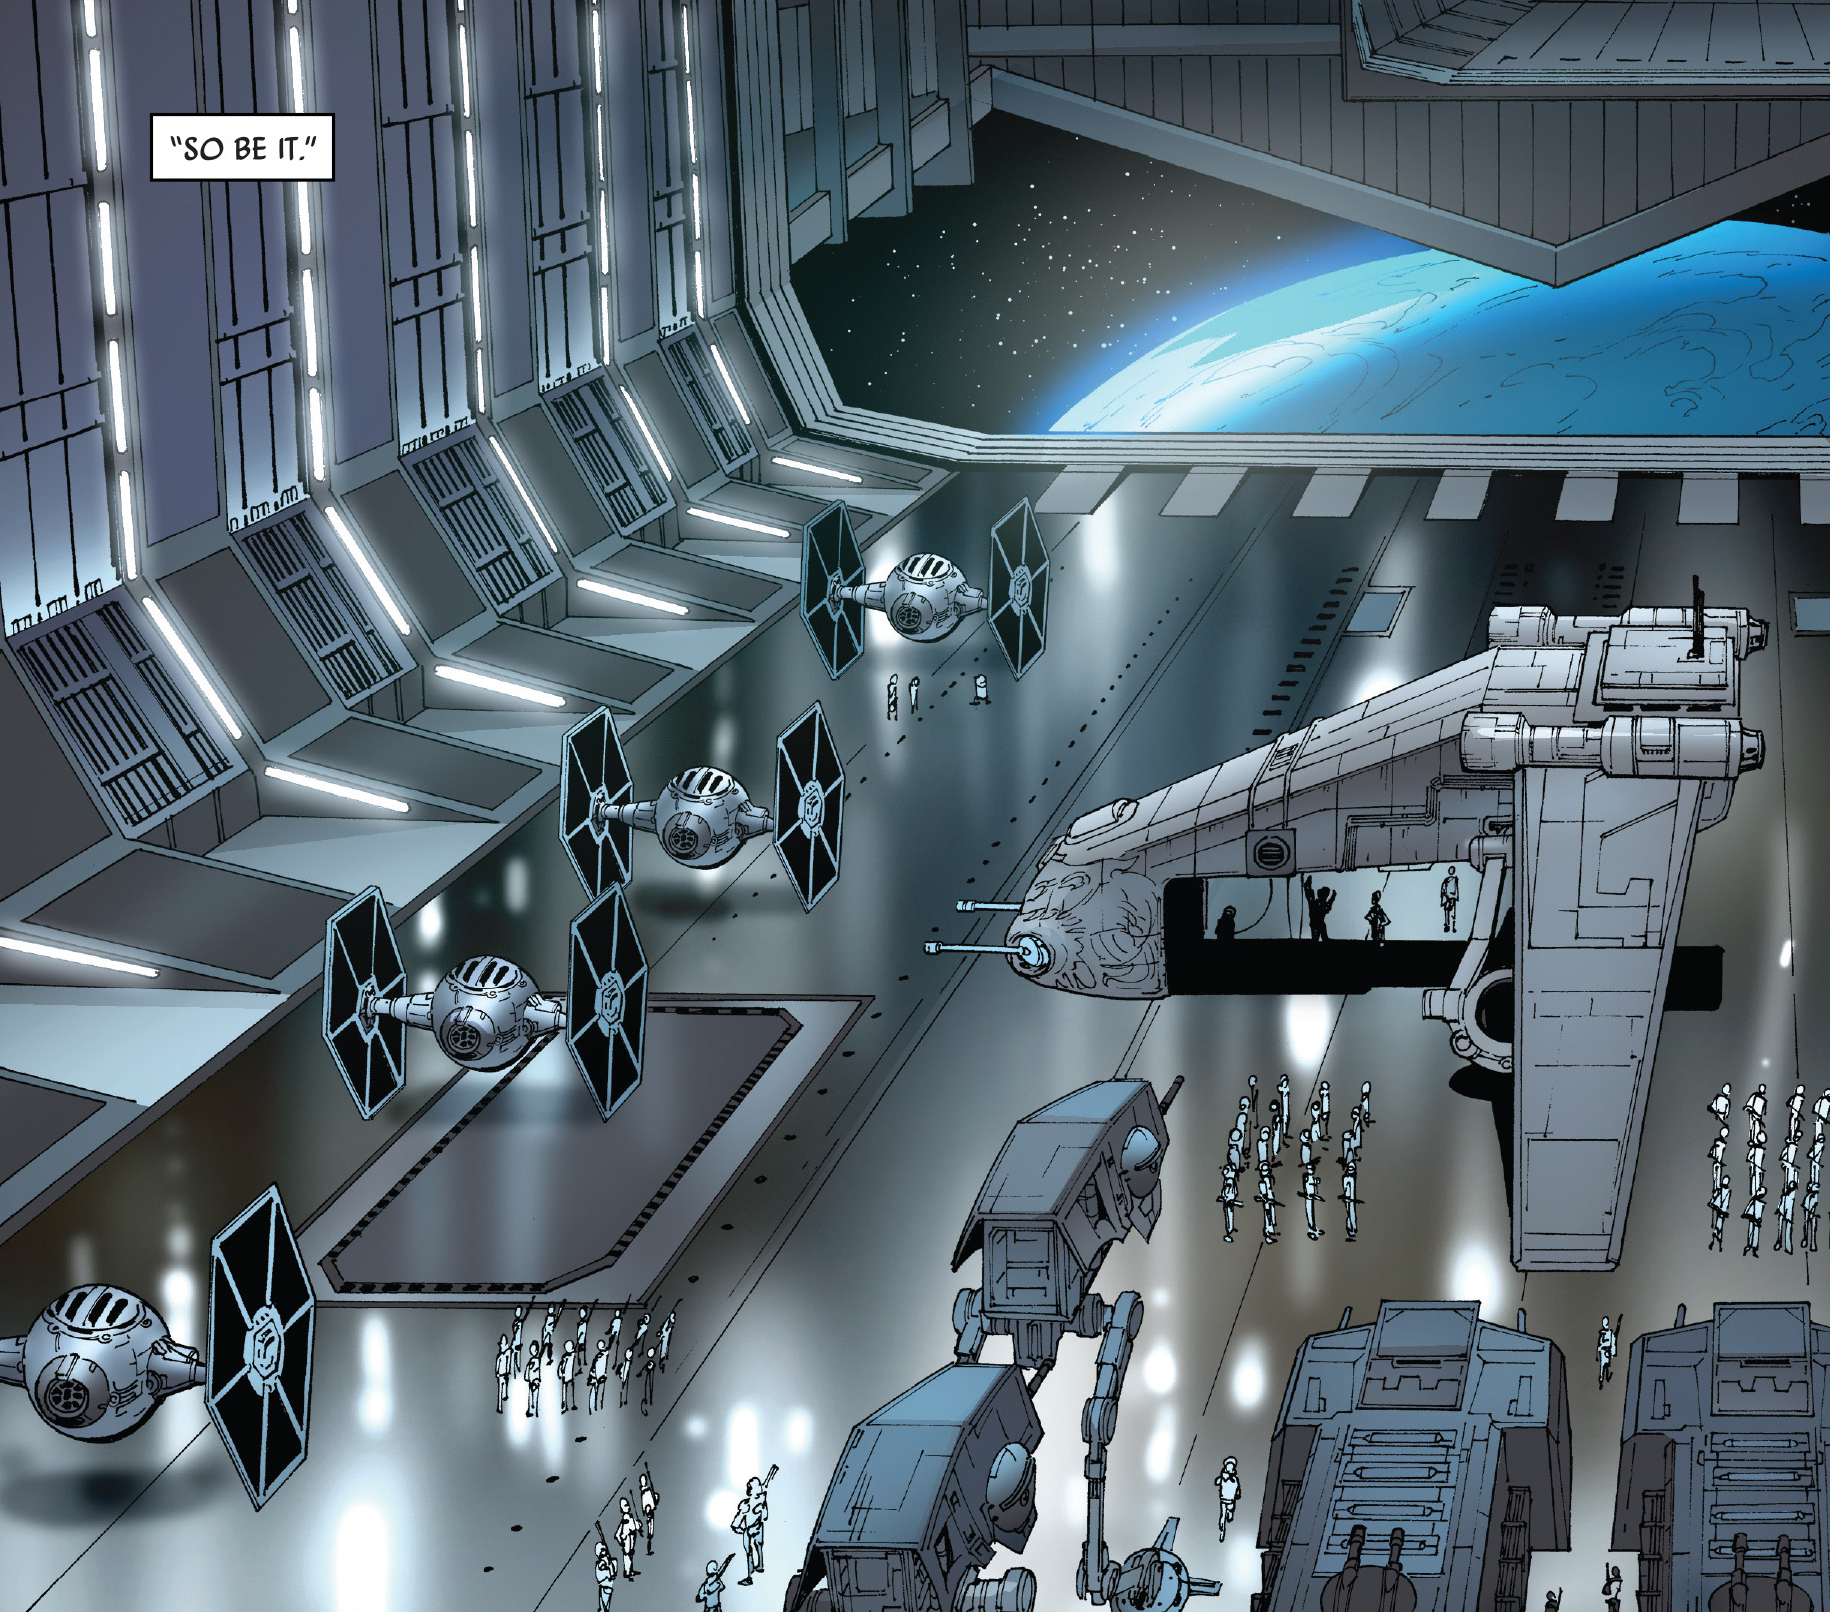
Subsequently, the Spectres made their entrance into the Mustafar system aboard a captured Gozanti-class cruiser, designated as Transport Ship 63378. As they neared the fleet, Ezra Bridger, Jarrus' Jedi Padawan, pinpointed his master's location through his attunement to the Force. Following the transmission of their access codes, the rebels' transport received clearance to dock from an Imperial technician stationed on the bridge of the Sovereign. This same technician also notified Konstantine and Tarkin of the imminent arrival of ten TIE fighter reinforcements and directed the opening of Bay 5. With clearance secured, the rebels deployed their conspicuously painted TIE fighter on autopilot; it then integrated itself with the approaching TIEs within the hangar. One stormtrooper, identified as JJR-579, commented on the rebels' fighter being outside of regulations, while another trooper, JTN-303, expressed a liking for it. However, the TIE was equipped with Electro Magnetic Pulse grenades, detonated by the rebel Sabine Wren. The resulting pulse incapacitated the Sovereign and rendered unconscious all stormtroopers wearing a helmet.
On the bridge of the Star Destroyer, an Imperial officer informed Tarkin of the starship's main power failure. In response, the Grand Moff issued an order to switch to auxiliary power. Simultaneously, Transport Ship 63378 docked with the starboard hull of the Sovereign, and Bridger employed his lightsaber to breach a wall, creating an entry point for himself, Wren, Hera Syndulla, and Garazeb Orrelios, who then proceeded towards the cell wing. Back on the Star Destroyer's bridge, Tarkin received another report from the officer, stating that the Sovereign was operating solely on emergency power and life support. The Grand Moff explained that the interruption of his all-clear signal meant that reinforcements were on their way. As he spoke, two Sentinel-class landing craft detached from another Star Destroyer and entered Bay 5, deploying a contingent of stormtroopers.
Duel in the engine room
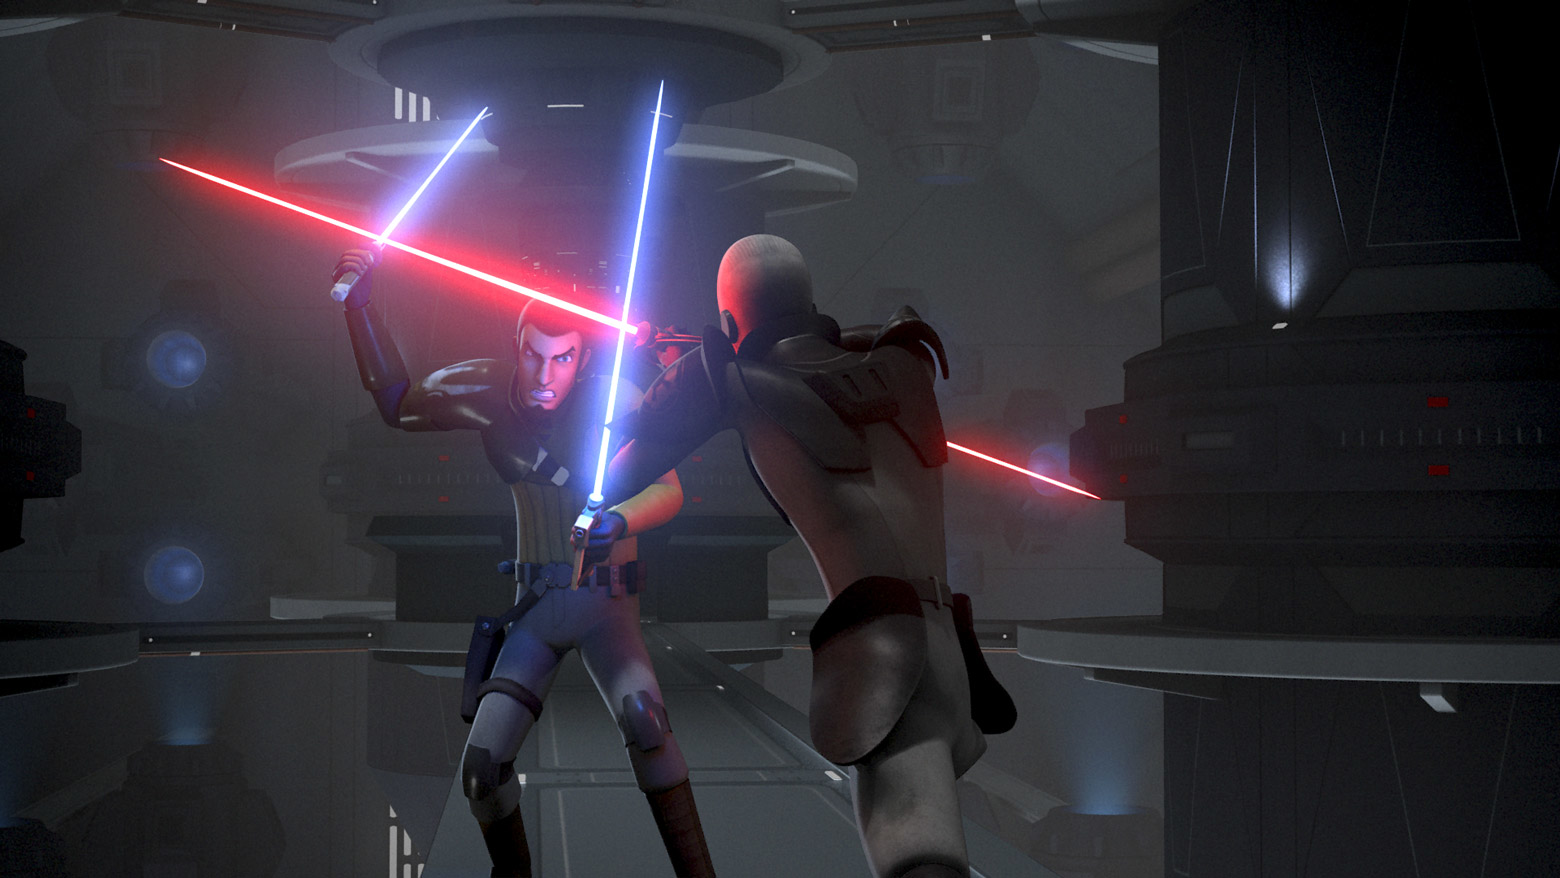
The stormtroopers promptly located the rebels within the corridors of the Sovereign, but Bridger used his lightsaber to seal a blast door, effectively isolating the Imperials. With the direct path to Jarrus blocked, Bridger resorted to using the ventilation ducts above the corridor. Upon reaching the cell wing, Bridger liberated his master. Meanwhile, the other rebels attempted to access a turbolift, only to find it occupied by stormtroopers. Despite eliminating several, the group found themselves pursued by the Imperial troopers. Bridger and Jarrus then arrived in the Sovereign's engine room, where they were confronted by the Grand Inquisitor. Jarrus then attacked the Jedi hunter using his Padawan's lightsaber, initiating a fierce duel. Bridger then employed the Force to pull his master's lightsaber from the Inquisitor's belt, joining the fray.
However, after a series of exchanges, the Grand Inquisitor used the Force to push Bridger and Jarrus away, before launching his lightsaber at the Padawan, causing him to cry out and fall from the walkway to a lower level. Believing his student to be dead, Jarrus telekinetically retrieved his own lightsaber and declared that he no longer had anything to fear, before resuming his attack on the Inquisitor. Meanwhile, the Sovereign's original stormtroopers were beginning to regain consciousness, aided by Tarkin's reinforcements. Employing a smoke grenade to obscure the troops' vision, Wren and the other rebels began their advance towards Bay 5.

Fueled by the power of the Force, Jarrus overwhelmed the Grand Inquisitor, who defended himself with his double-bladed spinning lightsaber. Jarrus then severed the lightsaber's hilt, sending the pieces plummeting into the engines below. This triggered an explosion, which shook the Sovereign and filled the room with fire and smoke. The Inquisitor, having lost his balance and clinging to a walkway, chose to release his grip, preferring to fall to his death in the inferno below rather than face the wrath of his master, Darth Vader. Bridger then revealed himself to Jarrus, and together they escaped the room.
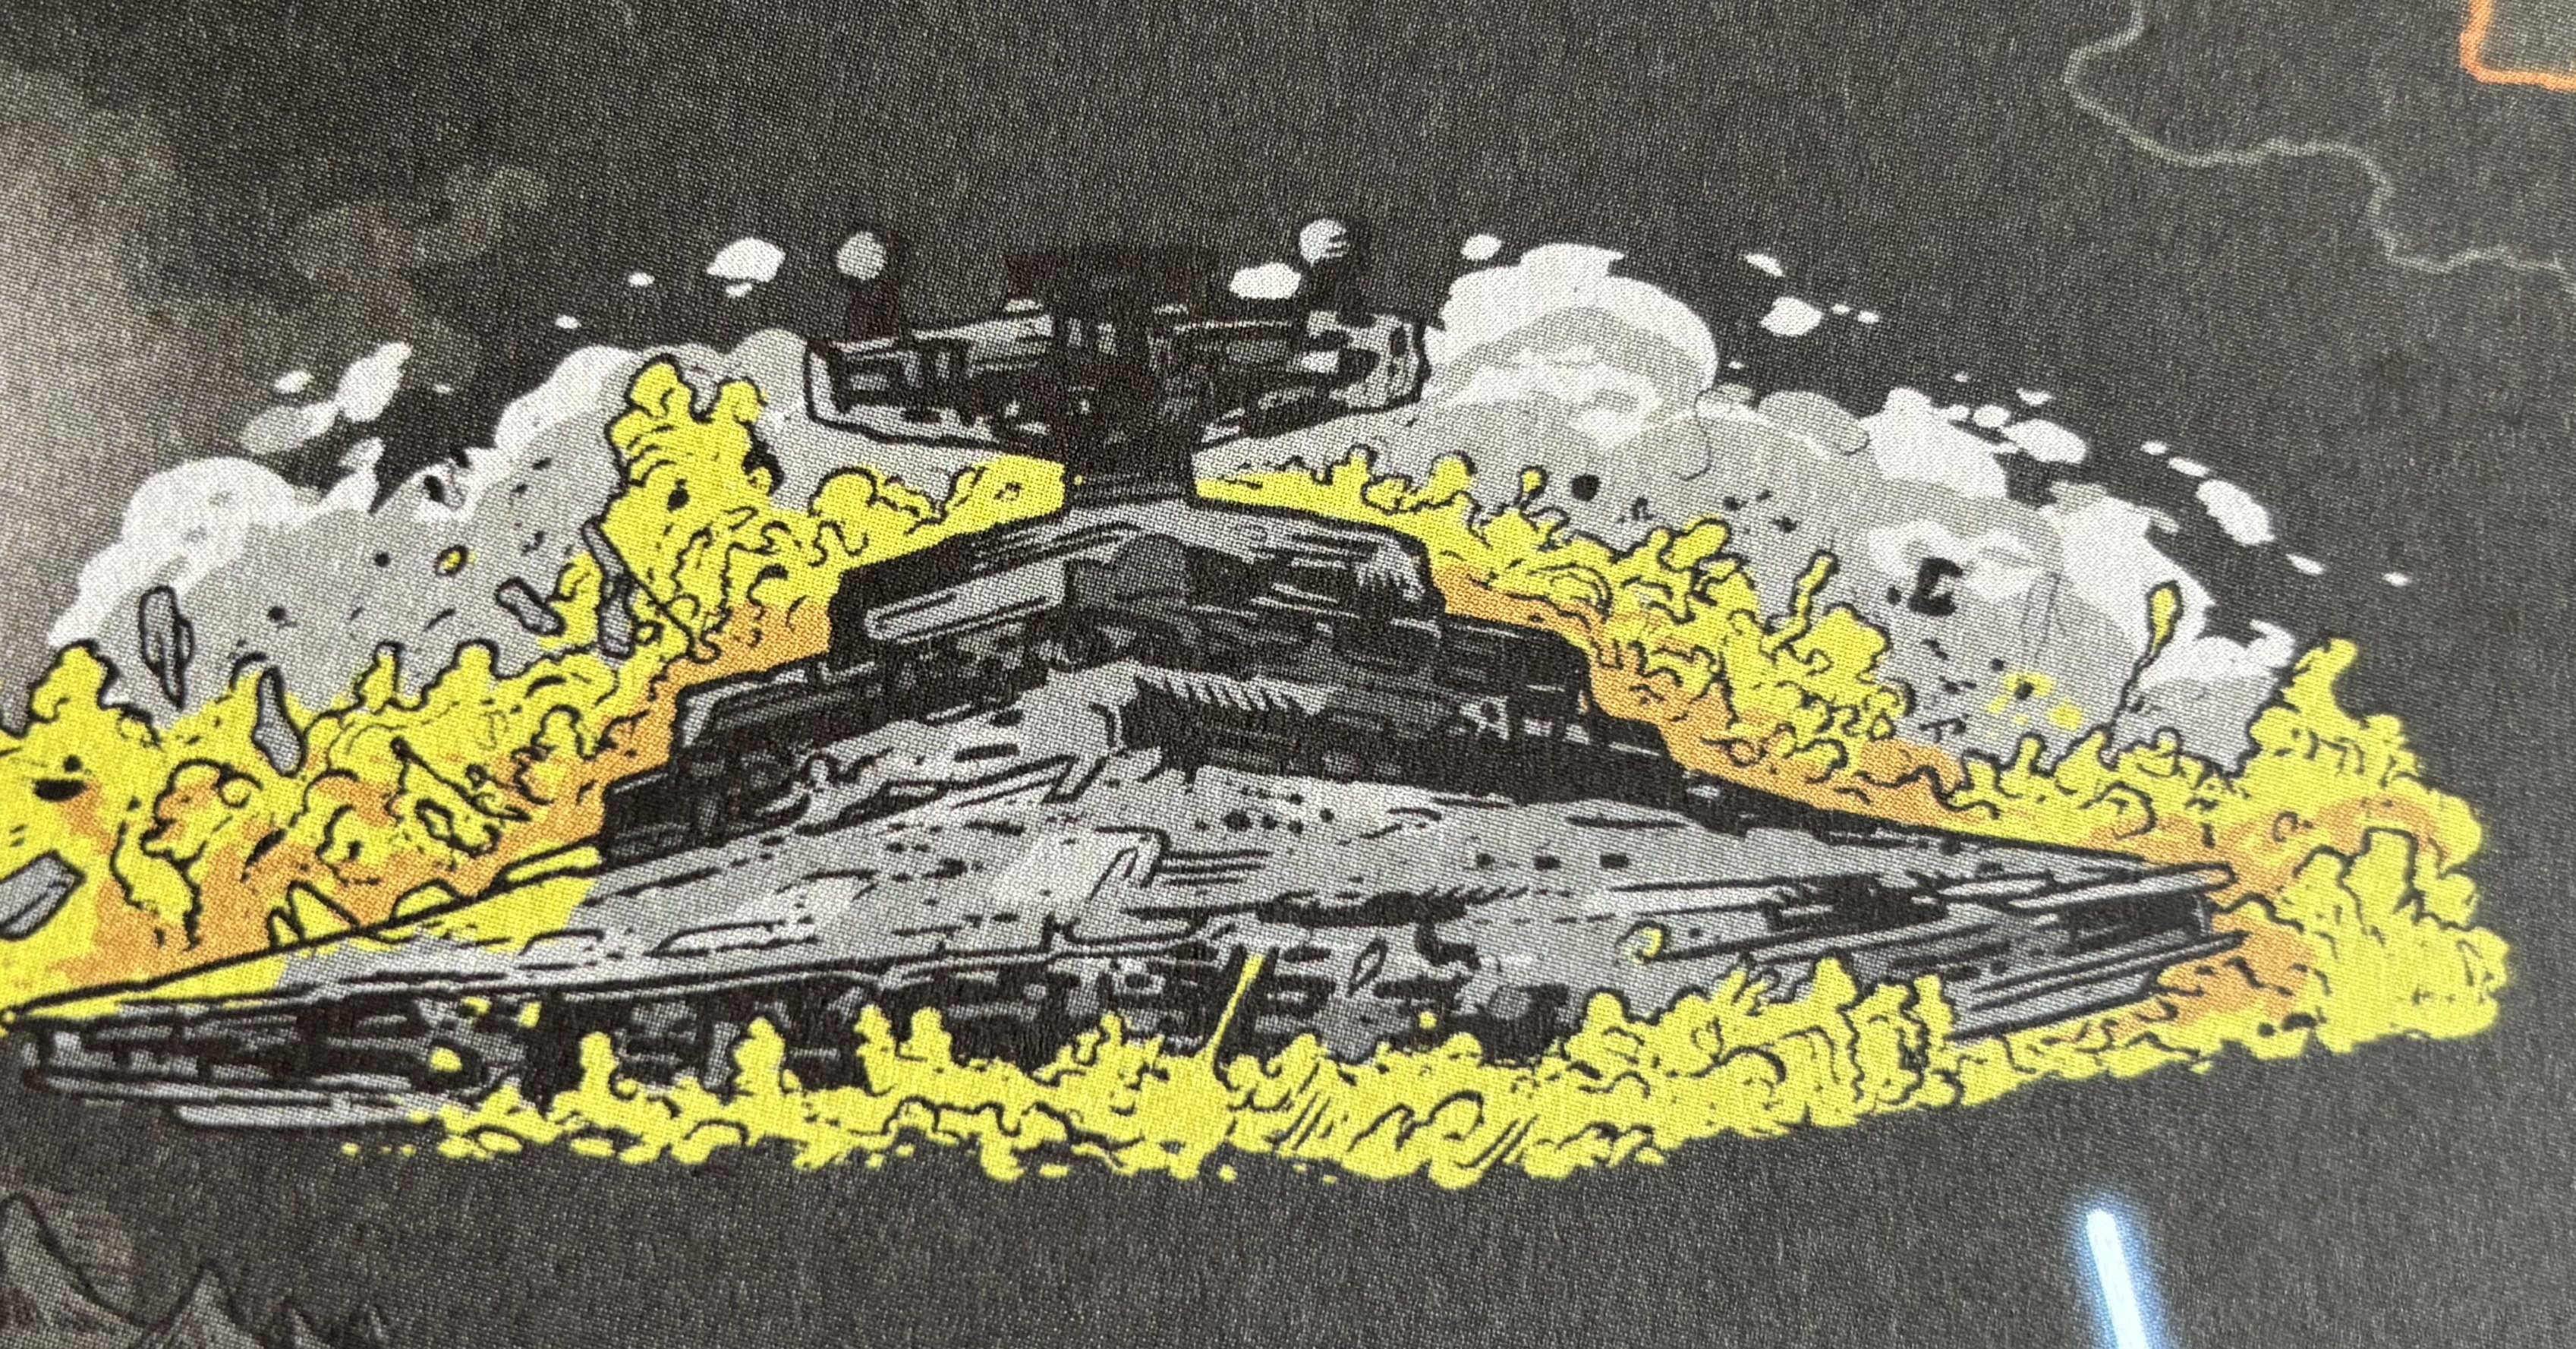
Destruction
On the bridge of the Sovereign, an Imperial officer informed Tarkin of damage to the power core and a leak in the hyperdrive. They then reported that the ship was beyond saving and that Tarkin needed to evacuate immediately for his own safety. Before the evacuation could begin, Wren, Syndulla, and Orrelios reached the unguarded Bay 5 and escaped in their painted TIE fighter as explosions began to rupture the Sovereign's outer hull. However, by the time Jarrus and Bridger arrived in the hangar, the evacuation was complete, leaving only the Inquisitor's TIE Advanced, which the Jedi used to escape before Bay 5 detonated. The Star Destroyer had begun to list and descend towards Mustafar below, as more explosions consumed its hull.
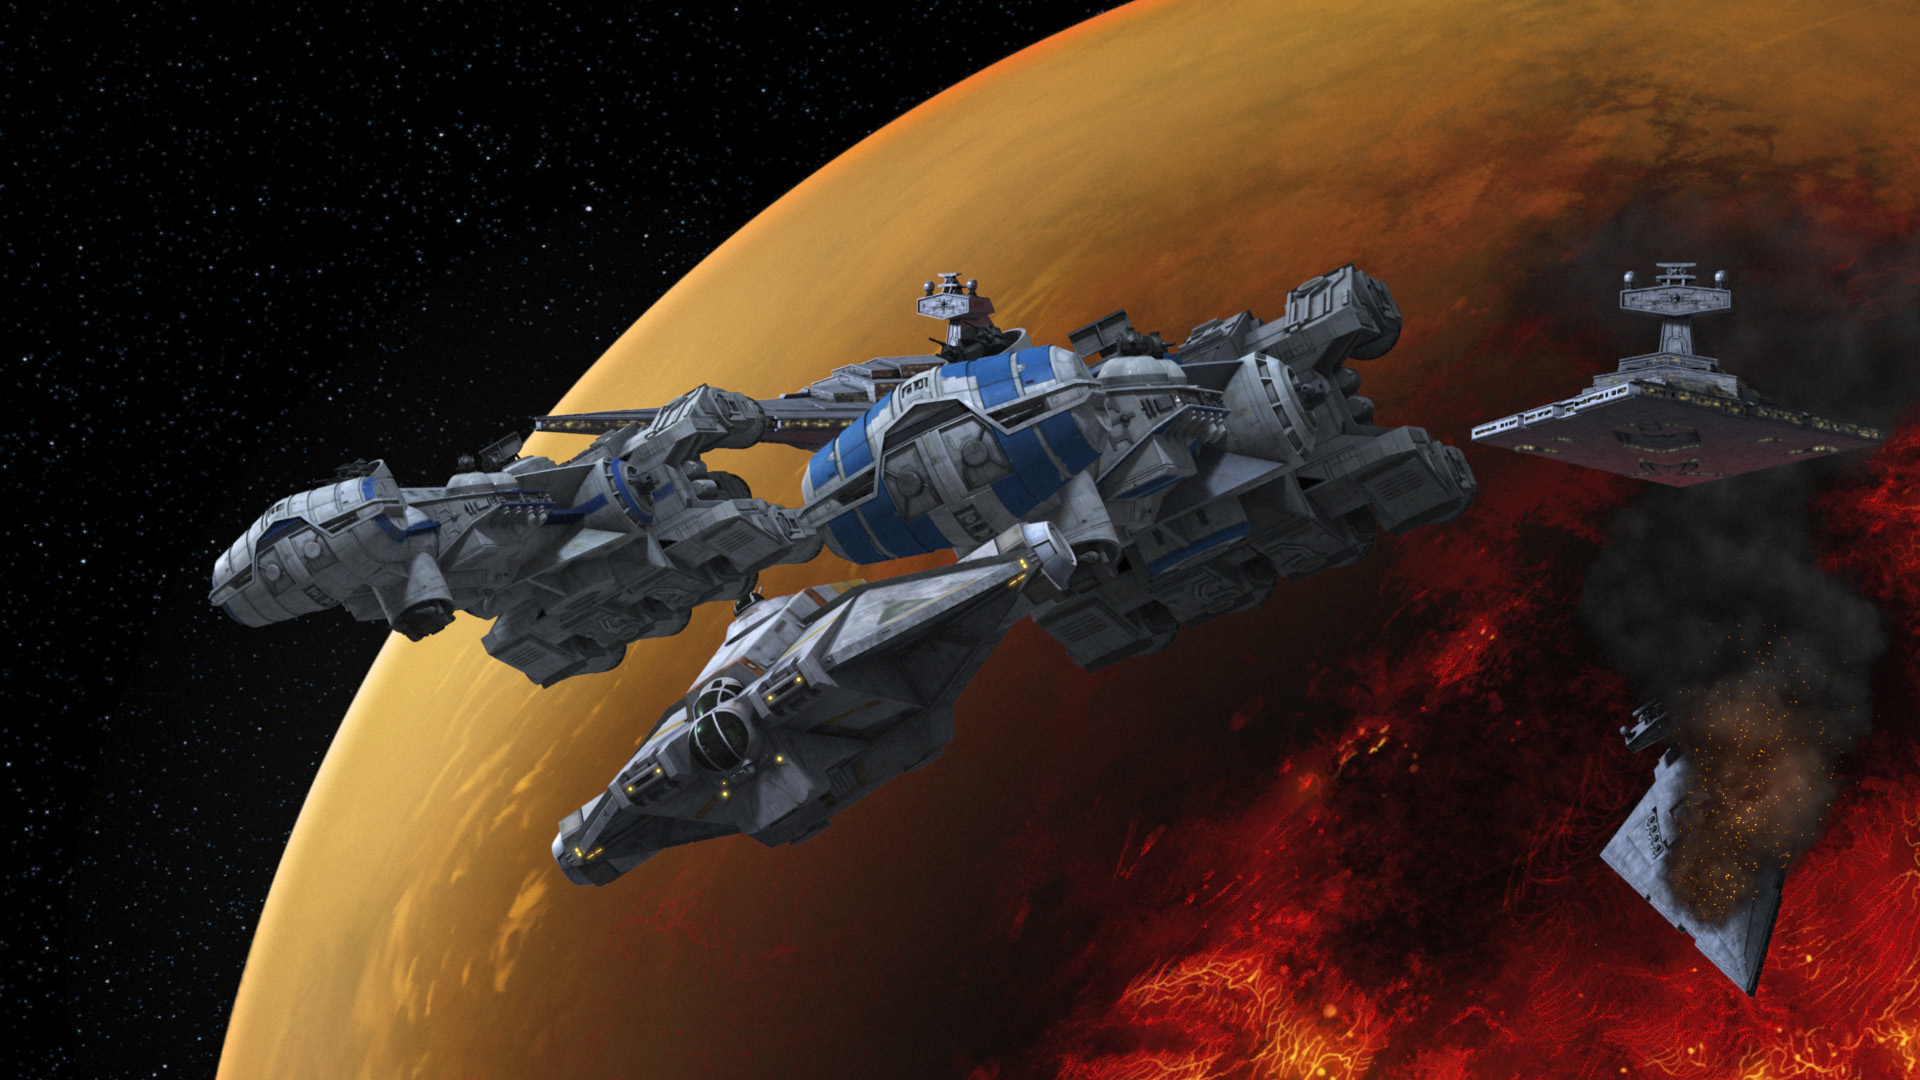
Following their escape, both rebel TIEs were pursued and fired at by Imperial fighters. The group realized that their carrier, piloted by the droid C1-10P, had disappeared. However, Transport Ship 63378 then emerged from hyperspace, accompanied by several CR90 corvettes and the Spectres' primary vessel, the VCX-100 light freighter Ghost. These vessels, the Alliance sector fleet led by Ahsoka Tano, engaged the TIEs and allowed the Specters' TIEs to dock before the group escaped into hyperspace. As the entirety of the Sovereign was consumed by explosions, a Sentinel-class landing craft escaped the vessel and made its way to another Star Destroyer. Aboard, Tarkin was informed by a pilot that the rebels had escaped. The Sovereign then crashed onto Mustafar's lava fields.
Legacy
Immediate consequences
The destruction of the Sovereign not only caused embarrassment for Tarkin but also incurred the displeasure of Emperor Palpatine himself. After the loss of his flagship, Tarkin returned to Lothal. Upon his arrival, Kallus informed the Grand Moff of reports of unrest across Lothal, stemming from rumors of the incident at Mustafar, with some perceiving the Empire as weak and vulnerable. Tarkin dismissed these concerns, stating that the Emperor had also dispatched Darth Vader as an alternative solution to deal with the Spectres. Following the incident at Mustafar, the Executrix once again served as Tarkin's flagship.
Tarkin anticipated that Lothal would face punishment following the destruction of the Sovereign, an event he took personally. Agent Kallus conveyed this expectation to Lothal's Minister Maketh Tua after her failure to gather information on the Spectres. Lothal was subsequently punished by Kallus and Vader, with measures including an increased Imperial presence and the burning of the refugee camp known as Tarkintown. Meanwhile, the Spectres were inducted into the rebel Phoenix Cell following Jarrus' rescue. Ahsoka Tano sent a summary of the incident to rebel General Davits Draven, who viewed it as a net victory for the rebellion. In another message to Draven, Tano cited the destruction of the Sovereign as justification for providing the Spectres with more hardware and a support network.
In an entry in her journal, Mon Mothma, the rebel Senator representing Chandrila, concurred that the naval engagement at Mustafar constituted a short-term victory. However, she observed that the Empire had become aware of the Rebel Alliance's naval capabilities and that security would be swiftly tightened throughout the Outer Rim in response to the loss of a Star Destroyer. Monthma then wrote that the rebellion must start making aggressive moves or else it would be defeated. This was a moment the senator believed was inevitable, yet not one she was expecting to face so soon. At some point, rebel archivist Hendri Underholt compiled Tano's two messages and Mothma's journal entry in The Rebel Files, a compilation of information, reports, and accounts belonging to the Alliance, in the "Alliance Chron 1" section, dated to between 5 BBY and 0 ABY.
Later recollections
In 2 BBY, the Spectres received the assignment of refuelling the rebel Gold Squadron, who were escorting Mon Mothma into hiding following her treasonous pronouncements against the Emperor. One rebel pilot, Gold Two, commented that she had heard much about Phoenix Squadron, including their destruction of the Sovereign, a feat for which Garazeb Orrelios confirmed responsibility while laughing. The Gold Two then suggested that the Spectres reconsider attempting similar "stunts," as the Empire had intensified security across the Outer Rim as a consequence of the attack, making operations more challenging for other rebels.
Prior the Battle of Jakku in 5 ABY, the New Republic, the successor to the Rebel Alliance, formulated a plan to seize starships from the Empire, assembling soldiers who had previously served on Imperial vessels. Upon learning of this plan from General Carlist Rieekan, Thane Kyrell, a pilot and former Imperial, voiced his apprehension, pointing out that, despite the Sovereign's destruction over Mustafar, the Empire had since augmented its defenses against infiltrators and that no one had ever successfully captured a Star Destroyer. Although the New Republic ultimately prevailed at Jakku, Kyrell's mission to capture the Inflictor failed, as the Star Destroyer's captain scuttled the ship rather than allow it to fall into enemy hands.
Behind the scenes
Notable appearances
The Sovereign was initially referenced in Tarkin, a 2014 novel penned by James Luceno. The Star Destroyer then made its inaugural appearance in "Call to Action," the thirteenth episode of the first season of the animated television series Star Wars Rebels. The episode was first broadcast on February 9, 2015. While not named in "Call to Action," the Star Destroyer was identified as the Sovereign in the subsequent episode, "Rebel Resolve," which aired on February 23 of the same year.
Within Fantasy Flight Games' miniatures game Star Wars: Armada, a card featuring the Sovereign was included in the 2018 Chimaera Expansion Pack and subsequently reprinted in the 2020 Upgrade Card Collection. The artwork of the Star Destroyer, created by Leos Ng, was repurposed from the 2003 Star Wars Legends video game Star Wars Galaxies. In the game, the artwork is an in-universe painting entitled Imperial Star Destroyer, which depicts the Imperial-class Star Destroyer Devastator.
Inconsistencies
In its depiction in Star Wars Rebels and associated media, as well as Darth Vader (2017) 15, the Sovereign is shown with what Star Wars: Rogue One: The Ultimate Visual Guide describes as a tractor beam targeting array, consistent with other Imperial I-class Star Destroyers. However, in the Chimaera Expansion Pack, Upgrade Card Collection, Star Wars: Galactic Atlas, Darth Vader (2017) 14, and Darth Vader (2017) 16, the Sovereign is depicted with what Star Wars: Card Trader identifies as a communications tower. This feature has been observed on Imperial II-class Star Destroyers. This article assumes the former sources are correct.
In the Star Wars Rebels episode "Fire Across the Galaxy," which was broadcast on March 2, 2015, several TIE fighters land in Bay 5 as the rebels' electromagnetic pulse detonates. However, when Tarkin's reinforcements arrive in the same hangar aboard two Sentinel-class landing craft, the bay is empty. Similarly, later in the episode when the rebels arrive in the bay, the TIEs have returned and the landing craft have vanished.
The Star Wars Rebels webcomic adaptation, which commenced publication on December 6, 2019, portrays Kanan Jarrus' interrogation, as depicted in "Rebel Resolve," as taking place in the Imperial Complex. However, within the episode itself, Ezra Bridger states that Jarrus was not being interrogated in the complex, with the Spectres learning at the end of the episode that he was imprisoned on the Sovereign. Furthermore, Amy Beth Christenson's concept art for Jarrus' cell was titled "Imperial Star Destroyer interrogation room." This article assumes the webcomic to be incorrect and that the interrogation took place on the Sovereign.