BTL Y-wing starfighter
The BTL Y-wing starfighter, alternatively known as the Y-wing starfighter/bomber or simply the BTL-series, Y-wing fighter, or Y-wing, and humorously referred to as the wallowing pigs, represented a series of versatile starfighter-bombers crafted by Koensayr Manufacturing. Originally commissioned by the Galactic Republic during the Clone Wars, numerous surviving Y-wings later found service with the Alliance to Restore the Republic throughout the Galactic Civil War. Prominent models encompassed the initial two-seat BTL-B Y-wing starfighter/bomber, its successor, the BTL-S3 Y-wing Starfighter, and the single-seat BTL-A4 Y-wing assault starfighter/bomber.
Characteristics
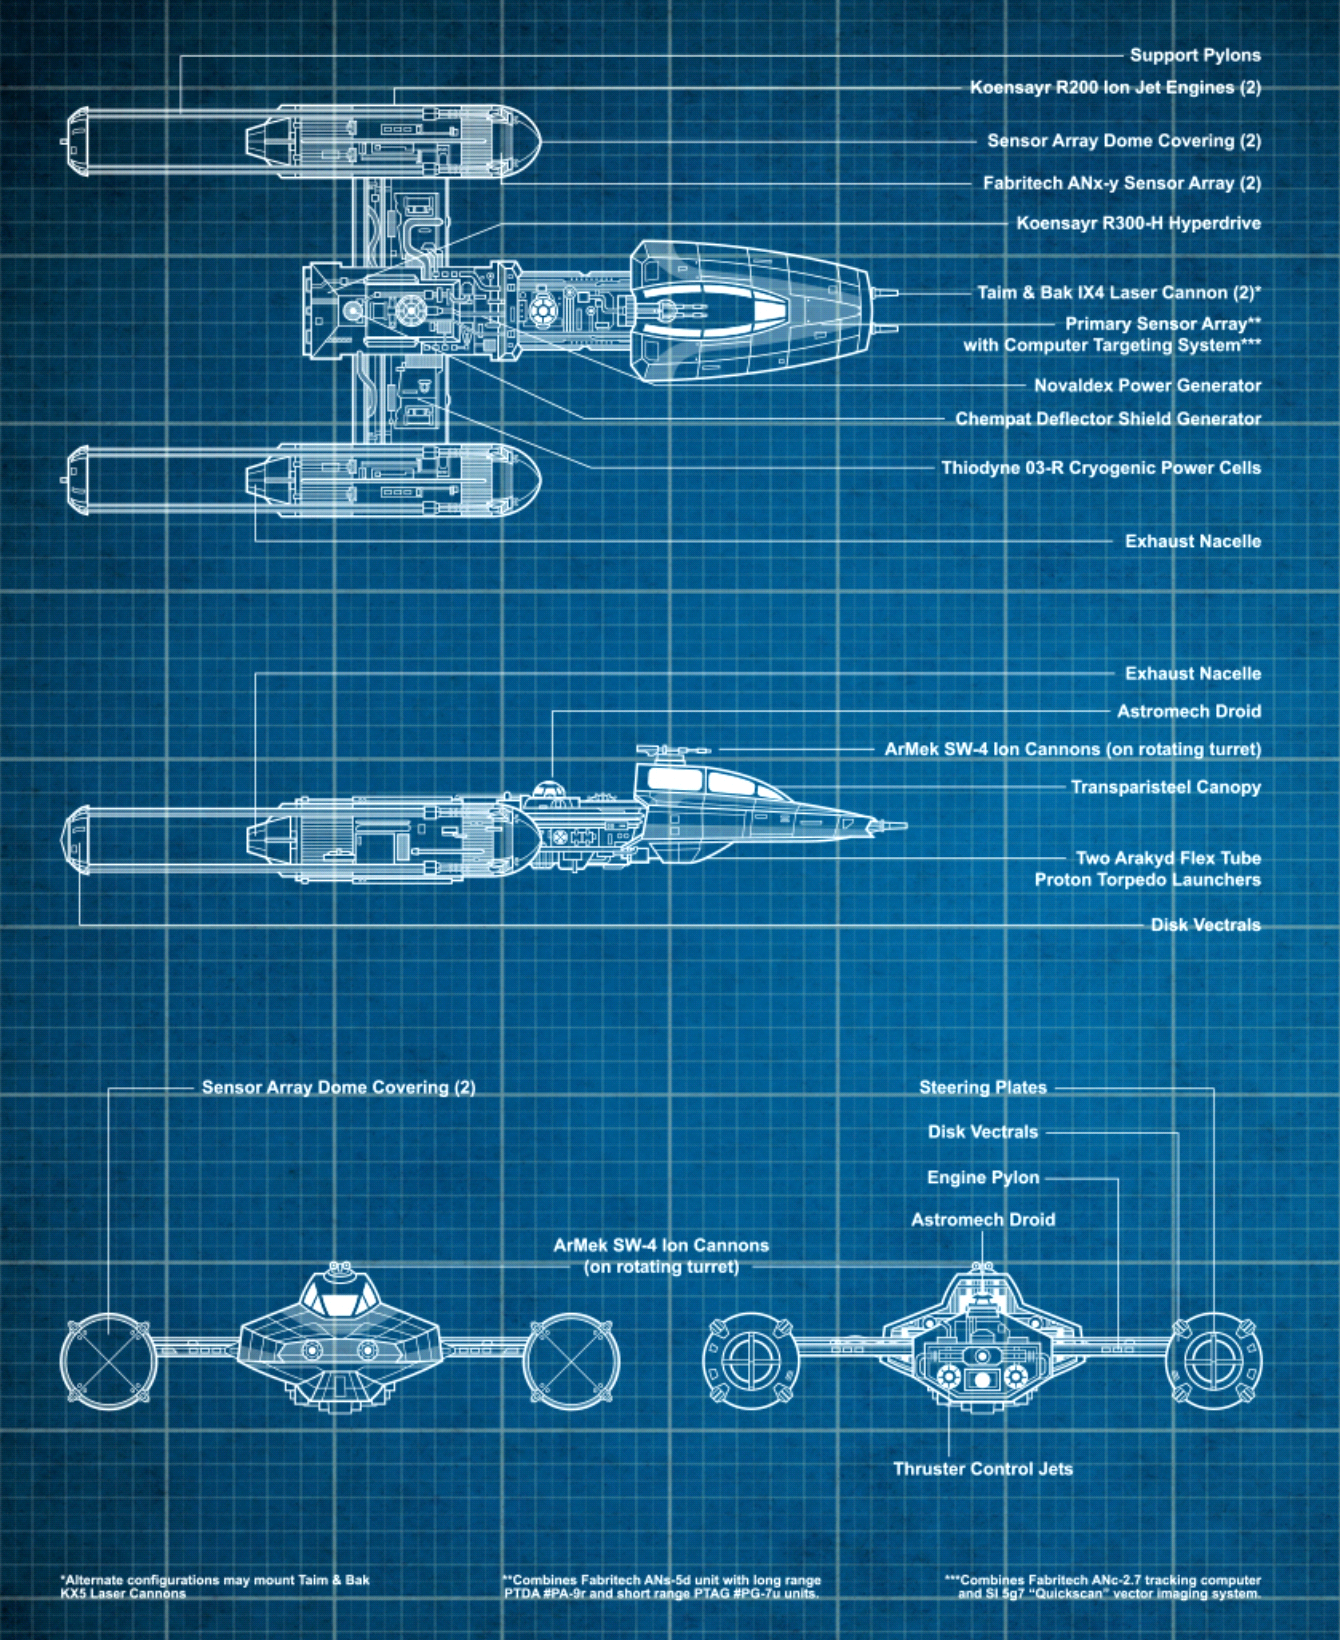
In the early stages of the Clone Wars, the Galactic Republic tasked Koensayr with the creation of a combined starfighter and long-range bomber. The resulting BTL-B model proved to be so effective that further variations were developed, including the BTL-S3 and BTL-A4. However, aside from variations in their cockpit and gunner configurations, they all possessed similar attributes.
The BTL-B Y-wing was composed of a cockpit section connected via a strengthened central spar and cross-wing to a pair of sizable Koensayr ion engines. The pressurized cockpit accommodated a pilot (and in some versions, a gunner) protected by a transparisteel canopy. Certain cockpit sections were modified to serve as fully enclosed, repulsor-powered escape vehicles, although the majority of Y-wings utilized conventional ejector seats.
Each engine was equipped with four robust pylons extending rearward to support an elongated engine nacelle, terminating in disk-ventrals that adjusted thrust for enhanced maneuverability. A duo of thrust control jets were integrated into the aft central spar to provide the Y-wing with greater agility. Repulsorlifts were installed in the neck and wings to enable atmospheric flight. A fuel recycling system ensured exceptional efficiency for the Y-wing during extended missions. In cases of emergency landings, pilots could jettison fuel from the engines.
In terms of armament, the Y-wing featured two forward-firing laser cannons, either the KX5 or IX4 models. These cannons, engineered to penetrate battle cruiser hulls, could inflict significant damage on smaller targets, capable of collapsing a five-story stone structure with only a few shots. Supplementing these were twin SW-4 or SW-5 ion cannons, mounted on a rotating turret controlled either by a dedicated gunner or the pilot, depending on the specific model. Additionally, it carried a pair of MG7 proton torpedo launchers, each with a magazine holding six rounds. These launchers could deploy various ordnance, including concussion missiles, proton bombs, and cluster missiles, alongside proton torpedoes. The starfighter possessed considerable firepower, particularly when deployed in groups; a squadron of Y-wings could carry sufficient ordnance to obliterate an entire city, blanketing the battlefield with intense white explosions that disrupted sensors. Moreover, the Y-wing could accommodate external ordnance attached directly to its hull, such as an electro-proton bomb.
The Y-wing boasted substantial armor, featuring a titanium-reinforced alusteel hull and a Chempat deflector shield generator. This generator, powered by the ion engines, was linked to shield projectors distributed across the Y-wing's hull, enabling the pilot to adjust the shields for maximum protection or to reinforce damaged areas of the craft. The Y-wing could also employ its cannons to intercept incoming enemy missiles, provided the targeting computer remained operational.
For flight management, the Y-wing incorporated a Sublights Products Corporation NH-7 flight control avionics package and photonics communication system, along with an ANc 2.7 tracking computer interfaced with an SI 5g7 "Quickscan" vector imaging system, an ANs-5d "lock track" full-spectrum transceiver, PA-9r long-range phased tachyon detection array, and PG-7u short-range primary threat analysis grid. A composite sensor dome was mounted on the forward end of each engine, with a rear-facing sensor positioned on the cross-wing. The Y-wing's sensors were sensitive enough to detect an escape pod-sized object via its metallurgical signature within a five-kilometer radius when operating at low altitudes. An R2 series astromech droid, housed in a dedicated socket behind the cockpit, stored hyperspace data for the R300-H hyperdrive motivator and could independently manage all other systems. Y-wings were heavily reliant on a functioning astromech, as hyperspace travel was impossible without one.
The original Y-wing included a range of additional equipment tailored for long-range strike missions, such as backup batteries, a redundant life support system, fresh water reservoirs, and an emergency flotation system. Due to the Y-wing's tendency to generate significant heat, a complex cooling system was integrated throughout the starfighter.
The Rebel Alliance actively sought to acquire Y-wings, either through purchase or theft, to establish their burgeoning rebellion. However, they soon discovered that the cooling system demanded extensive maintenance after each flight, necessitating the removal of armor plates for access. To alleviate this issue, the decision was made to remove the armor plating, which was then repurposed to reinforce other vessels, such as the T-47 airspeeder. Additional shield power was implemented to compensate for the loss of armor.
Further modifications included the removal or reconfiguration of various components to reduce weight. This involved eliminating the fuel reclamation system from most models, except for some BTL-S3 variants (which were used as couriers), and replacing the torpedo launchers' six-round magazine with a four-round version. The engine-supporting pylons were also shortened to improve maneuverability during close combat. While the resulting fighter appeared more slender, the Y-wing's overall structural integrity remained intact, resulting in a faster and more deadly starfighter compared to the original. The speed and maneuverability of certain models, particularly the two-seat BTL-S3, were still considered below average, but they were nonetheless regarded as dependable and heavily armed.
Models
For decades following the Clone Wars, various Y-wing models participated in military engagements, spanning the Galactic Civil War to the First Order-Resistance conflict. The Alliance modified their Y-wings by stripping away the hull and nacelle plating to simplify maintenance on the aging craft, a feature that would become iconic. Apart from cockpit differences, all ships within the BTL series shared a similar design.
BTL-B Y-wing
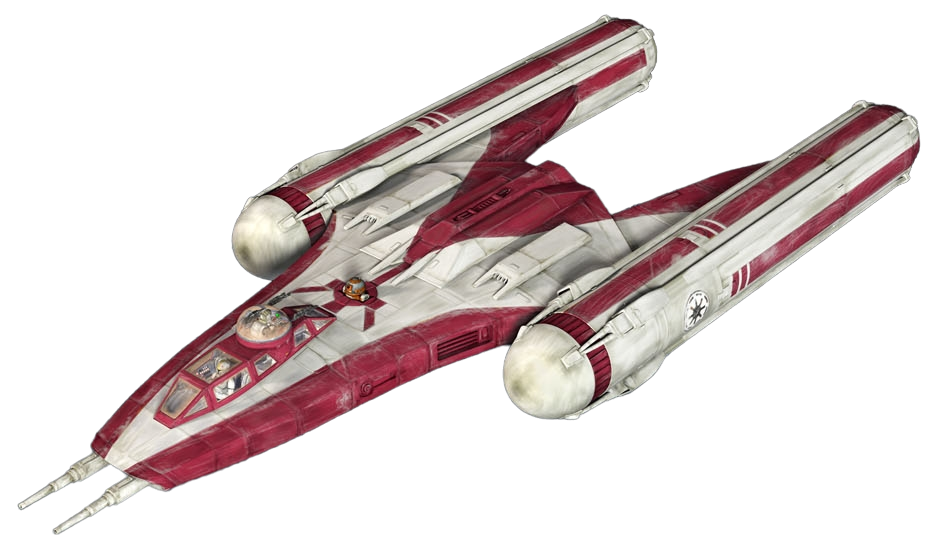
The BTL-B Y-wing starfighter/bomber was the initial model commissioned by the Republic Navy early in the Clone Wars. It was conceived as a versatile starfighter and long-range bomber intended to supersede the V-19 Torrent and Jedi interceptors. Its defining characteristic was its bubble-turret, capable of rotating 360 degrees, offering gunners an unobstructed view of the surrounding space. A mainstay of the Republic Navy, it saw action in numerous major battles of the war, although the majority of BTL-Bs were dismantled by the Empire after the conflict.
BTL-A4 LP
The BTL-A4 LP variant was used as a long-range reconnaissance asset.
BTL-A4 Y-wing
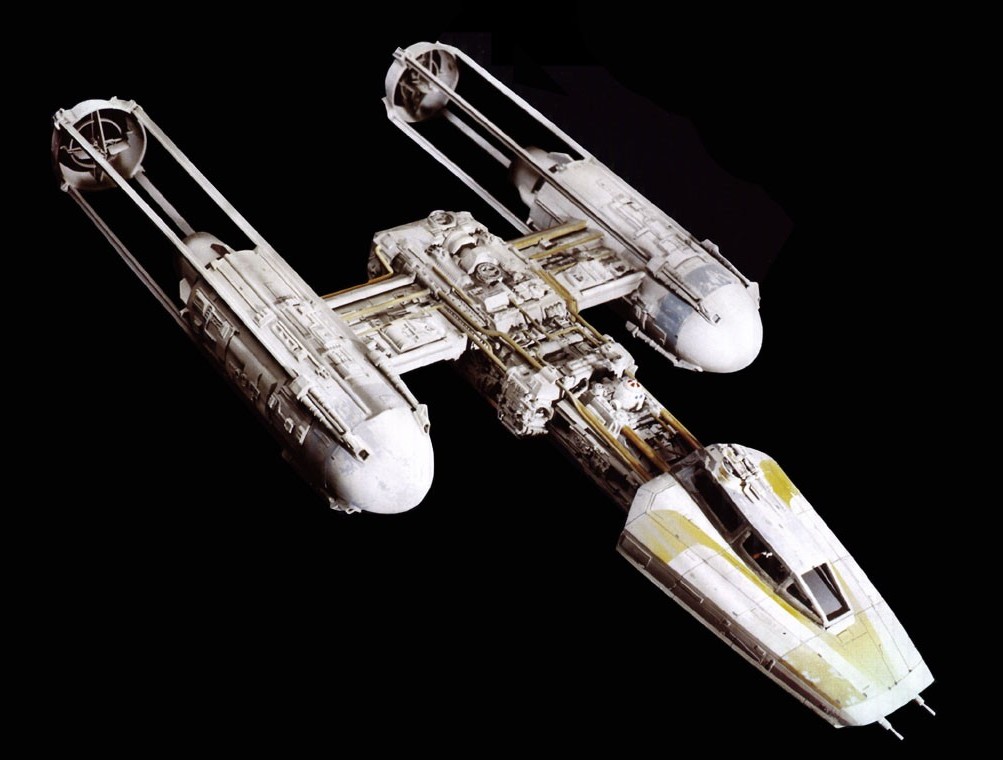
Following the success of the BTL-B, the BTL-A4 Y-wing assault starfighter/bomber variant was designed as a single-seat tactical strike spacecraft, lacking the gunner's position found in other versions. After the Empire retired the BLT-A4, this variant was extensively employed by the Alliance to Restore the Republic and New Republic during the Galactic Civil War. Its resilience, reliability, and heavy armament made it a key component of the rebel fleet, participating in significant battles such as Scarif, Yavin, Endor, and Jakku.
BTL-S3 Y-wing

The BTL-S3 Y-wing Starfighter retained the tailgunner position from the BTL-B, but eliminated the elevated bubble turret by positioning the pilot and gunner back-to-back within the cockpit. Similar to the BTL-A4, it would later serve with the Rebel Alliance, and by the time of the Cold War three decades later, it was still prized for its durability despite being considered outdated.
BTA-NR2 Y-wing

The BTA-NR2 Y-wing starfighter revitalized the Y-wing line after the Galactic Civil War popularized the design as "the starfighter that crippled the Empire." It was largely based on the BTL-A4 single-seat variant and mirrored the customizability and absence of armor plating that customers associated with the "rebel Y-wing." Despite this, it offered optional plating and enhanced sensors, deflector shields, controls, and engines. This variant served as a planetary defense craft with the New Republic Defense Fleet, as well as with the Resistance in their fight against the First Order.
History
The Clone Wars
Overview
During the Clone Wars, Y-wings developed under the Y-wing project demonstrated their value to the Republic, participating in several crucial battles against the Separatists. Despite their size, these two-seat starfighters were surprisingly agile, with clone trooper pilots routinely executing rapid rolls while maintaining formation. Their turrets and fixed guns enabled them to engage and eliminate multiple targets simultaneously, making them effective in combat missions against enemy starfighters. This adaptability made them suitable for a range of mission profiles, from attacking enemy capital ships to bombing ground targets. However, they were considered "buggy" in atmospheric operations.
Corvair and the Kaliida Nebula
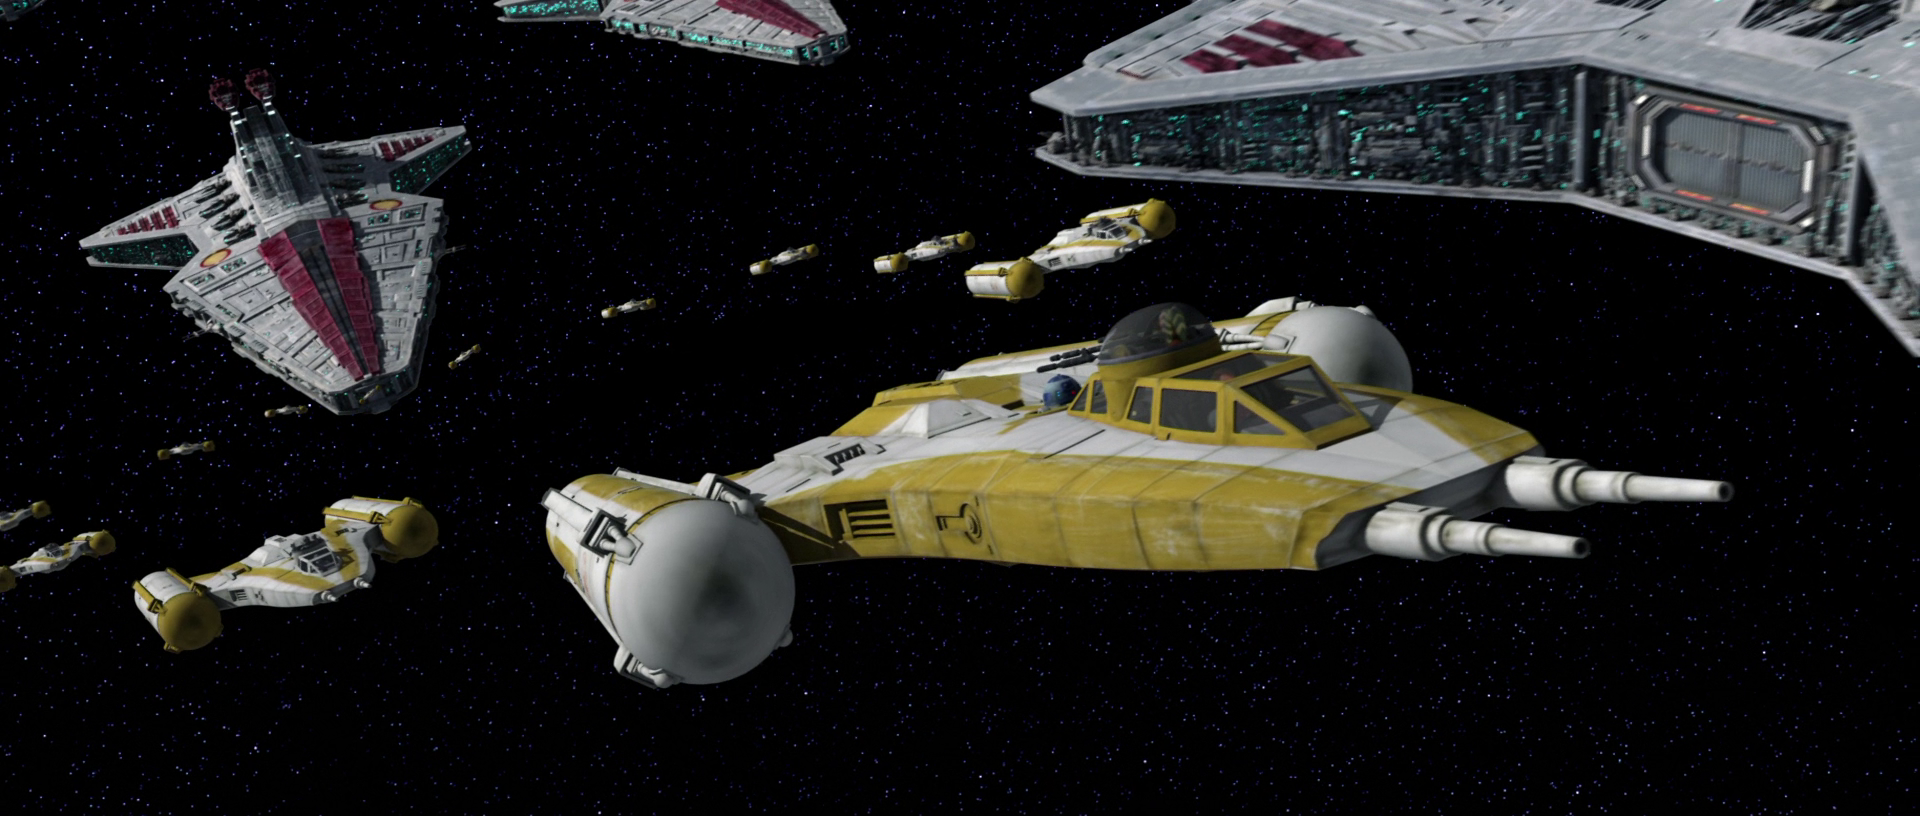
Y-wings were deployed in the Battle of Corvair alongside V-19 Torrent starfighters under the command of Jedi General Anakin Skywalker. Shadow Squadron, a unit of clone trooper pilots, flew Y-wing bombers in the Battle of the Kaliida Nebula under Skywalker's command. At the time, Y-wings were still undergoing testing. Jedi Commander Ahsoka Tano served as the gunner in Skywalker's Y-wing, and Jedi General Plo Koon acted as a fighter escort. The Y-wings successfully destroyed the Malevolence's ion cannon during the engagement. Of the initial force of 12 Y-wing bombers, six were lost in the assault.
Ryloth
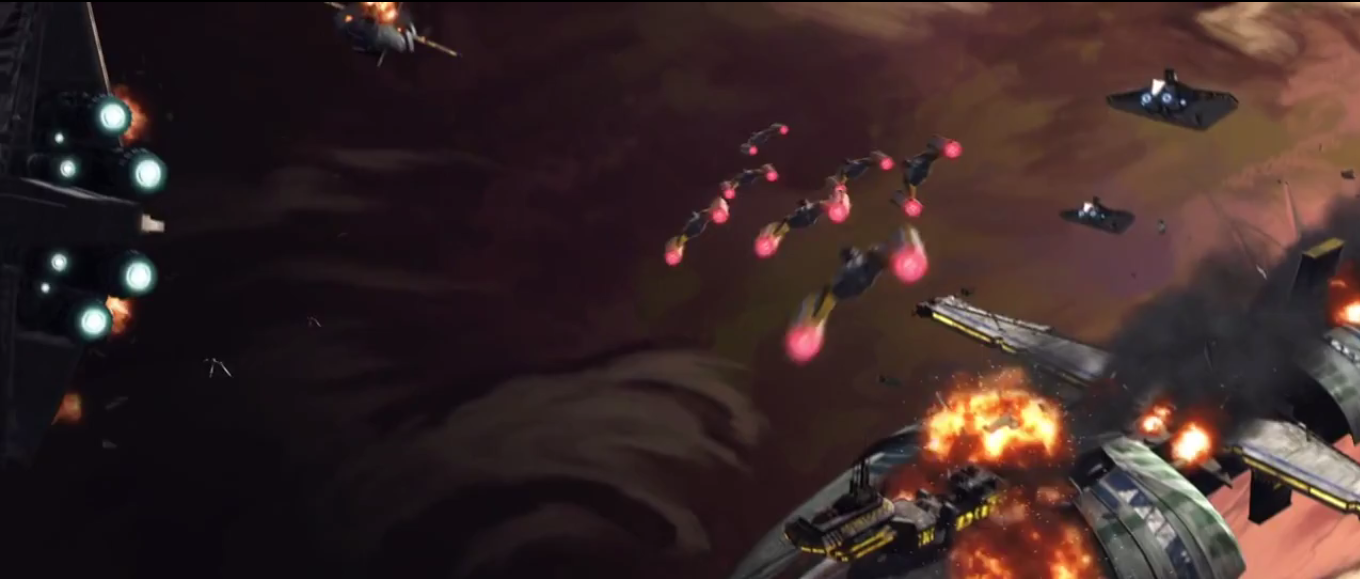
Y-wings participated in the Battle of Ryloth, where they breached the planetary blockade established by the Confederacy of Independent Systems. They also engaged in atmospheric operations, and at least one crashed near the Syndulla residence. Hera Syndulla rescued "Chopper" from the wreckage, and Cham Syndulla decided to preserve the crash site as a memorial. Several of Skywalker's Y-wings destroyed Separatist Hyena-class Droid Bombers tasked with destroying Lessu following the Separatist withdrawal from the capital.
Malastare
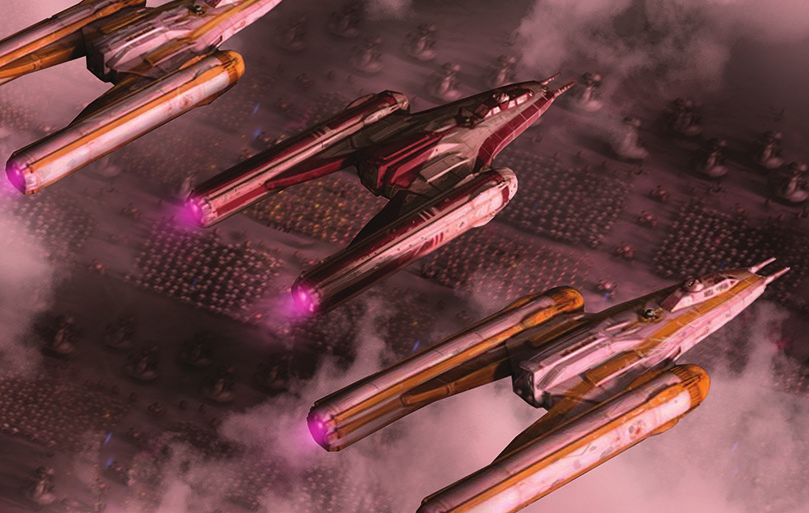
In 21 BBY, Y-wings took part in the Battle of Malastare, famously deploying an electro-proton bomb on the Separatist Droid Army, inadvertently awakening the last surviving Zillo Beast. The battle concluded with a joint Republic/Dug victory, with the Separatists being driven off the planet and the Dugs signing a treaty, granting the Republic access to its considerable fuel reserves.
Geonosis
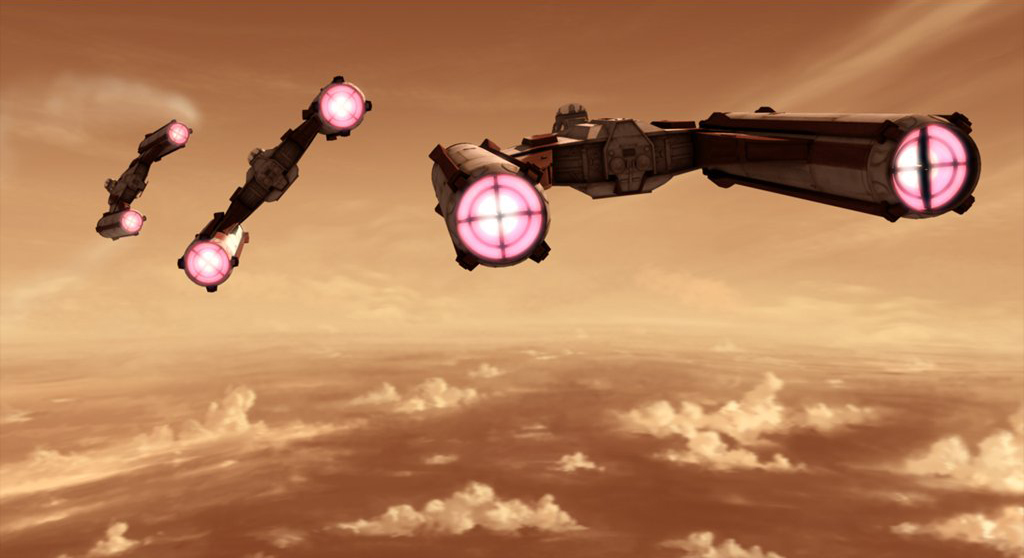
In 21 BBY, Republic Y-wings bombed Separatist anti-aircraft cannons during the Second Battle of Geonosis, enabling Jedi Generals Obi-Wan Kenobi, Anakin Skywalker, and Ki-Adi-Mundi to land at Point Rain. Y-wings also defended Admiral Wullf Yularen's command ship from attacks by Geonosian Nantex-class territorial defense starfighters and assisted in the defense of Kenobi's position.
Kamino
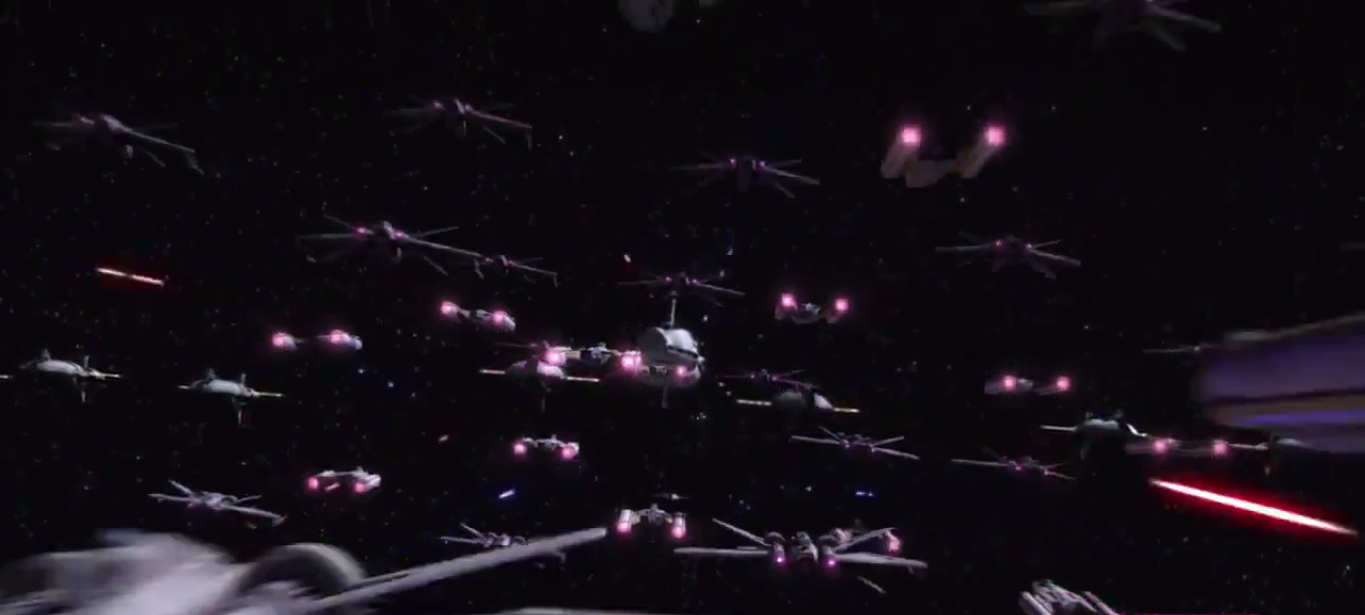
Republic Y-wings joined Aggressive ReConnaissance-170 starfighters and V-19 Torrent starfighters in the Battle of Kamino, conducting bombing runs on Separatist transports in space. Unbeknownst to the clone pilots, these transports carried Trident-class assault ships, which landed in the ocean below and deployed aqua droids to Tipoca City. Separatist forces were eventually compelled to withdraw after the clone troopers—including the 501st Legion—on Kamino launched a counteroffensive against the battle droids.
Sullust
Republic Y-wings saw action at the Battle of Sullust, engaging Separatist starfighters and conducting bombing runs on their capital ships. Darth Sidious ordered Count Dooku to eliminate Asajj Ventress during the battle, leading to a Separatist retreat and a Republic victory.
Patitite Pattuna
In 20 BBY, Republic Y-wings mounted an unsuccessful defense of Jedi General Adi Gallia's flagship at the Battle of Patitite Pattuna. Astromech droid R2-D2 and protocol droid C-3PO escaped the doomed Star Destroyer aboard a Y-wing and crashed on Patitite Pattuna's surface. After repairing their ship, the duo made a brief detour to Balnab in search of power but were forced to abandon the ship. Shortly after the Battle of Patitite Pattuna, the Republic initiated a rescue of Adi Gallia and recovered the droids, who had been captured by Weequay pirates and taken prisoner by the Separatists.
Umbara
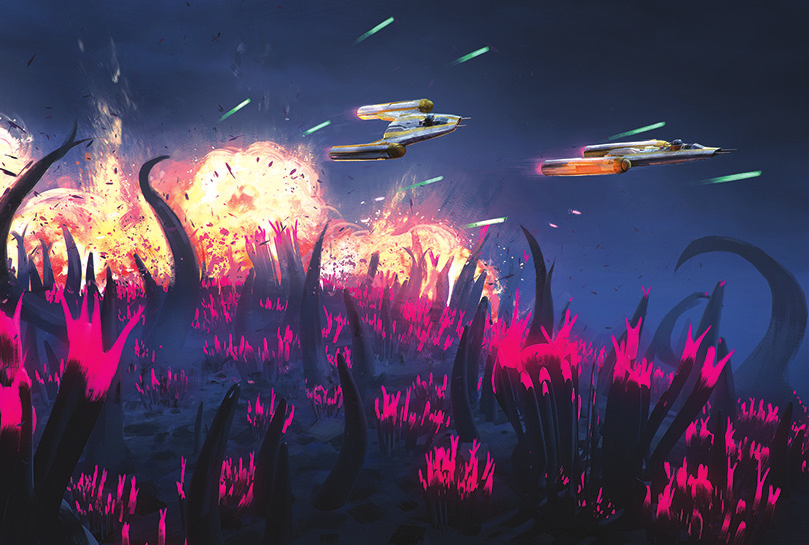
Y-wings participated in the Battle of Umbara, destroying Separatist frigates guarding the planet and deploying ordnance on Umbaran Militia personnel who had ambushed the 501st Legion. They also engaged in atmospheric combat operations, battling Vulture-class starfighters and droid tri-fighters in air-to-air engagements. The Battle of Umbara culminated in a Republic victory and the execution of the traitorous Jedi General Pong Krell.
The Negotiator
Republic Y-wings mounted an unsuccessful defense of Kenobi's flagship, the Negotiator, after it came under attack by Separatist warships. The Separatist victory prevented the Republic from intervening in the rescue of Ahsoka Tano, who had been abducted by Weequay pirates in the Florrum system. Instead, her rescue was undertaken by a group of six younglings.
Outer Rim Sieges
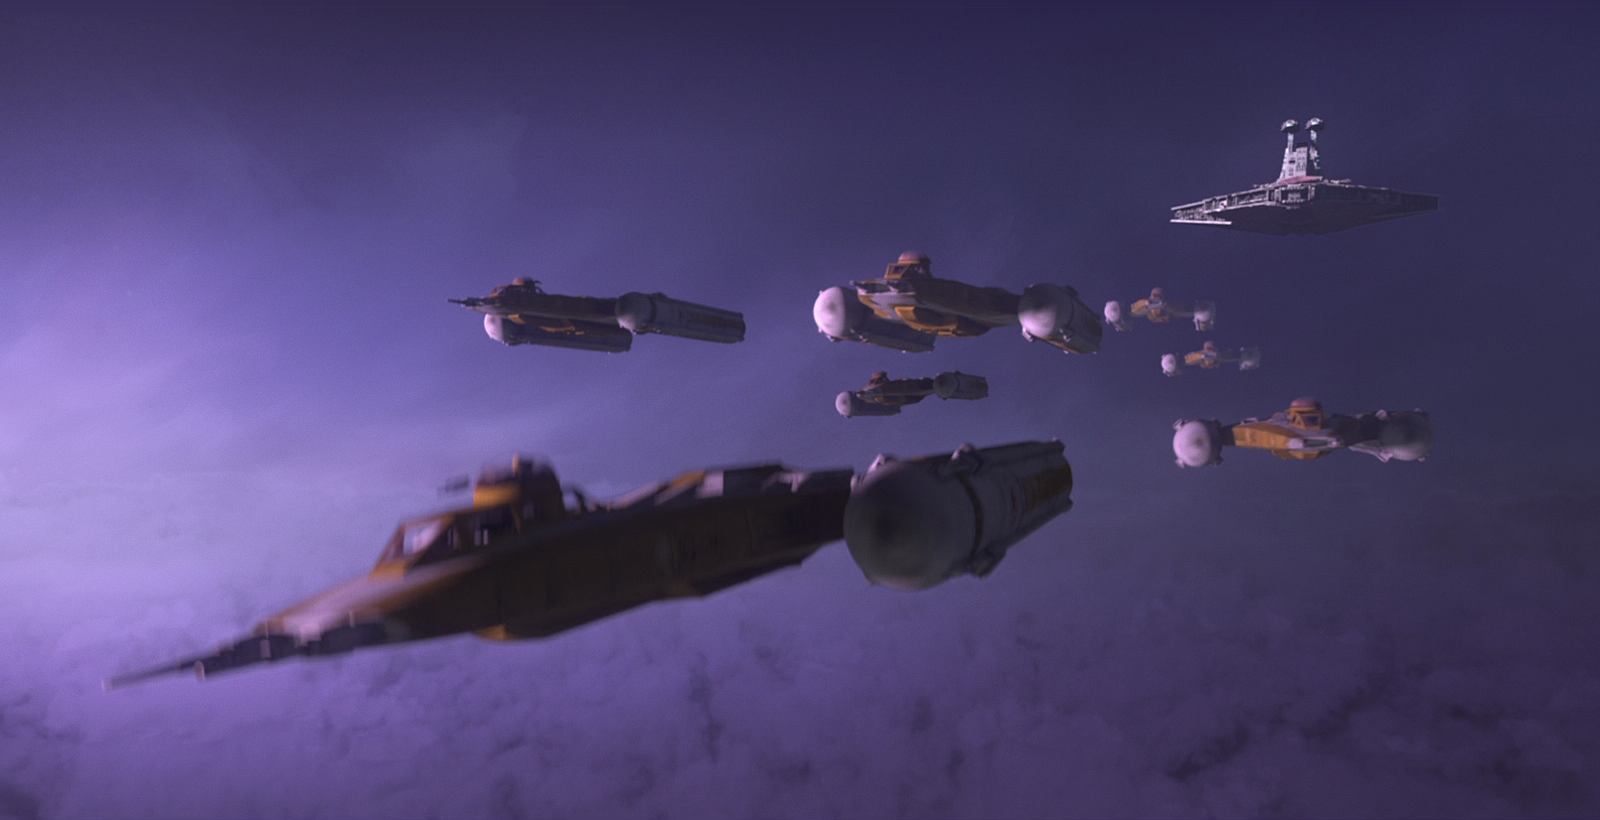
In the year 19 BBY, during the Battle of Anaxes within the Outer Rim Sieges, Gold Squadron deployed Y-wing bombers to strike at Separatist anti-aircraft weaponry positioned at the Anaxes assembly complex. The campaign concluded with a Republic triumph, the demise of Admiral Trench, and the complete rout of Separatist forces stationed on Anaxes. Following the Siege of Mandalore, a BTL model was undergoing repairs aboard the Tribunal, a Venator-class Star Destroyer. The Y-wing played a crucial role in Captain Rex and Ahsoka Tano's escape from Order 66 and their subsequent visit to Padmé Amidala's funeral. Rex continued to utilize the Y-wing in the early years of the Imperial Era.
Age of the Empire
Overview
Shortly after the formation of the Galactic Empire in 19 BBY, an early rebellion began to emerge against the new Imperial regime. With covert backing from influential Senators such as Bail Organa and Mon Mothma, the various rebel cells made use of any vehicles they could get their hands on. Y-wings, having been relegated to planetary defense roles, were a popular choice for the rebels, owing to their integrated hyperdrive and robust construction. Rebels sought to purchase or pilfer as many as possible from military surplus vendors or junkyards, establishing the Y-wing as the most prevalent Rebel starfighter during the Galactic Civil War. They demonstrated superior firepower, resilience, and reliability compared to the Empire's TIE fighters, and were employed in diverse missions, including escort duties, courier runs, reconnaissance, and precision strikes. The BTL-A4 variant was the most common, with most BTL-B models having their bubble turrets replaced by the remotely operated turret found on other models.
Skuhl
In 4 BBY, at least five Y-wings were engaged in combat with Imperial TIE fighters while Jyn Erso attempted to escape from Imperial Military forces on Skuhl. The SC3000 freighter Ponta One was destroyed by crossfire during the aerial battle, resulting in the deaths of both civilians on board.
Yarma
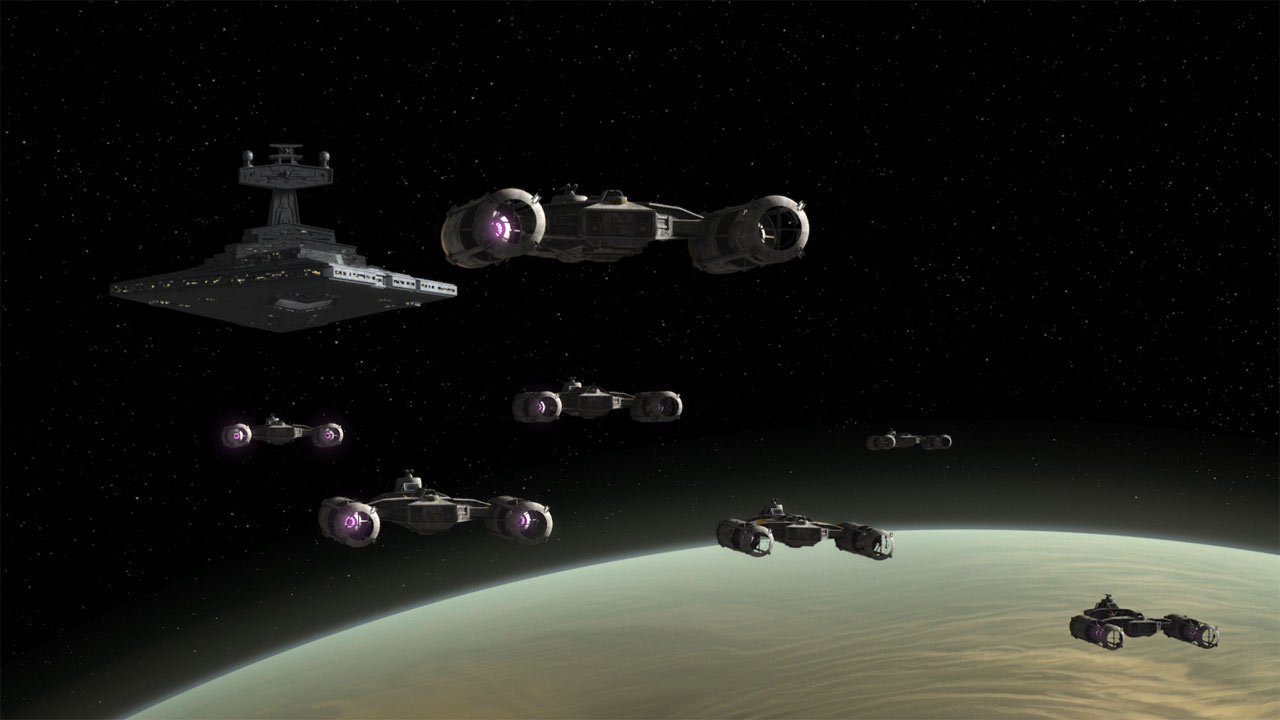
In 2 BBY, Phoenix Cell undertook a mission to retrieve decommissioned Republic Y-wings from Reklam Station, an aerial scrapyard situated within the atmosphere of the planet Yarma. The mission was a success for the rebels, with five Y-wings successfully acquired and Reklam Station destroyed. Two of the original seven craft were lost to Imperial fire, both piloted remotely by Chopper. Despite Commander Jun Sato's initial plan to integrate the Y-wings into Phoenix Squadron, they were instead reassigned to Jan Dodonna's unit on Yavin 4.
Backbone of the Rebellion
Imperial cadets received training at Skystrike Academy on Montross on how to eliminate Y-wing starfighters. Sabine Wren and Wedge Antilles participated in one such training exercise before their initial attempt to escape from Skystrike Academy alongside Derek Klivian and Rake Gahree.
Archeon Nebula

The Y-wings of Gold Squadron provided escort for the Chandrila Mistress, carrying former Imperial Senator Mon Mothma, to a clandestine rendezvous point with the Spectres aboard the Ghost. From there, the Ghost was to transport Mothma to Dantooine for a meeting involving key leaders of the rebellion.
Imperial forces had been tracking the Chandrila Mistress, and shortly after its arrival, it came under attack from an Arquitens-class command cruiser, a Gozanti-class cruiser, and a number of TIE/ln space superiority starfighters. Although Gold Squadron managed to destroy the TIEs and cruisers, Mothma and her crew were compelled to abandon the Chandrila Mistress and transfer to the Ghost. The Rebels made their escape into hyperspace, heading for the Archeon Nebula in the hope that it would obscure their movements from the Empire. Grand Admiral Thrawn had anticipated this maneuver and dispatched a force of Imperial-class Star Destroyers and TIEs to intercept them, including a TIE/d "Defender" Multi-Role Starfighter prototype piloted by Vult Skerris. The ensuing Operation Handoff resulted in a decisive victory for the rebels, but Gold Squadron suffered the loss of three Y-wings.
Atollon
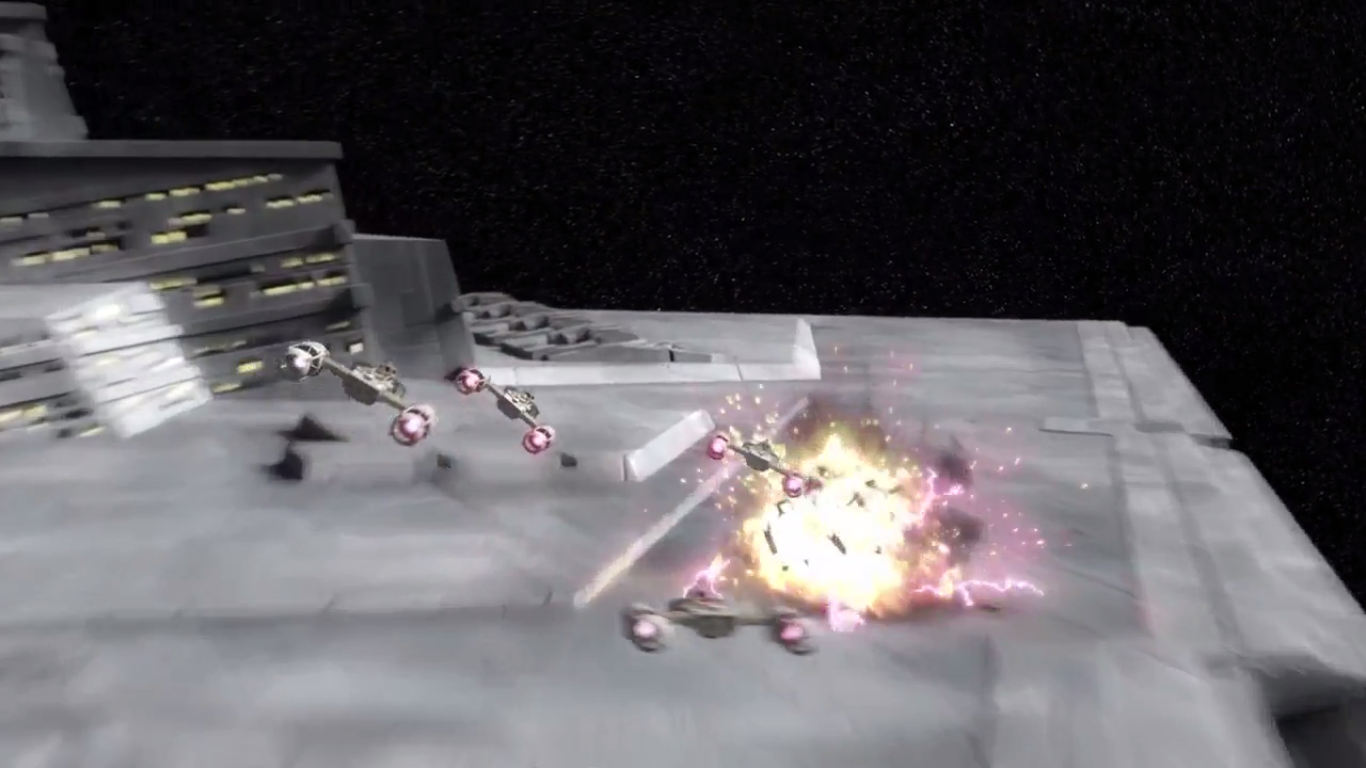
During the Battle of Atollon, the Y-wings of Green Squadron launched an attack on an Imperial-class Star Destroyer while Phoenix Squadron's RZ-1 A-wing interceptors engaged Imperial TIEs. Despite staunch Alliance resistance, the Rebels were forced to retreat to Chopper Base on the surface, and it was only through the intervention of Clan Wren and the Bendu that the Alliance forces were able to escape from Atollon to Yavin. All but two Y-wings were destroyed in the assault.
Lothal
In 1 BBY, under the command of the recently promoted General Hera Syndulla, a combined force of Y-wings and X-wings was deployed to assist in the liberation of the planet Lothal from the Galactic Empire. The Y-wings and X-wings engaged Grand Admiral Thrawn and the Seventh Fleet, targeting the fuel depot and Imperial Armory Complex in Capital City after penetrating the blockade and defeating Skerris once and for all. However, after breaching the outer perimeter defenses in orbit of Lothal, Thrawn's second wave of TIE fighters shot down the Y-wings and X-wings of the entire rebel attack force. None of the Y-wing pilots or their astromechs survived the crash landings in Capital City.
Eadu
During Operation Fracture in 1 BBY, Y-wings from the Massassi Group participated in a mission to Eadu, resulting in the death of Galen Walton Erso and the destruction of an Imperial kyber crystal research facility.
Scarif
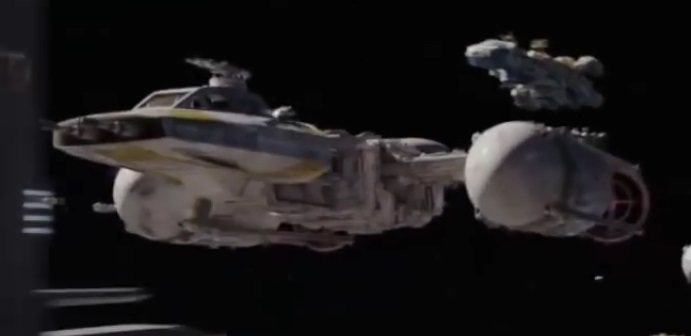
Shortly thereafter, Y-wings from Gold Squadron and Blue Squadron were dispatched to take part in the Battle of Scarif, the opening clash of the Galactic Civil War. Blue Squadron, having been divided into two groups due to the closure of the field aperture, assisted other squadrons in defending the Alliance Fleet and attacking the Shield Gate. Gold Squadron spearheaded the attack on the Shield Gate and used ion torpedos to disable a Star Destroyer. The battle concluded with the Alliance successfully acquiring the Death Star plans, but at the cost of a substantial portion of its forces.
Yavin
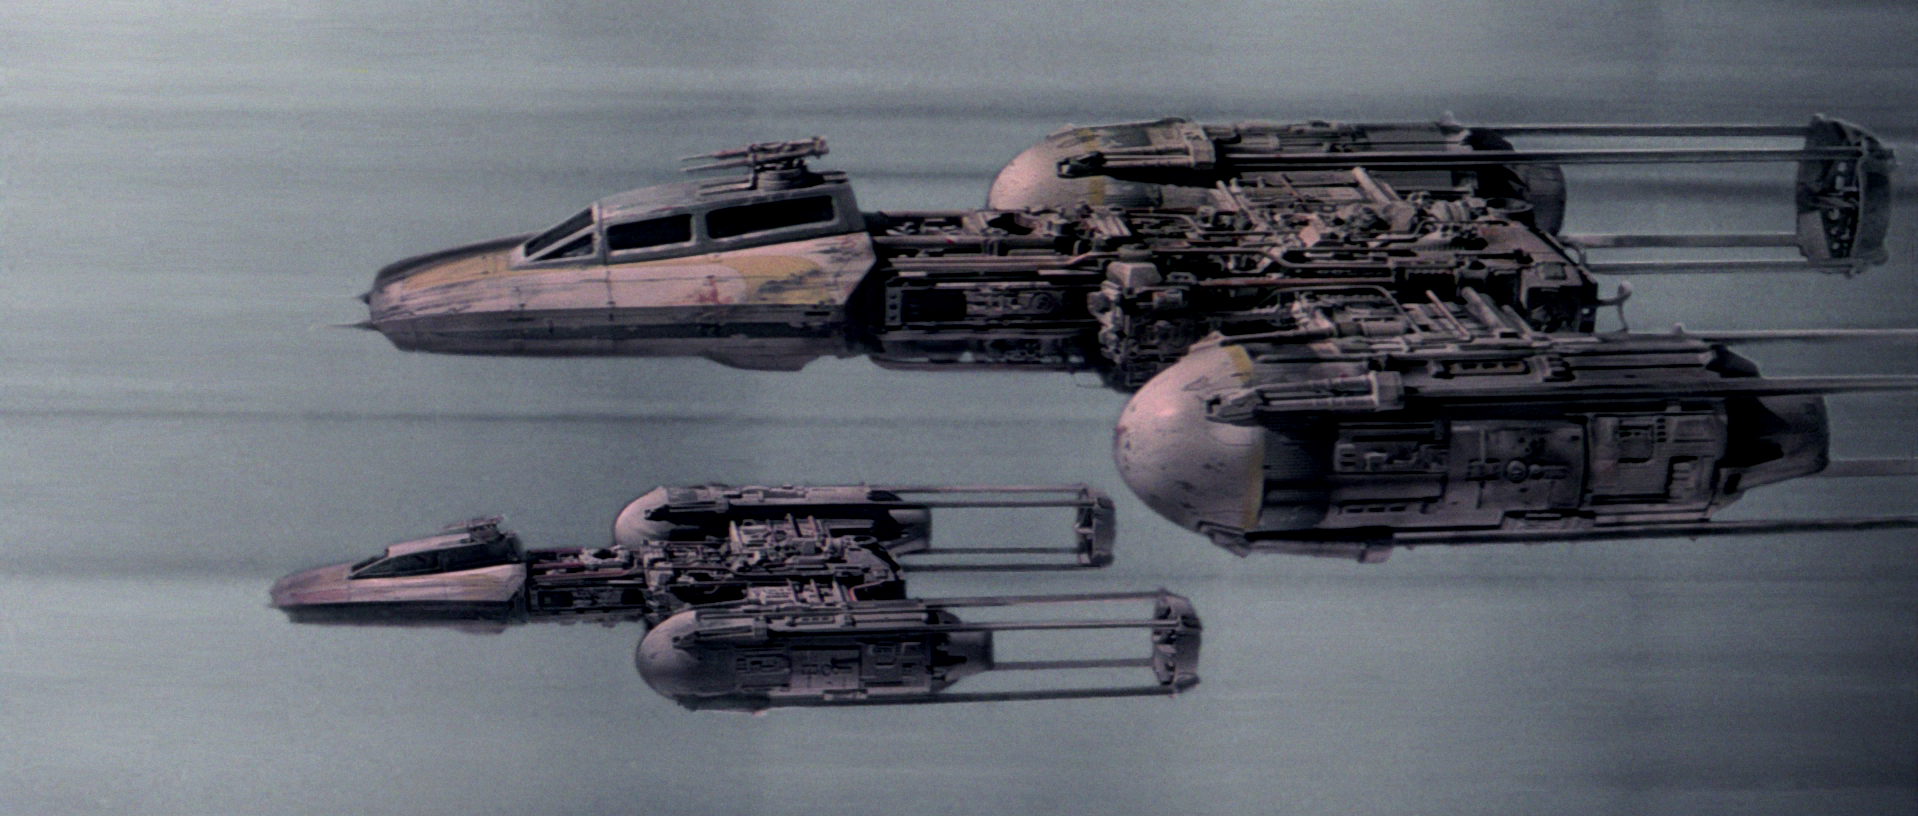
Not long after the events at Scarif, a force of 30 starfighters (including 8 Y-wings from Gold Squadron) was deployed in a desperate attempt to destroy the Death Star at the Battle of Yavin. Captain Jon Vander led Dex Tiree and Davish Krail down the battle station's meridian trench during the initial attack run, but all three were shot down by Darth Vader. The X-wing starfighters of Red Squadron executed two additional attack runs, with the second proving successful. Luke Skywalker, a Force-sensitive Rebel pilot, utilized the Force to launch a pair of proton torpedoes into the station's thermal exhaust port, triggering a chain reaction within the reactor core that resulted in the complete destruction of the station. Only one Y-wing, piloted by Evaan Verlaine, survived the Battle of Yavin.
Mission to recover Imperial communication logs
Shortly following the Battle of Yavin, Luke Skywalker would pilot the BTL-S3 Y-wing Starfighter, Y 4, during his mission to recover Imperial communication logs. During this mission, the rebel pilot employed the starfighter against the Razor-class frigate named Kreuge's Revenge in the Tertiary Usaita system.
Anthan 1

In 0 ABY, Darth Vader and Inspector Thanoth undertook a Mission to the Anthan system to identify those responsible for the Son-tuul Pride robbery and retrieve its cargo of credits. As part of an attempt to negotiate with the Imperials, an information broker known as the Ante revealed the location of the Plasma Devils base of operations on Anthan 1. Armed with this information and following the death of the Ante, Vader and Thanoth abandoned the pursuit and attacked the Plasma Devils' base. During the Plasma Devils' efforts to evacuate, Vader personally downed one of their Y-wings by hurling his lightsaber at the portside engine.
Vrogas Vas

Y-wings from Gray Squadron's saw combat at the Battle of Vrogas Vas, in an attempt to assassinate Darth Vader. By using the Force to throw debris from his crashed TIE at the bombers, the Sith Lord destroyed multiple craft and proved too powerful for the squadron. Later in the battle, Leia Organa commanded the Y-wings of Amber Wing to bomb her position in order to kill Vader, but Commander Karbin's forces decimated the wing.
Mon Cala
Y-wing starfighters participated in the Mutiny on Mon Cala, a significant strategic triumph for the Alliance. The successful mutiny resulted in the Mon Cala Mercantile Fleet joining the Alliance Fleet.
Mako-Ta Space Docks
Y-wings were involved in the defense against an Imperial assault on the Rebellion's base known as the Mako-Ta Space Docks.
Tatooine
Sometime between 0 ABY and 3 ABY, a squadron consisting of X-wings and Y-wings patrolling the Arkanis sector located an Imperial listening station and requested that Saponza's Gang provide them with targets. The subsequent raid completely destroyed the base.
Endor
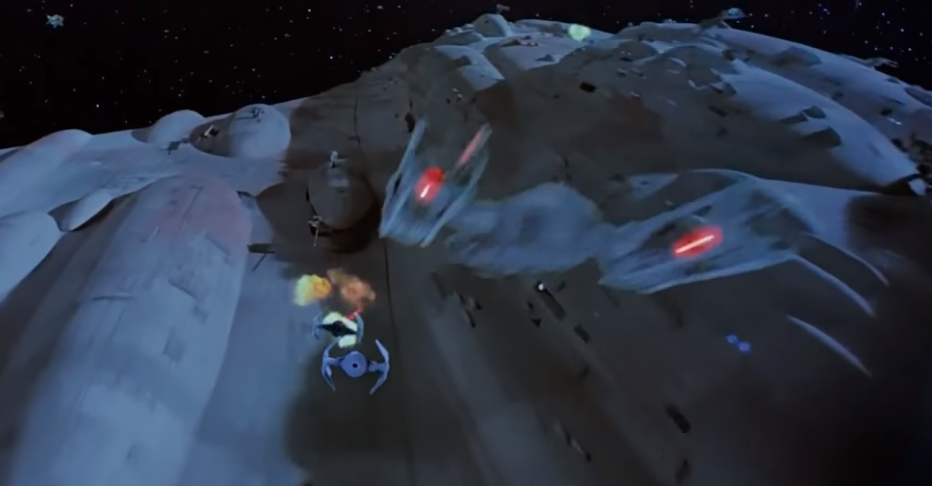
In 4 ABY, Y-wings took part in the Battle of Endor with numerous units including Gold Squadron, Gray Squadron, and Red Squadron. At least one Y-wing, piloted by Norra Wexley under the Gold Nine callsign, entered the superstructure of the DS-2 Death Star II Mobile Battle Station and drew Imperial TIEs away from the Millennium Falcon. The unexpected Rebel victory at Endor led to the death of Galactic Emperor Sheev Palpatine, the redemption of Anakin Skywalker, and the destruction of the Sith, the second Death Star, and the Super Star Destroyer Executor.
Sterdic IV

Seventeen standard days following the Battle of Endor, the Y-wings of Feral Group participated in the Battle of Cawa City on the planet Sterdic IV, dropping bombs on Imperial All Terrain Armored Transport walkers. The battle concluded with a decisive victory for the Alliance.
Naboo

A minimum of three Y-wings participated in the Battle of Theed on Naboo during Operation: Cinder under the command of General Lando Calrissian. The fighters engaged Imperial TIEs that had swarmed Leia Organa, Shara Bey, and Queen Sosha Soruna, who were attempting to disable Imperial weather-control satellites. With assistance from Shriv Suurgav's Danger Squadron-- now joined by former Imperial Special Forces Commandos Iden Versio and Del Meeko-- the Y-wings successfully bombed the Star Destroyer Torment's shield array. The battle ended with a rebel victory and the failure of Operation: Cinder in the region.
Akiva
Several standard months after the Battle of Endor, the New Republic deployed Y-wings to assist the rebellion on Akiva in overthrowing its local Imperial government. The operation resulted in the capture of at least two high-ranking Imperial officials, the rescue of Captain Wedge Antilles, and the liberation of Akiva from Imperial rule.
Hyborean Moon
In 5 ABY, New Republic Y-wings took part in an attack on the Hyborean Moon with the goal of destroying an Imperial Security Bureau prison situated there. The strike leveled the prison, but also destroyed adjacent buildings and resulted in the deaths of an unknown number of civilians.
Fondor
New Republic Y-wings saw action with Shepherd Squadron at the Battle of Fondor Shipyards, one of the last large-scale engagements before the Empire's final stand at Jakku. The battle resulted in a New Republic victory.
Jakku
Y-wings served with Phantom Squadron and the Tierfon Yellow Aces in the Battle of Jakku, the concluding battle of the Galactic Civil War.
New Republic Era
By 28 ABY, Y-wings had largely been phased out of military service due to their outdated design. Despite this, the Amaxine warriors operated at least one Y-wing around this time, which attempted to prevent Organa's Mission to Sibensko. Furthermore, the New Republic utilized the more modern BTA-NR2 Y-wing starfighter. The Resistance also operated at least one two-seat BTL-S3 in 34 ABY and deployed it on a Mission to Spalex, though it was noted that the fighter was very old and therefore dangerous. The Resistance also acquired BTA-NR2s and employed them within the Resistance navy. Zorii Bliss piloted a BTA-NR2 in the Citizens' Fleet.
Behind the scenes
The Y-wing starfighter made its initial appearance in the now Legends promotional novel Star Wars: From the Adventures of Luke Skywalker, the very first Star Wars product ever released. This was a novelization of the film, later deemed canon, which at the time of its release was known simply as Star Wars.
Within the novelization, the Y-wings participating in the Battle of Yavin were part of Red Squadron, while the X-wings belonged to Blue Squadron. Due to the limitations of blue screen technology at the time, the Y-wing squadron was renamed Gold Squadron, and the X-wings became Red Squadron.
Y-wings have appeared in numerous other narrative media released between 1977 and 2014, most notably The Star Wars Holiday Special, the other two films of the original trilogy, and The Clone Wars.
In the original release of Star Wars, the Y-wing starfighters were represented by plastic models filmed against blue screens using computer-controlled cameras. In later versions of the film released in theaters and for home viewing, some shots have been removed and replaced with computer-generated ones.
A transparent turret was initially part of the design, but it was removed when it became clear that blue screen technology was not yet capable of correctly compositing with the turret. The turrets, along with extensive body paneling and the gunner's station, were reintroduced to the Y-wing's design in Star Wars: The Clone Wars.
The aesthetic of the Clone Wars-era Y-wing bombers is directly derived from the original Y-wing design and speculation from A New Hope Visual Effects Art Director Joe Johnston that the Y-wing used by the Rebel Alliance was a "chopped" version of an older craft. The appearance of the Y-wings seen in the episode "Shadow of Malevolence" is intended to bridge the design aesthetic of the prequel and original trilogies.
On April 25, 2014, Lucasfilm announced the discontinuation and rebranding of the former Expanded Universe as "Legends," to be replaced by a new single-level canonicity system where new releases would be declared either canon or non-canon from the start. Since this rebranding, Y-wings have been featured in numerous narrative, promotional, and reference Star Wars products.
In "THE TWINS," an episode of Star Wars: Visions, Y-wings are used by Am's Galactic Empire.