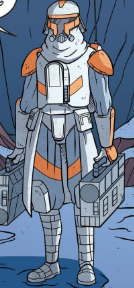
Cody
Cody, formerly known as CC-2224, held the rank of Clone Marshal Commander within the Grand Army of the Republic. As a male clone, he led the 7th Sky Corps, a unit that included the famous 212th Attack Battalion, throughout the duration of the Clone Wars. Within the Third Systems Army and the 7th Sky Corps, he acted as the trusted second-in-command to High Jedi General Obi-Wan Kenobi. General Kenobi considered the commander reliable, trustworthy, and loyal. Cody’s skills as a soldier and his strategic mind earned him the respect of his Jedi superiors and his fellow clone troopers alike.
Cody's creation occurred during the closing years of the Republic Era. He was part of a massive army of soldiers who were genetically identical, bred from the genetic template of Jango Fett, a human bounty hunter. These clones were engineered for unwavering loyalty to the Galactic Republic. After their deployment from their homeworld of Kamino, Cody participated in significant battles against the Confederacy of Independent Systems, including the Battle of Christophsis, the Second Battle of Geonosis, and the Battle of Anaxes. Beyond his relationship with General Kenobi, Cody also developed a friendship with Clone Captain Rex, another clone trooper officer who served under Jedi General Anakin Skywalker in the 501st Legion.
After the Battle of Coruscant, the Jedi High Council sent Cody's battalion to the planet Utapau, which had become the refuge of General Grievous and the Separatist Council. His troops overpowered the Separatist Droid Army, while Kenobi engaged Grievous in combat, ultimately destroying the [cyborg](/article/cyborg] general and bringing the Clone Wars to an effective end. As the Battle of Utapau raged on, Cody performed an action that would forever define his legacy: he gave the order for Kenobi's assassination, although he was not acting of his own volition. The Clone Commander received a communication from Supreme Chancellor Sheev Palpatine, secretly the Dark Lord of the Sith Darth Sidious, instructing him to initiate Order 66. Due to the secret programing implanted within him and all clone troopers by the Sith, Cody was compelled to betray his longtime general and friend, though he ultimately failed to kill him. He continued his service during the reign of the Galactic Empire, aiding in the final enslavement of Kashyyyk. Following an additional mission for the Empire on the Separatist holdout world of Desix, Cody began to question the Empire's objectives and deserted soon thereafter.
Biography
Clone Wars
Creation and early career
Like all clone troopers, Cody was both created and trained on the planet Kamino with the purpose of serving as a soldier in the Galactic Republic's military. From the onset of the Clone Wars, Commander Cody was placed under the command of Jedi General Obi-Wan Kenobi and frequently fought alongside him, acting as the Jedi Master's trusted second-in-command. In this capacity, he assisted Kenobi in leading the 212th Attack Battalion. Although Cody was not present during the First Battle of Geonosis, he participated in many other battles throughout the Clone Wars. Early in the conflict, Cody, Clone Captain Rex, and several Jedi officers were involved in an incident that took place on Tibrin.
During the initial weeks of the war, Kenobi, his Padawan Anakin Skywalker, and Cody led their respective troopers in a series of battles aimed at securing control of a rocky planet. As the Jedi and clones were still in the process of integrating their skills during this early time, Cody and his fellow clones engaged battle droids separately from Kenobi and Skywalker. After their respective skirmishes concluded, both Jedi moved to speak with the clones. While the battle continued in the distance and Skywalker conversed with Sister, Kenobi and Skywalker's astromech droid, R2-D2, approached Cody, who concurred with his general that they needed better cover. Both the Jedi and commander expressed concern over how easily their soldiers could be targeted on the planet. Subsequently, Cody issued an alert over their secure communications channel to warn of approaching battle droids, prompting a swift response from Skywalker and another clone.
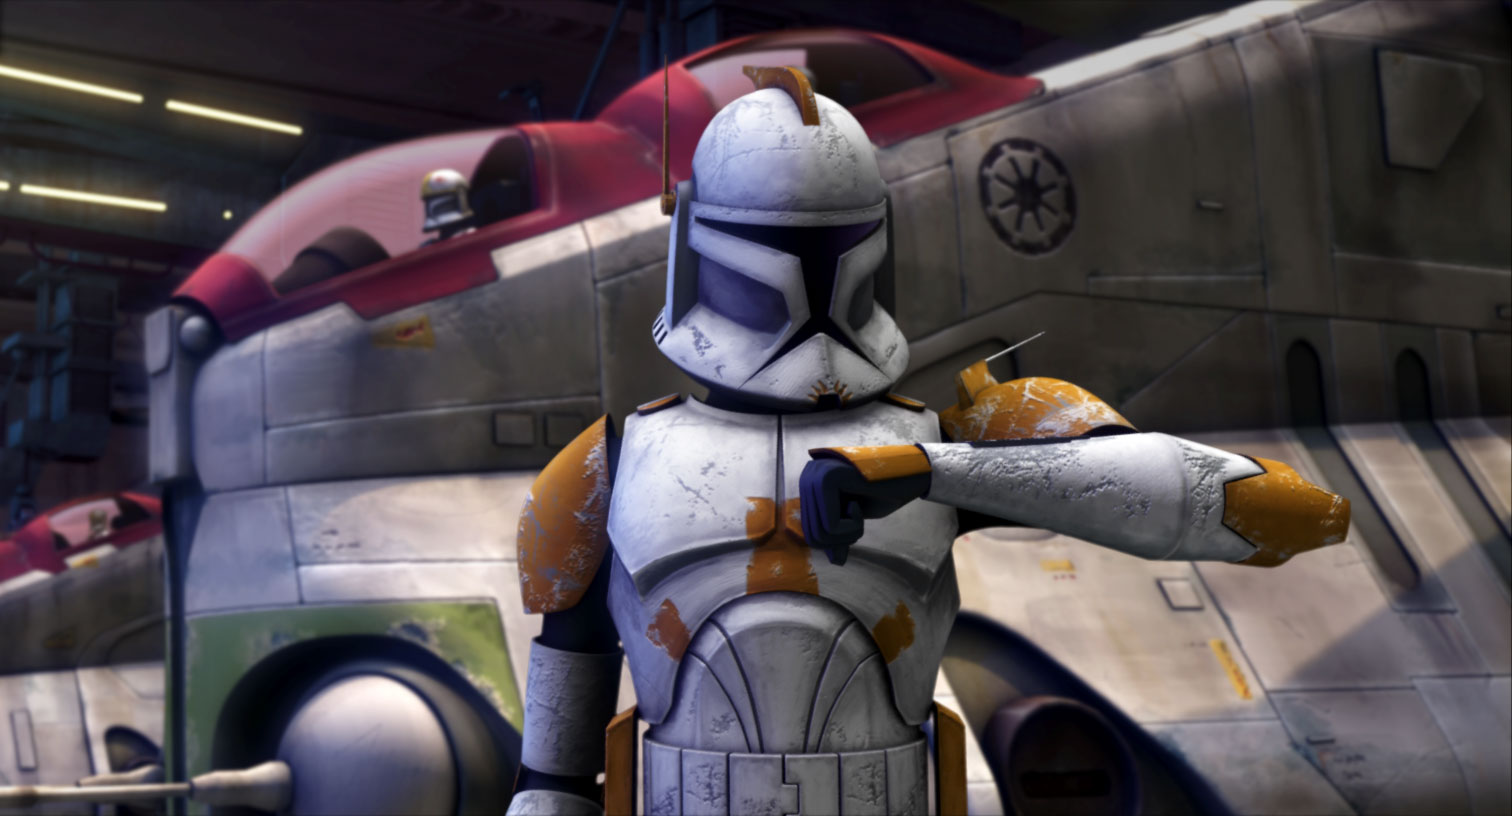
Following Kenobi and the recently promoted General Skywalker's mission to the planet Cato Neimoidia, Kenobi requested a report regarding the crash of a prisoner transport on Cato Neimoidia. This transport had been carrying Ruug Quarnom of the Neimoidian Royal Guard, with whom he had formed an alliance during the mission. After the enactment of the Jedi Military Integration Act, Cody entered a hangar bay on the Republic [capital](/article/capital] planet of Coruscant to provide his general with a datapad containing the requested report, interrupting a conversation between Kenobi and Skywalker in the process. Kenobi, who had come to anticipate further collaboration with the clone, thanked Cody before reviewing the report alongside Skywalker. As the war progressed, Cody and Kenobi improved their tactical coordination, fostering a sense of mutual trust and camaraderie as they fought together. Cody's armor was modified to feature orange markings, replacing the yellow that was typical of early commanders.
Mission to Krystar
Sometime after Cody adopted orange markings on his armor, Cody and his troopers went with Kenobi and Senator Padmé Amidala to Krystar. Their objective was to determine if the Ovissians had taken prisoners for the Confederacy. While Amidala engaged in discussions with Regent Queb and Senator Vishar Koss, Cody and Kenobi dispatched Waxer, Boil, and several other troopers on a reconnaissance mission. Cody received information from his troops indicating that Queb was planning to sell the clone prisoners to a Trandoshan hunter. Cody then contacted some of the captured troops, including Wooley, and informed them that they were there to facilitate their escape. Their operation proved successful, with Cody and his men rescuing the prisoners and eventually departing from Krystar.
Battle on Caliban
On the frozen moon Caliban, Cody, Kenobi, together with their troopers, were taken prisoner by General Grievous's forces and compelled to construct a bridge. While there, Cody and Kenobi encountered a Qubey attempting to find its parents, whom they persuaded to assist them by attacking Grievous and retrieving Kenobi's lightsaber. Following the bridge's completion, Cody, Kenobi, and their men were scheduled for execution. Nevertheless, they were saved by the Qubey. Cody and his men managed to acquire the battle droids' blasters, assist the Qubey, and return to a gunship. Cody proposed capturing Grievous, but Kenobi informed them that Separatist reinforcements were en route. Before departing from Caliban, the gunship destroyed the bridge.
Siege of Hisseen
Cody was also a participant in the siege of Hisseen, working alongside Rex, Clone Commander Wolffe, and their respective units. Cody, Wolffe, and Rex made the decision to rescue the members of the Hisseenian parliament while the Jedi kept Dooku occupied. Cody led his troops, accompanied by Wolffe's Wolfpack, in liberating the parliament members from the battle droids. Cody, Wolffe, and their troops escorted the parliament members to rendezvous with Rex's troops. Cody and his troops successfully pushed back the droids. Cody, Rex, Wolffe, and their forces were subsequently surrounded by battle droids. However, the Jedi arrived and rescued them. Cody and Kenobi were then summoned back to Coruscant.
Battle of Christophsis
Cody was involved in the battle against a large-scale Separatist invasion of the planet Christophsis and fought alongside Generals Anakin Skywalker and Obi-Wan Kenobi. During the campaign, they successfully identified a traitor within their ranks: a Clone Sergeant named Slick, who had disclosed intelligence to Count Dooku's apprentice Asajj Ventress in exchange for freedom. While Anakin and Obi-Wan were engaged in combat with Ventress, Cody and Captain Rex successfully apprehended Slick after a brief pursuit, but not before he managed to sabotage numerous walkers, gunships, and other weapons belonging to the Republic's weapons depot.
Shortly after this, Cody was joined on the front lines by Skywalker to defeat the first wave of droids, commanded by General Whorm Loathsom, but was eventually compelled to retreat when the Separatist tanks overwhelmed the Republic artillery. Whorm managed to establish a deflector shield that protected his advancing forces from the Republic's heavy cannon fire. Skywalker and his newly arrived Padawan Ahsoka Tano were tasked with taking down the shield, while Cody, Rex, Kenobi, and the clones were to hold off the enemy for as long as possible. Kenobi allowed himself to be captured and distracted the Separatist general by discussing the surrender in a civilized manner. Whorm grew tired of the charade and ordered Kenobi to surrender just before Skywalker and Tano took down the shield, enabling the Republic's cannons to decimate Whorm's tanks. While Whorm was distracted, he was taken hostage by General Kenobi, bringing the battle to a Republic victory.
Battle of Teth
Following the Battle of Christophsis, Cody and the 212th Battalion accompanied General Kenobi during his meeting with Jabba the Hutt on Tatooine. He and his men were assigned to assist the 501st Legion, General Skywalker, and his apprentice Ahsoka Tano during their mission to rescue Jabba's son Rotta, who had been kidnapped and taken to a Separatist-controlled prison on Teth. With the 212th's assistance, the battle was ultimately won by the Republic, and Rotta was rescued.
Skirmish on Rishi Moon
When Cody and Rex were dispatched to inspect the Rishi moon station, they were greeted by what appeared to be a clone trooper, who was secretly a disguised commando droid. It attempted to deceive them by claiming that the base was in good condition; however, Rex and Cody remained unconvinced. Rex deduced that it was a droid due to the droid responding to a command with "Roger, Roger," and a droid attack flare was fired by the surviving base guards, Hevy, Echo, and Fives. Rex immediately shot the disguised BX droid, surprising Cody. They were caught in an ambush set up by the droids in case the disguised droid failed to send both away, and the droids proceeded to throw thermal detonators towards the clones. The explosion destroyed their shuttle, but the clones were able to survive by hanging from cables and landing safely on the ground. Later, they met the survivors and encountered a Rishi eel that had previously eaten Cutup, one of the survivors. Rex shot the beast in the eye, killing it, and then used its blue blood to place his hand-print onto Echo's "shiny" armor.
The group managed to reclaim the station and discovered that the droids had hard-wired an "all-clear" signal to the unsuspecting Republic Navy, which would allow General Grievous to attack Kamino and halt the clones' production once and for all. As the clones attempted to disable the signal, droid reinforcements arrived and discovered that the clones had survived and retaken the station. The outnumbered clones tried to deactivate the all-clear signal by destroying the station with tibanna liquid and explosives set off by remote detonation, but the detonator jammed. Heavy chose to remain and activate it manually. Heavy continued to hold off incoming droids for as long as he could, eventually getting shot in the back. Before he could have been killed by the droid forces, he manually detonated the explosives. The all-clear signal ceased to broadcast, thereby alerting the Republic fleet of Grievous' presence near Kamino. For this act, the last two survivors were awarded medals and accepted into the 501st Legion.
Continued service
Battle of Ryloth
Later in the war, Cody and the Ghost Company were dispatched to Ryloth to liberate the Twi'leks from Techno Union leader and Separatist Council member, Wat Tambor. When General Skywalker and his apprentice Commander Tano successfully destroyed the blockade surrounding the planet, Cody, along with Jedi generals Kenobi and Mace Windu, were able to make an almost safe landing onto the planet. However, they were attacked by anti air guns, which Windu tasked General Kenobi and Ghost Company with destroying.
After landing outside of Nabat, Cody and his troops then took down the droids' defense. Cody then took Wooley, Waxer, and Boil to scout ahead. While Waxer and Boil went off on their own, Cody and Wooley found the cannons and witnessed the droids using Nabat's survivors as a living shield. After General Kenobi spoke with Windu, Cody signaled Waxer and Boil to return. After that, Cody, Wooley, Waxer, and Boil went with Kenobi to free the Twi'leks.
First Battle of Felucia
Cody fought at Felucia alongside Rex, General Kenobi, General Skywalker, Tano, and their troops. However, they were forced to retreat when the Confederate forces began to surround and overwhelm them. They were able to leave Felucia using General Plo Koon's gunships. Cody accompanied Generals Windu and Kenobi with bounty hunter Cad Bane in custody to his station to retrieve the holocron and the memory crystal. Unfortunately, Bane escaped, but Cody was able to get their ship away from the station before it blew up.
Second Battle of Geonosis
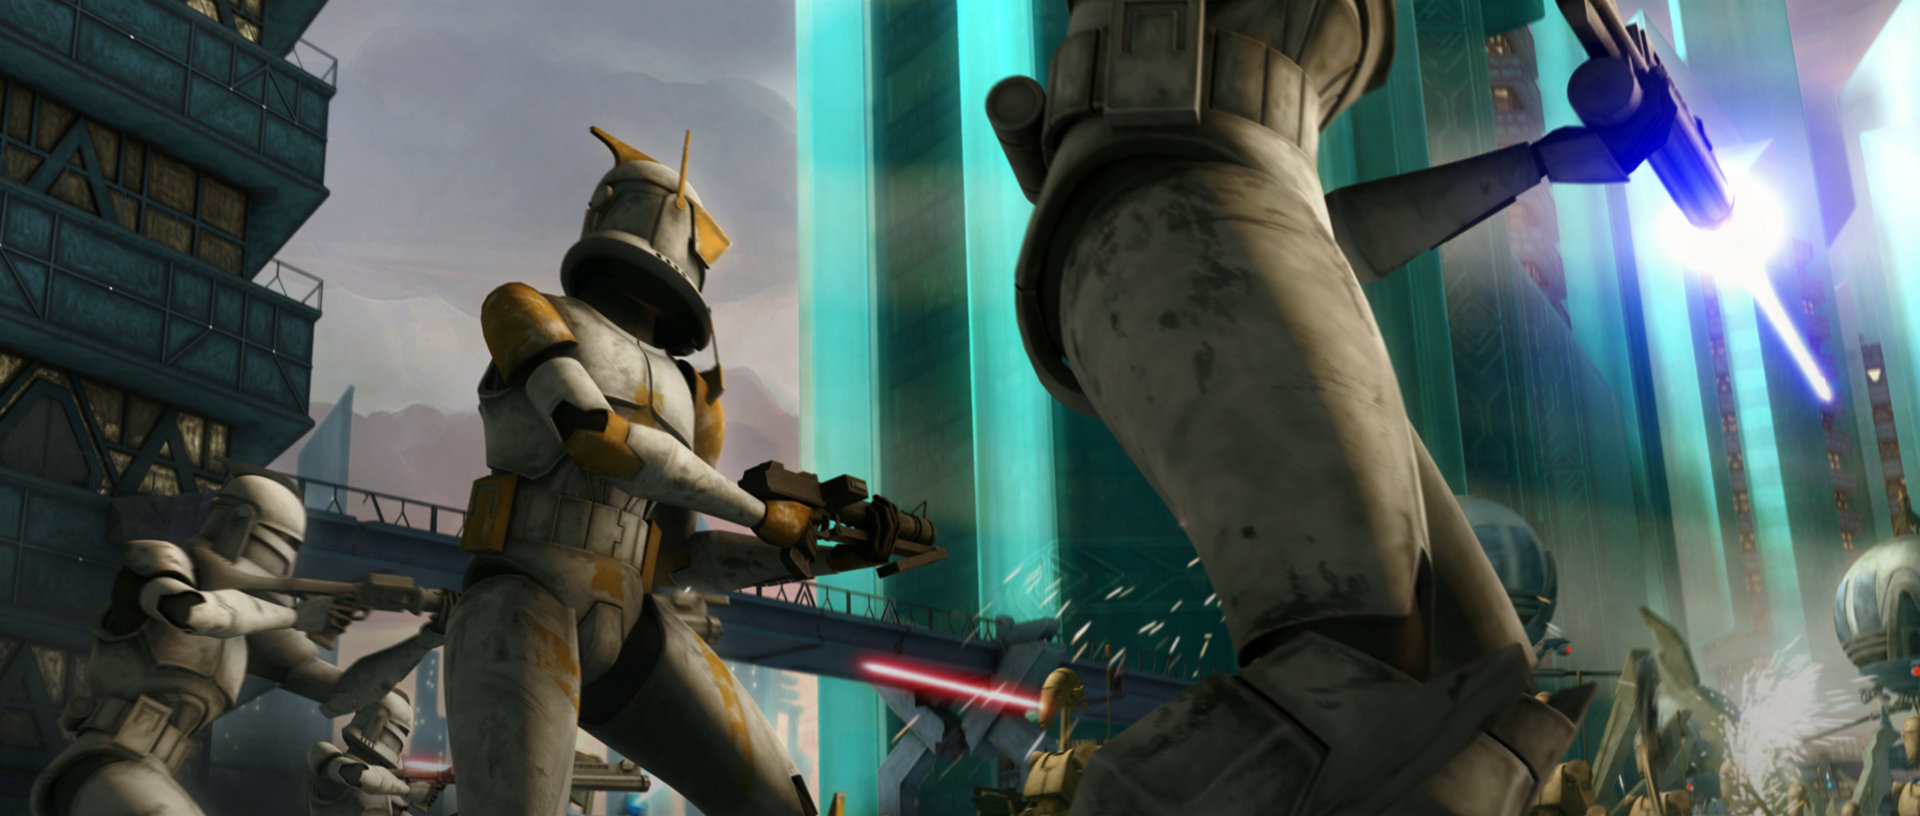
Cody participated in retaking Geonosis in order to capture Poggle the Lesser, one of the Separatist leaders. He and his forces landed at Point Rain to set up the rendezvous point for Generals Skywalker's and Mundi's forces. When General Kenobi's gunship was shot down, Cody sent Waxer and Boil to rescue Kenobi and Trapper from the wreckage. Cody and his men held out against the Geonosians and their AATs until Skywalker called in an airstrike. Cody, the Jedi and their clone commanders then planned the attack on the ray shield fortress. Cody and Kenobi brought up the AT-TEs and destroyed the generator after Skywalker and Tano disabled the proton cannons.
Cody and one of his squads accompanied Kenobi and Skywalker as they investigated the disappearance of General Luminara Unduli as she searched for Poggle. The search party went underground where they fought undead Geonosian warriors. While narrowly escaping them, they found themselves in the lair of the Geonosian Queen, Karina the Great, where Poggle retreated. The rescue party freed Unduli and killed the Queen, escaping the catacombs as they collapsed, bringing Poggle along with them. The squad returned back to base for recovery.
Battle of Saleucami
When Jedi General Eeth Koth was captured by General Grievous, Cody accompanied General Kenobi aboard his Jedi light cruiser after learning that Grievous was in the Saleucami system. There, they attacked Grievous' fleet. Once there, their ship was seized by Grievous' destroyer's tractor beam. Cody and his men stood their ground when Grievous, his Magna Guards, and BX commando droids boarded the ship. Cody and his men attempted to halt Grievous' escape of the ship, but failed in doing so. Cody and Kenobi followed Grievous into the docking tube as their ship was being destroyed. Cody and Kenobi then met up with Gallia. However, they could not continue their attempt and were forced to leave the destroyer.
Cody then accompanied Kenobi, Rex, and their units to the surface of Saleucami. There, Cody, Kenobi, and Crys then searched the flatland for Grievous. The ground battle was fought when Grievous came to find the only working escape pod from the crash. Obi-Wan and the clones did not catch Grievous, as he got away yet again.
Skirmish aboard the Coronet

Cody along with Skywalker, Rex, and their troops then accompanied General Kenobi as he continued to protect Mandalore's Duchess Satine Kryze and her entourage during their trip to Coruscant from Death Watch aboard the Coronet. Cody, Rex, and their men checked the cargo hold for anything dangerous. They then found R2 spooked by something and contacted Skywalker. Cody, Rex, and Skywalker then opened the container. Cody, Rex, and their men then went to Skywalker's aid when he was attacked by a Assassin probe.
They were able to stop, but one got past them and went into the lift. Cody and the others then came under attack by smaller SD-K4a mini-assassin droids, which they were able to destroy. They then questioned the protocol droid in charge of the cargo, who confirmed that one of the senators was a traitor. They then continued their search for more of the probes. When Cody and Rex were under attack by one of the droids, it was dispatched by R2-D2. Cody and Rex then assisted Skywalker in destroying the last of the probe droids. Later, Cody, Rex, Skywalker and the rest of the clones assisted the royal guards in repelling the B2-series super battle droids boarding the Coronet. During the skirmish, Skywalker managed to kill the traitor, by then revealed to be Tal Merrik, before he destroyed the ship. Cody, Rex, and the royal guards were able to destroy the droids, and Cody subsequently reported their success to Skywalker.
Battle of Tipoca City
As the war progressed, the Republic managed to intercept a coded hologram. This hologram revealed Ventress and General Grievous's plans for an attack targeting Tipoca City. In response, Cody and Rex, accompanied by Generals Kenobi and Skywalker, along with the 501st Legion, were dispatched to reinforce General Shaak Ti's forces stationed on Kamino. Upon the arrival of General Grievous's droid fleet, Cody, along with Masters Ti and Kenobi, Prime Minister Lama Su, and other clone officers, oversaw the unfolding battle. Later, he joined Rex, Echo, Fives, and clone 99 when Ventress's AQ-series battle droids, deployed from Tridents, launched an underwater assault on Tipoca City. Subsequently, Cody assisted other clones and cadets in setting up an ambush for Grievous and his droids, who were in the process of clearing out the barracks. During this time, Kenobi engaged Grievous in a brief duel. As the clones engaged the incoming droids, 99 attempted to return to the armory to replenish the clones' supplies, but Cody ordered him to stop. Tragically, due to his slower speed, 99 was shot in the back. Following the Separatist defeat, with Grievous and Ventress fleeing the system, the loss of 99 was mourned, and he was recognized as a true soldier by his comrades. Subsequently, Fives and Echo received promotions to ARC troopers.
Meeting Vos
Kenobi, along with his unconventional Jedi friend Quinlan Vos, received the assignment to track down Jabba's infamous uncle, Ziro, who had been liberated from imprisonment within the Republic Judiciary Central Detention Center by a group of bounty hunters led by Cad Bane. Cody encountered Kenobi on one of the Jedi Temple's landing platforms. Cody inquired about his Jedi general's well-being, noting that he appeared troubled. Kenobi responded that Vos had a reputation for causing such reactions. Cody then commented on Vos's notoriety, to which Kenobi replied that Vos was known for being unpredictable. Subsequently, a gunship rendezvoused with Cody and Kenobi, with Vos leaping from the ship while it was still airborne. Vos greeted Kenobi and Cody, after which Kenobi began to brief Vos on the mission. However, he soon discovered that Vos had already reviewed all the details in the mission file. Cody listened as Kenobi stated his intentions to recapture Ziro and apprehend Bane, bringing both to justice. Vos then suggested that he would pilot the ship, while Kenobi would serve as the co-pilot. Kenobi remarked to Cody that he had anticipated Vos requesting to be the pilot.
Battle of Lola Sayu
Cody became a member of Skywalker's and Kenobi's assault team, tasked with infiltrating the Citadel on Lola Sayu to rescue Master Even Piell before the Confederacy could obtain information regarding the Nexus Route. As a result, he and his comrades were encased in carbonite to evade sensor detection. Upon reaching a cave near the prison tower, the team faced the challenge of free-climbing a cliff face. When the team was detected, Cody lost one of his men, Longshot, who was ensnared in an electric field. Eventually, Cody played a role in liberating Master Piell and his captain, Wilhuff Tarkin. After repelling several waves of droids, the team made the decision to split up, with Cody accompanying Kenobi, Piell, three clone troopers, and three rescued clones. Their group opted to create a diversion to facilitate Skywalker's group's escape from the tower and access to the lower levels. They strategically placed explosives to wreak havoc on the facility, enabling Skywalker's team to reach the tunnels.
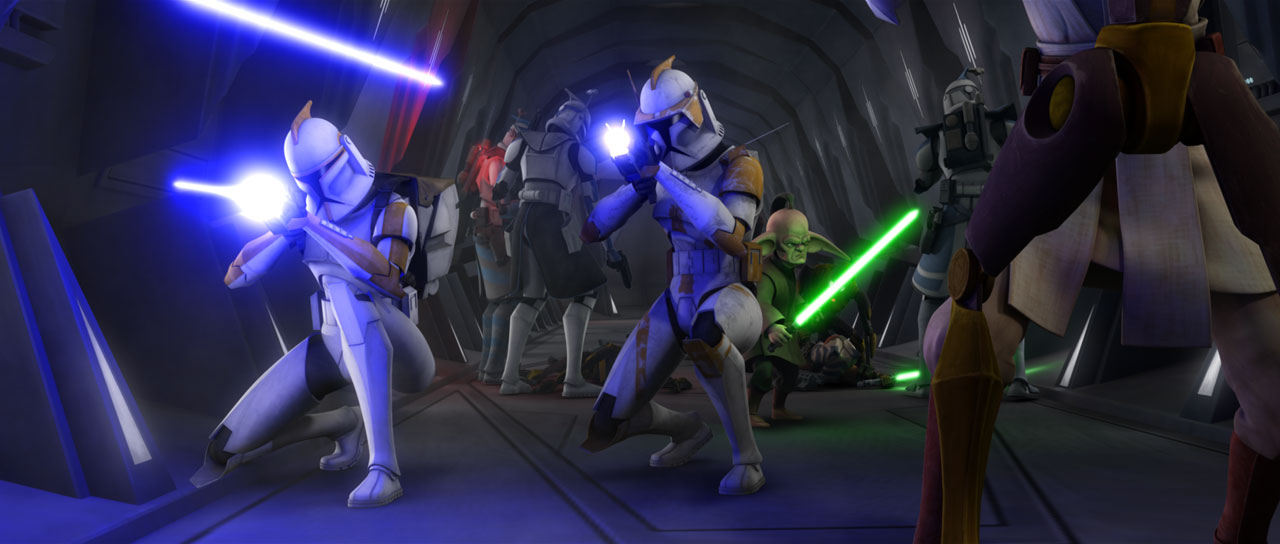
Kenobi and his group sought refuge in the ventilation shafts, aiming to discover an escape route. Cody then noticed a probe droid, which Piell promptly destroyed. However, this action triggered the closure of the security doors, resulting in one of Cody's men being bisected. Despite the challenges, they managed to find their way out, only to be ambushed and captured by droidekas, crab droids, and commando droids. The group was brought before the facility's commander, Osi Sobeck, who sought to extract information from Piell. Sobeck executed one of Cody's men when they refused to comply but subsequently ordered his droids to escort them to the interrogation room. They were later rescued by R2-D2. The two groups eventually reunited and attempted to board the shuttle. However, it was destroyed, forcing them to retreat. The group found themselves on the run, pursued by droids and Anoobas. Ultimately, they were rescued by the Republic, with only Anakin, Obi-Wan, Ahsoka, Tarkin, Rex, Cody, Fives, R2, and two rescued clones remaining.
Transition to phase II armor
Battle of Umbara
At some point, Cody adopted a set of Phase II clone trooper armor. Subsequently, Cody, Kenobi, and their battalion were dispatched to reclaim Umbara. Kenobi briefed Skywalker, Rex, Cody, and their troops on the strategic plan. Jedi Masters Krell and Tiin, along with their respective troops, were assigned to support Kenobi, Cody, and the 212th in the southern region, while Skywalker and his forces would approach from the north to eliminate enemy reinforcements. Their ultimate objective was to capture and secure the capital. However, the 212th encountered significant resistance. During one particular moment, Cody instructed his troops to target and eliminate a specific target.
The 501st, now under the command of General Krell following Skywalker's recall, received orders to seize control of the Umbaran airbase responsible for supplying the capital. Upon the successful completion of this objective by Rex and his troops, the 212th emerged victorious in the battle for the capital, compelling the remaining Umbaran forces to retreat toward the 501st's position. Despite acts of sabotage orchestrated by General Krell, who deceived Cody's and Rex's men into engaging each other under the false belief that the opposing force consisted of disguised Umbaran soldiers, Republic forces ultimately prevailed.
Battle of Kiros

Cody accompanied Kenobi to reclaim Kiros. While there, he received a message from Confederate commander, Darts D'Nar, proposing terms of surrender. Cody, Skywalker, and Tano listened in on Kenobi's negotiations with D'Nar, who claimed to have planted bombs throughout the city. After D'Nar detonated one of the bombs, Cody and R2 guided Skywalker and Tano to the locations of the remaining bombs. They successfully disarmed all of them.
Rescue on Florrum

When Tano was abducted from her group of Jedi younglings aboard the Crucible, Cody accompanied Kenobi to retrieve the younglings and rescue Tano from Captain Ohnaka's gang of pirates. However, they were subsequently attacked by a Confederate fleet under the command of General Grievous. When Grievous's forces seized control of the Negotiator, Cody and Kenobi activated the self-destruct mechanism and evacuated to the escape pods with the remaining members of their forces.
Cody, Kenobi, and their men later reunited with Tano and the younglings after they had escaped from Grievous with Ohnaka's assistance.
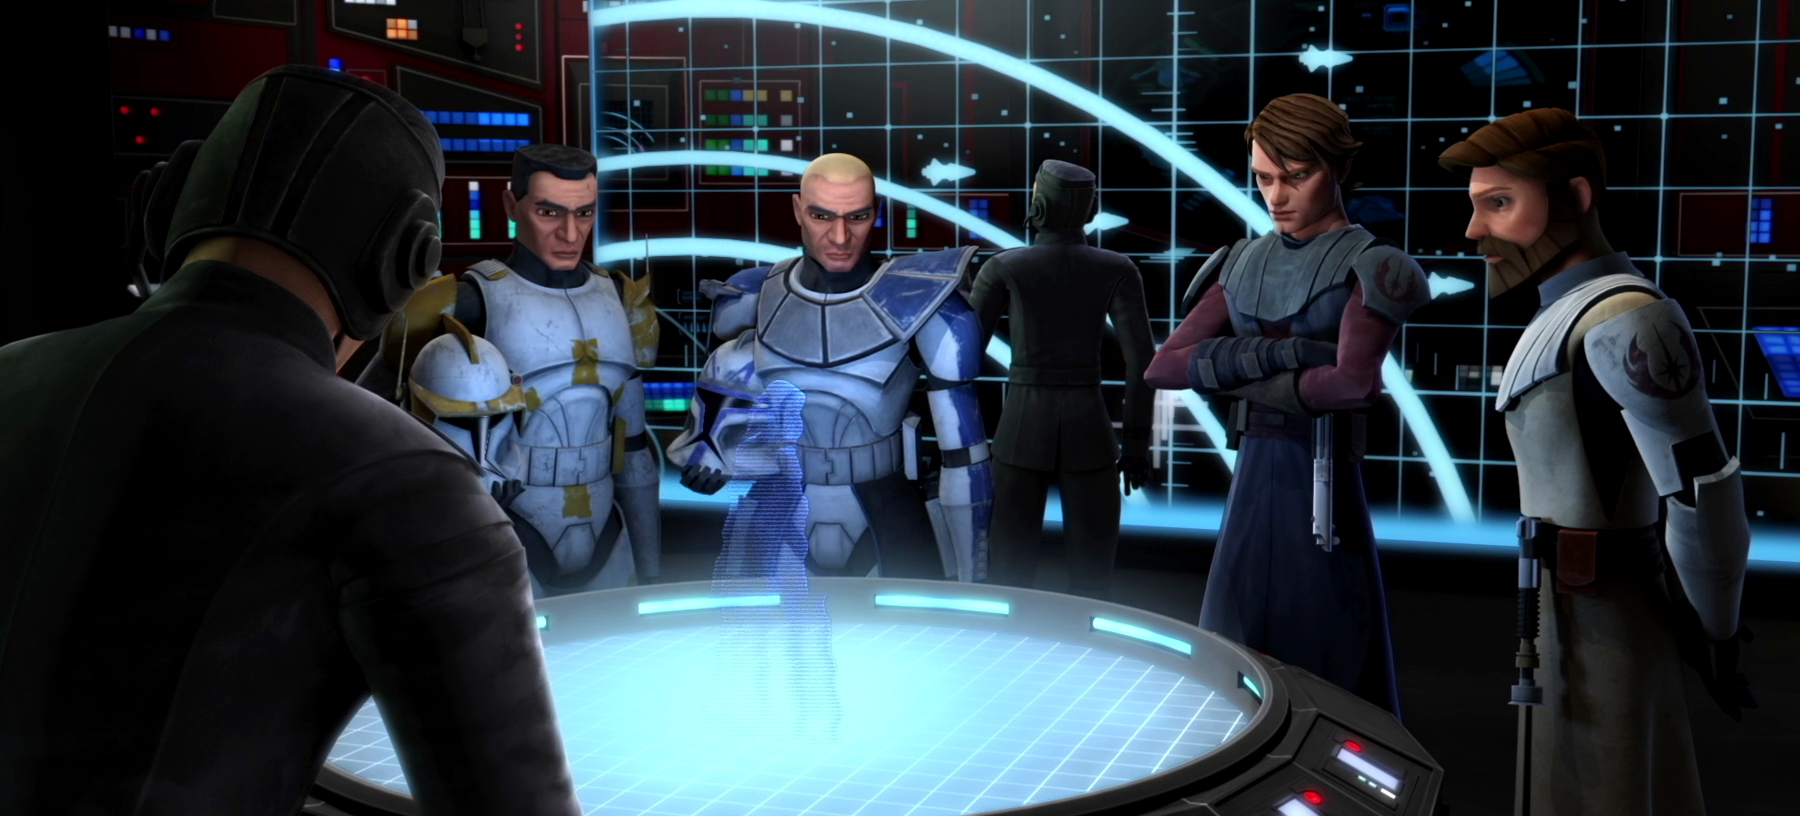
Republic strategy conference
Cody was in attendance at the Republic strategy conference held at the Valor space station, situated within the Carida system. During the conference, a Separatist plot was uncovered, involving the use of a substantial quantity of rhydonium to destroy the space station. However, their scheme was foiled by R2-D2.
Mission to Bray
During the war, Cody, along with several other clones, accompanied Adi Gallia and Kenobi on a mission to the planet Bray in response to a request for assistance from the native Brayans to the Jedi Order. There, they combatted a vampiric entity known as Ravna that was sabotaging the Brayans' power supply. Peel, a member of the 212th, was infected by the creature and began damaging the electrical systems on Obi-Wan's shuttle. Upon discovering this, Peel attacked them but was stunned and restrained by Cody. Later, after Ravna's defeat, Peel was cured.
End of the war
Assault on Vizsla Keep 09
Following Maul's capture of Dooku and Grievous during the Battle of Ord Mantell, Jedi Masters Obi-Wan Kenobi and Mace Windu led a team of Jedi to track Maul to his supply outpost at Vizsla Keep 09. Maul persuaded Dooku to join him and launched an assault against the Jedi. Cody and the 212th Attack Battalion fought alongside the Jedi, navigating through an asteroid field and engaging numerous Gauntlet fighters. Ultimately, Maul, Dooku, and Grievous successfully escaped, and Master Tiplee was killed by Dooku.
Dealing with Quinlan Vos

Near the conclusion of the Clone Wars, Commander Cody participated in a mission to raid a Separatist supply storage base containing medications, arms, ship repair components, and foodstuffs. For this mission, Commander Cody collaborated with the Jedi Kenobi, Anakin, Desh, and Quinlan Vos. Unbeknownst to Cody and his comrades, Vos had succumbed to the dark side and was secretly colluding with Count Dooku to undermine the Republic's war efforts. Upon their arrival, Vos promptly "discovered" that the retreating Separatist forces had strategically placed bombs throughout the asteroid. Cody and his colleagues managed to evacuate the asteroid but were unable to retrieve the supplies, which were destroyed along with the asteroid.
Subsequently, Cody participated in another joint Jedi-Republic operation to destroy a Separatist listening post on Vanqor. Under General Kenobi's command, Cody divided his squadron into teams and dispatched them to scout the facility. Upon arriving at the location, Cody and his Clone and Jedi comrades discovered that the listening post had already been deserted. As a consequence of this incident, the Jedi High Council began to suspect that Master Vos was a traitor. To assess his loyalty to the Jedi and the Republic, they assigned Vos a mission to assassinate Count Dooku.
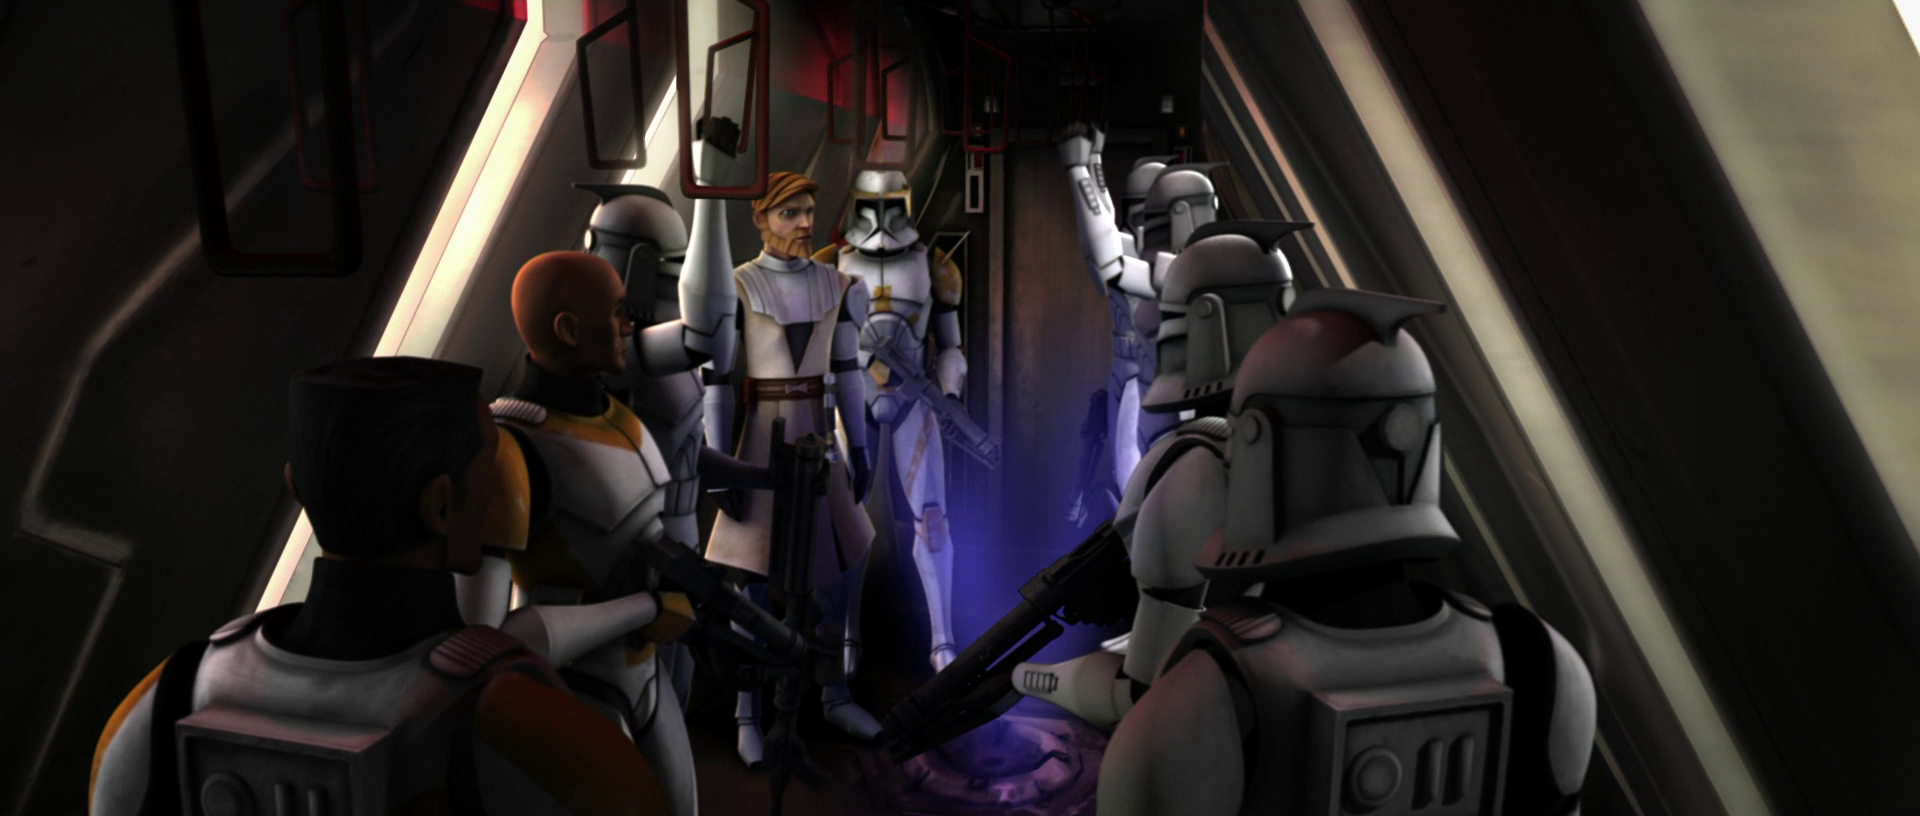
Vos successfully infiltrated Dooku's dreadnought in space but failed to eliminate the Count. His intention was to have Dooku lead him to his enigmatic master Darth Sidious and subsequently assassinate both Sith Lords. However, Master Kenobi and the Jedi Knight Anakin had secretly followed him there and apprehended both Vos and Dooku. Master Kenobi then contacted Cody and Desh, who were aboard the Venator-class Star Destroyer Vigilance, informing them that they were transporting Vos and Dooku back as prisoners. When Desh inquired about the number of troops they should deploy to the hangar, Cody jokingly suggested sending two hundred men.
Instead, Cody carefully selected two dozen of his most skilled clone troopers to greet the prisoners upon their arrival at the brig. As a precautionary measure, Cody also stationed clones at intervals of a few meters between the hangar bay and the brig. Cody was accompanied by Desh and another Jedi Knight named Kav Bayons. Despite being outnumbered, Vos managed to turn the situation to his advantage by deceiving Desh into approaching him and then seizing his lightsaber. Vos then used the lightsaber to sever Dooku's bonds. After acquiring Bayon's lightsaber, Dooku eliminated one clone escort and then used the Force to hurl Cody down the corridor. Following the deaths of Desh, Bayons, and all the other clone troopers, Vos and Dooku escaped the Vigilance aboard Asajj Ventress's ship, the Banshee. Cody survived the encounter but sustained a broken leg. While Anakin and Obi-Wan pursued the fugitives to Christophsis, Cody remained behind to recuperate aboard the Vigilance.
Battle for Anaxes
During the Outer Rim Sieges in the final stages of the Clone Wars, Cody fought alongside Rex and under the command of Generals Kenobi, Skywalker, and Mace Windu during Admiral Trench's campaign to capture Anaxes's shipyards. However, after several weeks of intense combat, the Republic's hold on the planet began to weaken. Amidst this crisis, Cody supported Rex's theory that the Separatist Droid Army had acquired knowledge of the Clone Captain's personal strategy. Rex shared this theory with Windu and Skywalker, and Cody expressed his concern: given Rex's status as one of their best, the droids' ability to counter the Captain's tactics could render the rest of them vulnerable. Cody proposed that he and Rex lead a small squad into Separatist territory to reach the Cyber Center, knowing that it served as the hub for all battlefield intelligence transmitted to the Separatist command ship. Cody believed that any information they needed to uncover would be located at the center.
After Windu approved the mission, Cody met with Rex inside the barracks to inform the Captain of their impending departure. Inside, however, Rex was examining a photograph of the two of them alongside ARC troopers Echo, who was presumed dead at the Citadel, and Fives, who had perished on Level 1325 of Coruscant. Rex reflected on the numerous clones who had lost their lives, and Cody acknowledged that regular people did not comprehend the situation and how challenging it could be to be a survivor. However, this was precisely Rex's concern, as he confided in Cody that he believed Echo had survived. While Cody considered it improbable, Rex pointed out that the strategies employed by the Separatists and himself were based on old plans devised by himself and Echo. Cody understood the Captain's point, but the Clone Commander reiterated that it was not possible, ultimately advising his fellow officer that it was unlikely, probably wishful thinking, and that he needed to maintain focus.
Rex affirmed that he understood and instructed Cody not to worry before inquiring about the squad they would be taking. Cody responded that they were bringing Clone Force 99. After the squad's ship, the Marauder, landed, Cody explained to Rex that the squad was an experimental force possessing desirable genetic mutations. However, as their operation commenced, Cody sustained an injury in their gunship's crash and was left behind with Kix. In the end, the battle resulted in a Republic victory following the rescue of the indeed alive Echo, who would subsequently join the Bad Batch.
Battle of Yerbana

Some time after the Anaxes campaign, the 212th and the 501st received orders to attack a Separatist stronghold on the planet Yerbana. At one point during the fighting, Cody, armed with a DC-15A blaster rifle, fought back-to-back with Kenobi on a Yerbana bridge. Later, Cody, now equipped with a DC-15 carbine, commanded his troopers on a bridge and faced significant resistance from droid forces. After ordering his men to take cover, Cody was nearly killed by a missile but was saved by the timely arrival of Kenobi, who deflected the missile with his lightsaber. Kenobi then instructed Cody to seek cover as he deflected a laser blast back at the Separatist droids.
After taking cover behind some debris, Cody informed his general that they were unable to locate the tactical droid in command of the enemy army, as it was remaining out of sight. Skywalker arrived shortly afterward and questioned Cody and Kenobi about their hiding. Kenobi replied that they were taking cover and urged Skywalker to do the same. Skywalker created a diversion, feigning surrender to the Separatists, which surprised Cody and Kenobi. Cody observed as Skywalker stalled the droids, causing them to cease fire and summon their commanding officer to the front lines. The tactical droid deduced that it was a trap and ordered its forces to open fire. However, it was too late for the droid commander, as Skywalker's ruse allowed him to destroy the tactical droid. Rex and the 501st then emerged from beneath the bridge, destroying a significant portion of the leaderless Separatist forces. Cody turned to Kenobi, who confirmed that he and the 212th could reinforce the 501st, joining the fray on the bridge battlefield. Cody ordered his troops to blast their opponents as he emerged from his hiding spot and charged the droids alongside his troopers. Soon after, the combined forces of the 212th and 501st defeated the remaining droids.
Battle of Utapau
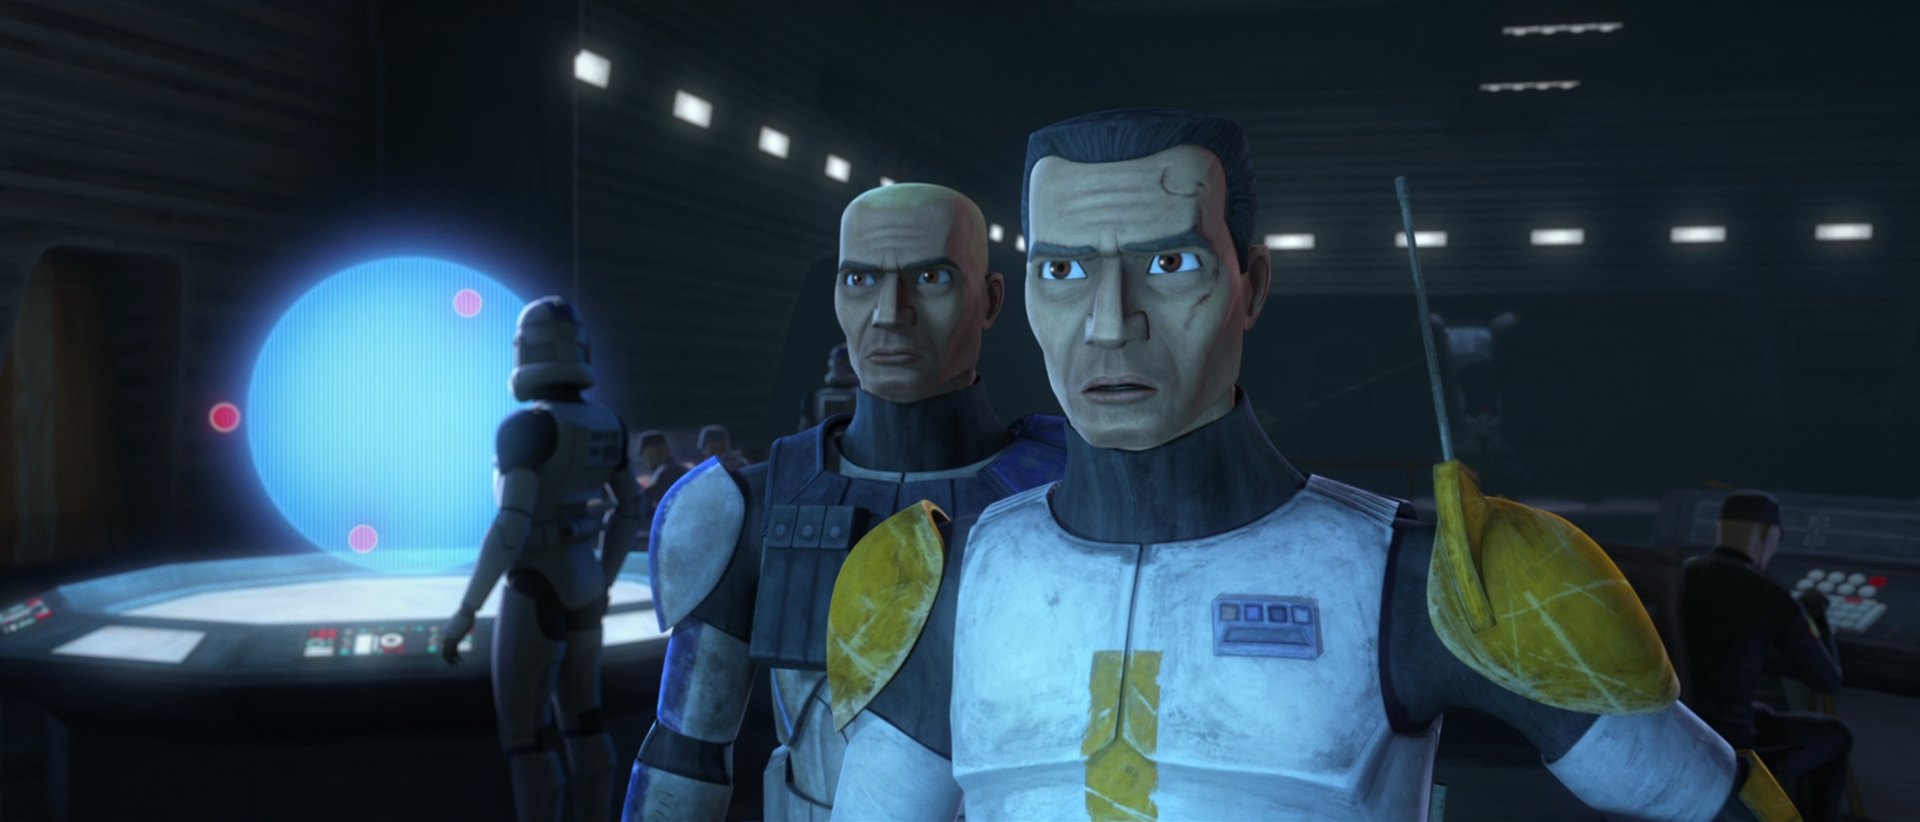
During the Battle of Coruscant, Separatist Head of State Count Dooku was executed by General Skywalker, leaving Supreme Commander General Grievous as the highest-ranking member of the Confederacy. In an attempt to end the war with Grievous's capture, the Republic relentlessly searched for the droid general throughout the galaxy until he was discovered by Clone Intelligence to be hiding on the Outer Rim planet Utapau. The Jedi High Council tasked General Kenobi and the 7th Sky Corps with the capture of Grievous. Upon departing from Coruscant's atmosphere aboard a Venator-class Star Destroyer, Kenobi and Cody devised a strategy for the upcoming battle in the Destroyer's hangar.
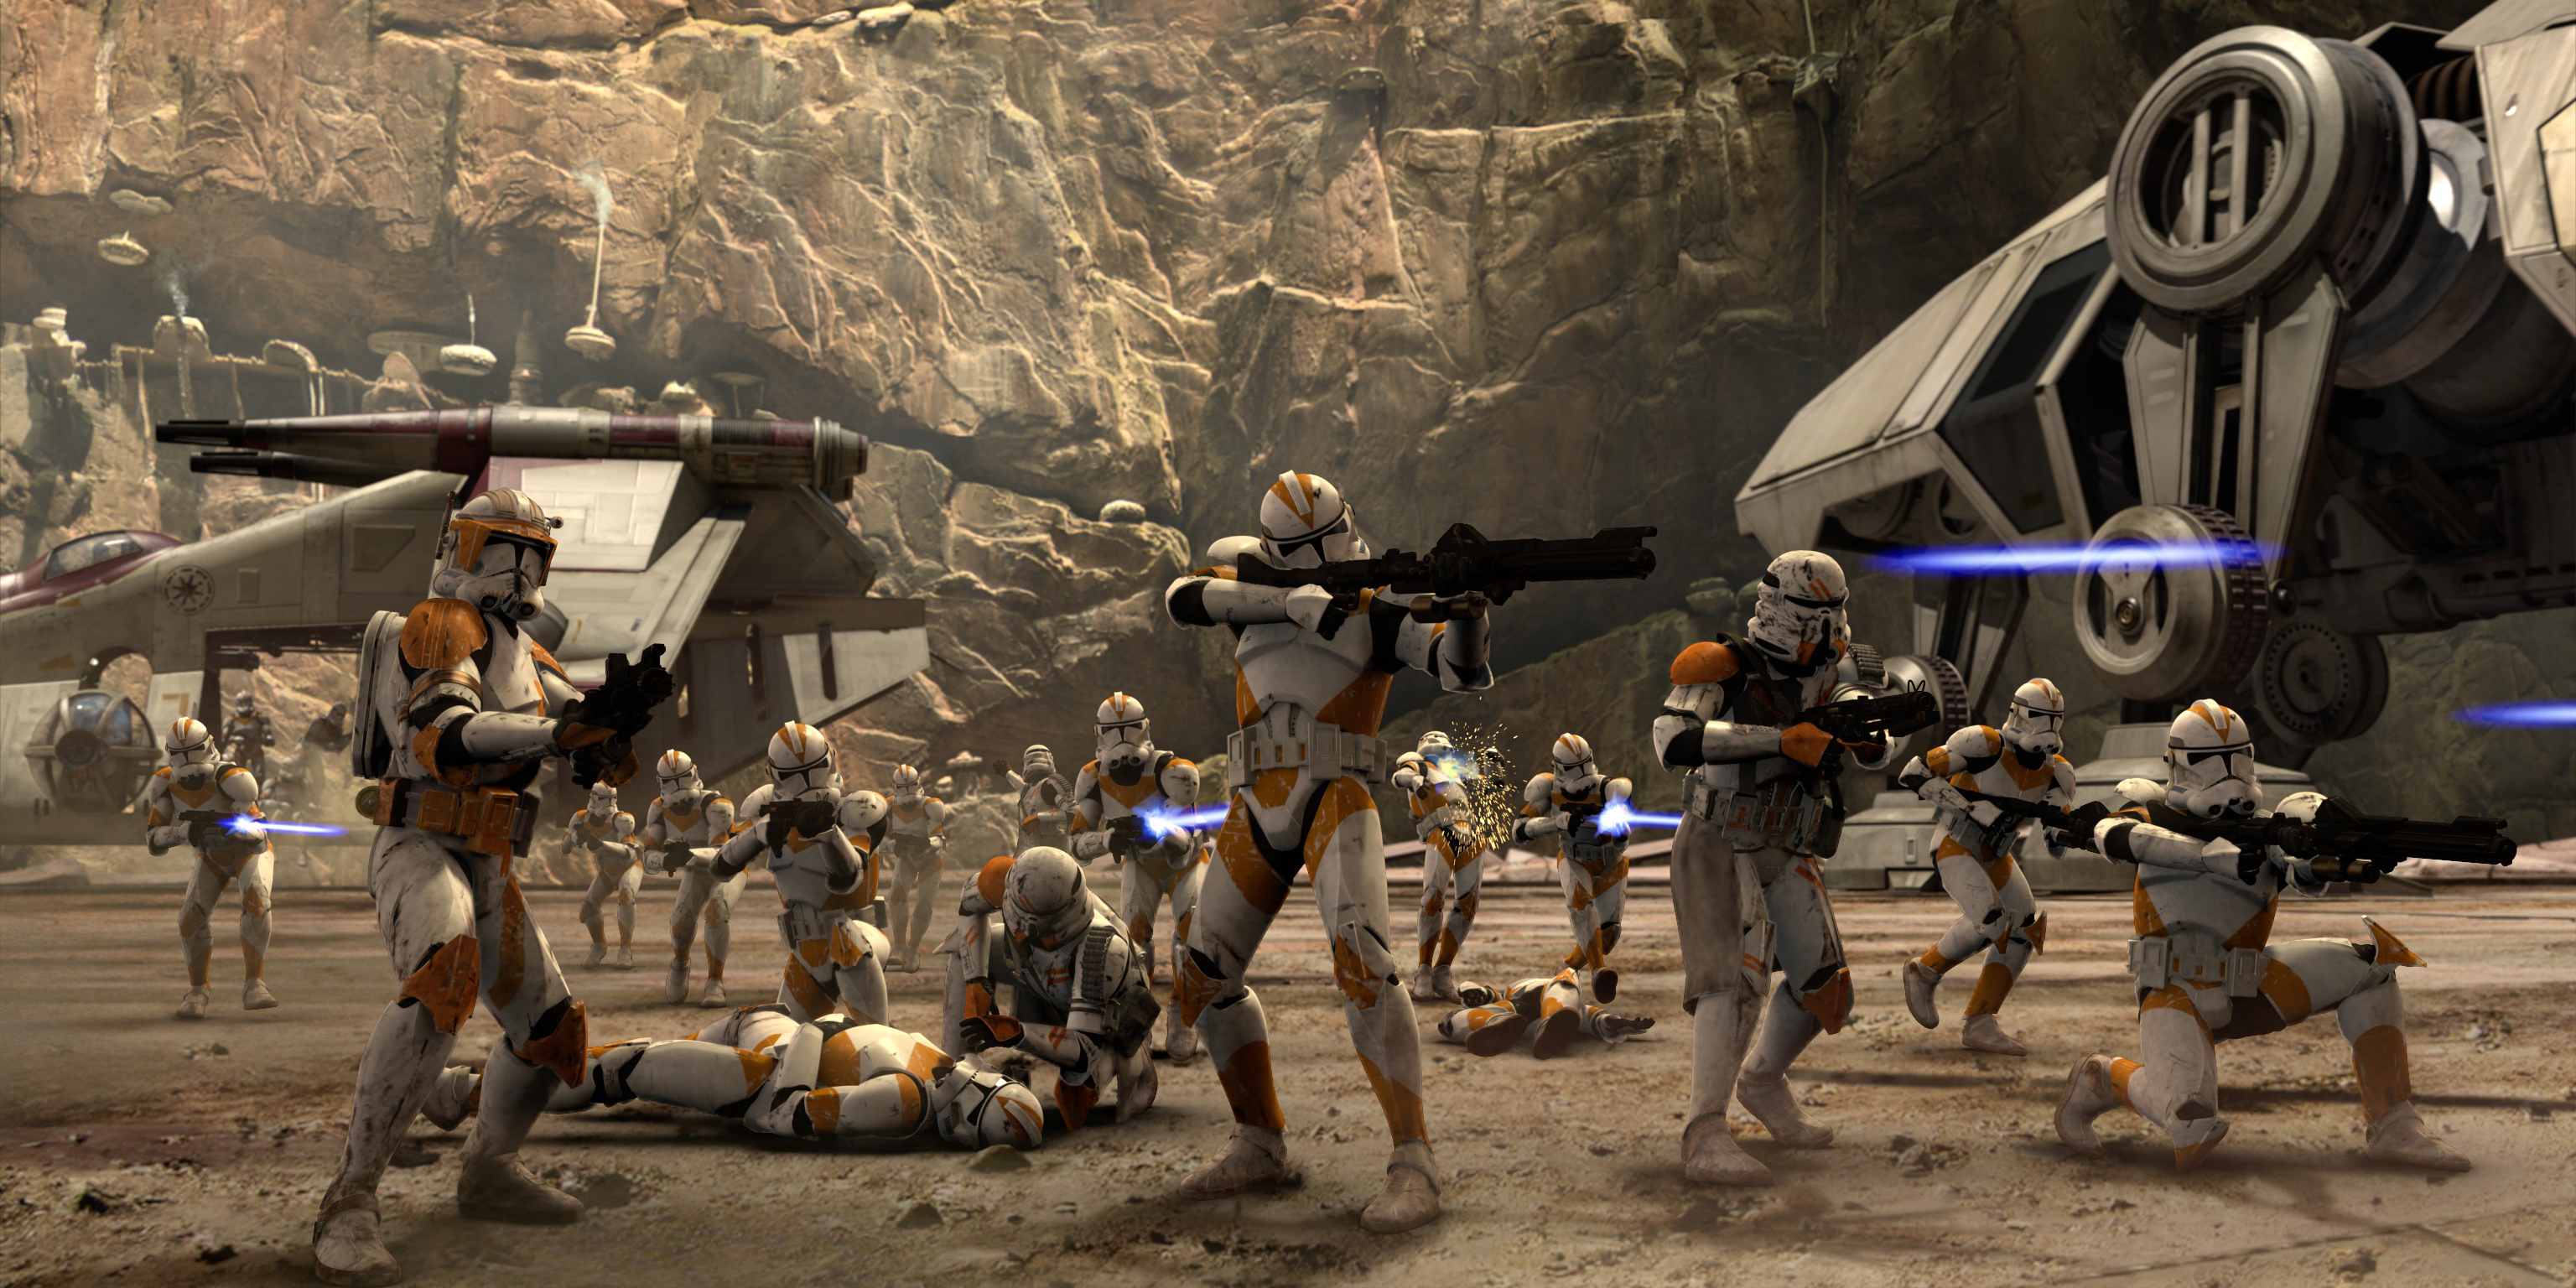
Obi-Wan decided to infiltrate Utapau to confirm Grievous's exact location before the battle. As he entered his starfighter, Kenobi requested that Cody prepare to attack the Separatist forces on Utapau. Cody reassured the Jedi General, reminding him that he had never let Obi-Wan down. Kenobi successfully infiltrated Pau City, the capital of Utapau, and located General Grievous. Creating a distraction, Obi-Wan engaged the droid General in single combat, allowing Cody and the 7th Sky Corps to launch a surprise assault on the droid forces occupying the city. During the battle, Kenobi dropped his lightsaber while pursuing Grievous across the city. The weapon landed near Cody, who picked it up and kept it with him. Partway through the battle, Cody contacted General Windu on Coruscant and informed him that Kenobi had made contact with Grievous.
Order 66
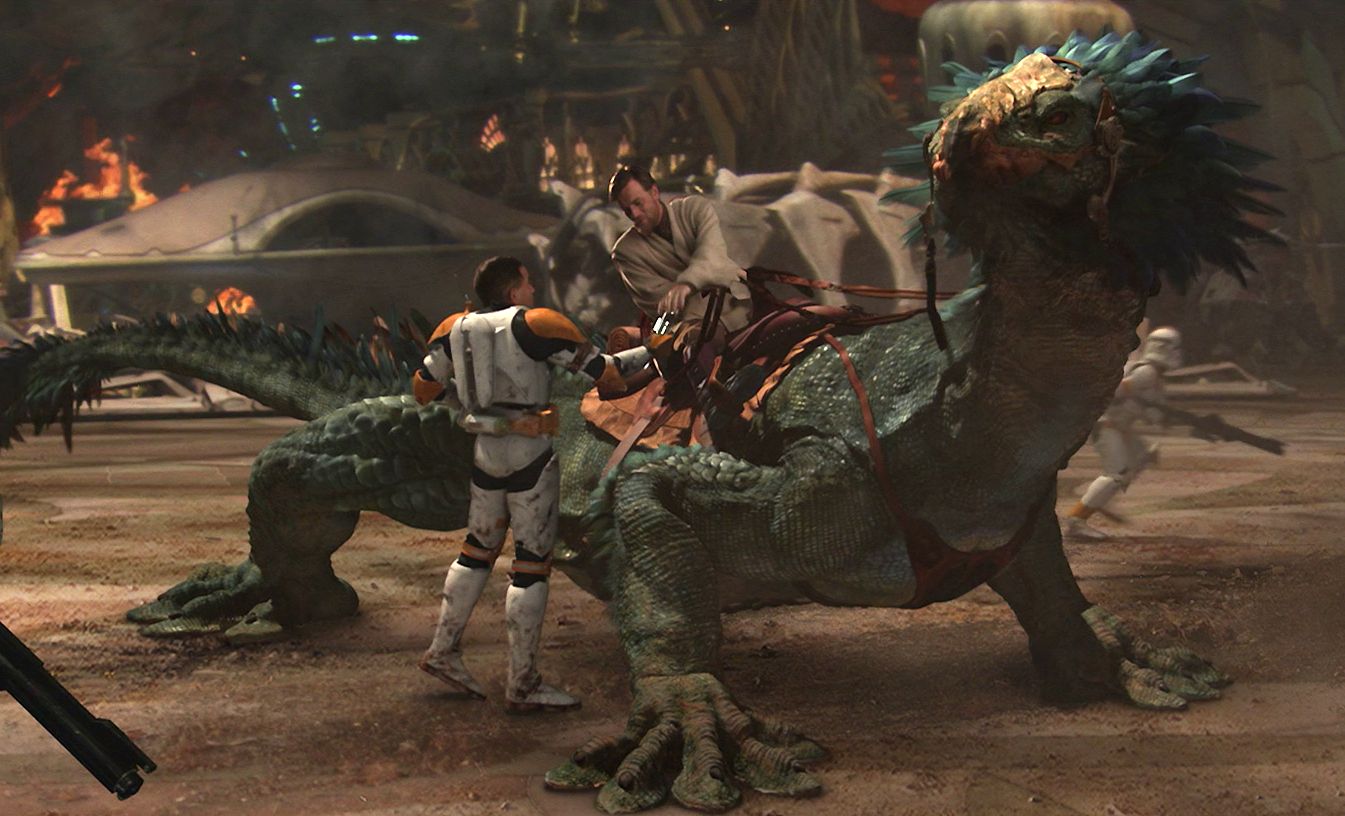
Kenobi, having slain Grievous, approached Cody during the battle atop the varactyl Boga. Kenobi instructed Cody to order his troops to move to the upper levels of the city. As Obi-Wan prepared to rejoin the fighting, Cody handed the Jedi his lightsaber, reminding him that he might need it for the battle ahead. Kenobi thanked Cody and sped off on Boga, determined to push the Separatist forces from Utapau.
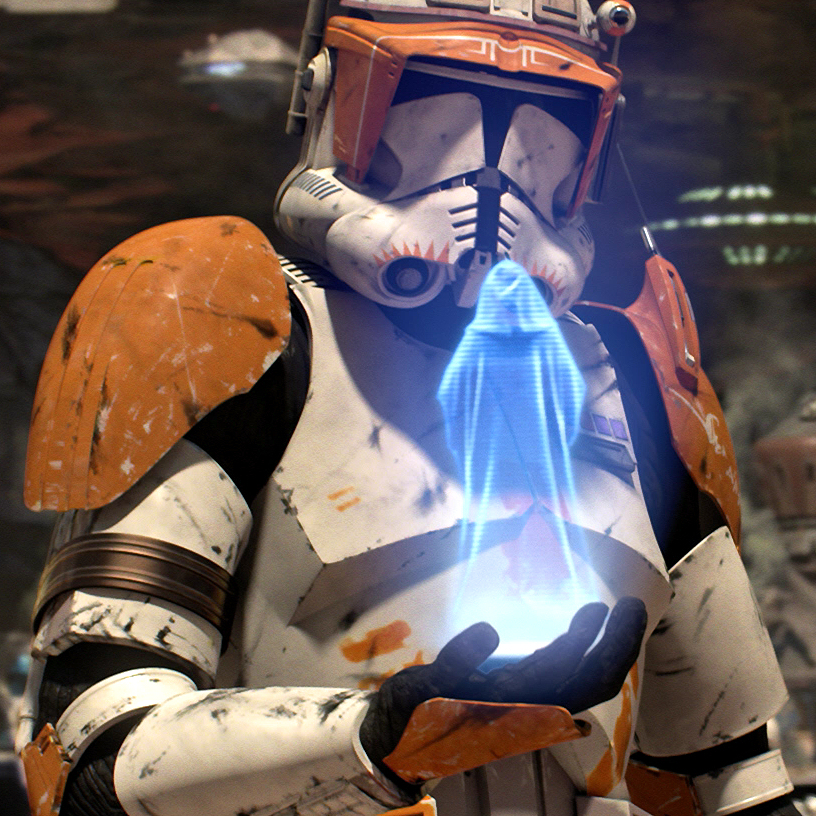
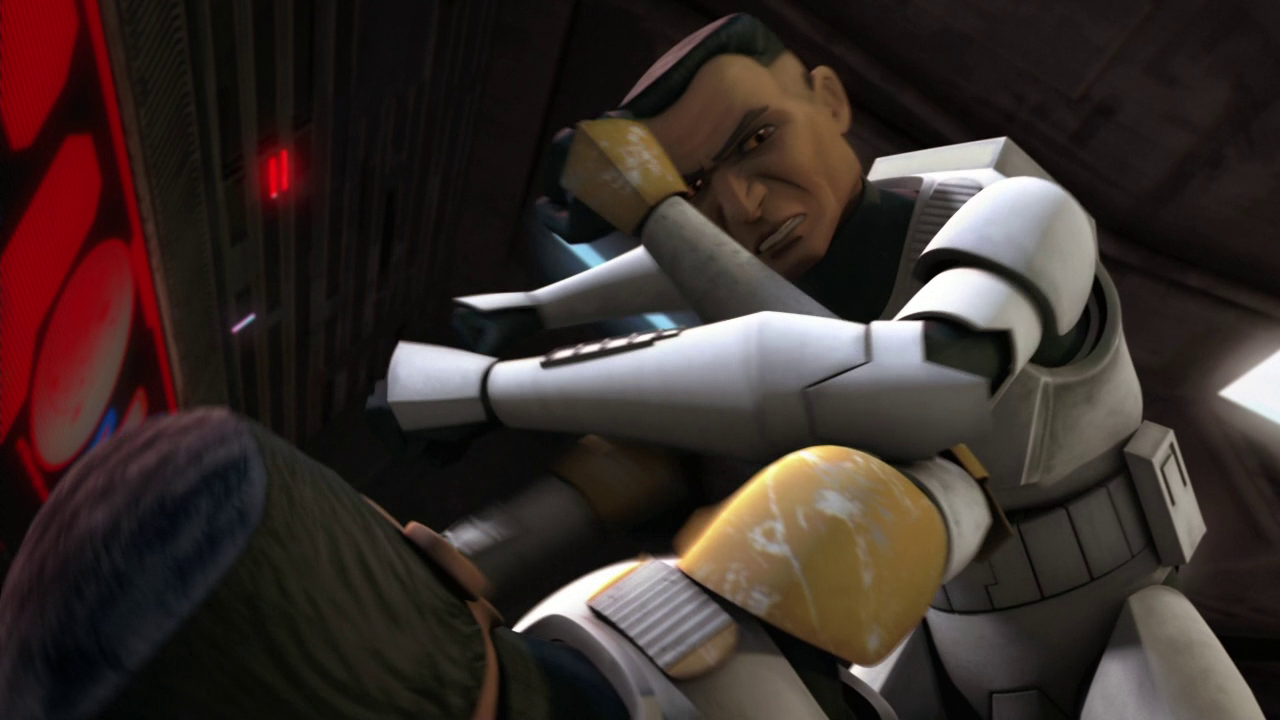
However, as Kenobi traveled up the chasm of Pau City atop Boga, Cody received an encrypted transmission from the Dark Lord of the Sith Darth Sidious, who ordered Cody to execute Order 66, the secret directive to eliminate all members of the Jedi Order. Sidious and Dooku had implanted control chips within all clones at birth, which, when activated, would override their loyalty to the Jedi and control them into betraying and murdering them. With Sidious activating his chip, Cody's loyalty toward Kenobi was nullified, brainwashing the Commander into believing Kenobi was a traitor to the Republic. Cody immediately turned on his former friend, ordering a nearby AT-TE to fire on him without hesitation. The laser blast from the AT-TE knocked Kenobi and Boga off the carven wall, sending them plummeting into the abyss below.
Like Cody, many other clones were forced to turn against the Jedi upon Sidious ordering them to execute Order 66. Unsure of Kenobi's fate, Cody ordered a search party to locate the Jedi's body. Eventually, a clone paratrooper reported that a corpse could not be recovered and expressed his doubts that anyone could survive such a fall. Cody, seemingly convinced that the Jedi Master had perished, ordered his men to prepare for departure. Kenobi survived, however, becoming one of the few Jedi to escape the activation of Order 66.
Age of the Empire
Mission to Kashyyyk
Following the near-extinction of the Jedi Order, Sidious reorganized the Republic into the first Galactic Empire, proclaiming himself as Galactic Emperor. During the subsequent Imperial Era, Cody and the 212th, now serving as stormtroopers, assisted in the Empire's final enslavement of the Wookiee homeworld of Kashyyyk.
Desix

Years after the rise of the Empire, Cody, then stationed at the Imperial Inspectorate HQ located on Coruscant, received news that Crosshair, the sole member of Clone Force 99 who remained loyal to the Imperial Military, was returning to duty after a period of medical leave. Tasked with a mission to eliminate a Separatist resistance on Desix, Cody requested Crosshair join his squad for the operation. The two clones met near the Imperial Inspectorate HQ, exchanged greetings, and discussed the state of the galaxy. The conversation turned to Order 66, and Cody grew noticeably uncomfortable with Crosshair's detached perspective on the genocide. Despite this, the two, accompanied by a large unit of clone troopers, boarded a Nu-class attack/transport shuttle and headed for Desix.
As the shuttle descended into the planet's atmosphere, Cody briefed his troops on their objective: to eradicate the Separatist holdout's battalion of reprogrammed battle droids and liberate Grotton, the Imperial-appointed governor, who had been captured during a prior unsuccessful attempt to subdue the resistance. The Separatists, anticipating the attack, met the Imperial shuttle with a barrage of rockets and tank fire as it approached the city, causing it to crash in the nearby farmlands. Despite the crash, Cody, Crosshair, and half the team survived and advanced towards the city. Cody observed Crosshair's expert marksmanship as he destroyed an AAT tank. Cody and his troopers then used ropes to scale the city walls and opened the gates, eliminating any droids in their path. Before delving deeper into the city, Cody split his forces, leading Crosshair and troopers Wyler and Nova through the city's northern entrance, while a second team of clones entered through the southern access point.
After fighting through the city's confined corridors against numerous battle droids, which resulted in the deaths of Wyler and Nova, Cody and Crosshair approached the command tower, where the Separatist governor Tawni Ames was holding Grotton captive. Following intense close-quarters combat with BX commando droids, Cody and Crosshair found Ames holding Grotton at gunpoint. Cody rebuked Ames for attacking Imperial convoys and defying the Empire's authority. Ames retorted that peace with the Empire was impossible, criticizing Palpatine's warmongering. Cody, attempting to demonstrate the possibility of a peaceful resolution, laid down his weapon and helmet, pleading with Ames to release Grotton to prevent further bloodshed. Ames, visibly hesitant, lowered her blaster and freed Grotton, only for the Imperial governor to immediately demand her execution. Despite Cody's assurance of a peaceful outcome, the enraged Grotton reiterated his order for Ames' execution, threatening the clones with insubordination. At that moment, Crosshair fatally shot Ames with his sniper rifle, pleasing Grotton but shocking and dismaying Cody. Later, Cody witnessed the arrival of more Imperial forces to occupy the planet, seizing resources and brutalizing the population of Desix. With a look of disapproval, Cody boarded a shuttle with Crosshair and the surviving troopers and left the planet.
Upon their return to Coruscant, Cody silently gazed at the First Battle Memorial located near the Imperial Inspectorate HQ. As Crosshair passed by, Cody questioned whether the clones were truly improving the galaxy under the Empire's rule. Crosshair simply responded that, as soldiers, they "do what needs to be done." Unconvinced, Cody argued that they were not battle droids and therefore capable of making their own choices, and thus must bear the consequences, before entering the Imperial facility. The following day, Crosshair reported to Vice Admiral Edmon Rampart's office for new orders and was informed that he would be reporting to a new clone commander. When Crosshair inquired about Cody's whereabouts, Rampart revealed that Cody had gone AWOL overnight.
Legacy
Roughly a year into the Imperial Era, Kenobi, having gone into exile on the desert planet Tatooine to safeguard the young Luke Skywalker, reflected on his past during meditation, recalling Cody returning his lightsaber just before Order 66. Upon seeing the face of a clone, Anakin Skywalker, now the Sith Lord Darth Vader, remembered Cody, Rex, Fives, and Echo. Each name triggered a memory, and Vader viewed each clone as a haunting reminder of his past.
Fifteen years after the rise of the Empire, the codes and emergency protocols developed by Cody and Rex during the Clone Wars were still in use by the Empire. Despite his participation in numerous battles during the Clone War, Cody was most infamously known as the clone who ordered Kenobi's execution. His failure in this regard proved crucial for the future of the galaxy because of the Jedi's role in the Galactic Civil War.
Personality and traits
As a clone of Jango Fett, Cody was a human male standing 1.83 meters tall, characterized by his black hair, brown eyes, and tan skin. Possessing natural leadership qualities, he transformed the 212th Attack Battalion into a highly respected unit. He was also a skilled strategist with a practical approach to warfare. These qualities, paired with his combat prowess, earned him the respect of both his superiors and fellow soldiers. He was known as Cody, a name that he used as part of a growing trend in the military, where the Jedi encouraged the clones to embrace their individuality.
Cody could be cautious and adhere to procedure, but was consistently capable on the battlefield. His effectiveness as a leader was due in part to his range in ability, being able to efficiently lead his soldiers in either straightforward infantry battles or more complicated infiltration missions. As a soldier in the Grand Army of the Republic, Cody never wavered in his allegiance to the government he was bred to serve. His loyalty to the Galactic Republic was absolute; any attempt to make him question his service was met with Cody's impassiveness. He hated it when clones died in otherwise preventable ways, such as not having enough cover, and confided in Rex that, sometimes, he found it hard to be one of the few who survived battle after battle, when so many of his family had fallen in battle. He shared his brethren's affinity for their homeworld, Kamino, having been grown in the Kaminoan hatcheries alongside the other Fett clones. The Separatist invasion of Kamino was personal for Cody, who viewed their actions as a direct threat to his kind.
Like his general, Cody developed a habit of walking with his hands clasped behind his back. He was also familiar with the reputation of Quinlan Vos, which he quickly noted to Kenobi when asked about him. Owing to his strong sense of loyalty, Cody had little patience for traitors. He was unaffected by the treason of Slick, who believed that the clones were enslaved. However, Cody expressed to the Jedi that he understood how Vos' betrayal affected them, recalling the incident with Slick.
Cody frequently collaborated with Captain Rex, another clone, and the two shared a close bond. Cody often wondered how Rex could tolerate working under a Jedi as reckless as Anakin Skywalker, appreciating that Jedi General Obi-Wan Kenobi was considerably more cautious on the battlefield than his former padawan. Moreover, Cody's officer qualities made him an excellent second-in-command to Kenobi. Serving alongside Kenobi throughout the Clone Wars, Cody cultivated a strong working relationship and friendship built on trust and camaraderie with the general. Kenobi trusted Cody implicitly, while Cody and his troops respected their Jedi general's abilities as both a negotiator and a warrior. Kenobi also held Cody in high regard for his leadership skills displayed in combat and his tactical acumen. However, Cody's chip was activated by Chancellor Palpatine, which overrode his loyalty to Kenobi. As a result, he was forced to follow Order 66, the directive to kill all Jedi as enemies of the Republic, as such he was compelled to turn against the general who had also been his longtime friend. As a soldier of the Galactic Empire, Cody participated in the subjugation of Kashyyyk and the enslavement of its native Wookiee population, but he later realized that Imperial peace was not a type of governance he could support.
Skills and abilities
Commander Cody was a skilled and accomplished field commander. His expertise and proficiency on the battlefield led to his promotion to Marshal Commander. Cody also demonstrated impressive close-quarters and hand-to-hand combat skills, as evidenced by his victory over Sergeant Slick and his performance against the droid forces on Christophsis. The Commander was also proficient with blasters. He was able to accurately hit a fuel tank that was launched from Obi-Wan, and was able to destroy many battle droids throughout the Clone Wars.
Being an experienced commander, Cody was capable of formulating and executing plans effectively. Prior to the Second Battle of Geonosis, he briefed the Jedi Generals on the plan that would ultimately lead to victory. Cody was an expert military tactician and was also proficient with a jetpack, frequently wearing one for aerial maneuvers and was known for his skills in reconnaissance.
Equipment
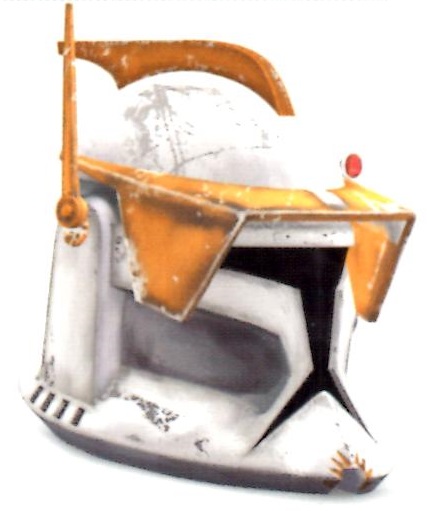
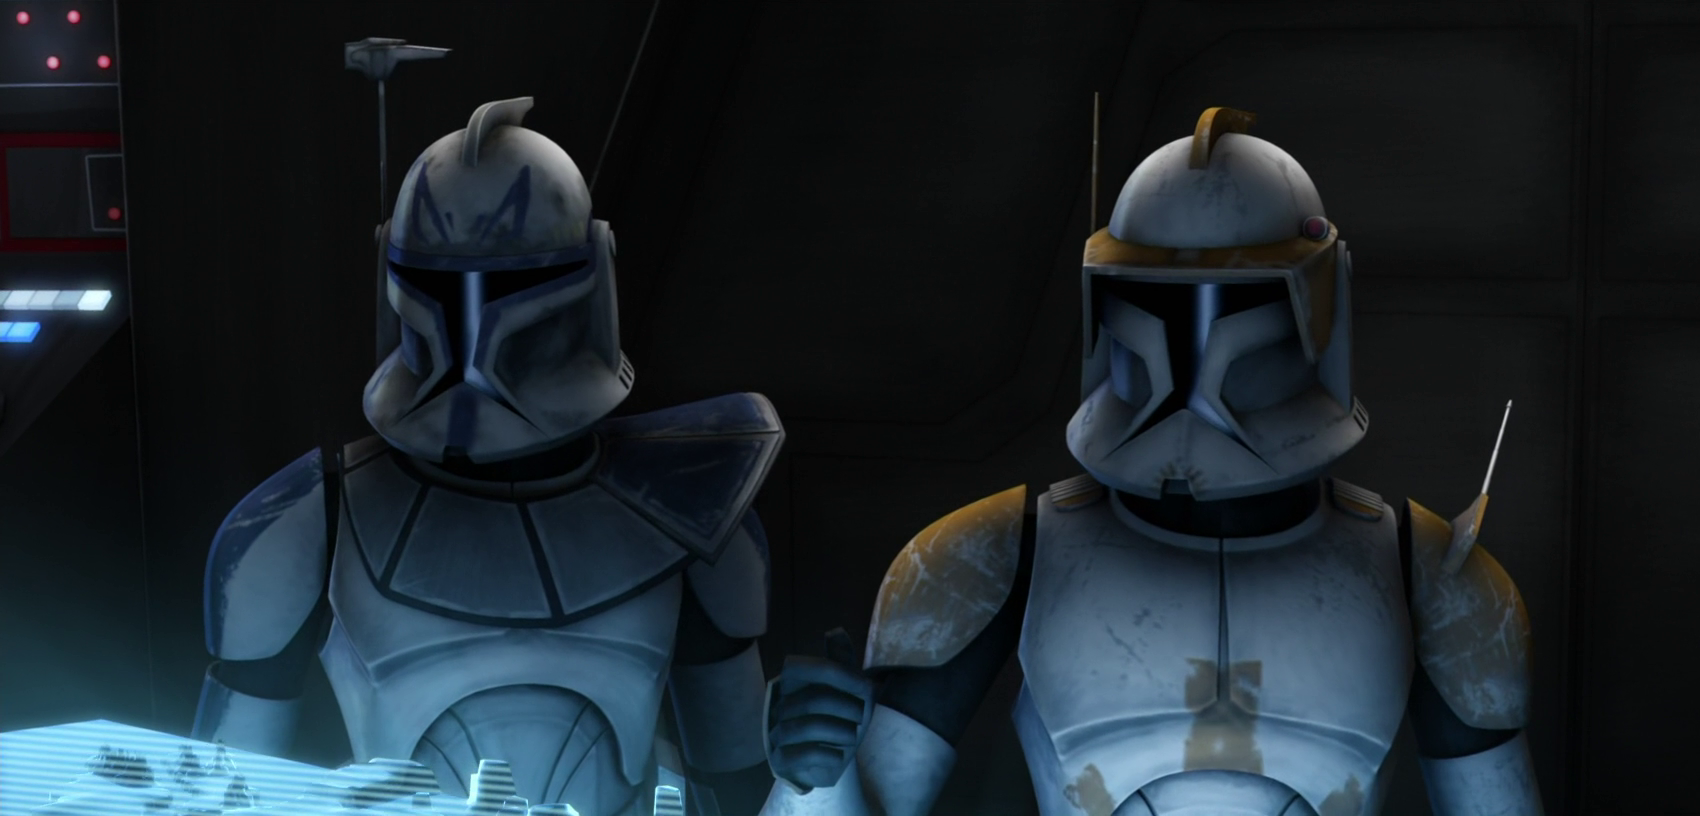
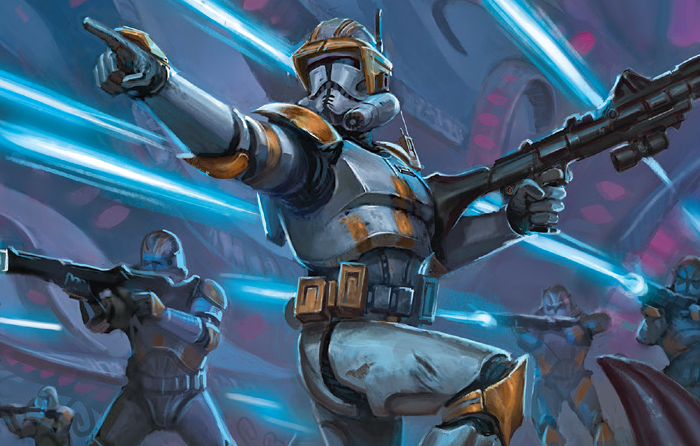
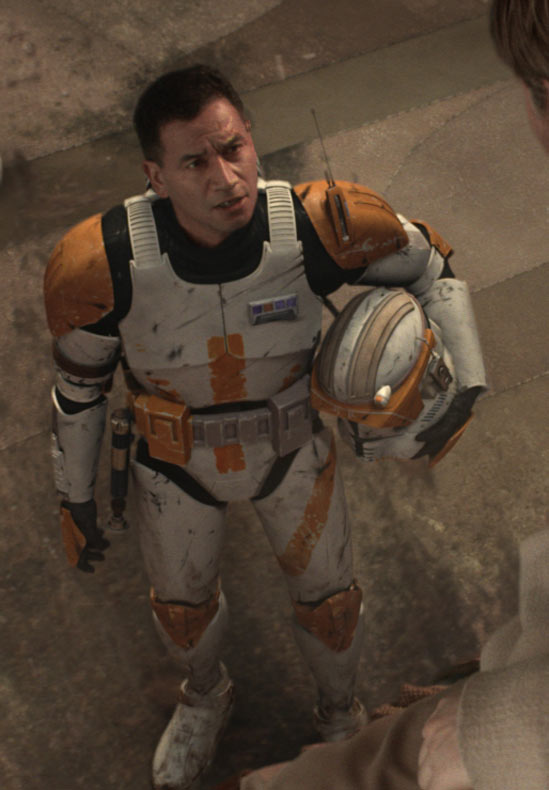
During the Clone Wars, Cody utilized a set of Phase I clone trooper armor that initially featured yellow markings, consistent with all Clone Commanders at the war's outset. As clones increasingly customized their armor, Cody's armor was recolored orange, a color commonly used by members of the 212th.
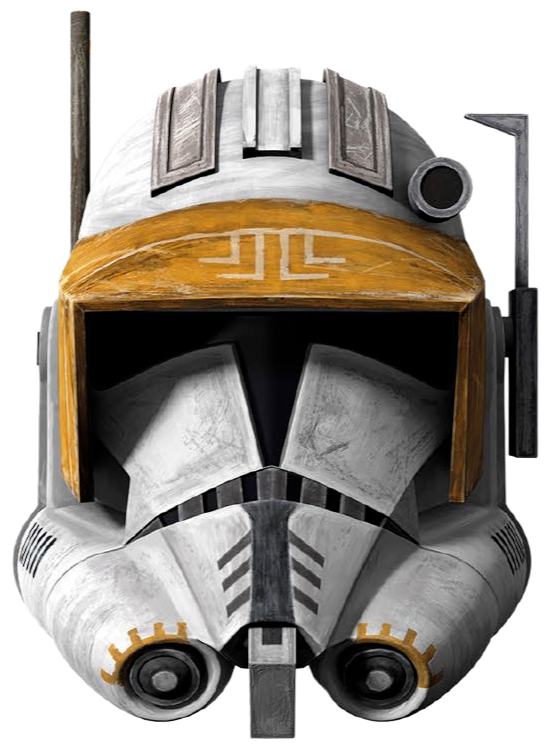
His armor also included a removable visor to reduce glare, a communications antenna on his helmet, with a secondary antenna on his shoulder, and a small light. He had lamps on his helmet at Geonosis. Later, with the introduction of Phase II clone trooper armor, Cody adopted a similar set with several modifications: two gray stripes running down the sides of the helmet's top, a clip for Obi-Wan Kenobi's Lightsaber on his waist, a small tool attached to the upper arm piece, one antenna on the shoulder pads, one on the back of his helmet, and a smaller, oval-shaped jetpack. This armor also featured a visor and orange markings.
During the Imperial Era, the orange markings on Cody's armor were replaced with gray, and additional markings were added to his helmet.
Behind the scenes
First appearances
Cody's first canonical appearance was in the 2005 film Star Wars: Episode III Revenge of the Sith, portrayed by Temuera Morrison, who also played the other clone troopers in the movie. Cody's name was a tribute to the film serial character Commando Cody.
Cody was later voiced by Dee Bradley Baker in Star Wars: The Clone Wars. In "The Hidden Enemy," the sixteenth episode of The Clone Wars first season, Cody was mistakenly referred to as a captain by Kenobi, due to a script change in which Kenobi was originally talking to Rex.
During the development of Star Wars Rebels, the writers considered bringing back Cody. At Dragon Con 2018, Henry Gilroy revealed an idea where Grand Admiral Thrawn realized that the Spectres were working with clones, prompting him to research and enlist Cody's assistance.
Cancelled appearance in Obi-Wan Kenobi television series
Writer Stuart Beattie envisioned a significant role for Cody in his draft for the first of three Obi-Wan Kenobi feature films, exploring Cody's character arc and his transformation from Revenge of the Sith to Obi-Wan Kenobi. In Beattie's script, when Kenobi entered a town on Tatooine, Cody would lead the Jedi into an alley and threaten him with a knife. It would eventually be revealed that Cody had his inhibitor chip removed, allowing him to refrain from hunting Kenobi. Cody then became Kenobi's "secret buddy" and that they would both be overwhelmed by guilt. Beattie's idea was that when Kenobi left Tatooine, he left Cody in charge of Luke Skywalker, which was meant to be a side plot that the film would cut away to. Cody was planned as a way to show how disconnected Kenobi was from the Force due to forcing his will upon young Skywalker in a manner similar to when Superman lost his powers in the 1980 film Superman II. Beattie wrote Cody as a fun character who is tragically racing against his accelerated aging. The writer added a comedic scene when Cody and Kenobi visited the local sarlacc to get rid of some dead stormtroopers, and other locals showed up to also get rid of bodies. Beattie wasn't sure why Cody didn't appear in the Obi-Wan Kenobi television series, but he assumed it was because Temuera Morrison was too busy with The Book of Boba Fett or it was decided that the show didn't need Cody.