Alliance to Restore the Republic
The Alliance to Restore the Republic (from 2 BBY to 4 ABY), often called the Rebel Alliance, simply the Alliance, or the Rebellion, served as a resistance organization. Its purpose was to fight against the Galactic Empire's rule and to bring back the Galactic Republic. Senator Mon Mothma made a public and formal declaration, the Declaration of the Rebel Alliance, which officially established the Alliance. This declaration united various previously independent rebel groups into a unified force opposing the Empire. The very idea of a "Rebel Alliance" grew out of earlier, smaller movements that aimed to connect these scattered cells. These included a movement secretly guided by Senator Bail Prestor Organa and a rebel network created by revolutionary Luthen Rael, who received support and funds from Mothma. These initial groups, along with the eventual Alliance, were formed from a diverse collection of independent rebel cells, such as the crew of the Ghost and Phoenix Cell. The Atrivis Resistance Group holds the distinction of being among the first cells to align with what Mothma began referring to as "the Alliance" prior to the official establishment of the Alliance to Restore the Republic.
The seed of the Alliance and its constituent cells was planted by widespread dissatisfaction under the Empire, particularly among those who yearned for the return of the Galactic Republic. Supportive senators within the Imperial Senate, including Mothma, Organa, and later Organa's daughter Leia Organa, bolstered their efforts. Its ranks included both citizens of the Empire and defectors from the Imperial Military, such as Jan Dodonna, Ryder Azadi, and Wedge Antilles. Organa and Ahsoka Tano were the founders and unifiers of the early rebels, who also received assistance from surviving Jedi like Kanan Jarrus and his Padawan, Ezra Bridger. Veterans of the Clone Wars, such as Captain Rex, also played a role in supporting the movement's beginnings.
Rather than engaging in a full-scale conventional war, the Alliance opted for an insurgency strategy against the Empire. This involved establishing small bases across the galaxy instead of attempting to control entire planets. A significant turning point occurred when the Alliance stole the plans for the Empire's superweapon, the Death Star, and Luke Skywalker aided in destroying the space station during the Battle of Yavin. This victory shifted the momentum of the war and established the Rebel threat as a major problem for the Empire. The Rebellion persisted in engaging the Empire in battles throughout the Galactic Civil War. However, under the command of Darth Vader, Imperial forces successfully defeated the Alliance on Hoth, which compelled the Alliance to disperse its forces to ensure its survival.
Ultimately, the Alliance achieved victory over the Empire, dealing it a critical blow by launching an assault on the second Death Star while it was under construction during the Battle of Endor. In addition to destroying the battle station, the Alliance significantly weakened the Imperial Navy through the loss of one of its Super Star Destroyers. Furthermore, Luke Skywalker's actions led to the redemption of his father, Darth Vader, who then killed Emperor Sheev Palpatine before succumbing to his own injuries in the battle.
The Alliance subsequently reorganized itself into the nascent New Republic, effectively restoring the Old Republic. It maintained the fight against the remnants of the shattered Empire until the Battle of Jakku, which took place one year after Endor. This final battle forced the Galactic Empire to end the war, leading to its eventual overthrow through the signing of the Galactic Concordance.
History
Early foundations
Resistance movements aided by the Jedi
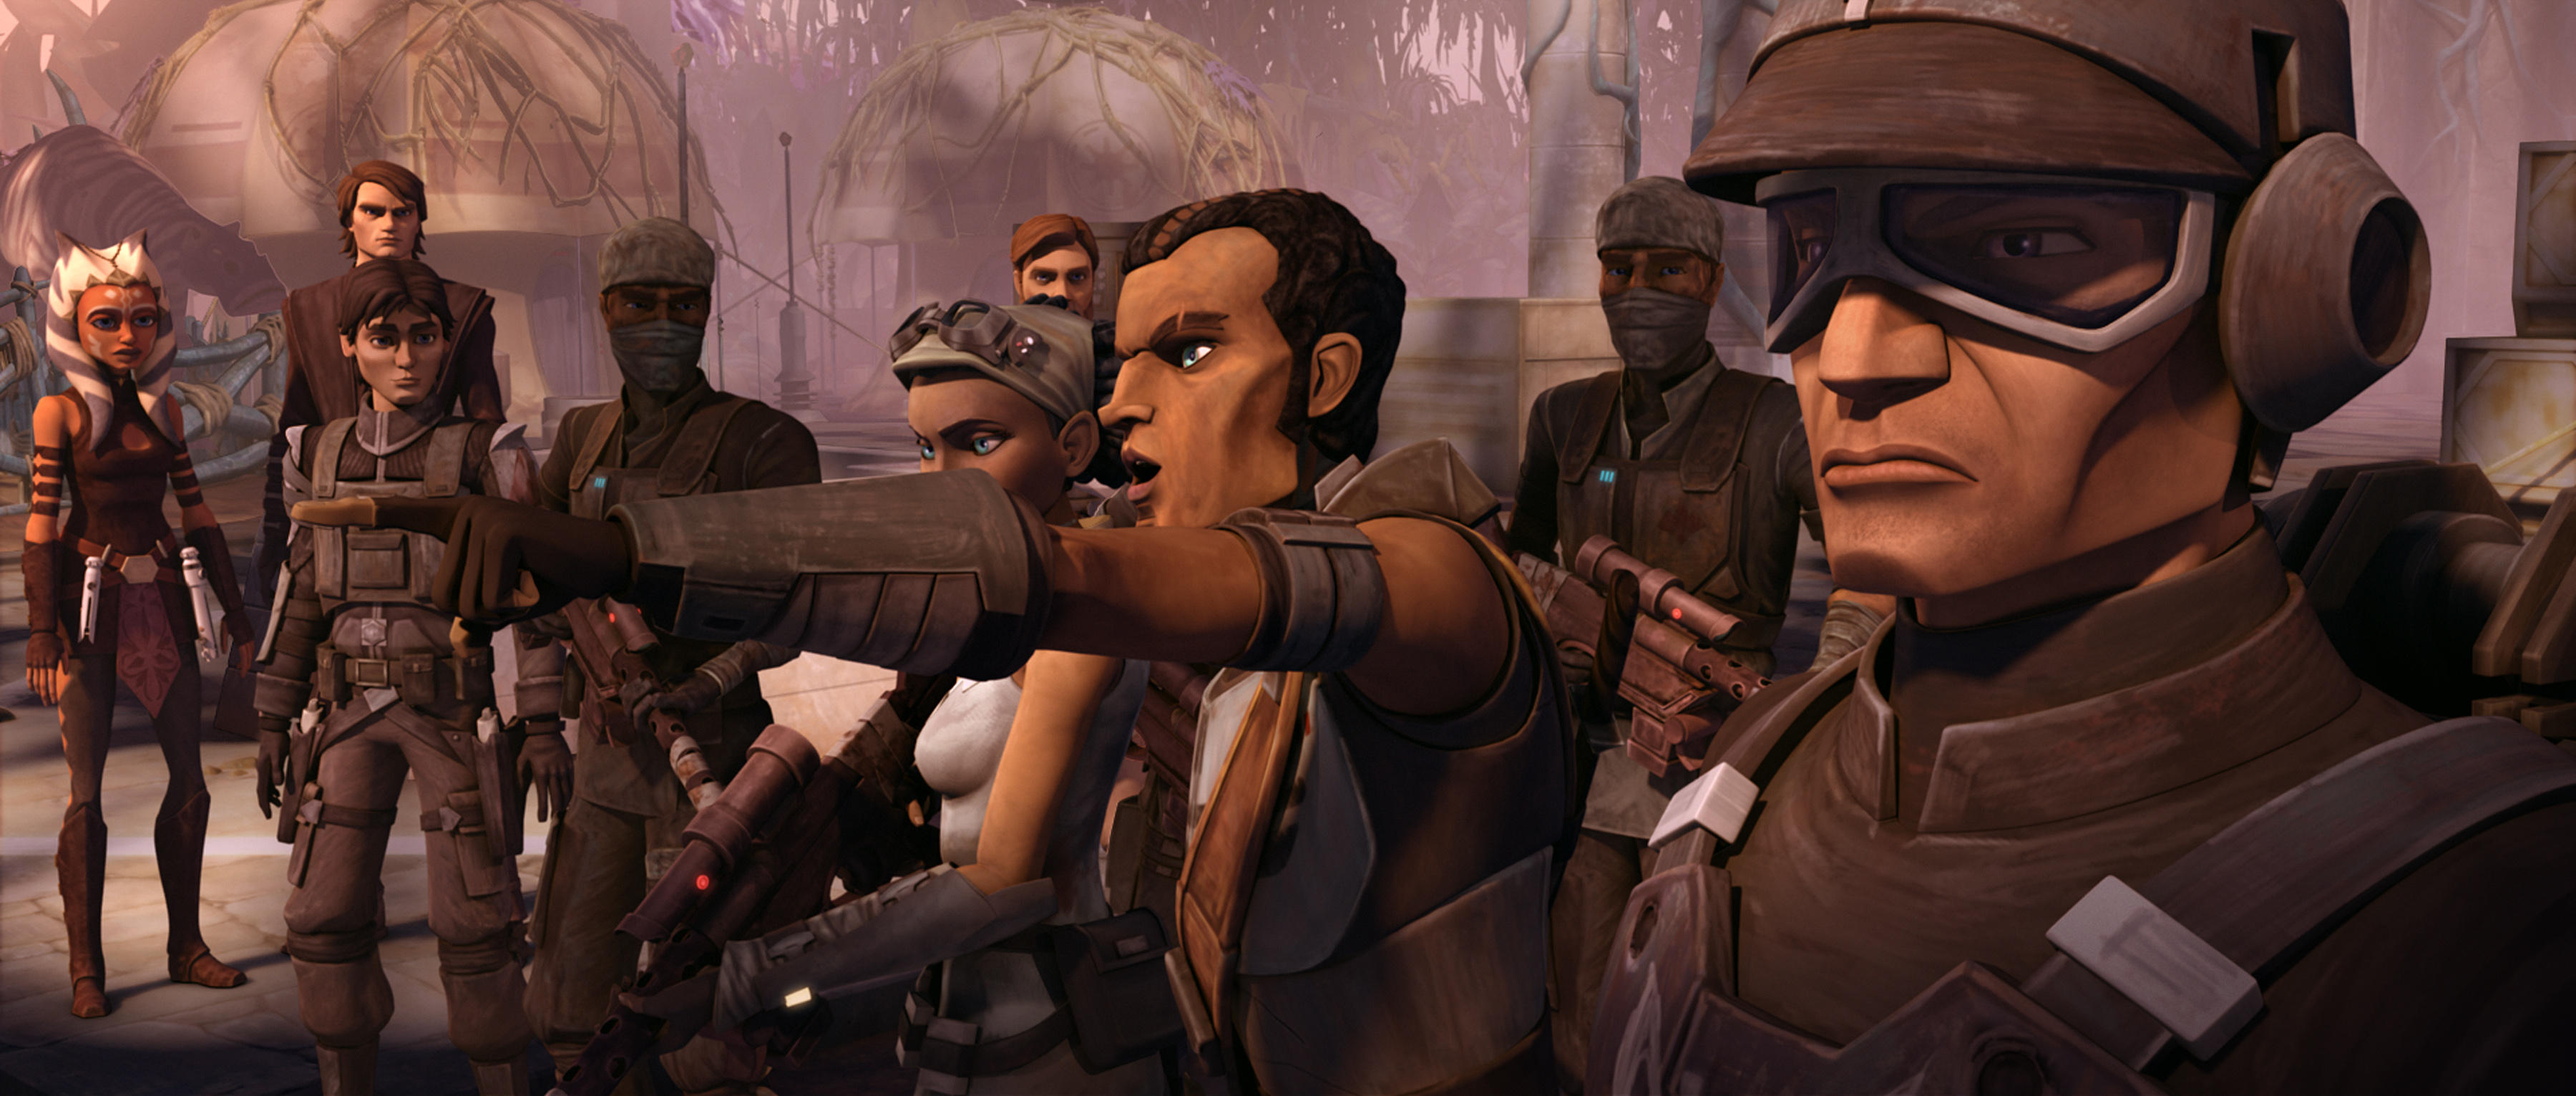
The Alliance to Restore the Republic was a resistance movement that stood against the oppressive Galactic Empire and its [New Order](/article/new_order]. However, its origins can be traced back to a time before the Empire even existed, during the final years of the Galactic Republic. During the Clone Wars, a conflict that pitted the Republic against the Confederacy of Independent Systems, the Jedi Order played a key role in forming resistance units on worlds controlled by the Separatists. This initiative was part of a plan put forward by Jedi Knight Anakin Skywalker, and the Onderon rebels serve as one such example. However, it would take several more years before these scattered rebel cells would unite into a single Rebellion with a central command structure.
Delegation of 2,000

During the Clone Wars, Supreme Chancellor Sheev Palpatine successfully acquired significant emergency powers from the Galactic Senate. This led certain members of the Chancellor's own Loyalist Committee, including Bail Prestor Organa of Alderaan, Padmé Amidala of Naboo, and Mon Mothma of Chandrila, to voice their concerns about the leader's behavior. These dissenting senatorial representatives eventually formed the Delegation of 2,000. They collectively signed the Petition of 2,000, a formal document expressing their concerns regarding Palpatine's leadership and urging him to relinquish his emergency powers as soon as possible. Senator Meena Tills of Mon Cala was among those who signed the petition.
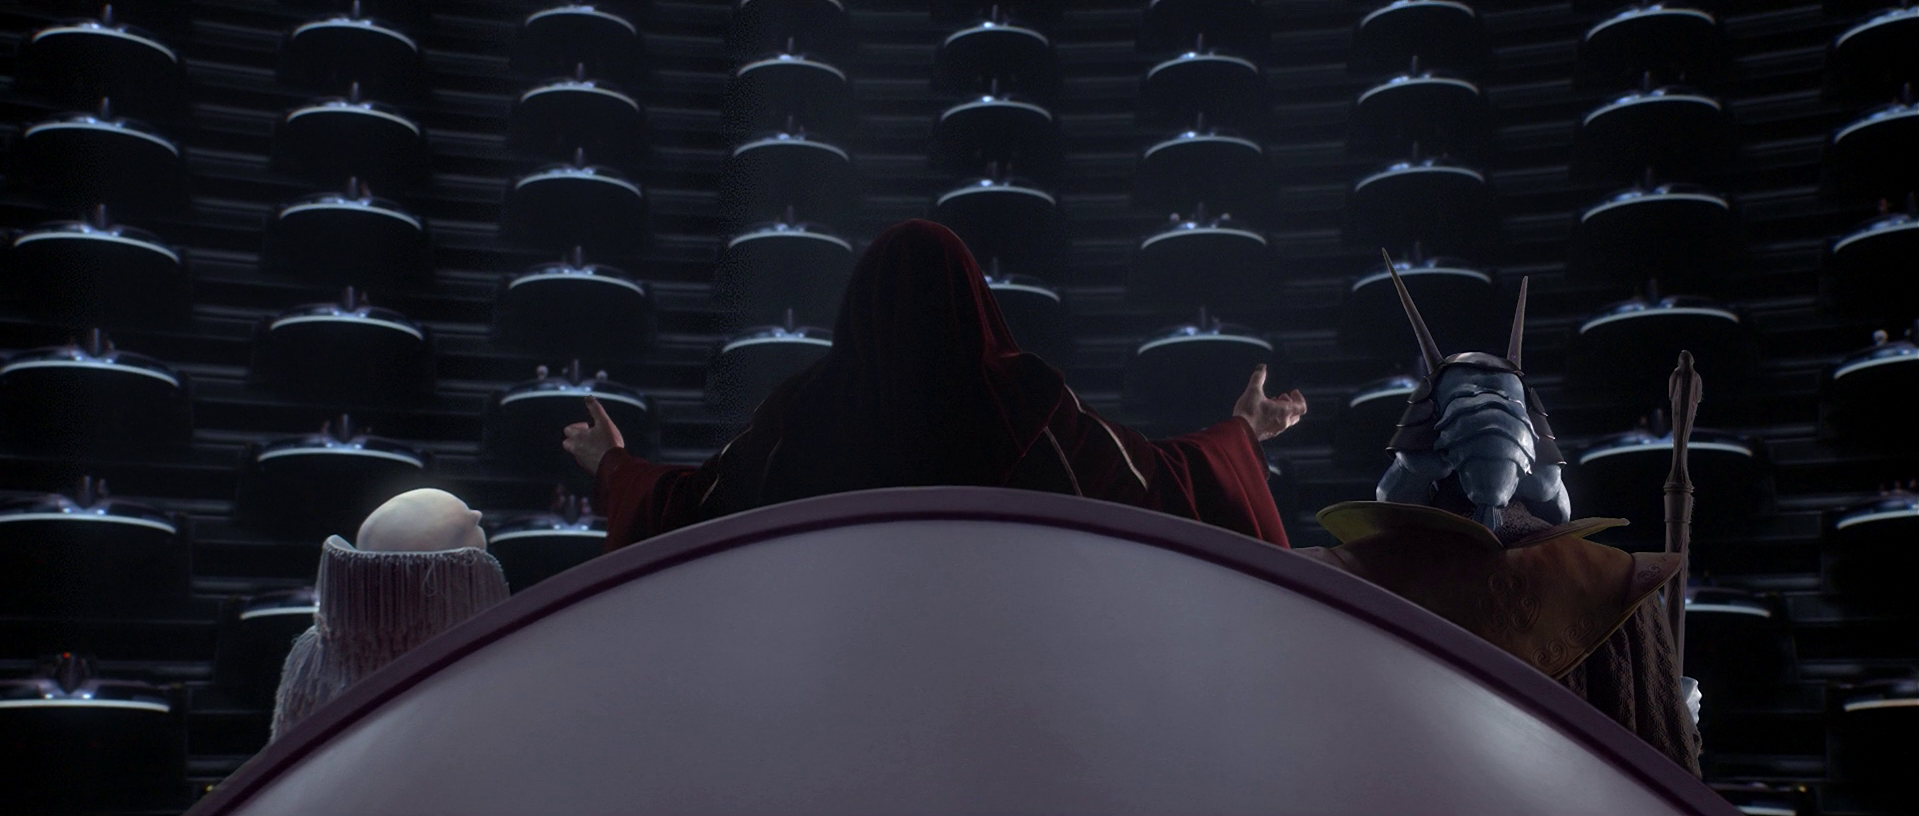
Soon after, the Clone Wars came to an end. However, instead of relinquishing his dictatorial authority, Chancellor Palpatine unilaterally dissolved the Republic in front of the entire Senate and declared himself the Galactic Emperor. This transformed the democratic government into an authoritarian regime known as the Galactic Empire. Unbeknownst to most of the galaxy, Emperor Palpatine was secretly the Sith Lord Darth Sidious, who had orchestrated the Clone Wars to seize power and overthrow the Republic. The Emperor immediately began to undermine democracy across the galaxy and declared the peacekeeping Jedi Knights enemies of the state. In the immediate aftermath of the Clone Wars and Senator Amidala's death at the hands of her husband, Darth Vader — the identity adopted by Anakin Skywalker when he became Sidious's Sith apprentice — Senators Organa and Mothma began secretly plotting to overthrow the Empire.
Age of the Empire
With little significant opposition, the Galactic Empire prospered in the early years of Palpatine's rule. It amassed a massive military force, using it to instill fear within the civilian population. However, public opinion and the perceived power of the Imperial Senate remained crucial until Palpatine could fully consolidate his authority. Despite this, the reformed Senate, even less effective than in the Republic's final years, did nothing to curb the military expansion. Meanwhile, in utmost secrecy, the Empire began developing the Death Star, a moon-sized battle station capable of destroying entire planets. While many harbored resentment towards the Empire, few dared to take action. Those who did often acted in their self-interest, hindering the emergence of a cohesive and organized rebellion.
One notable example of organized resistance against the Empire was Cham Syndulla's Free Ryloth Movement, which aimed to end the Imperial occupation of Ryloth. This movement evolved from the Twi'lek Resistance, which had previously resisted the Separatist occupation of Ryloth during the Clone Wars. Over time, the movement established clandestine bases throughout the Ryloth system and conducted raids against Imperial forces. Meanwhile, Separatist holdouts remained active in the galaxy, continuing their fight for independence from Imperial control. The former Separatist capital, Raxus Secundus, was occupied by the Imperial Military, but this did little to diminish the spirit of independence among its people.
As early as around 18 BBY, rumors circulated that Palpatine feared the prospect of planets and entire star systems joining forces to overthrow him. Although no unifying leaders existed for such a potential rebellion at the time, Palpatine and his agents were unable to act openly because public opinion remained vital to his legitimacy, even with the excuse to occupy worlds such as Raxus. At that time, a growing number of Pantorans desired genuine independence rather than remaining under Imperial rule. To that end, Pantoran Senator Riyo Chuchi met with the former Separatist Senator of Raxus, Avi Singh, to discuss Palpatine's concerns and the possibility of an allied Rebellion. To preempt a revolution, a clone assassin codenamed CX-1 was dispatched to assassinate Singh, but his efforts were thwarted by the Clone Underground, a network of clones who had rebelled against the Empire and sought to aid their brethren.
Another rebel cell emerged a year after the end of the Clone Wars when the Empire decided to severely punish the world of Antar 4 for its past associations with the Confederacy of Independent Systems. This brutal operation, led by Wilhuff Tarkin, prompted former Republic Intelligence agent Berch Teller to establish his own resistance cell. Teller hoped that their actions would contribute to a larger movement against the Empire. Four years after its formation, the insurgents managed to steal the Carrion Spike, Tarkin's personal starship, to attack various Imperial targets using information provided by an Imperial traitor, Vice Admiral Dodd Rancit. Teller's insurgents later launched an attack on an Imperial convoy transporting crucial components for the Death Star project. However, their plans were thwarted by Tarkin's timely intervention, resulting in the deaths of all insurgents except Teller.
The early rebellion
By 5 BBY, several rebel cells had emerged, operating throughout the galaxy as part of an early rebellion against increasing Imperial oppression, particularly in light of the Empire's continued expansion into the Outer Rim. One such cell was the Spectres, which formed on the Imperial-controlled Outer Rim planet of Lothal. Insurgencies also began in the Atrivis sector, with the Liberators seizing an Imperial garrison, only to be decisively defeated by the Imperial Navy soon after. A rebel operative named Luthen Rael played a significant role in the early stages of forming a network of rebel cells, receiving funding from and working alongside Senator Mon Mothma. Mothma also established a rebel cell of her own at some point.
As the Empire began to scrutinize Mothma's banking activities, Rael established a rebel infiltration team under Mothma's cousin Vel Sartha to steal the quarterly payroll for the Imperial sector surrounding the planet Aldhani. Rael also believed that such a major strike against the Empire would provoke the regime to retaliate harshly, inspiring more people to rise up as they suffered under a sudden surge of Imperial tyranny. However, the success of the Aldhani mission effectively froze Mothma's bank accounts under new laws, leaving Mothma with limited options to balance her accounts before the Empire conducted a full investigation. Ultimately, Mothma's only solution was to marry off her daughter Leida to the son of Chandrilan oligarch Davo Sculdun. If she proceeded with the proposal, Sculdun promised to deposit funds into her account, thereby covering up the missing funds she had provided to Rael.
Rael also met with Saw Gerrera of the Partisans in an attempt to persuade him to collaborate with former Separatist Anto Kreegyr's group, arguing that the rebel cells, despite their political differences, needed to unite to become a genuine threat to the Empire. By the time Gerrera agreed, the Imperial Security Bureau had discovered Kreegyr's planned raid on the Spellhaus Imperial power station. Reasoning that Kreegyr's demise would make the ISB overconfident and protect Rael's agent within the ISB, Lonni Jung, the two reluctantly agreed to sacrifice Kreegyr's forces for the greater good of their war effort. Shortly afterward, the raid ended in the complete destruction of Kreegyr's attack force. Following the Rix Road riot, Rael also formally recruited Cassian Jeron Andor into his network. The Atrivis Resistance Group, led by Travia Chan, was also operating in the Atrivis sector. After careful consideration, they decided to join Mothma, becoming one of the first groups to become part of what Mothma had begun calling "the Alliance."
Another rebel cell, Phoenix Cell, was led by Commander Jun Sato and was part of a larger rebel network led by Ahsoka Tano and Senator Organa, who had opposed Palpatine for many years. At that point, members of these cells were intentionally kept unaware of their connection to a larger rebellion to prevent them from revealing information about other cells if captured. Intelligence was provided to the cells on a need-to-know basis by Tano, using the codename "Fulcrum."
Due to the increased rebel activities around Lothal, the Imperial Security Bureau dispatched Agent Alexsandr Kallus to hunt down the Spectres. Kallus viewed the rebel activities as part of a pattern that could ignite a larger rebellion. After the Spectres thwarted several Imperial attempts to capture them, Grand Moff Tarkin visited Lothal and warned the Imperial officials and officers that while the various cells lacked unity, the rebels on Lothal were unique because they had unity, which made them a credible threat to the Empire. Tarkin warned that the failures of Imperial forces on Lothal allowed the Spectres to represent hope, and ordered the Grand Inquisitor to execute two of the incompetent Imperial officers. He warned the others that failure would have consequences.
The Rebellion's existence was finally exposed to the Empire when they captured Kanan Jarrus after he and the Spectres successfully hacked and transmitted a rebellious message to Lothal and several surrounding systems. His capture prompted the Spectres to launch a mission to rescue him from Tarkin's personal Imperial Star Destroyer, the Sovereign, over Mustafar. To save one of their cells and the only other Jedi involved in the movement besides herself, Tano led Phoenix Squadron to assist in their escape. Following the successful rescue, she informed the Spectres that their protocol of secrecy had changed. In response to the transmission sent by the Spectres and the rumors of the rebel action over Mustafar, anti-Imperial unrest began on Lothal and several other worlds. In response, the Emperor dispatched Darth Vader to address the situation.
Following the Siege of Lothal, the Spectres were forced to retreat from Lothal, and Phoenix Cell was crippled when Vader destroyed their command ship. As a result of their encounter with Vader on Lothal, the Spectres decided to permanently join Phoenix Cell. Despite the attack, the Spectres were able to recruit retired Clone Captain Rex to their cause. Phoenix Cell was also able to acquire a prototype B-wing starfighter from Mon Calamari engineer Quarrie. Working with Rex, the Spectres were able to destroy the Imperial Interdictor. The Spectres also prevented members of the Inquisitorius from capturing several Force-sensitive children.
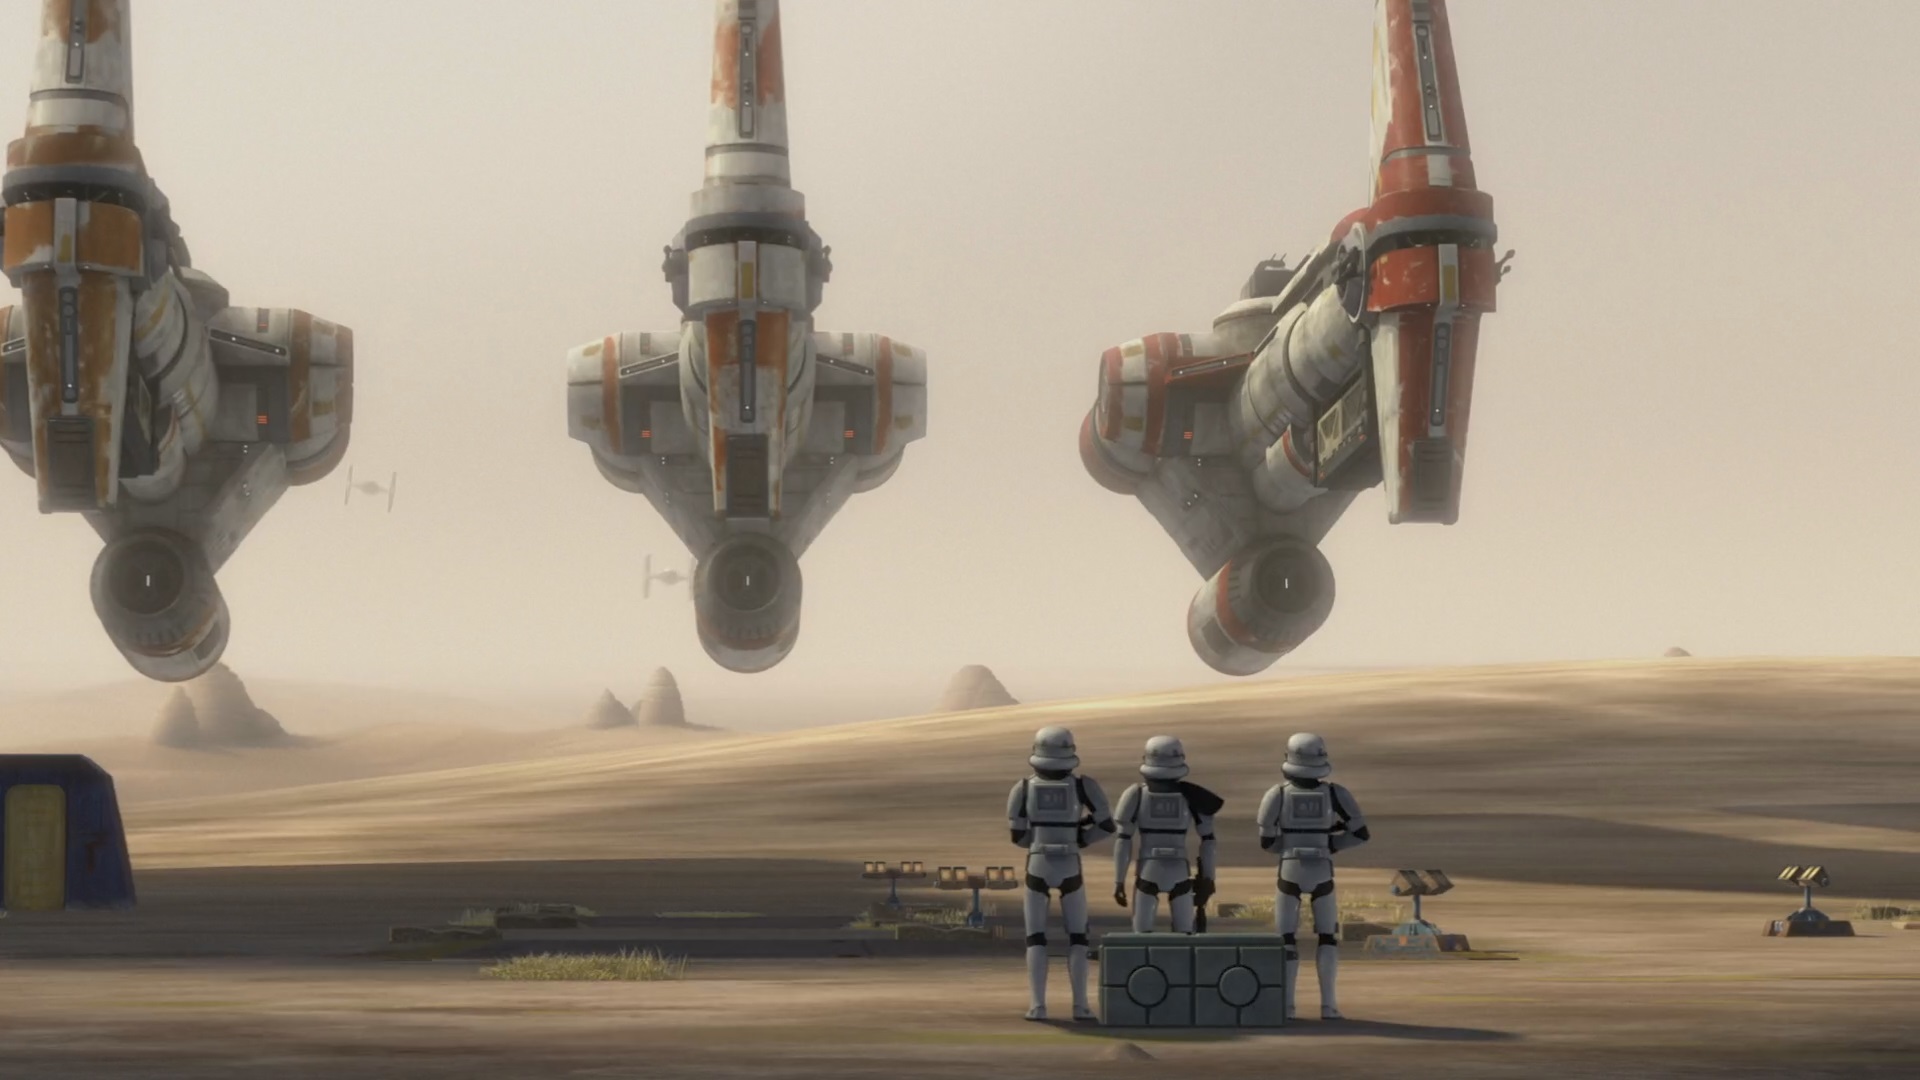
Later, Phoenix Cell suffered a major blow when the Empire discovered their hiding place on the planet Garel. Phoenix Squadron managed to escape, but they incurred losses during the Battle of Garel. After Senator Organa learned of their losses, he sent his daughter Princess Leia Organa to deliver three Sphyrna-class Hammerhead corvettes to them on Lothal. In 3 BBY, Phoenix Cell undertook a mission to secure safe passage for the Rebellion through the Concord Dawn system. After encountering resistance from Fenn Rau's Mandalorian Protectors, the Spectres managed to kidnap him and force him to meet their demands for safe passage after a second attempt.
Afterward, the Spectres and Cham's Free Ryloth movement joined forces to steal a Quasar Fire-class cruiser-carrier above the planet Ryloth. The stolen carrier became the new flagship Phoenix Nest of Phoenix Squadron. With the help of Chopper and the former Imperial RA-7 protocol droid AP-5, Phoenix Squadron established a new base called Chopper Base on the planet Atollon.
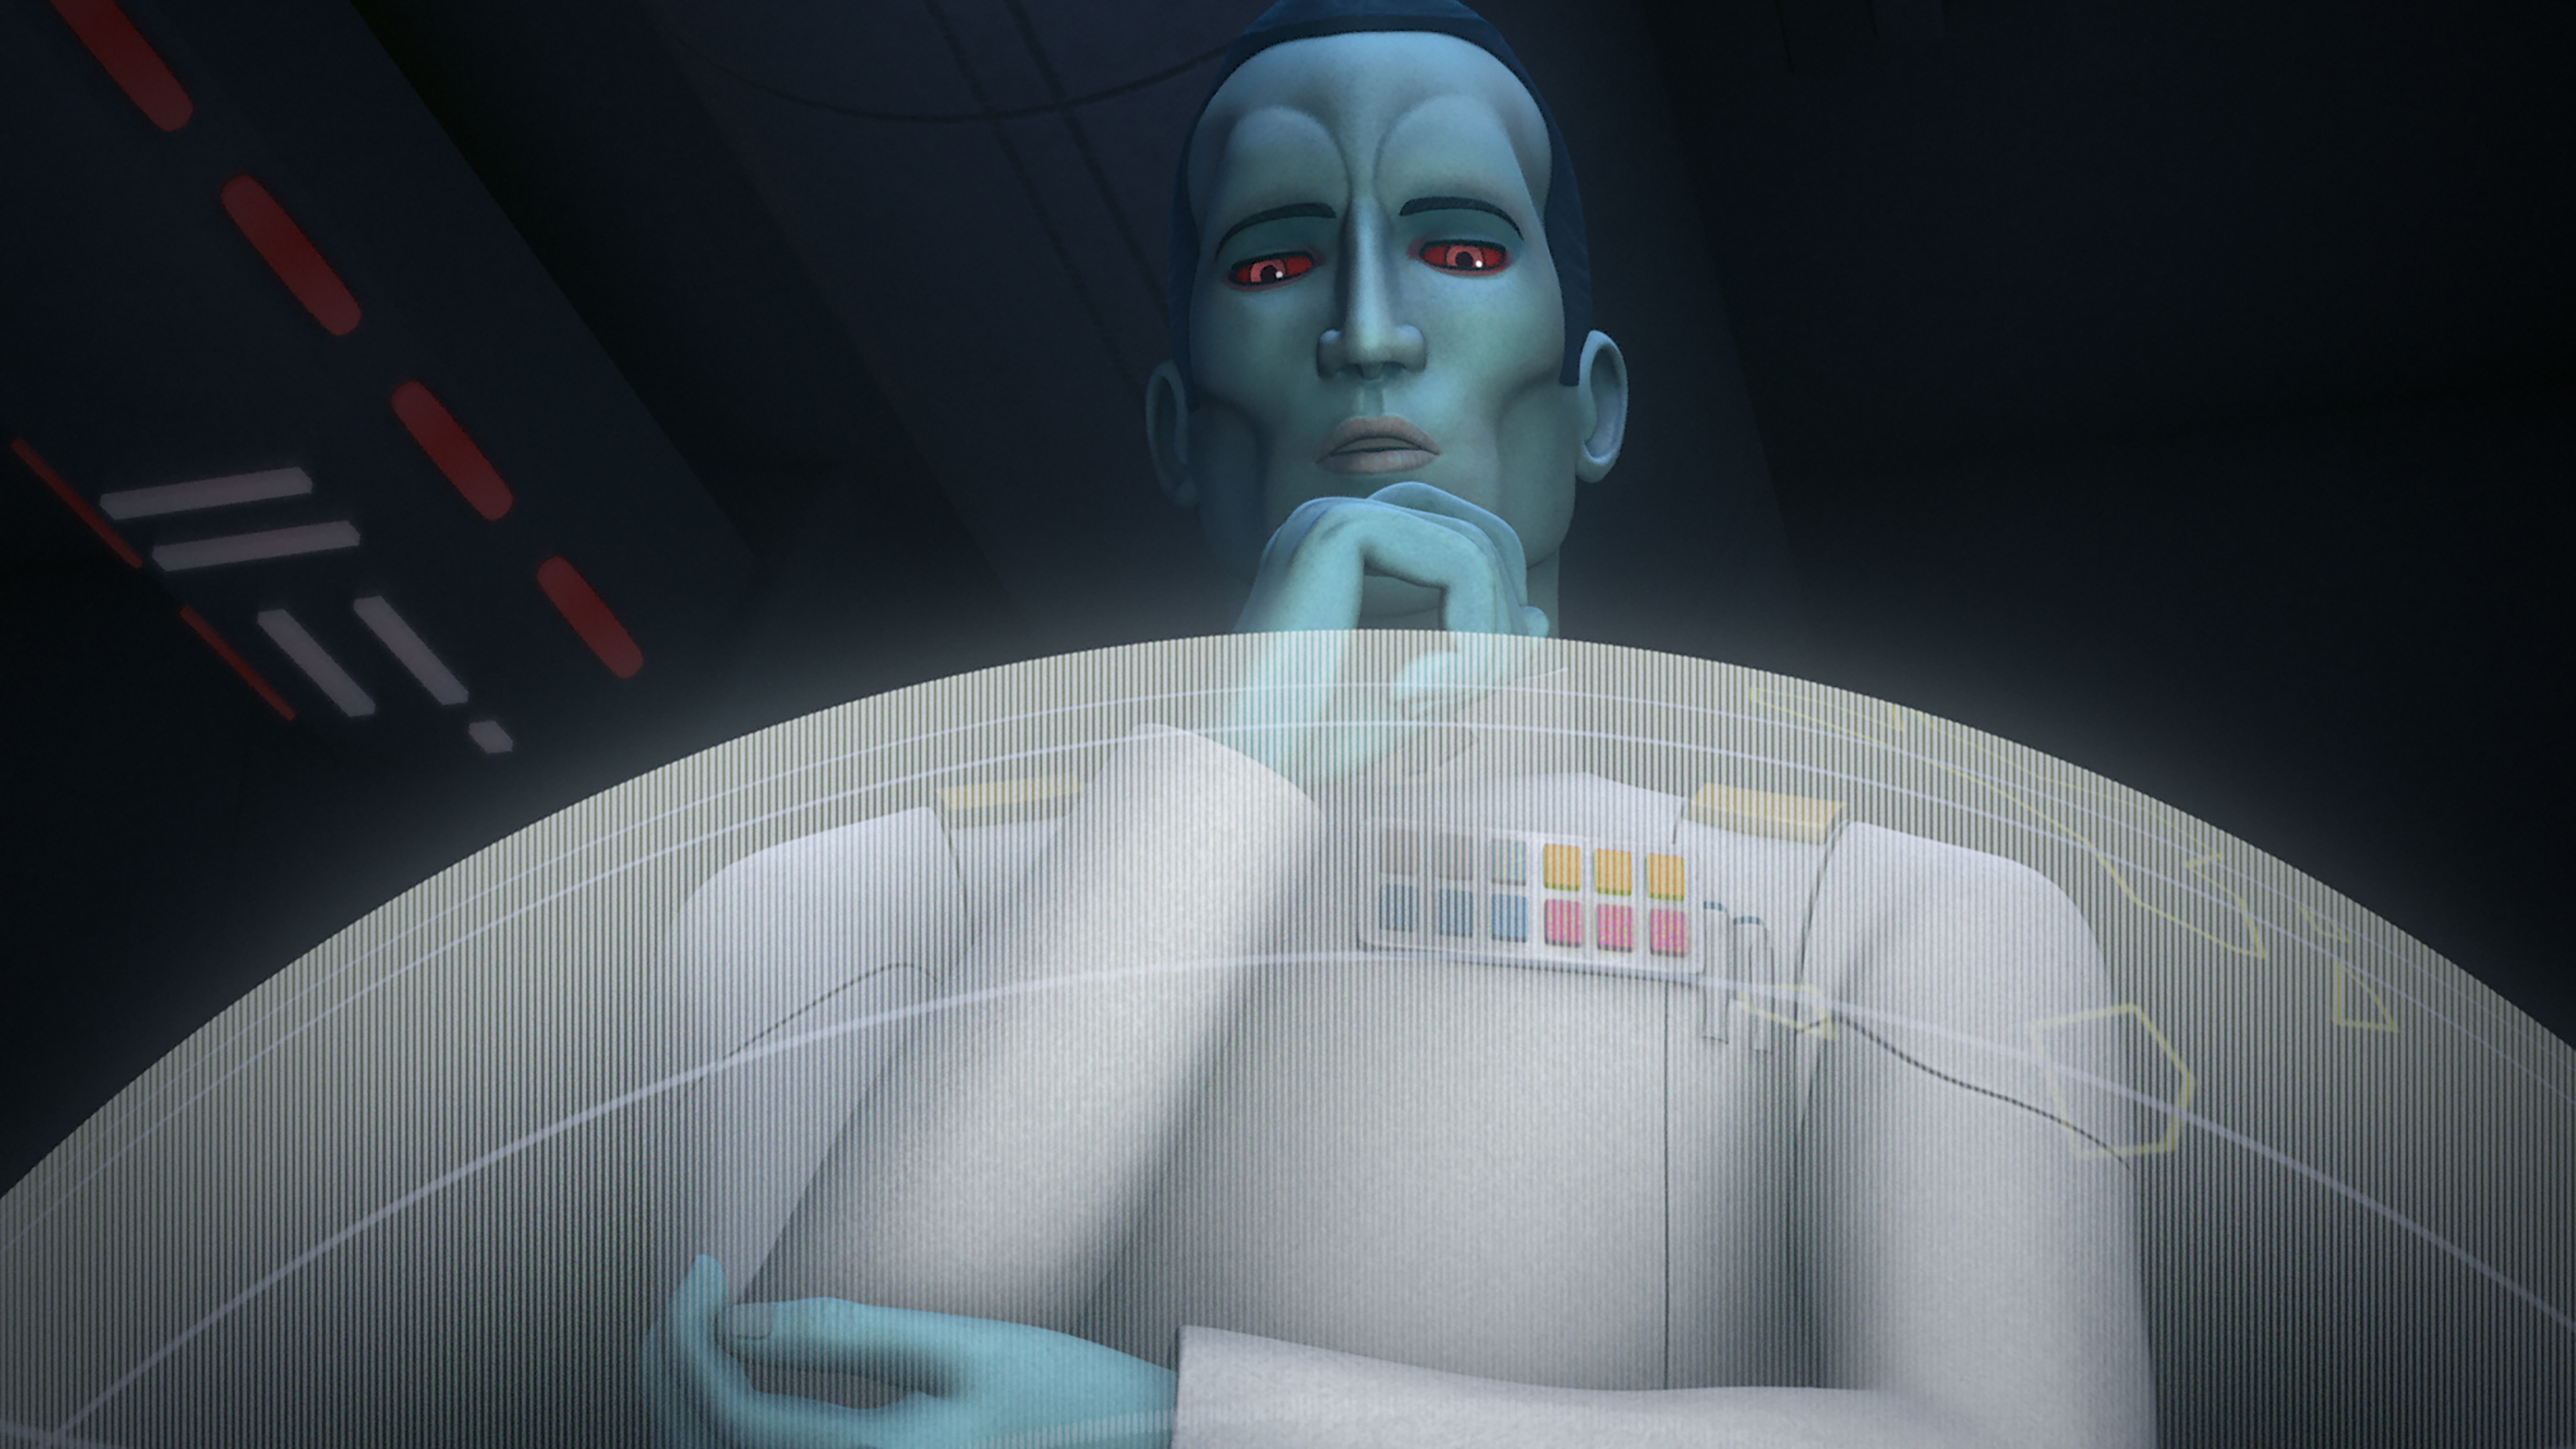
The Emperor elevated Imperial tactician Thrawn to the rank of Grand Admiral in recognition of his success in annihilating both the rebellious uprising within the Batonn sector and the shadowy figure of Nightswan, a mastermind vigilante. Nightswan had once considered uniting various rebel and insurgent factions into a cohesive alliance; however, as he confessed to Thrawn, he abandoned the idea due to his own anxieties, widespread distrust, constant "infighting," and excessive pride. Nightswan admitted he lacked the ability to forge a lasting rebel alliance, uncertain if anyone else could succeed where he had failed.
Convinced that the Empire was confronting an insurgency spanning the entire galaxy, Grand Admiral Thrawn dedicated himself to studying the philosophies, artistic expressions, and historical records of his adversaries to better understand and ultimately defeat them. Governor Arihnda Pryce, grappling with the actions of Phoenix Cell within the Lothal sector, sought Thrawn's expertise in suppressing their activities. Thrawn's ambition extended beyond simply dismantling Phoenix Squadron; his ultimate goal was the complete destruction of the entire rebel fleet. To achieve this, he strategically allowed the squadron to escape with several stolen Y-wings during a mission targeting Reklam Station. These Y-wings were subsequently dispatched to General Jan Dodonna's command.
The Rebellion also gained an unexpected supporter: Agent Kallus, previously a staunch opponent of Phoenix Cell and the Spectres. Kallus experienced a profound change of heart following a bonding experience with Zeb Orrelios on the frigid ice moon of Bahryn. Adopting the alias Fulcrum, Kallus became a crucial rebel informant, relaying intelligence to Phoenix Cell about a planned defection by several TIE fighter pilot cadets stationed at the Skystrike Academy. Furthermore, Kallus facilitated the escape of the rebel Wren alongside the defecting pilots Wedge Antilles and Derek Klivian, who later became valuable members of the Alliance's Starfighter Corps.
Rau's decision to join the Rebellion came after Governor Gar Saxon's brutal massacre of the Mandalorian Protectors. Following the Phoenix rebels' evacuation of rebel sympathizers from the planet Mykapo, the rebel cell known as Iron Squadron formally joined the Rebellion's ranks. The Spectres, in collaboration with Ryder Azadi's rebel group (the former and original Governor of Lothal), embarked on a covert operation to pilfer Thrawn's schematics for a new prototype starfighter from the heavily guarded Imperial Armory Complex situated on Lothal. During their perilous infiltration, the rebels received invaluable assistance from Agent Kallus.
Later on, Rebel Command tasked Gerrera and his Partisans with a mission to uncover the truth behind the mysterious disappearance of the entire Geonosian species. Aided by the Spectres and Klik-Klak, a Geonosian survivor, the rebels unearthed irrefutable evidence of a genocidal act perpetrated by the Empire against the Geonosians. Organa had hoped to leverage this information to expose Imperial atrocities and sway more worlds to join their cause. However, the crucial evidence—the canisters used in the genocide—was lost during the Spectres' and Gerrera's forced retreat, though they managed to capture images of the canisters. As the Rebellion's ranks swelled, Gerrera's increasingly violent methods caused friction with the broader rebel movement. Eventually, Mothma formally proposed a resolution of Censure Condemning Saw Gerrera of the Partisans to sever ties with him and his extremist faction.
Thrawn also launched a large-scale operation to locate Phoenix Squadron's hidden base, deploying E-XD-series infiltrator droids to meticulously scan the Outer Rim Territories for any signs of rebel activity. One particular unit, EXD-9, discovered Chopper Base, but Orrelios, Chopper, and AP-5 cleverly reprogrammed him into a makeshift bomb, which was then sent back to its origin and detonated, destroying one of Thrawn's Star Destroyers. Despite this setback, Thrawn successfully narrowed down the search area for Chopper Base to a mere 94 star systems. Furthermore, Thrawn uncovered Kallus's identity as a rebel spy and devised a plan to exploit him to the Rebellion's detriment.
The Rebellion's Ascent
Formal Establishment
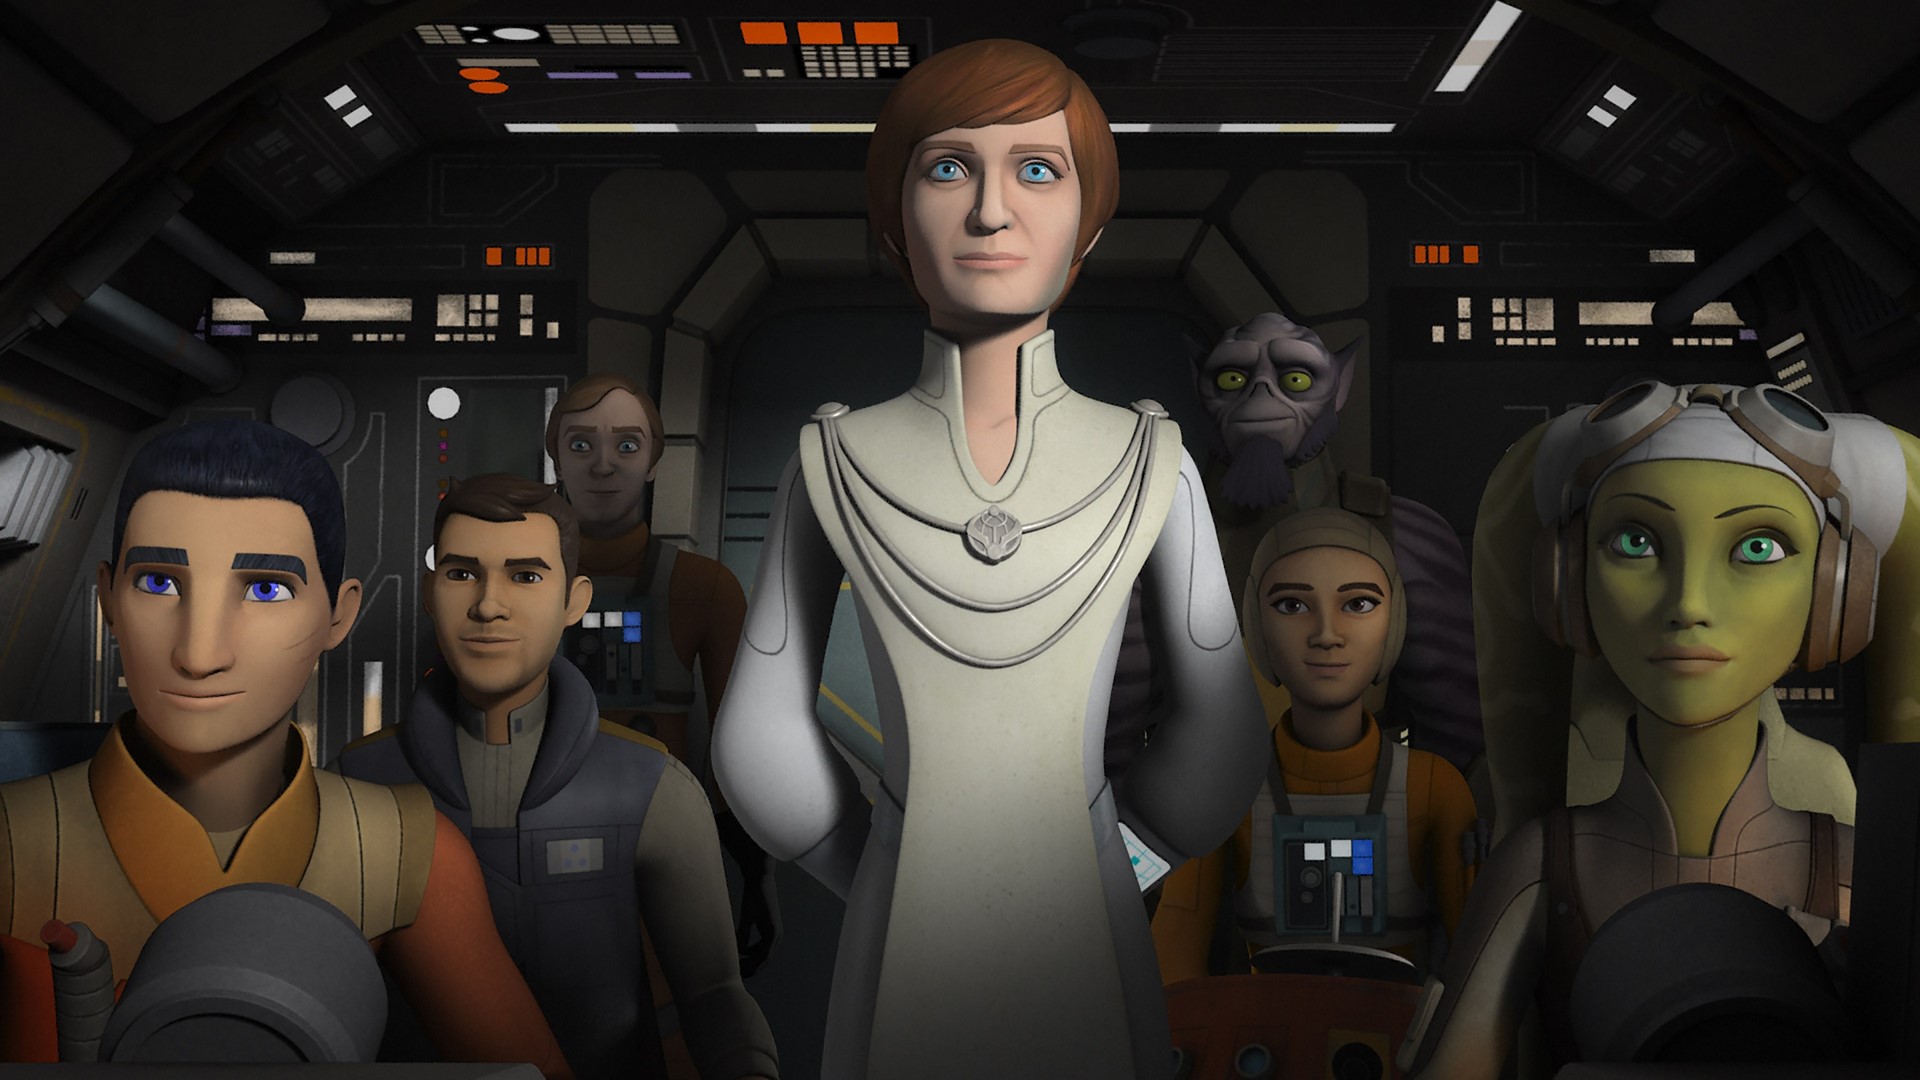
The Rebel Alliance was officially established after Mothma dramatically resigned from the Imperial Senate, publicly condemning Emperor Palpatine for his involvement in the Ghorman Massacre. With the assistance of Phoenix Leader Hera Syndulla and her Spectres, Mothma evaded Thrawn's pursuing forces by navigating the treacherous Archeon pass to reach the sanctuary of Dantooine. From there, Mon Mothma delivered a stirring HoloNet address, urging the galaxy's inhabitants to rise up in unified rebellion against the oppressive Empire. Mothma's message resonated with rebel cells scattered throughout the galaxy, including those on Lothal and Atollon. The disparate elements of the Rebel Fleet converged above Dantooine, and these independent cells were united to form the Alliance to Restore the Republic, marking the official commencement of the Galactic Civil War.
As an integral part of the Attack on Lothal strategy, Syndulla dispatched the droids AP-5 and Chopper, accompanied by the former Imperial cadet Wedge Antilles, on a mission to steal crucial clearance codes from the Imperial Security Bureau station orbiting the moon known as Killun 71. During this operation, Chopper was hijacked by a team of skilled Imperial slicers and intelligence officers, led by LT-319, operating from an IGV-55 surveillance vessel. LT-319 attempted to exploit Chopper to eliminate the Spectres and pinpoint the location of Chopper Base. However, Syndulla skillfully reprogrammed Chopper, unleashing a powerful data surge that obliterated the Imperial surveillance vessel.
With the acquisition of the clearance codes, Phoenix Squadron commenced rigorous training exercises in preparation for their impending Attack on Lothal. Ezra Bridger's focus was momentarily diverted when he and Chopper embarked on an unauthorized mission to Tatooine to rescue Jedi Master Obi-Wan Kenobi from his nemesis, the rogue Sith Lord Maul. Kenobi urged Bridger to return to the Rebellion and decisively defeated Maul in combat. At some point during its existence, the Rebel Alliance engaged in an assault on Vivonah and the slaughter on Noult, actions that their enemies condemned as acts of terrorism. The rebellion maintained forces on the planet Gaulus until effecting a withdrawal.
Ambush at Atollon
As the final phase of the planned Attack on Lothal approached, General Dodonna and the Massassi Group made their way to Atollon to join forces with Phoenix Cell. However, Thrawn's network of spies relayed the trajectory of Dodonna's forces directly to the Grand Admiral. After exposing Kallus as the rebel informant Fulcrum, Thrawn correlated the flight path of Massassi Group with Kallus's Fulcrum transmissions to accurately pinpoint the location of Chopper Base and Atollon. Thrawn's formidable Seventh Fleet, employing Interdictor cruisers, established a blockade around the Atollon system, effectively preventing the rebels from launching their attack on Lothal and swiftly disabling an EF76 Nebulon-B escort frigate. Trapped within the system, the rebels were forced to launch a desperate attack on the blockade, employing bombing runs in an attempt to breach the Imperial defenses. Thrawn, anticipating this tactic, ordered his ships to maintain their positions. He then swiftly decimated Green Squadron as they attempted to cripple his Star Destroyers. He then counterattacked with his TIE squadrons, destroying several rebel corvettes including the Sphyrna-class corvette P2. Realizing his tactic was hopeless, Commander Sato ordered the fleet to charge the blockade, and the Star Destroyers took out a second Nebulon-B frigate and the Braha'tok-class gunship Orion almost instantly.
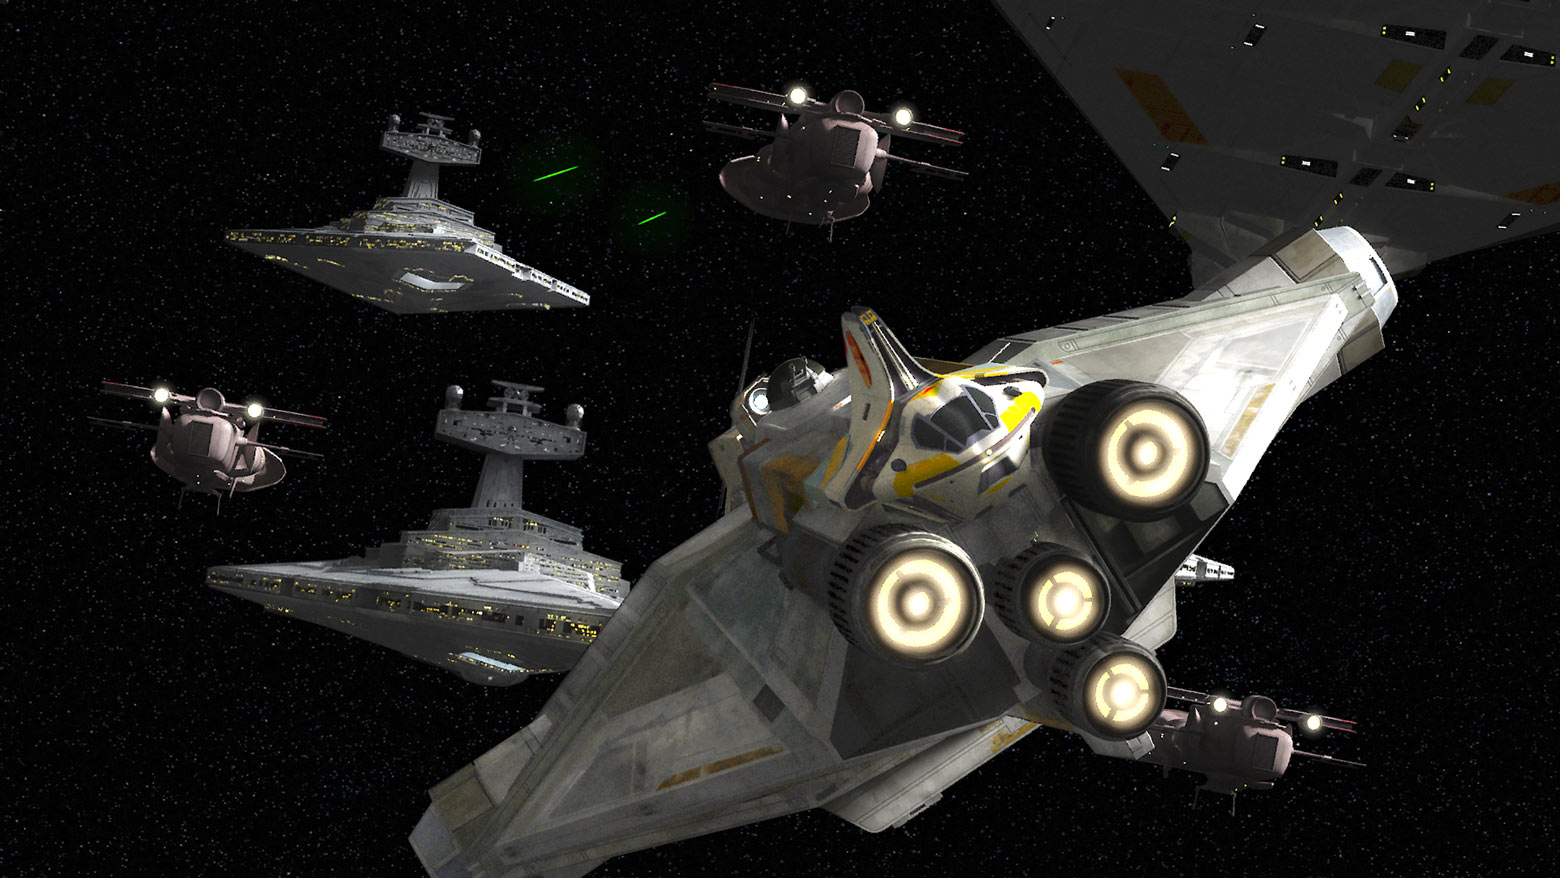
Bridger and Chopper managed to escape aboard the Gauntlet fighter named Nightbrother after Commander Sato selflessly sacrificed his life to destroy an Imperial interdictor vessel that was preventing hyperspace jumps. Ezra pleaded with Mon Mothma for assistance, but the rebel leader was hesitant to reveal the Alliance's full strength to Thrawn. Mothma agreed with Senator Organa's assessment that the rebels were not yet prepared for open warfare with the Empire. With the Rebel Alliance unwilling to intervene, Ezra sought the aid of Sabine's Clan Wren, who successfully destroyed Thrawn's second interdictor cruiser. Consequently, the remaining rebel forces, under the command of Captain Syndulla and General Dodonna, emerged from the planet's surface, suffering heavy losses, and managed to escape to Yavin 4. Only a handful of ships, including the Ghost, the CR90 corvette Liberator, two Sphyrna-class corvettes P1 and P3 and an assortment of RZ-1 A-wing interceptors and Y-wings, made it out.
Building the Alliance

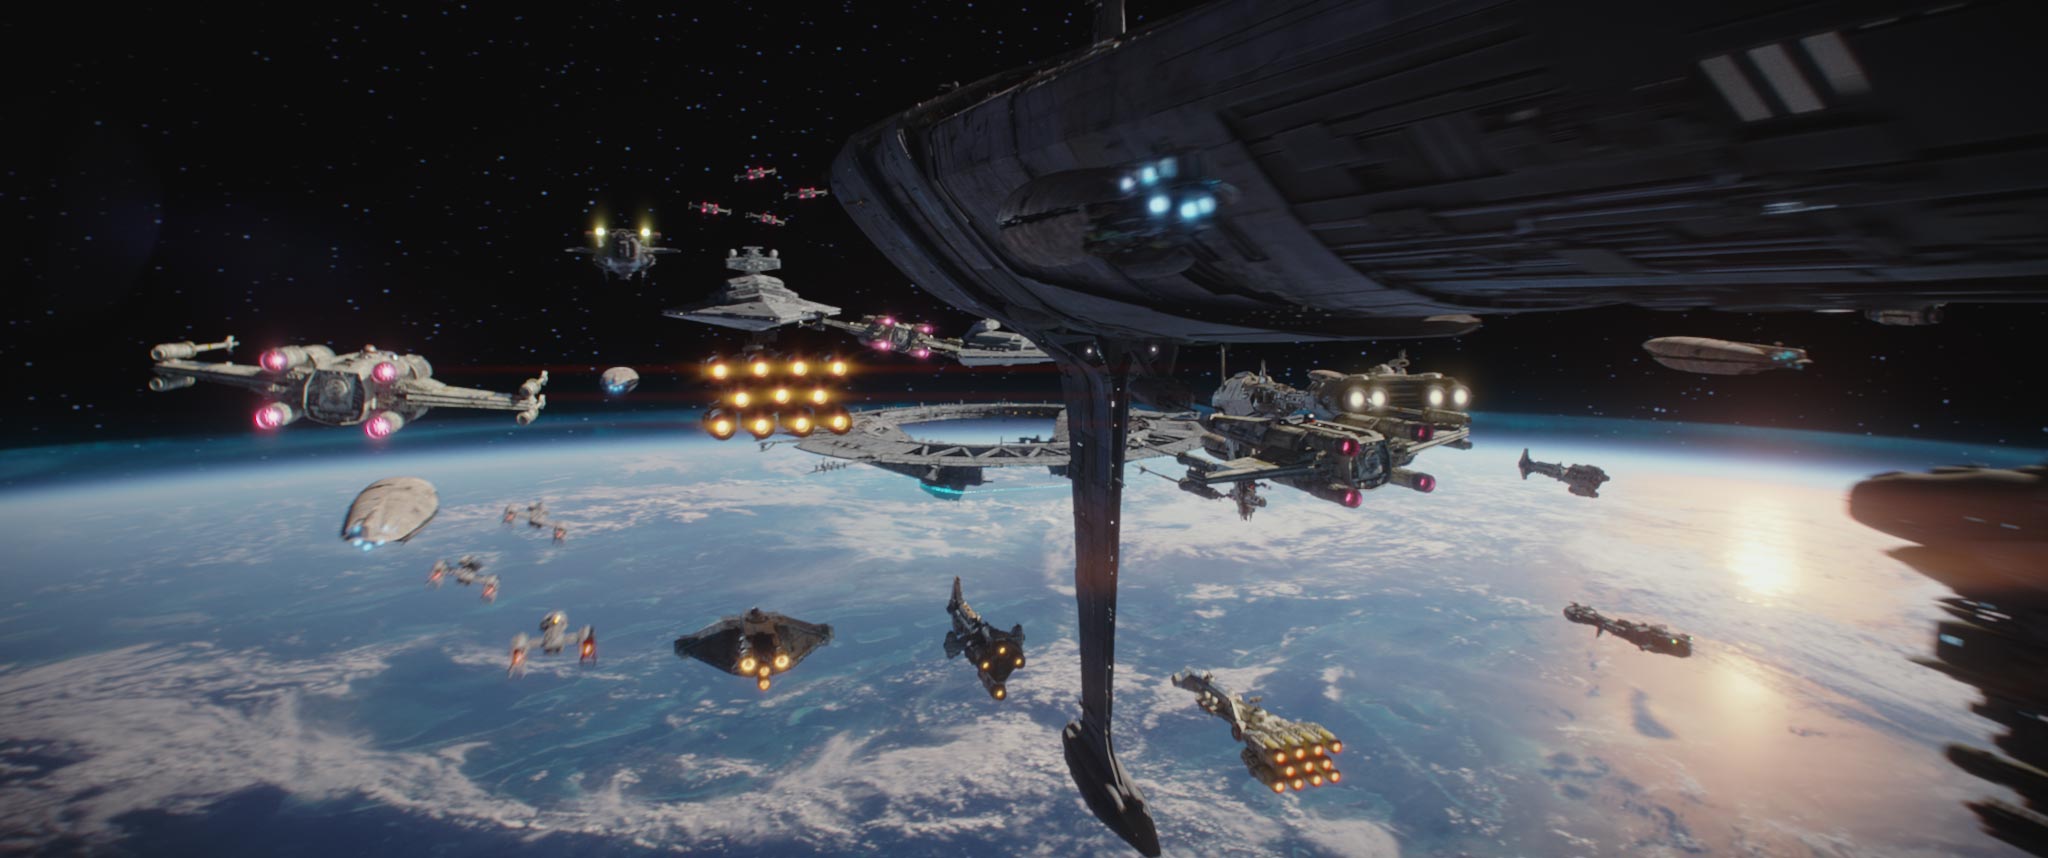
By 1 BBY, the Alliance had evolved into a formidable resistance movement, led by Organa and Mothma, with Mothma holding the title of Chancellor. Now equipped with a respectable starfleet comprised of T-65B X-wing starfighters, BTL-A4 Y-wing assault starfighter/bombers, A-wing starfighters, and larger capital ships such as MC80 Star Cruisers, at least one MC75 Star Cruiser, EF76 Nebulon-B escort frigates, and various corvettes, gunships, and transports, the Alliance was finally capable of engaging the Empire on a more even playing field. At this time, the Alliance established its headquarters on the verdant moon of Yavin 4, within an ancient stone structure known as the Great Temple.
Leia, the adopted daughter of Organa and crown Princess of Alderaan, succeeded her father in the Imperial Senate while secretly serving as a key member of the Alliance. Prominent Alliance war leaders during this period included General Dodonna and Admiral Gial Ackbar. Some members of the Empire's Joint Chiefs, such as General Cassio Tagge, recognized the full extent of the threat posed by what they termed "the Rebellion." Others, like Admiral Conan Antonio Motti, remained steadfast in their belief in the Empire's invincibility. The Imperials, seeking to prevent dissent and sympathy for the Rebellion among loyal Imperial citizens, employed propaganda to downplay the Alliance's true strength, portraying them as a disorganized and vengeful terrorist group.
Return to Lothal
Following their failed attack on Lothal, which culminated in the devastating defeat at Atollon, the Spectres returned to Lothal to provide assistance to the Lothal resistance group and Azadi. They obtained intelligence regarding Thrawn's newly upgraded TIE/D Defender. Bridger and Wren stole the prototype, but their escape was thwarted by its kill switch, forcing them to flee with only the hyperdrive. They dispatched Syndulla to Alliance High Command to request an attack on the Imperial Armory Complex, a request that was ultimately approved. Syndulla was promoted to General and returned with a Squadron of X-wing starfighters and Y-wings piloted by Iron Squadron’s leader and the late Commander Sato’s nephew Captain Mart Mattin, Cleat, Duke, Secon Daree, and many others. However, Thrawn was waiting for them and had laid a trap. One by one they fell, and Syndulla, Mattin, and Daree were the only confirmed survivors. Thrawn dispatched his assassin Rukh to find them, and he quickly captured Daree and Syndulla.
Shortly after, Bridger, Wren, and Jarrus launched a rescue mission to save Syndulla. Jarrus infiltrated Governor Arihnda Pryce's office and freed Hera, while Bridger and Wren, disguised as TIE pilots, searched for an escape route. Jarrus and Syndulla escaped on a glider to the Lothal City fuel depot, where they were met by Bridger and Wren in a patrol transport. Pryce then arrived in an All Terrain Armored Transport and fired upon the fuel pod. Jarrus sacrificed himself to save the others, and the fuel depot was destroyed, halting the production of the TIE/D Defender on Lothal.
Victory at Scarif
Having primarily relied on covert operations prior to the open declaration of war, the Alliance's first large-scale engagement with the Empire occurred on the tropical planet of Scarif, where the Alliance achieved its first significant victory in the War. Before the battle, Alliance Intelligence intercepted information suggesting that the renowned scientist Doctor Galen Erso was developing an Imperial superweapon with the capability of obliterating entire planets. Alliance leadership dispatched Galen's daughter, Sergeant Jyn Erso, and Captain Cassian Andor to investigate her father's involvement. Their subsequent efforts led the Alliance to uncover the existence of the Death Star, as well as a critical flaw in its design intentionally placed there by Galen Erso. During the Battle of Scarif, the Alliance successfully stole the blueprints of the Death Star, which had been under construction for nearly two decades, from the Imperial satellite base on the planet. The Death Star plans were then transmitted to Princess Leia aboard the Tantive IV.
Victory at Yavin
Following the Battle of Scarif, Princess Leia's ship was attacked by Imperial forces over Tatooine, and she was captured by Darth Vader, preventing her from delivering the blueprints to her father on Alderaan. However, she managed to entrust the plans to the droids R2-D2 and C-3PO, who escaped the ship in an escape pod and landed on Tatooine. After Grand Moff Tarkin ordered the destruction of Alderaan using the Death Star's superlaser, Leia was rescued from the battle station's prison by the crew of the Corellian YT-1300f light freighter Millennium Falcon, who also recovered the two droids. The group—excluding Kenobi, who sacrificed his life in a duel against Darth Vader—escaped the Death Star aboard the Falcon and headed for the Alliance headquarters on Yavin 4, where the plans for the Empire's superweapon were analyzed.
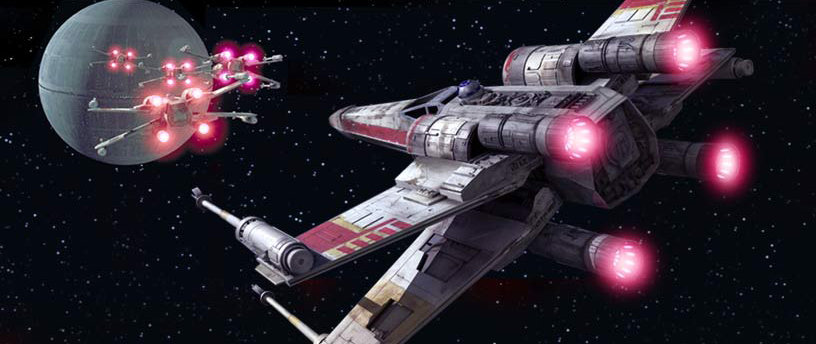
Having tracked the fleeing rebels, the Empire discovered the location of the Alliance base, and the Death Star moved into position above Yavin 4. The Alliance then launched its assault against the battle station, with Princess Leia monitoring the operation from the command center. Leia’s older twin brother Jedi Lieutenant Luke Skywalker joined the mission in his own way, piloting an X-wing under the call sign of Red Five. However, the assault would go bad for the rebels as the stationary defenses and the TIE Fighter defenders would shot down nearly the entire strike force. As the Empire prepared to obliterate Yavin 4 and the Alliance with a single blast from its superlaser, Captain Han Solo unexpectedly intervened, saving Skywalker by eliminating a group of Imperial TIE/ln starfighters that were pursuing him. Skywalker then successfully fired a proton torpedo into the Death Star's thermal exhaust port, exploiting its only vulnerability and destroying the battle station, killing Governor Tarkin and many of the Empire’s best forces at his hand.
Post-Yavin Advancements
Aftermath of Victory

In the aftermath of the Battle of Yavin, the Alliance celebrated its first major tactical triumph, but at a tremendous cost in lives. In addition to the Alliance pilots who perished during the assault, millions of Alderaanians had been lost with their planet, including Bail Organa. Following an award ceremony during which Princess Leia presented the heroes of the day with medals of Bravery, General Dodonna prioritized the evacuation of Yavin 4. With the Empire now aware of their location, they needed to find a new base of operations as quickly as possible. Darth Vader became consumed with finding the young rebel who destroyed the Death Star and killed Governor Tarkin and most of the Empire’s best forces right under his nose. Unbeknownst to him, until learning Luke's last name through Boba Fett, and the rebels at the time, he was in fact the biological father of both Luke and Leia.
Shortly after the Battle of Yavin, the Rebel Fleet relocated to the Pantora system. The Rebellion also disseminated footage of their victory over the Death Star via the DarkNet, and the destruction of the battle station was a boon to the rebellion's efforts: with such a major victory secured, the battle proved that victory over the Empire was actually possible. Shortly after Yavin, the Empire targeted and destroyed the Alliance's fuel refinery located within the Choah Belt, prompting the rebels to retaliate by capturing the Imperial fuel tanker known as Black Ice. The Black Ice was lost in a collision at some point later in the war.
Rescuing Drusil Belphorin
Luke and Nakari Kelen were assigned the mission of rescuing Drusil Bephorin, a Givin whose exceptional slicing abilities had attracted the Empire's attention. They met with a Kupohan spy named Sakhet on Denon, who provided them with information leading them to Drusil. They successfully extracted the Givin and transported her to Kupoh, where another of Sakhet's contacts, Azzur Nessin, owned a company in the capital of Tonekh city called Nessin Courier & Cargo. He repaired their ship, whilst they kept one of his employees Migg Birkhit from bringing the Empire to them. They managed to contain a Gotal ISB agent called Barrisk Favvin, along with Migg. Then, another employee Ruuf Waluuk called in a Devaronian mercenary and he killed Nessin before Skywalker and Kelen killed them both. They escaped the Kupoh system and went to Omereth, where Drusil's family were waiting after being extracted by Major Bren Derlin. However, bounty hunters intercepted them and they crashed into the ocean and swam to the land where they face the many mercenaries. Kelen died in the fight, but Luke reunited Drusil with her family and she promised to return and help them.
Advancement into the Mid Rim
Empowered by the victory at Yavin, the Alliance leaders deployed thousands of ships and hundreds of battle groups, including Twilight Company, to advance into the Mid Rim. Numerous battles erupted, resulting in significant territorial gains for the Alliance. However, after nine months, the Fleet became overextended, leading to a halt in the advance. This was soon followed by a retreat, as the forces began evacuating their bases.
Attack on Weapons Factory Alpha

Right after their triumph at Yavin, the rebels initiated more than a dozen significant offensives against the Empire, as the war's momentum appeared to swing toward the Alliance. These attacks featured events such as the Imdaar supply base bombing, the Kuat shipyards bombing, and the Cymoon Assault, the location of the Imperial weapons factory recognized as Weapons Factory Alpha. Luke, Princess Leia, R2-D2, and Han infiltrated the factory secretly, while Chewbacca acted as a sniper, and C-3PO remained on the Falcon to pilot their escape. Despite a confrontation with Darth Vader, the Rebels successfully demolished the factory, dealing another major setback to the Empire.
Even though the Empire officially claimed the destruction of the Death Star and Weapons Factory Alpha were rebel propaganda lies, whispers of the rebel achievements spread. However, during the brief encounter with Vader, he noticed Luke's lightsaber. Recognizing it as his former weapon, he began his quest to uncover Luke's origins.
Battle of Vrogas Vas
Darth Vader had been gathering data concerning the individual who annihilated the Death Star and eliminated Governor Tarkin, along with a significant portion of the Empire's elite forces. He recently discovered his name, confirming Luke as his son. Vader's adversary, Commander Karbin, pinpointed his location and disclosed it to Vader's associate, Doctor Aphra, who dispatched Vader to Vrogas Vas. He promptly encountered three X-wing squadrons, Red Squadron, Blue Squadron, and Yellow Squadron, which he commenced obliterating before Luke crashed his X-wing into Vader's TIE Advanced, resulting in both crashing onto the planet's surface. The Alliance forces stationed at the Rebel Refueling Base then deployed hundreds of soldiers, supported by numerous tanks, to hunt down Vader. They also deployed the Y-wings of Gray Squadron to engage Vader, who countered by hurling rocks with the Force, destroying them.
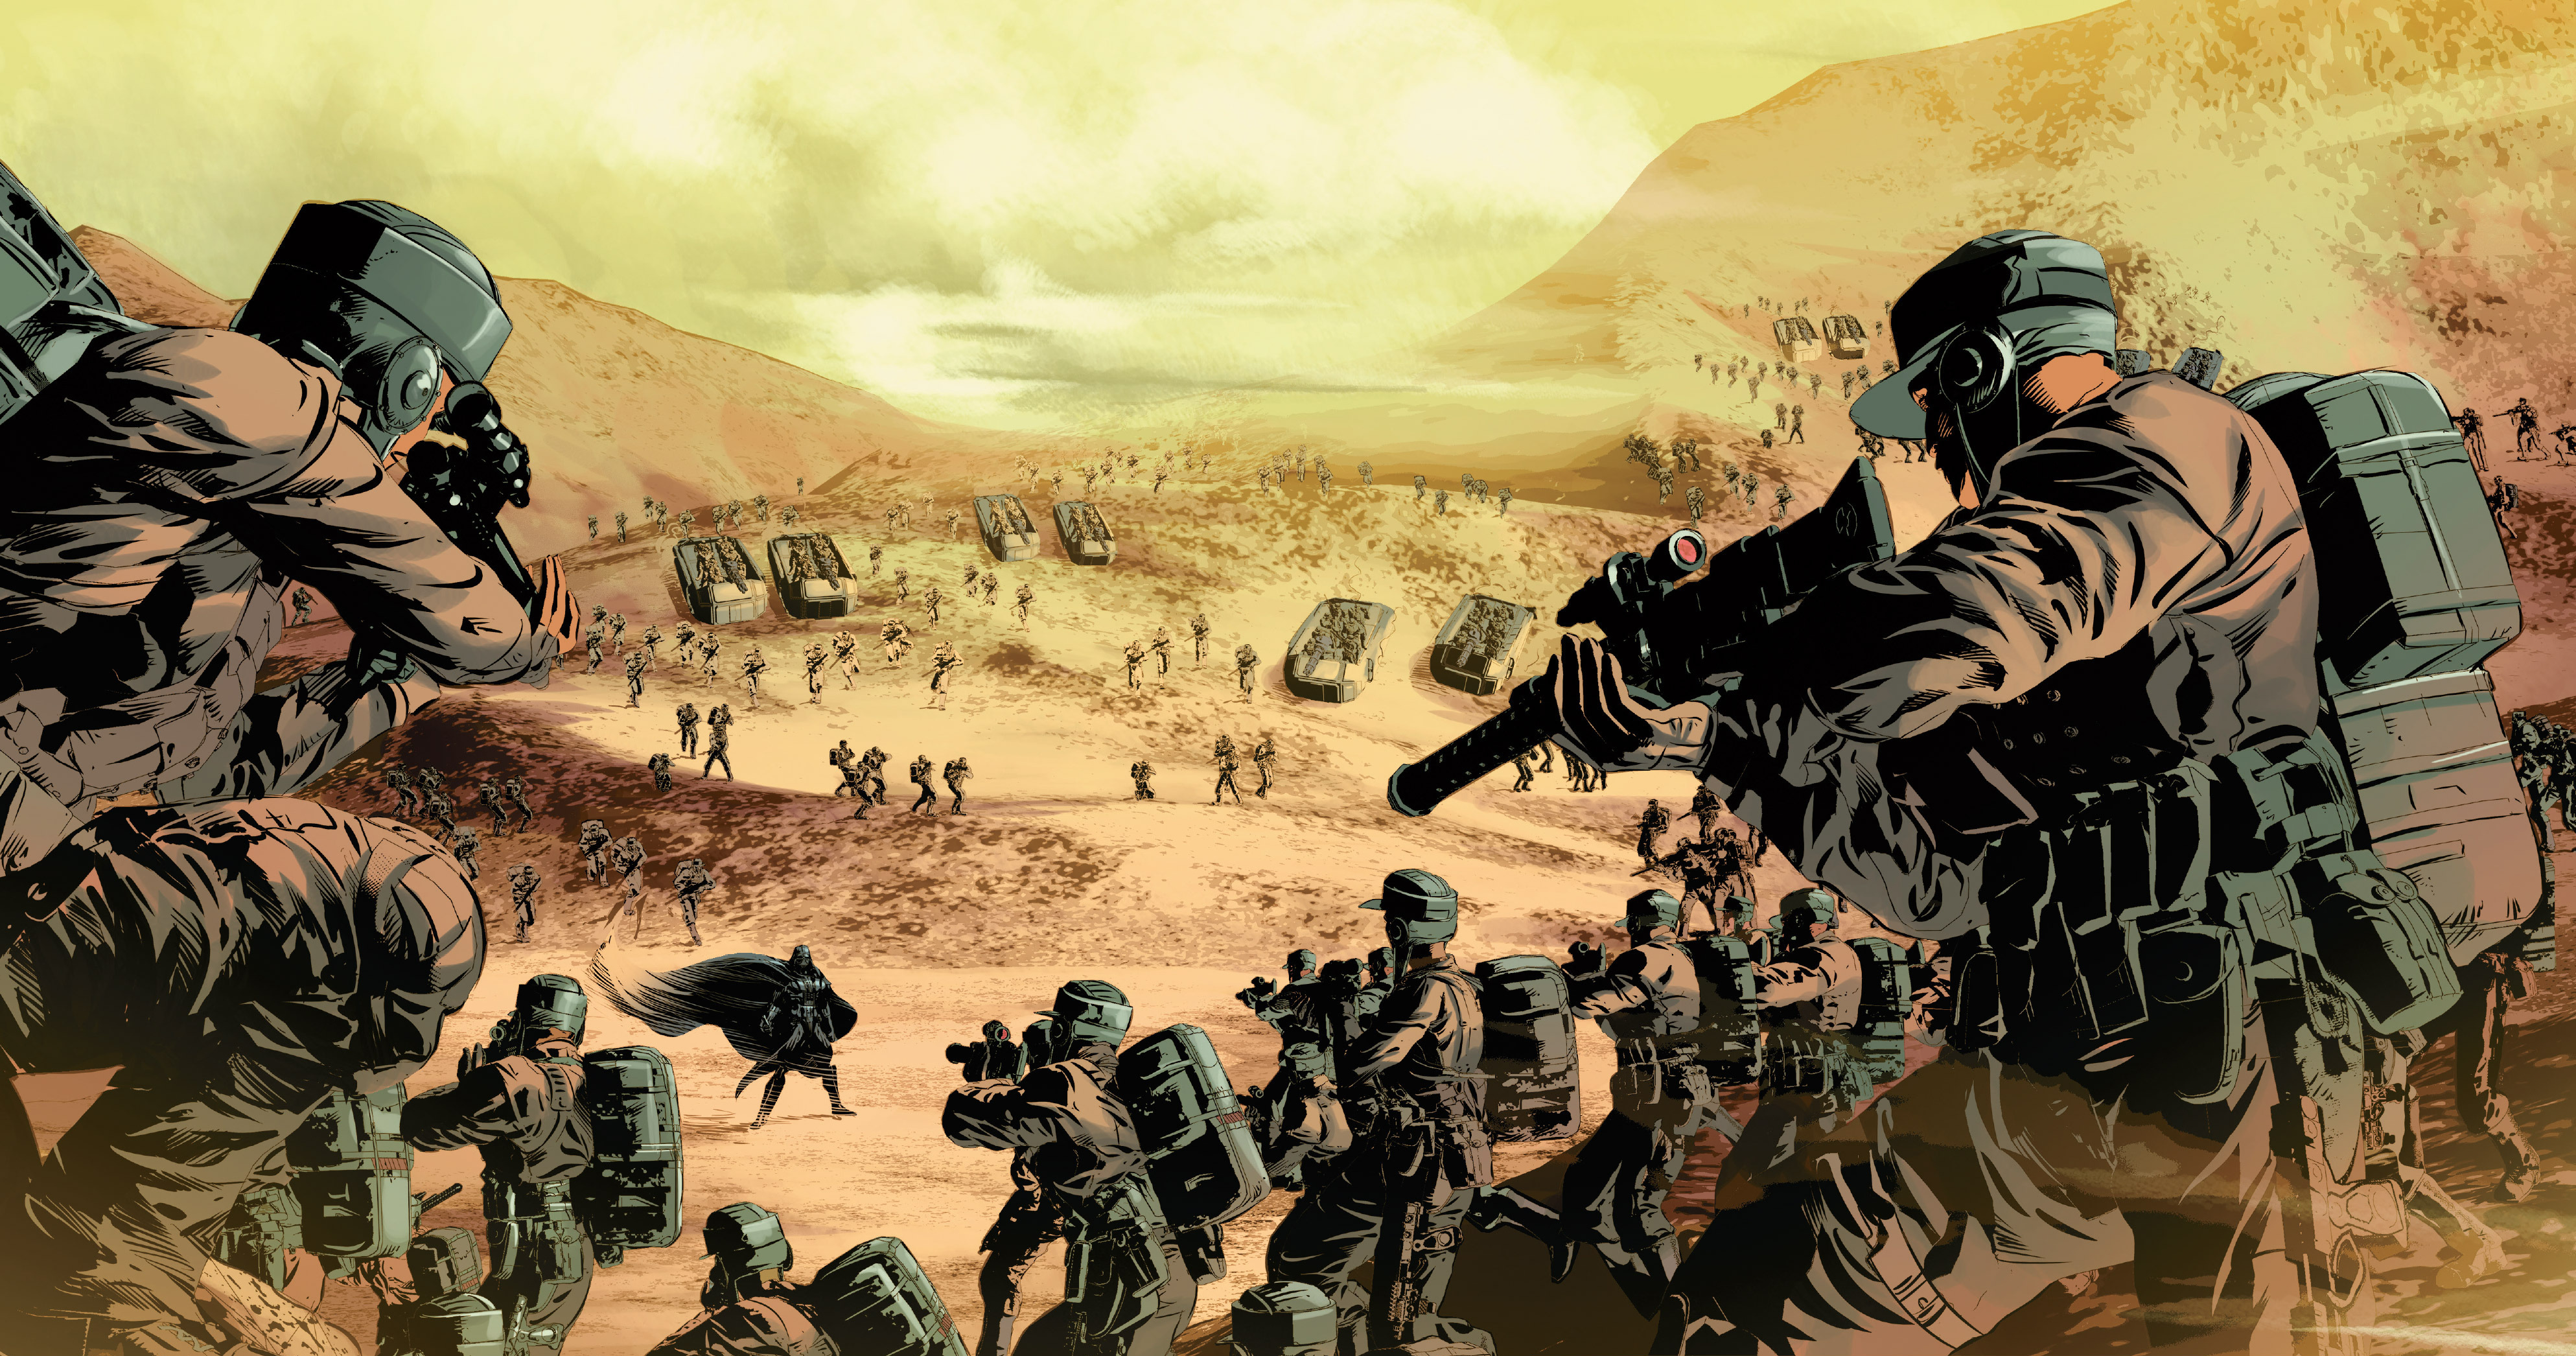
Vader soon found himself encircled by a substantial number of ground troops, but he remained unafraid. He cleverly outmaneuvered them by activating their grenades and dispersing them. He then proceeded to cut down more of them, while deflecting tank fire and eliminating the T-47 airspeeders of Cyan Squadron. Meanwhile, Dr. Aphra arrived at Vrogas Vas and captured Skywalker. Organa, Solo, and Chewbacca also arrived, with Solo setting out to rescue Skywalker once more, while Organa led a strike team to locate Vader. As Han confronted Doctor Aphra, Vader eliminated Organa's squad but allowed her to escape in order to lure more rebels to him. Leia dispatched the Y-wings of Amber Wing to bomb the area, but they were swiftly intercepted by Commander Karbin and his forces, who attempted to capture Luke. Vader intervened, halting Karbin's men and engaging Karbin in combat. Vader defeated Karbin, while Organa, Solo, Skywalker, and Chewie escaped with a captured Dr. Aphra. With the Empire gaining the upper hand, the Alliance forces were compelled to retreat as well.
Mid Rim Retreat
The Mid Rim Retreat involved the Empire forcing the Alliance back from the Mid Rim, reversing their previous advancements. Units such as Twilight Company, Fish Eye Company, Bitter Pill Company, and the Twenty-First were involved in defensive, diversionary, or rescue operations. It marked a segment of the Alliance's withdrawal from the Mid Rim region.
Twilight Company initiated a campaign on Haidoral Prime as a diversionary maneuver to facilitate the Alliance Fleet's retreat from the Mid Rim. During this campaign, Sergeant Hazram Namir and his squad extracted the defecting Governor Everi Chalis. She presented herself as a valuable asset to the Alliance, possessing extensive knowledge of the "Imperial war machine's" inner workings. Captain Micha Evon expressed interest in this, but the soldiers were skeptical. One of them, Corbo, attacked her holding cell with a knife, still grieving over the death of his pet Felinx due to one of her laws. They then encountered an Imperial patrol. However, during the Coyerti campaign, Chalis provided crucial intelligence about a distillery, which Namir and his squad subsequently destroyed. Twilight Company then endured three more attacks in the Metatessu sector and discovered that the CR90 corvette Thunderstrike's hyperdrive was leaving a detectable trail. Chalis orchestrated a raid on an Imperial heavy freighter to acquire necessary supplies. Her plan succeeded flawlessly, but at the cost of two sergeants, Fektrin and Maximian Ajax.
Concurrently, the Alliance suffered significant losses during their withdrawal from the Mid Rim. While the Twenty-First fought on Bestine and Bitter Pill Company lost their transport on a desolate planet, the Alliance lost Unroola Dawn, Talrezan Four, and Hope Station, and General Amrashad was killed.
Chalis and Captain Evon subsequently received an invitation to Echo Base and brought Namir, Roja, and Beak along. Meanwhile, the rest of Twilight Company proceeded to the Elochar sector, where a flotilla, including the Sixmoon, was stationed. Chalis, Evon, and the other three arrived at Echo Base on Hoth, where they met with General Philap Bygar, who escorted them to a strategy conference. The other three performed various tasks around the Base in the meantime, and Namir engaged in a dispute with a Rebel Alliance Special Forces soldier named Kryndal regarding the Alliance's ethics. The strategy conference proceeded as planned, but an alarm soon sounded, indicating that the Empire had discovered their location.
Rebounding from Hoth
Defeat at Hoth
In 3 ABY, one of the numerous Imperial probe droids scouring the galaxy ultimately detected the Rebels' presence. Death Squadron, Darth Vader's personal fleet, advanced toward Hoth with a contingent of ground troops, prepared to crush the rebellion definitively. However, due to an error by Admiral Kendal Ozzel, the Alliance forces were alerted to the Empire's arrival. The Rebels had sufficient time to activate the deflector shield safeguarding Echo Base, rendering orbital bombardment impossible. As the Alliance prepared for evacuation, Imperial troops disembarked on the surface of Hoth, beyond the range of the energy shields. Upon arrival, several legions of snowtroopers advanced on Echo Base. A squadron of All Terrain Armored Transports under the command of General Maximilian Veers was assigned to destroy the massive generators powering the Rebel base's shield. Perimeter Outpost Delta was the first to fall, with Sergeant Hazram Namir, Roja, and Beak being forced to retreat back to the main base to find Captain Micha Evon and Everi Chalis.

Luke, who had been promoted to Commander by Mothma, led Rogue Squadron of snowspeeders against General Veers' armored transports. By employing a harpoon gun and tow-cable, the Rebels managed to topple one of the transports, but Skywalker's snowspeeder was shot down. Unlike his gunner, Dak Ralter, the Rogue commander survived the crash. With the aid of his lightsaber and a grenade, he still managed to destroy another walker. Despite the Rebels' best efforts to delay Veers' armored transports, the Imperial general successfully destroyed the protective shield generator, allowing Darth Vader and his men to enter Echo Base. While the Rebel command personnel and material were loaded into transports and evacuated just in time, the unprepared Alliance soldiers engaged the Imperials in conventional warfare. Namir and his two men returned to the main base to find Chalis, with Captain Evon, who was unconscious. They then encountered Darth Vader, who killed Captain Evon, Roja, and Beak. Namir and Chalis escaped on a shuttle using Chalis' clearance codes.
Unable to reach a transport, Princess Leia Organa, Han Solo, Chewbacca, and the droid C-3PO took flight in the Millennium Falcon. The Alliance stalled the Imperial troops long enough to evacuate its most important staff from the planet, and its ground-based ion cannon temporarily disabled all ships of Death Squadron, preventing them from attacking the escaping transports. Overall, the Empire still secured a significant victory on Hoth, as the Alliance was driven from its base once more and narrowly escaped Death Squadron's blockade. The Imperial victory left the Alliance scattered, and General Philap Bygar was killed during or after the battle while fleeing from the Imperials.
Rebel Alliance on the run
Organa, Solo, Chewbacca, and C-3PO were in flight on the Millennium Falcon. They evaded numerous Imperial-class Star Destroyers before escaping the grasp of Captain Lorth Needa. They then journeyed to Cloud City on the gas giant Bespin to meet with Solo's old acquaintance Lando Calrissian. Calrissian had the Millennium Falcon repaired, but when the moment arrived, he betrayed them, turning them over to Darth Vader, who sought to set a trap for Luke Skywalker. He had Solo frozen in carbonite as Skywalker arrived at Cloud City with R2-D2. Vader then confronted Skywalker, and after defeating him in a duel, revealed that he was his father. Meanwhile, Calrissian had his security forces turn against the Empire, and Cloud City descended into chaos.
Skywalker fled from Vader and was rescued by the two as they escaped Cloud City with Chewbacca, C-3PO, and R2-D2. Solo was taken to Jabba the Hutt by Boba Fett, who had initially tracked them to Bespin. The Second Division of the Rebel Fleet established a base at a temporary base in the Outer Rim on Panisia.
Operation Ringbreaker
Shortly after the Battle of Hoth, the Sixty-First found itself without leadership, with their captain Micha Evon killed on Hoth and the remaining officers killed in the Elochar sector. Stranded on Ankhural while vital repairs were being performed on the Thunderstrike, they needed a purpose. Thus, Chalis and Namir (who assumed command) initiated Operation Ringbreaker, which aimed to compel Imperial redeployments from the shipbuilding world of Kuat by attacking worlds such as Obumubo, Naator, Xagobah, and the asteroid mines of the Kuliquo belt, thereby enabling the Alliance to assault its ultimate target. This operation was spearheaded by the Alliance's Sixty-First Mobile Infantry, commonly known as Twilight Company. One of the final planets in the chain before the attack on Kuat itself was the mining world of Sullust. The Twilight Company attacked the Inyusu Tor mineral processing facility. The facility was swiftly captured, and victory seemed assured until Twilight Company's ship, the Thunderstrike, was shot down and irreparably damaged while attempting to pick up the division.
Liberating Sullust
Twilight Company was compelled to guard the facility until they could find an alternative means of leaving the planet. The Imperial-class Star Destroyer Herald and the ground forces advanced on them. They received assistance from the local rebel cell led by Nien Nunb, although the tide of the battle only truly shifted when Governor Everi Chalis disabled the Imperial-class Star Destroyer Herald using a shuttle and ion mines. In the ensuing days, an interim government was established in Pinyumb, while heavy losses sustained by the Sixty-First would ultimately cancel Operation Ringbreaker, allowing the company to act as a temporary police force for the Sullustan people. Their Braha'tok-class gunship the Apailana's Promise had barely survived after returning to help them against the Herald. Subsequent pirate broadcasts and intercepted Imperial signals indicated further insurrections across the planet, delaying the inevitable Imperial counterattack.
The Second Death Star
Recovering from their losses at Hoth after Operation Starlight, the Rebel Alliance formally announced its survival by attacking the Imperial Unity Day parade on Bar'leth, which was being broadcast throughout the galaxy. The victory was therefore incredibly public and showcased that the Rebels took care to not hurt civilians. After Rebel Command learned of the existence of a second Death Star from Skywalker, the Bothan Spynet began to search for more information. Emperor Palpatine discovered this and sought to set a trap for the Alliance. He allowed more information to be fed more to the Bothans, with many of them dying in order to get it, and concealed the fact that the Death Star II was operational. The new information revealed the location of the Death Star II, Endor, the shield protecting it and the shafts within it big enough for starfighters to pass through to the core.
When Alliance High Command got this information, they launched Operation Yellow Moon in order to distract Imperial forces across the galaxy. This was led by Princess Organa and her strike team. Meanwhile, the rebels on the MC80 Star Cruiser Invincible Faith had intercepted a message from Moff Derrek Raythe, which would reveal Emperor Palpatine's trap if they decrypted it in time, but they also captured Commander Iden Versio of the Empire's Inferno Squad, who let it happen so she could get rid of the message. She broke free, forced her way through the ship and deleted the message making sure no-one in the Alliance could know about the trap. Versio escaped with the help of the other members of Inferno Squad.
Triumph at Endor
In 4 ABY, the Alliance to Restore the Republic resolved to deliver a decisive blow to Emperor Palpatine's tyranny. The Alliance Fleet converged near Sullust to strategize an attack. Thanks to its Bothan spies and learned Palpatine was overseeing the final construction stages of the new battle station.

It was decided that a rebel strike team led by Skywalker, Organa, Solo, and Chewbacca would land on Endor in a stolen Lambda-class T-4a shuttle, with the mission to deactivate the Death Star's energy defense shield. Little did they know that they fell into a trap. When they reached the shield's bunker, the Imperial Army was waiting for them. In orbit of Endor, the Alliance Fleet was ambushed by a large Imperial armada led by the Super Star Destroyer Executor that emerged from hyperspace. Unable to attack the Death Star II until its shield was destroyed, the Rebel Fleet focused its attack on the Star Destroyers. Although its starfighters were able to maneuver easily around the Death Star II, they were still vulnerable to the battle station's superlaser, which destroyed the Liberty and the Nautilian.
On Endor, the rebel strike team ended up allying with the native Ewoks, who used their knowledge of their homeworld's forests to take the Imperial army by surprise. The strike team was finally able to destroy the shield generator after a lengthy ground battle, allowing its starfleet to attack the Empire's dreaded superweapon. General Calrissian flew the Millennium Falcon into the Death Star with Antilles, Norra Wexley, Keir Santage, Jake Farrell, and another A-wing pilot. They flew through the shafts and were pursued by several TIEs, which gunned down Keir's X-wing starfighter. Calrissian then ordered the group to split up, and Farrell, Wexley and the other A-wing pilot flew down another shaft to lure TIEs back out. Calrissian and Antilles then made it to the reactor core and destroyed the battle station's power plant before retreating back out as the Death Star began to detonate. During an attack on the Executor, Green Leader Commander Arvel Crynyd's A-wing was crippled and crashed into the bridge, killing Admiral Firmus Piett and his staff. Having already taken considerable damage from the Alliance's starfighters, the Executor failed and drifted into the Death Star's gravity well, detonating on impact.
Meanwhile, aboard the station, a blow of an entirely different kind was struck against the Empire. A captive Luke Skywalker, now a JediKnight in his own right, appealed to Vader's paternal love, convincing him to turn on his Master. Vader—once again Anakin Skywalker—seized the Imperial Head of State and hurled him down a shaft to his death, but at the cost of his own life. The Death Star II soon exploded from the damages to its core. With the loss of Emperor Palpatine and his apprentice, the destruction of the Death Star II, and significant losses inflicted on the Imperial Fleet, the Imperials were forced to withdraw. The Empire suffered a decisive defeat, leaving the Rebels to celebrate in victory.
Founding a New Republic
In the days following the Battle of Endor, news of the Emperor's death spread to several worlds across the galaxy including Tatooine, Naboo, Bespin, and Coruscant despite many attempts by the Empire to conceal the fact and declare this information to be false. While there was much celebration, a riot broke out at Coruscant's Monument Plaza. With the Empire in turmoil, the Rebel Alliance launched an assault on an Imperial outpost on the far side of Endor. This attack was led by General Solo and uncovered a lot of data and communications on Imperial plans.
The Rebel Alliance was eventually reorganized into the New Republic. The new government, however, still had to contend with Imperial holdouts. But luckily, the Emperor's contingency plan had the Empire thrown into chaos with Operation: Cinder turning them on their loyal planets.
Legacy
One year after the destruction of the second Death Star, Republic and Imperial forces fought a major battle on the desert world of Jakku, which saw a Republic victory and the end of the Galactic Civil War. The Alliance also dispatched shock troopers to eliminate former Imperials that became warlords. The shock troopers were later assigned peacekeeping roles after the formation of the New Republic.
The symbol of the Alliance to Restore the Republic was used in the insignia of the New Republic and later became the emblem of the Resistance, a military force founded by Rebel veteran Leia and made up of several Alliance officers, such as Ackbar and Caluan Ematt, to combat the First Order, the successor of the Empire. During the Bail Organa statue-dedication ceremony in 28 ABY, speeches were delivered by Senators Tai-Lin Garr and Organa that reminded the gathered audience of the sacrifices made by the Rebel Alliance, which were further reinforced by an air show performed by Republic X-wings.
The Archivist recorded in her holocron her belief that empires required enemies, to give their soldiers targets and a reason to enforce fear. Remarking that Palpatine was very cunning in cultivating enemies in his time as both Supreme Chancellor and Emperor, she suggested that he created the Rebellion to maintain the cycle of violence. When her holocron was later discovered by Luke Skywalker and Leia Organa, they remarked that though the Archivist was incorrect regarding Palpatine being the Alliance's founder, he certainly did use it to his advantage.
Organization
Government
The Alliance to Restore the Republic was a military resistance movement, which was headed by the Alliance High Command and dedicated to upholding the ideals of the Old Republic, but also contained the Alliance Civil Government. The Alliance Cabinet served as political High Command, existing separate from the Alliance Military High Command, and represented both civilian and military interests. It was led by a Chief of State and had six cabinet posts: Minister of Education, Minister of Finance, Minister of Industry, Minister of State, Minister of Supply, and Minister of War.
The Alliance frequently changed its base of operations, ranging from numerous worlds across the galaxy in order to avoid detection or regroup from an attack by its nemesis, the massive Galactic Empire. A diplomatic corps who sought to maintain friendly relations and procure support from various worlds in the galaxy was maintained. Despite this, the Alliance had few worlds openly declare their support for the movement, as those few that did found their worlds cordoned behind Imperial blockades.
Military

Before the Alliance was officially established, the various independent rebel groups each maintained their own distinct armed forces. As these groups started to work together, shared military operations were frequently managed by leaders from different cells, for instance, Jun Sato from Phoenix Group, Cham Syndulla of the Free Ryloth movement, and Ryder Azadi representing the Lothal resistance. These rebel cells obtained their intelligence from "Fulcrum" agents.
The formal Alliance Military benefited from the leadership of skilled individuals such as Admiral Gial Ackbar and received timely intelligence from its dedicated Rebel Alliance Intelligence Service. Information also came through the Bothan spynet. The Alliance maintained the Alliance Fleet, the Alliance Army, and the Rebel Alliance Starfighter Corps. Across the galaxy, Rebel troopers fought to end the Empire's rule in units like the Sixty-First Mobile Infantry and the Thirty-Second Infantry. Elite commandos from the trooper ranks formed the Alliance Special Forces.
The Alliance Military welcomed anyone into its ranks, including imperial defectors, those who chose to leave the Galactic Empire and join the Rebel Alliance. These individuals often made this decision after witnessing the Empire’s cruel actions or experiencing personal betrayals. Imperial defectors brought significant advantages to the Alliance, including individuals such as: Han Solo, Alexsandr Kallus, Wedge Antilles, Derek Klivian, Trey Callum, Lindon Javes, Iden Versio, Del Meeko, Jan Dodonna, Bodhi Rook, Jon Vander, and numerous others.
The Commander-in-Chief was in control of the Alliance Military, which was organized into seven distinct branches: Rebel Fleet Command, Rebel Alliance Starfighter Command, Sector Command, Rebel Alliance Intelligence Service, Rebel Alliance Special Forces, Ordnance and Supply, and Support Services.
Behind the scenes
Dave Filoni, who served as the supervising director for the Star Wars: The Clone Wars animated television series, revealed that he and George Lucas envisioned the Onderon rebels, featured in the Onderon arc, as the initial groups of many militias created by the Jedi during the Clone Wars. These militias would eventually be united by figures like Bail Organa and Mon Mothma to form the Rebel Alliance.
The visual style of the Rebel Alliance in Star Wars: Episode IV A New Hope drew inspiration from the costume designs found in the western genre and the uniforms of the United States Marine Corps.